前言
现在大多数人都在使用SpringCloud和SpringBoot作为Web开发框架的时代,其实这篇文章讲解的内容已经是大多数码农都接触不到的地方了。但是为什么还要写呢?因为这部分Spring官方文档并没有放弃,而且我们再工作中不可避免地会接触到很多老的项目。比如使用Spring4,甚至使用Spring3构建的项目,就可能会碰到这些问题。而彼时的体系完全不像现在这么方便,所以为了更好的了解这些,笔者就把从官网上读到的内容,在这里做一个总结。好脑子不如烂笔头,既是为了提醒自己,也可以助人为乐。更多Spring内容进入【Spring解读系列目录】。
Spring开启注解的方式主要就两种,一种是基于xml的,一种是基于java的,两者亦可混用。如果没有开启常见的报错大概就是下面几种:
Error1:
Exception in thread "main" org.springframework.beans.factory.NoSuchBeanDefinitionException: No bean named 'aaaaaa' available
	at org.springframework.beans.factory.support.DefaultListableBeanFactory.getBeanDefinition(DefaultListableBeanFactory.java:816)
	at org.springframework.beans.factory.support.AbstractBeanFactory.getMergedLocalBeanDefinition(AbstractBeanFactory.java:1288)
	at org.springframework.beans.factory.support.AbstractBeanFactory.doGetBean(AbstractBeanFactory.java:298)
	at org.springframework.beans.factory.support.AbstractBeanFactory.getBean(AbstractBeanFactory.java:202)
	at org.springframework.context.support.AbstractApplicationContext.getBean(AbstractApplicationContext.java:1109)
	at com.example.demo.DemoTest.main(DemoTest.java:13)
Error2:
Exception in thread "main" java.lang.IllegalStateException: org.springframework.context.annotation.AnnotationConfigApplicationContext@77556fd has not been refreshed yet
	at org.springframework.context.support.AbstractApplicationContext.assertBeanFactoryActive(AbstractApplicationContext.java:1096)
	at org.springframework.context.support.AbstractApplicationContext.getBean(AbstractApplicationContext.java:1108)
	at com.example.demo.DemoTest.main(DemoTest.java:18)
Error3:
Exception in thread "main" org.springframework.beans.factory.UnsatisfiedDependencyException: Error creating bean with name 'service' defined in file [D:\idea_projs\demo\target\classes\com\example\demo\DemoService.class]: Unsatisfied dependency expressed through constructor parameter 0; nested exception is org.springframework.beans.factory.NoSuchBeanDefinitionException: No qualifying bean of type 'com.example.demo.DemoDao' available: expected at least 1 bean which qualifies as autowire candidate. Dependency annotations: {

    }
	at org.springframework.beans.factory.support.ConstructorResolver.createArgumentArray(ConstructorResolver.java:797)
	at org.springframework.beans.factory.support.ConstructorResolver.autowireConstructor(ConstructorResolver.java:227)
	at org.springframework.beans.factory.support.AbstractAutowireCapableBeanFactory.autowireConstructor(AbstractAutowireCapableBeanFactory.java:1356)
	at org.springframework.beans.factory.support.AbstractAutowireCapableBeanFactory.createBeanInstance(AbstractAutowireCapableBeanFactory.java:1203)
	at org.springframework.beans.factory.support.AbstractAutowireCapableBeanFactory.doCreateBean(AbstractAutowireCapableBeanFactory.java:556)
	at org.springframework.beans.factory.support.AbstractAutowireCapableBeanFactory.createBean(AbstractAutowireCapableBeanFactory.java:516)
	at org.springframework.beans.factory.support.AbstractBeanFactory.lambda$doGetBean$0(AbstractBeanFactory.java:324)
	at org.springframework.beans.factory.support.DefaultSingletonBeanRegistry.getSingleton(DefaultSingletonBeanRegistry.java:226)
	at org.springframework.beans.factory.support.AbstractBeanFactory.doGetBean(AbstractBeanFactory.java:322)
	at org.springframework.beans.factory.support.AbstractBeanFactory.getBean(AbstractBeanFactory.java:202)
	at org.springframework.beans.factory.support.DefaultListableBeanFactory.preInstantiateSingletons(DefaultListableBeanFactory.java:897)
	at org.springframework.context.support.AbstractApplicationContext.finishBeanFactoryInitialization(AbstractApplicationContext.java:879)
	at org.springframework.context.support.AbstractApplicationContext.refresh(AbstractApplicationContext.java:551)
	at org.springframework.context.annotation.AnnotationConfigApplicationContext.<init>(AnnotationConfigApplicationContext.java:89)
	at com.example.demo.DemoTest.main(DemoTest.java:17)
Caused by: org.springframework.beans.factory.NoSuchBeanDefinitionException: No qualifying bean of type 'com.example.demo.DemoDao' available: expected at least 1 bean which qualifies as autowire candidate. Dependency annotations: {

    }
	at org.springframework.beans.factory.support.DefaultListableBeanFactory.raiseNoMatchingBeanFound(DefaultListableBeanFactory.java:1717)
	at org.springframework.beans.factory.support.DefaultListableBeanFactory.doResolveDependency(DefaultListableBeanFactory.java:1273)
	at org.springframework.beans.factory.support.DefaultListableBeanFactory.resolveDependency(DefaultListableBeanFactory.java:1227)
	at org.springframework.beans.factory.support.ConstructorResolver.resolveAutowiredArgument(ConstructorResolver.java:884)
	at org.springframework.beans.factory.support.ConstructorResolver.createArgumentArray(ConstructorResolver.java:788)
	... 14 more
提前准备
假设我们现在有一个接口DemoDao,一个实现类DemoDaoImpl,一个业务类DemoService。依赖关系如下:
DemoDao
public interface DemoDao {


    void test();
}
DemoDaoImpl
public class DemoDaoImpl implements DemoDao{


    @Override
    public void test() {


        System.out.println("test");
    }
}
DemoService
public class DemoService {


    private DemoDao dao;
    public void myDaoService(){


        dao.test();
    }
}
schemal-based 基于XML配置文件的
首先我们以schemal-based 基于xml的为例子,写一个测试类和一个spring的配置文件。
DemoTest
public class DemoTest {


    public static void main(String[] args) {


       ClassPathXmlApplicationContext cpth
                = new ClassPathXmlApplicationContext("classpath:spring.xml");
        //拿到service
        DemoService service= (DemoService) cpth.getBean("service");
        service.myDaoService();
    }
}
spring.xml
<?xml version="1.0" encoding="UTF-8"?>
<beans xmlns="http://www.springframework.org/schema/beans"
       xmlns:xsi="http://www.w3.org/2001/XMLSchema-instance"
       xsi:schemaLocation="http://www.springframework.org/schema/beans
       http://www.springframework.org/schema/beans/spring-beans.xsd">
	<bean id="service" class="com.example.demo.DemoService">
		<!--注册一个service -->
	</bean>
</beans>
如果我想要在DemoDaoImpl上用注解,把这个类编程一个dao的服务,那么就要写成下面的样子。然而如果直接运行,那一定是会报错的,因为我们还没有开启注解。虽然Spring框架有这样的语法,但是基于xml配置文件搭建的项目是不会自动解析注解的,就算是碰到注解也不会解析。这样应该是为了节约性能,当你需要注解的时候启动注解,如果不需要Spring也不会去消耗资源去解析注解。
@Component(“dao”)
public class DemoDaoImpl implements DemoDao{


    @Override
    public void test() {


        System.out.println("test");
    }
}
那么怎么开启呢?要想开启xml的注解,需要配置上context官方路径xmlns:context="http://www.springframework.org/schema/context"
就是把<beans>的头改成下面的样子:
<beans xmlns="http://www.springframework.org/schema/beans"
       xmlns:xsi="http://www.w3.org/2001/XMLSchema-instance"
       xmlns:context="http://www.springframework.org/schema/context"
       xsi:schemaLocation="http://www.springframework.org/schema/beans
                            http://www.springframework.org/schema/beans/spring-beans.xsd
                            http://www.springframework.org/schema/context
                            http://www.springframework.org/schema/context/spring-context.xsd">
这样context就可以被引用进来了,完全不需要下载任何插件。然后加入<context:annotation-config></context:annotation-config>这个注解,就开了spring的解析注解。如果现在直接运行。那么一定还会报错。因为还没有配置扫描。<context:component-scan base-package="com.example"></context:component-scan>这里的base-package就是配置的扫描范围。然后运行DemoTest就成功了。完整的文件如下:
<beans xmlns="http://www.springframework.org/schema/beans"
       xmlns:xsi="http://www.w3.org/2001/XMLSchema-instance"
       xmlns:context="http://www.springframework.org/schema/context"
       xsi:schemaLocation="http://www.springframework.org/schema/beans
                            http://www.springframework.org/schema/beans/spring-beans.xsd
                            http://www.springframework.org/schema/context
                            http://www.springframework.org/schema/context/spring-context.xsd">
    <!--新版可以不要这句配置 <context:annotation-config></context:annotation-config> -->
    <context:component-scan base-package="com.example"></context:component-scan>
    <bean id="service" class="com.example.demo.DemoService">
		<!--注册一个service -->
	</bean>
</beans>
特别提醒一下:笔者这里使用的版本已经是Spring5了,在Spring4以及更高版本<context:annotation-config>这个配置已经不需要了。<context:component-scan>把开启和扫描都包含在了一起,有了这个就意味着既开启了注解也开启了扫描。如果是低版本,两句配置都要有。如果看到网上的成还要配置annotation-config而且还是必须配置的,就说明这个博主写的至少得是spring3甚至更低的版本,参考价值就大打折扣了。
java-based 基于JAVA代码的配置
既然是基于java注解的,那么我们就不需要spring.xml这个文件了。还是一样的例子。只是我们要把DemoService加上注解,告诉Spring框架这个类是一个名字叫做“service”的Service。
@Service(“service”)  //起了一个别名。如果不加别名,默认就是第一个字母小写的demoService
//@Service    //不加别名
public class DemoService {


@Autowired
    private DemoDao dao;
    public void myDaoService(){


        dao.test();
    }
}
因为我们的DemoTest里面拿出来的名字是service,这里就是给起了一个别名。因为我们已经不要spring配置文件启动了,那么测试类中也要修改Spring的Bean工厂为AnnotationConfigApplicationContext这个类。但是这个类需要一个加载类用来替代xml文件。因此我们还要创建一个类,笔者命名为Spring,名字自取也是无所谓的。
public class DemoTest {


    public static void main(String[] args) {


	//注意配置类更换了
       AnnotationConfigApplicationContext acac=new AnnotationConfigApplicationContext(Spring.class);
        //拿到service,如果上面没有给别名,这里拿到的应该是”demoService”,而不是”service”
        DemoService service= (DemoService) acac.getBean("service");
        //DemoService service= (DemoService) acac.getBean("demoService ");
		service.myDaoService();
    }
}
加载类Spring.class,可以看到内容和xml文件如出一辙。运行DemoTest成功。
@Configuration
@ComponentScan("com.example")
public class Spring {


}
混用验证
我们首先把DemoDaoImpl这类上的@Component(“dao”)删了,让spring框架不知道有这个类,如下。如果运行一定会报错的,因为spring已经找不到这个类了:
//@Component("dao")    删除注解,使其对spring不可见
public class DemoDaoImpl implements DemoDao{


    @Override
    public void test() {


        System.out.println("test");
    }
}
然后打开spring.xml这个文件,把注解扫描删了。然后强行定义IndexDaoImpl这个类进去,并且命名为dao:
<?xml version="1.0" encoding="UTF-8"?>
<beans xmlns="http://www.springframework.org/schema/beans"
       xmlns:xsi="http://www.w3.org/2001/XMLSchema-instance"
       xmlns:context="http://www.springframework.org/schema/context"
       xsi:schemaLocation="http://www.springframework.org/schema/beans
                            http://www.springframework.org/schema/beans/spring-beans.xsd
                            http://www.springframework.org/schema/context
                            http://www.springframework.org/schema/context/spring-context.xsd">
    <!--<context:annotation-config></context:annotation-config>
    <context:component-scan base-package="com.example"></context:component-scan>-->
    <bean id="dao" class="com.example.demo.DemoDaoImpl">
    </bean>
</beans>
然后去Spring这个配置类中把这个定义的spring.xml文件用@ImportResource注解引入进来。再运行,就没问题了。
@Configuration
@ComponentScan("com.example")
@ImportResource("classpath:spring.xml")
public class Spring {


}
那么这就是两者混用,既使用了AnnotationConfigApplicationContext基于java代码的注解,又使用了基于xml的sring.xml而且一点影响都没有。
结语
其实到目前为止,spring公司提供的springboot框架已经帮我们把这些东西都做好了。而且springboot就是基于java的配置启动的,非常的方便,更是被Spring公司作为SpringMVC框架的首推。但是正如笔者开头所说,多学习一些总是没错的,碰到了老项目看不懂就太尴尬了。到此本篇博客正式结束。
附
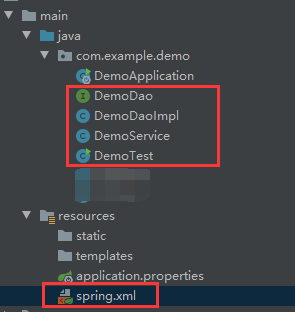
博客中代码的目录结构如下: