大家好,我是烤鸭:
今天分享的是 elasticsearch 6.x 部署 windows服务器。
环境:
win10
elasticsearch-6.2.4
springboot 2.0.0.RELEASE
1. 官网下载elasticsearch
这个是最新版本的es下载地址。
https://www.elastic.co/downloads/elasticsearch
选择zip包下载,网速较慢,请耐心等待。
2. 修改配置文件
刚开始入门,我们尽可能少改东西,就改个集群名称和节点名称。后期再解释各个参数什么意思。
# ---------------------------------- Cluster -----------------------------------
#
# Use a descriptive name for your cluster:
#
cluster.name: mytest-master
#
# ------------------------------------ Node ------------------------------------
#
# Use a descriptive name for the node:
#
node.name: mytest-node1
#
# Add custom attributes to the node:
#
#node.attr.rack: r1
#
# ----------------------------------- Paths ------------------------------------
#
# Path to directory where to store the data (separate multiple locations by comma):
#
#path.data: /path/to/data
#
# Path to log files:
#
#path.logs: /path/to/logs
#
# ----------------------------------- Memory -----------------------------------
#
# Lock the memory on startup:
#
#bootstrap.memory_lock: true
#
# Make sure that the heap size is set to about half the memory available
# on the system and that the owner of the process is allowed to use this
# limit.
#
# Elasticsearch performs poorly when the system is swapping the memory.
#
# ---------------------------------- Network -----------------------------------
#
# Set the bind address to a specific IP (IPv4 or IPv6):
#
#network.host: 192.168.0.1
#
# Set a custom port for HTTP:
#
#http.port: 9200
#
# For more information, consult the network module documentation.
#
# --------------------------------- Discovery ----------------------------------
#
# Pass an initial list of hosts to perform discovery when new node is started:
# The default list of hosts is ["127.0.0.1", "[::1]"]
#
#discovery.zen.ping.unicast.hosts: ["host1", "host2"]
#
# Prevent the "split brain" by configuring the majority of nodes (total number of master-eligible nodes / 2 + 1):
#
#discovery.zen.minimum_master_nodes:
#
# For more information, consult the zen discovery module documentation.
#
# ---------------------------------- Gateway -----------------------------------
#
# Block initial recovery after a full cluster restart until N nodes are started:
#
#gateway.recover_after_nodes: 3
#
# For more information, consult the gateway module documentation.
#
# ---------------------------------- Various -----------------------------------
#
# Require explicit names when deleting indices:
#
#action.destructive_requires_name: true
3. 启动
进入es根目录下bin, 点击elasticsearch.bat启动。
成功如图:
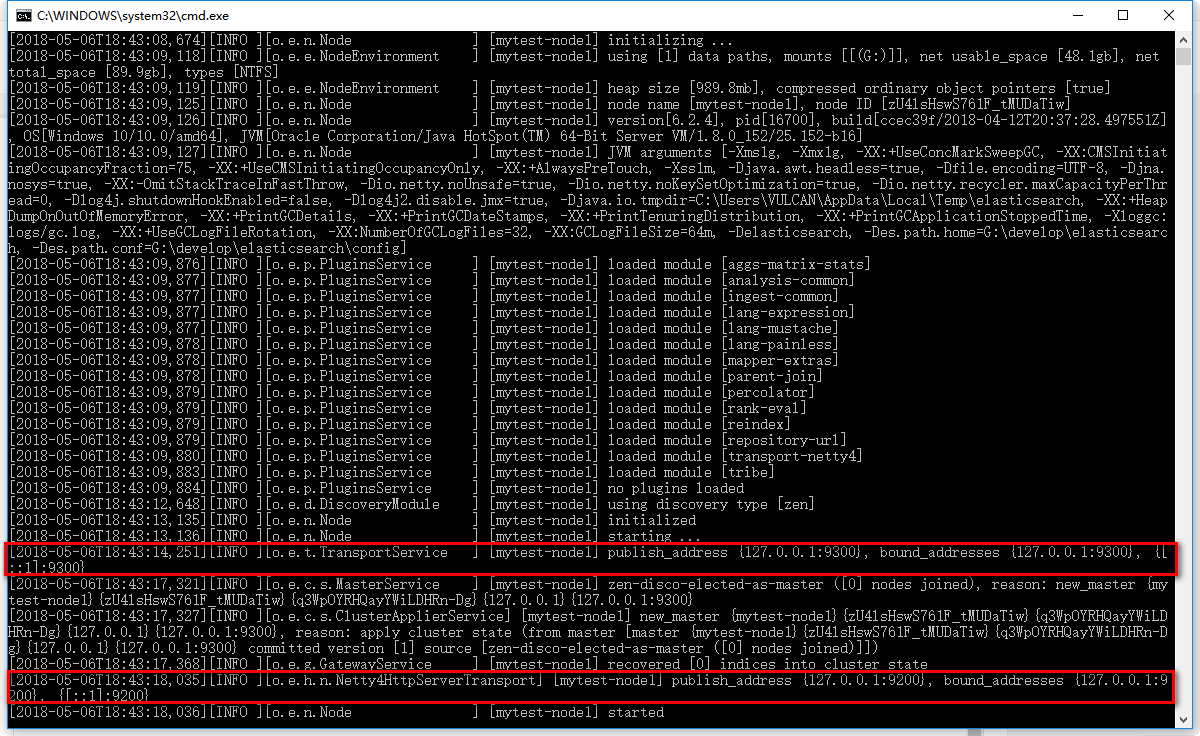
可以看到。
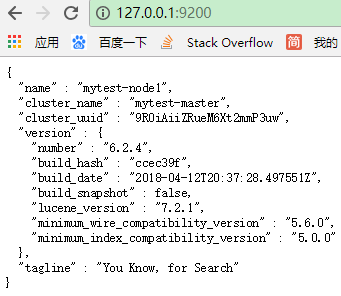
127.0.0.1:9200 是es发布服务的地址和端口。
浏览器访问 如图:
127.0.0.1:9300 是es客户端连接的地址和端口。
4. 客户端连接(java)
4.1 pom文件
<dependencies>
        <dependency>
            <groupId>org.springframework.boot</groupId>
            <artifactId>spring-boot-starter-web</artifactId>
            <version>2.0.0.RELEASE</version>
        </dependency>
        <dependency>
            <groupId>org.elasticsearch.client</groupId>
            <artifactId>x-pack-transport</artifactId>
            <version>${elasticsearch.version}</version>
        </dependency>
        <dependency>
            <groupId>junit</groupId>
            <artifactId>junit</artifactId>
            <version>${junit.version}</version>
        </dependency>
        <dependency>
            <groupId>com.alibaba</groupId>
            <artifactId>fastjson</artifactId>
            <version>1.2.47</version>
        </dependency>
    </dependencies>
    <repositories>
        <!-- add the elasticsearch repo -->
        <repository>
            <id>elasticsearch-releases</id>
            <url>https://artifacts.elastic.co/maven</url>
            <releases>
                <enabled>true</enabled>
            </releases>
            <snapshots>
                <enabled>false</enabled>
            </snapshots>
        </repository>
    </repositories>
x-pack-transport这个包是可以创建带有x-pack的连接,因为后边要演示加上x-pack,就用这个包了。
目前的话用下面这个包也可以,但是不支持x-pack连接。
<dependency>
    <groupId>org.elasticsearch.client</groupId>
    <artifactId>transport</artifactId>
    <version>6.2.4</version>
</dependency>
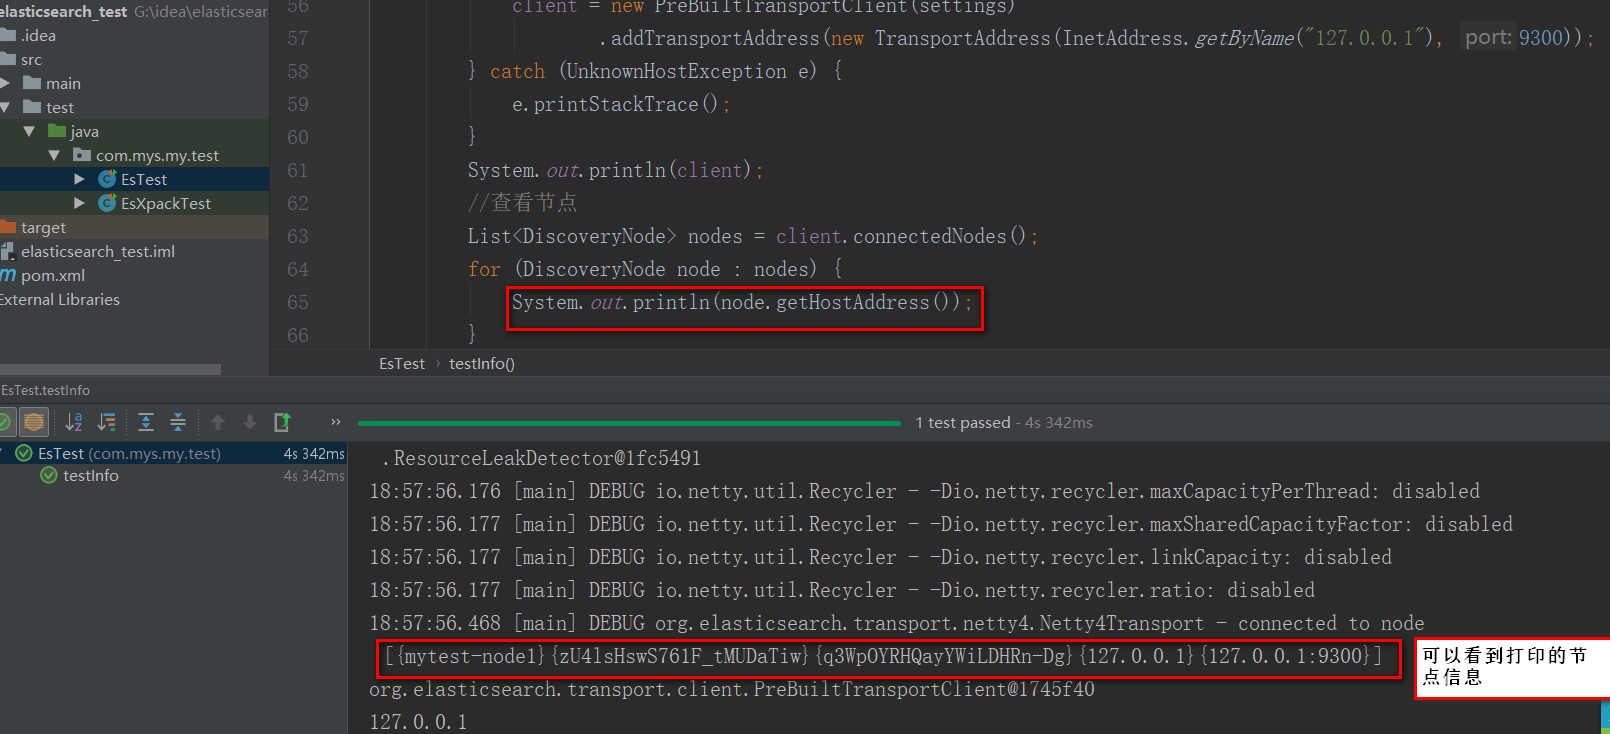
4.2 创建连接
@Test
    public void testInfo() {
        Settings settings = Settings.builder().put("cluster.name",
                "mytest-master")
                .put("thread_pool.search.size", 20)// 增加线程池个数,暂时设为5
                .build();
        try {
            client = new PreBuiltTransportClient(settings)
                    .addTransportAddress(new TransportAddress(InetAddress.getByName("127.0.0.1"), 9300));
        } catch (UnknownHostException e) {
            e.printStackTrace();
        }
        System.out.println(client);
        //查看节点
        List<DiscoveryNode> nodes = client.connectedNodes();
        for (DiscoveryNode node : nodes) {
            System.out.println(node.getHostAddress());
        }
    }
成功如图: