最近在学习Spring中的容器相关的知识和源码,特此记录下来。
准备工作:创建一个maven项目

next

finish. ok项目创建完成。
导入Spring的maven依赖:

<dependency>
  	<groupId>org.springframework</groupId>
  	<artifactId>spring-context</artifactId>
  	<version>4.3.12.RELEASE</version>
</dependency>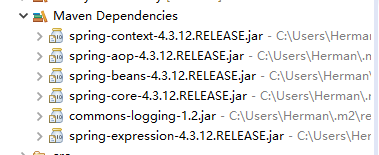
新建bean类Person,代码如下
package com.herman.bean;

public class Person {

	private String name;
	private Integer age;
	public String getName() {
		return name;
	}
	public void setName(String name) {
		this.name = name;
	}
	public Integer getAge() {
		return age;
	}
	public void setAge(Integer age) {
		this.age = age;
	}
	@Override
	public String toString() {
		return "Person [name=" + name + ", age=" + age + "]";
	}
	public Person(String name, Integer age) {
		super();
		this.name = name;
		this.age = age;
	}
	public Person() {
		super();
	}

}
好了,准备工作到此就ok了。
Spring中加入Bean的7中方式如下:
第一种:xml中配置
很古老的一种方式,刚开始学习spring的时候应该就是这种吧。
首先,在类路径下新建beans.xml,结构如下:

beans.xml内容如下:
<?xml version="1.0" encoding="UTF-8"?>
<beans xmlns="http://www.springframework.org/schema/beans"
    xmlns:xsi="http://www.w3.org/2001/XMLSchema-instance"
    xsi:schemaLocation="http://www.springframework.org/schema/beans
                        http://www.springframework.org/schema/beans/spring-beans.xsd">

  	<bean id="person" class="com.herman.bean.Person">
  		<property name="name" value="herman"></property>
  		<property name="age" value="18"></property>
  	</bean>
</beans>
测试类如下:
package com.herman;

import org.springframework.context.ApplicationContext;
import org.springframework.context.support.ClassPathXmlApplicationContext;

import com.herman.bean.Person;

public class MainTest {
	public static void main(String[] args) {
		/**
		 * ClassPathXmlApplicationContext
		 * 顾名思义:ClassPath下的一个Xml,传入我们的beans.xml即可。
		 */
		ApplicationContext applicationContext = new ClassPathXmlApplicationContext("beans.xml");
		Person person = (Person) applicationContext.getBean("person");
		System.out.println(person);
	}
}
输出结果:
第二种:利用@Bean注解
新建一个MainConfig,如下:
package com.herman.config;

import java.util.Arrays;

import org.springframework.context.annotation.Bean;
import org.springframework.context.annotation.Configuration;

import com.herman.bean.Person;

/**
 * @author Herman
 *
 *	添加了@Configuration注解的意思就是告诉Spring这个类是一个配置类
 *	配置类的方式等同于配置文件(配置类==配置文件)
 */
@Configuration
public class MainConfig {

	/**
	 * 这里可以对比一下配置文件的写法
	 *
	 * 		<bean id="person" class="com.herman.bean.Person">
  	 *			<property name="name" value="herman"></property>
  	 *			<property name="age" value="18"></property>
  	 *		</bean>
	 *
	 */
	/**
	 * @Bean就是给容器中注册一个Bean;类型为方法的返回类型(Person),id默认是方法名person
	 *
	 * 此处@Bean里面可以指定返回的id名
	 * 例如  @Bean("herman001") 那么 加入到ioc中的这个Person类型的Bean id叫做 herman001
	 * 所以	String[] names = applicationContext.getBeanNamesForType(Person.class);
	 *		System.out.println(Arrays.asList(names));
	 *		输出结果时候 [herman001]
	 * 也可以修改方法名	public Person person002() { 效果是一样的。
	 *
	 * 但是如果同时添加了@Bean("herman001") 和 public Person person002() ,
	 * 默认是herman001,也就是@Bean 占主导地位
	 */
	@Bean("herman001")
	public Person person002() {
		return new Person("张三",20);
	}
}
然后测试类继续 如下:
package com.herman;

import java.util.Arrays;

import org.springframework.context.ApplicationContext;
import org.springframework.context.annotation.AnnotationConfigApplicationContext;
import org.springframework.context.support.ClassPathXmlApplicationContext;

import com.herman.bean.Person;
import com.herman.config.MainConfig;

public class MainTest {
	public static void main(String[] args) {
		/**
		 * ClassPathXmlApplicationContext
		 * 顾名思义:ClassPath下的一个Xml,传入我们的beans.xml即可。
		 */
//		ApplicationContext applicationContext = new ClassPathXmlApplicationContext("beans.xml");
//		Person person = (Person) applicationContext.getBean("person");
//		System.out.println(person);

		/**
		 * 来来来,再看  AnnotationConfigApplicationContext
		 * Annotation中文意思是 注解
		 * 顾名思义:通过注解的方式获取ioc容器 (applicationContext 可以看做就是ioc容器)
		 */
		ApplicationContext applicationContext = new AnnotationConfigApplicationContext(MainConfig.class);
		Person bean = applicationContext.getBean(Person.class);
		System.out.println(bean);
		String[] names = applicationContext.getBeanNamesForType(Person.class);
		System.out.println(Arrays.asList(names));
	}
}
测试结果:输出
Person [name=张三, age=20]
[herman001]
-----------------------------------------------------------------------------------------------------------
其实applicationContext里面可以获取到很多东西,挺好玩的,可以自行尝试
比如可以获取到ioc容器中所有的beanName,还有一些环境相关的东西。

第三种:包扫描方式(常用)
以前的开发中用到的是这种,在beans.xml中添加包扫描
首先,beans中加入context的名称空间,然后加入<context:component-scan>标签,如下:
<?xml version="1.0" encoding="UTF-8"?>
<beans xmlns="http://www.springframework.org/schema/beans"
    xmlns:xsi="http://www.w3.org/2001/XMLSchema-instance"
    xmlns:context="http://www.springframework.org/schema/context"
    xsi:schemaLocation="http://www.springframework.org/schema/beans
                        http://www.springframework.org/schema/beans/spring-beans.xsd
                        http://www.springframework.org/schema/context
        				http://www.springframework.org/schema/context/spring-context-4.2.xsd">

   <!--  只要标注了@Controller @Service @Repository @Componet 注解的类都可以被扫描到Spring容器中-->
  	<context:component-scan base-package="com.herman"></context:component-scan>
  	<bean id="person" class="com.herman.bean.Person">
  		<property name="name" value="herman"></property>
  		<property name="age" value="18"></property>
  	</bean>
</beans>
此处添加了 xmlns:context="http://www.springframework.org/schema/context"等名称空间,利用<<context:component-scan>标签扫描了 com.herman包。
然后方便测试,在maven的pom中加入junit的依赖, pom现在更新为 如下:
<project xmlns="http://maven.apache.org/POM/4.0.0" xmlns:xsi="http://www.w3.org/2001/XMLSchema-instance" xsi:schemaLocation="http://maven.apache.org/POM/4.0.0 http://maven.apache.org/xsd/maven-4.0.0.xsd">
  <modelVersion>4.0.0</modelVersion>
  <groupId>com.herman</groupId>
  <artifactId>spring-annotation</artifactId>
  <version>0.0.1-SNAPSHOT</version>
  <dependencies>
  		<!--  springframework  -->
  		<dependency>
  			<groupId>org.springframework</groupId>
  			<artifactId>spring-context</artifactId>
  			<version>4.3.12.RELEASE</version>
  		</dependency>
  		<!-- junit  -->
  		<dependency>
  			<groupId>junit</groupId>
  			<artifactId>junit</artifactId>
  			<version>4.12</version>
  			<scope>test</scope>
  		</dependency>
  </dependencies>
</project>
然后 新建了 controller类,service类,dao类,在测试包下新建 IOCTest 测试类。目前项目结构更新为如下:

IOCTest类代码如下:
package com.herman.test;

import org.junit.Test;
import org.springframework.context.ApplicationContext;
import org.springframework.context.support.ClassPathXmlApplicationContext;

public class IOCTest {

	@Test
	public void test01() {
		ApplicationContext applicationContext = new ClassPathXmlApplicationContext("beans.xml");
		String[] names = applicationContext.getBeanDefinitionNames();
		for (String name : names) {
			System.out.println(name);
		}

	}
}
来看看执行结果:

mainConfig为什么会被扫描进去呢?因为mainConfig中加入了注解@Configuration,点开源码看看:
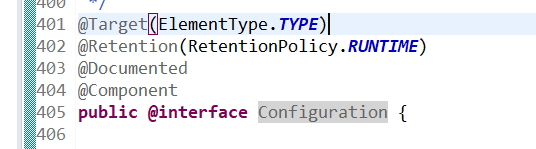
发现@Configuration里面有一个@Component注解,所以mainConfig就被加入到 ioc中了。
好了 我们在此不是要探讨配置文件的包扫描,我们来看看注解的包扫描。
我们给 MainConfig加入 @ComponentScan注解,如下

这里的@ComponentScan等同于配置文件中的<context:component-scan>扫描标签.
修改IOCTest类中加载ioc的方式 从ClassPathXmlApplicationContext换成 AnnotationConfigApplicationContext
package com.herman.test;

import org.junit.Test;
import org.springframework.context.ApplicationContext;
import org.springframework.context.annotation.AnnotationConfigApplicationContext;
import org.springframework.context.support.ClassPathXmlApplicationContext;

import com.herman.config.MainConfig;

public class IOCTest {

	@Test
	public void test01() {
//		ApplicationContext applicationContext = new ClassPathXmlApplicationContext("beans.xml");
		ApplicationContext applicationContext = new AnnotationConfigApplicationContext(MainConfig.class);
		String[] names = applicationContext.getBeanDefinitionNames();
		for (String name : names) {
			System.out.println(name);
		}

	}
}
看看测试结果:

发现结果和配置文件一样。
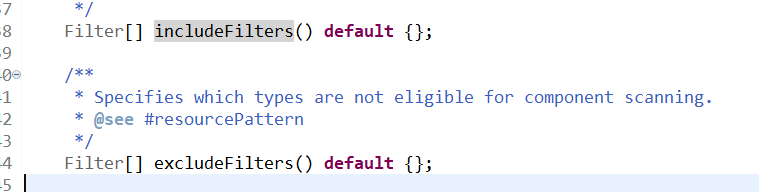
仔细看看@ComponentScan,点进去发现有个 @Repeatable 注解,也就是说 @ComponentScan可以添加多次。
还有includeFilters和 excludeFilters,包含哪些,排除那些都是可以设置的,还可以自定义规则设置,可以自行研究,这里就不探讨了。
其实还有一个类似的@ComponentScans,源码如下:

发现@ComponentScans里面有一个@ComponentScan的数组。可以用@ComponentScans代替@ComponentScan。
修改MainConfig的扫描规则如下 也是可以的.

好了,第三种就说到这里。
第四种 利用@Conditional注解(Spring boot底层使用的很多呦)
新建配置类MainConfig02 如下:
package com.herman.config;

import org.springframework.context.annotation.Bean;
import org.springframework.context.annotation.Configuration;

import com.herman.bean.Person;

/**
 * @author Herman
 */
@Configuration
public class MainConfig02 {

	@Bean("bill")
	public Person person01() {
		return new Person("Bill Gates",60);
	}
	@Bean("linux")
	public Person person02() {
		return new Person("linus",50);
	}
}
添加测试方法 如下:
@Test
	public void test02() {
		ApplicationContext applicationContext = new AnnotationConfigApplicationContext(MainConfig02.class);
		String[] names = applicationContext.getBeanNamesForType(Person.class);
		System.out.println(Arrays.asList(names));
		Map<String, Person> persons = applicationContext.getBeansOfType(Person.class);
		System.out.println(persons);
	}
来看看打印结果,看看ioc容器中现在有几个人,很显然是两个人,bill和linux。

好了 准备工作ok了 现在开始看@Conditional注解的作用。
翻译过来就是 条件,源码如下
@Target({ElementType.TYPE, ElementType.METHOD})
@Retention(RetentionPolicy.RUNTIME)
@Documented
public @interface Conditional {

	/**
	 * All {@link Condition}s that must {@linkplain Condition#matches match}
	 * in order for the component to be registered.
	 */
	Class<? extends Condition>[] value();

}
可以看出来这个注解 可以加在类上,也可以加在 方法上 (@Target({ElementType.TYPE, ElementType.METHOD}))
再看 这个类必须是Condition类的子类(实现类)[ Class<? extends Condition>[] value(); ]
点开 Condition,如下:
public interface Condition {

	/**
	 * Determine if the condition matches.
	 * @param context the condition context
	 * @param metadata metadata of the {@link org.springframework.core.type.AnnotationMetadata class}
	 * or {@link org.springframework.core.type.MethodMetadata method} being checked.
	 * @return {@code true} if the condition matches and the component can be registered
	 * or {@code false} to veto registration.
	 */
	boolean matches(ConditionContext context, AnnotatedTypeMetadata metadata);
发现是个接口,需要实现matches方法即可,返回一个boolean 类型的参数。我们分别创建两个类来实现Condition接口。
目的 : 如果当前环境是 Windows 给系统中添加 person01 即 bill,如果当前环境是 Linux 给系统中添加 person02 即 linux。
WindowsCondition和LinuxCondition 代码如下:
package com.herman.condition;

import org.springframework.context.annotation.Condition;
import org.springframework.context.annotation.ConditionContext;
import org.springframework.core.env.Environment;
import org.springframework.core.type.AnnotatedTypeMetadata;

/**
 *
 * @author Herman
 *
 * Windows 环境的 Condition实现类
 *
 */
public class WindowsCondition implements Condition{

	/**
	 * ConditionContext 判断条件能使用的上下文环境
	 * AnnotatedTypeMetadata:注释信息
	 *
	 */
	public boolean matches(ConditionContext context, AnnotatedTypeMetadata metadata) {
		//当前环境
		Environment environment = context.getEnvironment();
		//获取操作系统
		String property = environment.getProperty("os.name");
		if(property.contains("Windows")) {
			return true;
		}
		return false;
	}

}
package com.herman.condition;

import org.springframework.context.annotation.Condition;
import org.springframework.context.annotation.ConditionContext;
import org.springframework.core.env.Environment;
import org.springframework.core.type.AnnotatedTypeMetadata;

/**
 *
 * @author Herman
 *
 * Linux 环境的 Condition实现类
 *
 */
public class LinuxCondition implements Condition {
	/**
	 * ConditionContext 判断条件能使用的上下文环境
	 * AnnotatedTypeMetadata:注释信息
	 *
	 */
	public boolean matches(ConditionContext context, AnnotatedTypeMetadata metadata) {
		// 当前环境
		Environment environment = context.getEnvironment();
		// 获取操作系统
		String property = environment.getProperty("os.name");
		if (property.contains("linux")) {
			return true;
		}
		return false;
	}

}
补充,其实context里面可以get出来很多好玩,有用的东西,可以自行尝试哦。(context.getRegistry() 这个挺实用。)
改造我们的配置类MainConfig02如下:
package com.herman.config;

import org.springframework.context.annotation.Bean;
import org.springframework.context.annotation.Conditional;
import org.springframework.context.annotation.Configuration;

import com.herman.bean.Person;
import com.herman.condition.LinuxCondition;
import com.herman.condition.WindowsCondition;

/**
 * @author Herman
 */
@Configuration
public class MainConfig02 {

	/**
	 *
	 * 目的: 如果当前环境是 Windows 给系统中添加 person01 即 bill
	 * 	     如果当前环境是 Linux 给系统中添加 person02  即 linux
	 *
	 *
	 */
	@Conditional(WindowsCondition.class)
	@Bean("bill")
	public Person person01() {
		return new Person("Bill Gates",60);
	}

	@Conditional(LinuxCondition.class)
	@Bean("linux")
	public Person person02() {
		return new Person("linus",50);
	}
}
ok,运行测试方法 test02,结果来看看:

可以看出来当操作系统是 windows的时候,ioc中只有bill这个person了。
更换操作系统试试?
选中方法test02,右键 Run As 选择 Run Configurations,在Arguments中输入 -Dos.name=linux 如下

点击右下角 Run,结果如下:

这是@Conditional加在方法上,也可以加在类上,当满足条件的时候,这个类中配置的所有的Bean才能生效。
第五种 @Import
新建类Red和Color
package com.herman.bean;

public class Color {

}
package com.herman.bean;

public class Red {

}
修改MainConfig02中的注解,加一个@Import
如下:

@Import的value中可以写多个类,原因看一下源码就知道;

写测试方法运行一下看看情况:
@Test
	public void testImport() {
		ApplicationContext applicationContext = new AnnotationConfigApplicationContext(MainConfig02.class);
		printBeanNames(applicationContext);
	}
	/**
	 * 打印 ioc中的beans
	 * @param applicationContext
	 */
	public void printBeanNames(ApplicationContext applicationContext) {
		String[] beanDefinitionNames = applicationContext.getBeanDefinitionNames();
		for (String name : beanDefinitionNames) {
			System.out.println(name);
		}
	}
输出结果是:

第五种贼简单吧。嘻嘻
第六种 @ImportSelector和@ImportBeanDefinitionRegistrar
来看看 @ImportSelector的源码:

是一个接口,需要实现selectImports方法。可以导入String的数组。我们新建两个类Blue和Yellow
package com.herman.bean;

public class Yellow {

}


package com.herman.bean;

public class Blue {

}
新建类MyImportSelector implements ImportSelector
package com.herman.bean;

import org.springframework.context.annotation.ImportSelector;

import org.springframework.core.type.AnnotationMetadata;
import org.springframework.stereotype.Component;
@Component
public class MyImportSelector implements ImportSelector {

	public String[] selectImports(AnnotationMetadata importingClassMetadata) {
		return new String[] {"com.herman.bean.Blue","com.herman.bean.Yellow"};
	}

}
修改 配置类MainConfig02,修改原@Import的值为@Import(value= {Red.class, Color.class, MyImportSelector.class})
继续执行测试方法testImport,输出结果:

接下来看@ImportBeanDefinitionRegistrar
源码如下:

也是一个接口,需要实现registerBeanDefinitions方法。
新建类MyImportBeanDefinitionRegistrar.如下:
(我们这里搞个需求,假如容器中有Red和Blue类,就给容器中注册一个RainRow类。)
package com.herman.bean;

import org.springframework.beans.factory.support.BeanDefinitionRegistry;
import org.springframework.beans.factory.support.RootBeanDefinition;
import org.springframework.context.annotation.ImportBeanDefinitionRegistrar;
import org.springframework.core.type.AnnotationMetadata;
import org.springframework.stereotype.Component;

@Component
public class MyImportBeanDefinitionRegistrar implements ImportBeanDefinitionRegistrar {

	public void registerBeanDefinitions(AnnotationMetadata importingClassMetadata, BeanDefinitionRegistry registry) {
		/**
		 *  	这里搞个需求,假如容器中有Red和Blue类,就给容器中注册一个RainRow类。
		 *  	目的:熟悉BeanDefinitionRegistry里面的方法,可以判断有没有某个类,
		 *  	或者往ioc里面加入某个类,还可以移除某个类,挺好玩的
		 */
		boolean blue = registry.containsBeanDefinition("com.herman.bean.Blue");
		boolean red = registry.containsBeanDefinition("com.herman.bean.Red");
		if(blue && red) {
			//指定bean的定义信息
			RootBeanDefinition beanDefinition = new RootBeanDefinition(RainRow.class);
			//注册一个bean
			registry.registerBeanDefinition("rainRow", beanDefinition);
		}
	}

}
新建RainRow类。
package com.herman.bean;

public class RainRow {

}
修改配置类MainConfig02的@Import为
@Import(value= {Red.class, Color.class, MyImportSelector.class, MyImportBeanDefinitionRegistrar.class})
执行测试方法testImport(),执行结果如下:

第七种:使用Spring提供的FactorBean(工厂Bean)
可以看一下源码:
package org.springframework.beans.factory;

public interface FactoryBean<T> {


	T getObject() throws Exception;


	Class<?> getObjectType();


	boolean isSingleton();

}
也是一个接口,三个方法:
getObject() 返回一个T类型的对象,放在容器中。
getObjectType() 返回对象的类型
isSingleton() 是否单例。
新建类ColorFactoryBean implements FactoryBean<Color>
package com.herman.bean;

import org.springframework.beans.factory.FactoryBean;

public class ColorFactoryBean implements FactoryBean<Color> {
	//返回一个Color对象,添加在容器中
	public Color getObject() throws Exception {
		return new Color();
	}
	public Class<?> getObjectType() {
		return Color.class;
	}
	//true 代表 bean是单实例 。反之 多实例。
	public boolean isSingleton() {
		return false;
	}

}
修改配置类MainConfig02,把ColorFactoryBean加入到ioc中:
@Bean
public ColorFactoryBean colorFactoryBean() {
	return new ColorFactoryBean();
}
执行测试方法testImport(),结果如下:

虽然看着是注册了colorFactoryBean,但是实际上是个Color对象,因为调用的是getObject()方法。
那么我就要获取一个colorFactoryBean对象,要怎么做?,继续往下看
只需要给
Object bean = applicationContext.getBean("&colorFactoryBean");
bean的id前面 添加一个 & 符号即可。
继续测试结果如下:

为何不直接使用@Bean,而使用FactoryBean呢?
Spring 中有两种类型的Bean,一种是普通Bean,另一种是工厂Bean 即 FactoryBean。FactoryBean跟普通Bean不同,其返回的对象不是指定类的一个实例,而是该FactoryBean的getObject方法所返回的对象。创建出来的对象是否属于单例由isSingleton中的返回决定。
官方解释:
FactoryBean 通常是用来创建比较复杂的bean,一般的bean 直接用xml配置即可,但如果一个bean的创建过程中涉及到很多其他的bean 和复杂的逻辑,用xml配置比较困难,这时可以考虑用FactoryBean。
这里套用一下别人的解释:
简单的说:它是用来处理复杂的Bean,在初始化过程中需要做很多事情(比如MyBatis的SqlSessionFactoryBean等等),从而屏蔽内部实现,对调用者/使用者友好的一种解决方案。
如果这种Bean用xml去配置,几乎是不可能的。当用注解驱动@Bean去做后,虽然也是可以的,但是很显然对调用很不友好的(因为我们使用MyBatis可不想去知道它初始化到底要做些啥事之类的)
至此,完结,知识摘自 尚硅谷课堂,感谢。