没有装opencv的先看看我上一篇博客opencv安装的第一步:
https://blog.csdn.net/qq_43249043/article/details/95337180
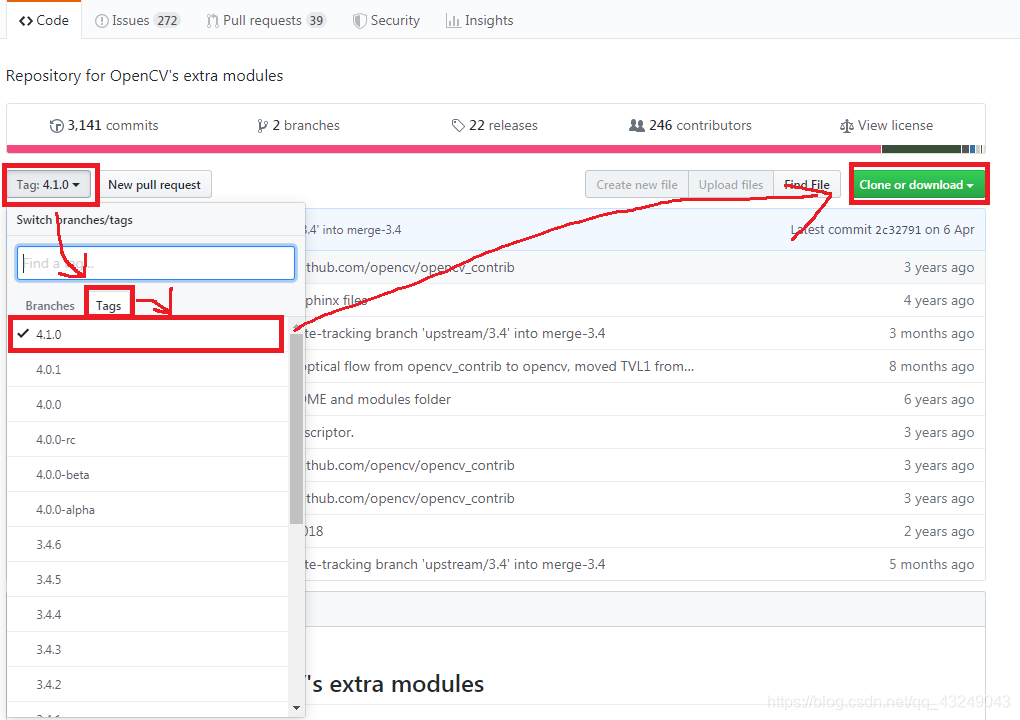
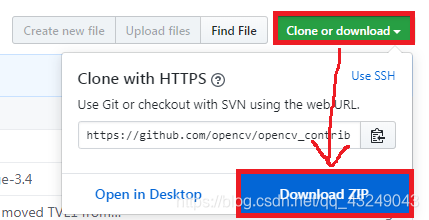
1.下载opencv_contrib
打开 https://github.com/opencv/opencv_contrib 最好用chrome 上一篇已讲
*******************************
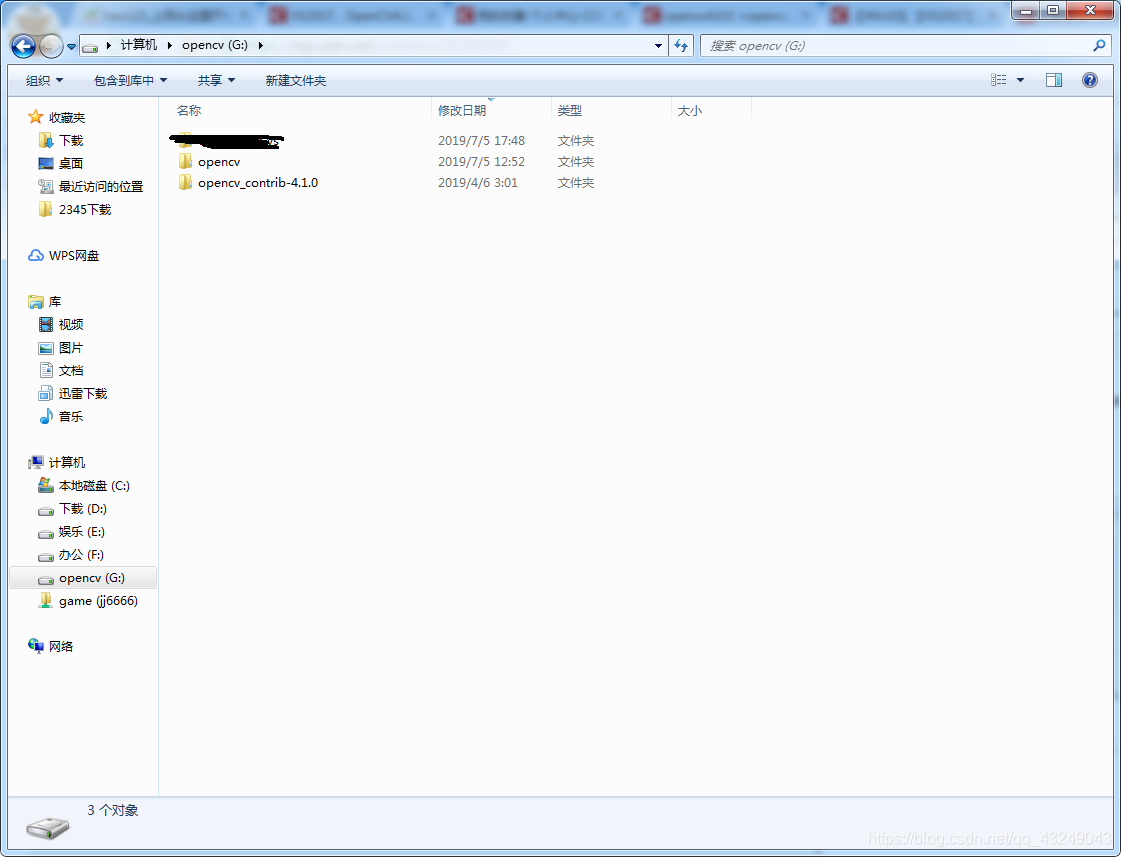
下载好的文件和opencv放在同一级,方便后续操作
2.Cmake的下载安装
下载地址:https://cmake.org/download/

不要装 Release Candidate (3.15.0-rc3)下面的,会发生未知的bug
下载完后还是一个应用程序 ,就无脑安装,别忘了Add Path,就不用自己手动加入path了,但是记得还是要和opencv同一个级,方便操作
****************************
3.Cmake编译
Where is the source code 选刚装好的opencv的source目录下
第二行先新建一个文件夹,名字随便取,还是和opencv同级,好操作
VS看着自己的选,别选错了,问题很严重的
等待一些时间后,下面会显示 configuring done
然后中间一片红色 然后三步走
1.BUILD_opencv_world 打勾;
2.OPENCV_ENABLE_NONFREE 打勾
3.OPENCV_EXTRA_MODELS_PATH添加G:\opencv_contrib-4.1.0\modules(根据自己情况改)
再点下边的 Generate
等待,直到 configuring done generating done 出现
到这步为止,你的Cmake编译就完成了
4.VS编译
打开你刚刚新建的文件夹,Cmake编译好的opencv在里边
用VS打开图里的那个文件

然后点击生成解决方案,等待一段时间
注意:看清楚是不是选了Debug x64环境,不然就做了无用功
*******************************就是这个

然后打开解决方案管理器
************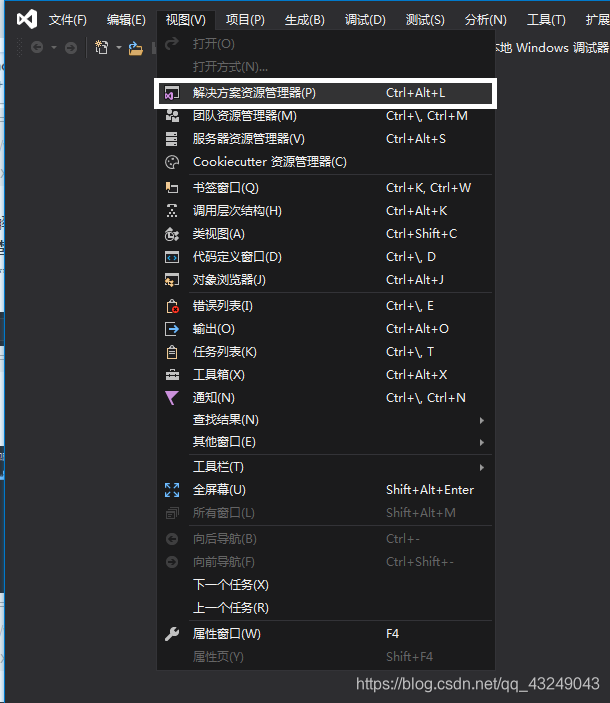
然后按照图里的指示点击
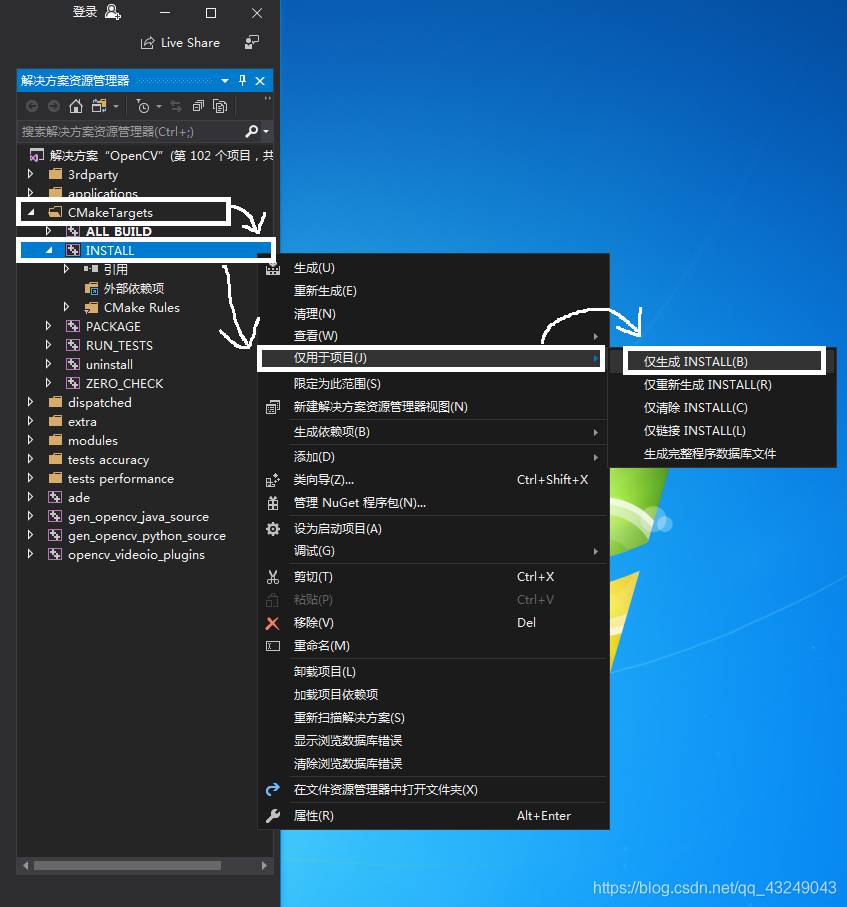
继续等待,成功会显示成功1个,失败0个,跳过0个,最新0个
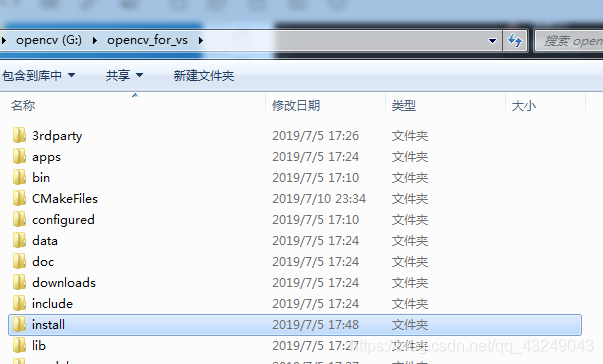
到这里VS的编译就完成了,看看自己有没有install这个文件
5.系统环境的配置
1.把(注意有;) ;G:\opencv_for_vs\install\x64\vc16\bin (根据自己配置更改)加入到Path里面

2. .把G:\opencv_for_vs\install\x64\vc16\bin目录里面的opencv_ffmpeg410_64.dll复制到C:\Windows\System32里,把opencv_world410d.dll复制到C:\Windows\SysWOW64里
没有这一步会报错 没有动态链接库Creat::…啥的,很奇怪的字符
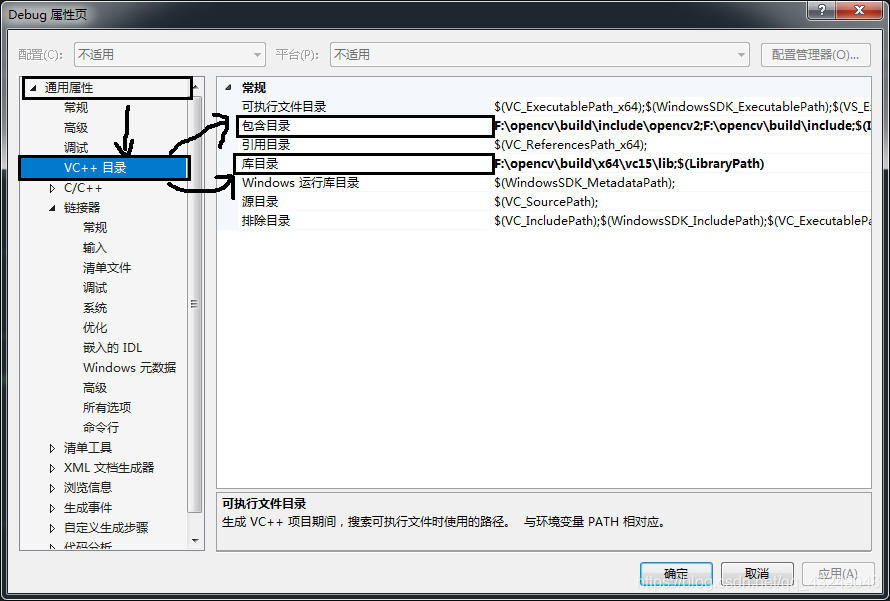
3.改属性
***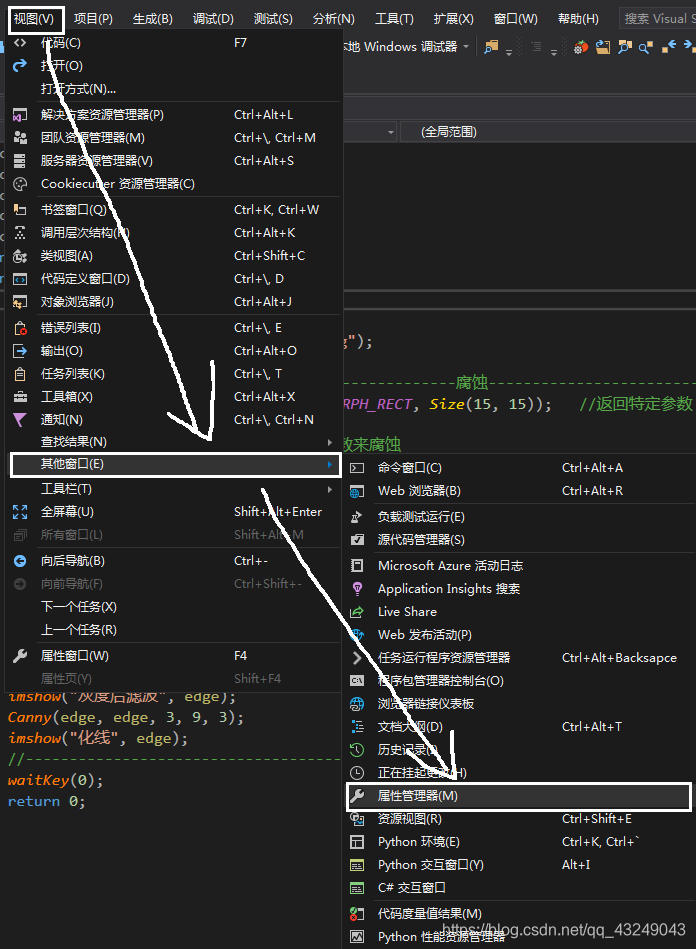
然后这样 *****************************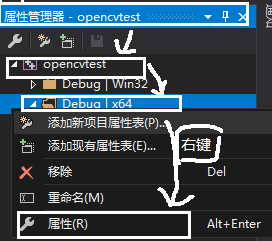
改下面包含目录 ,库目录,附加依赖项的内容
包含目录里面放 G:\opencv_for_vs\install\include\opencv2(选自己的目录)
****************G:\opencv_for_vs\install\include
库目录里面放 G:\opencv_for_vs\install\x64\vc16\lib
附加依赖项里面放 opencv_world410d.lib (410是4.1.0版本的意思)

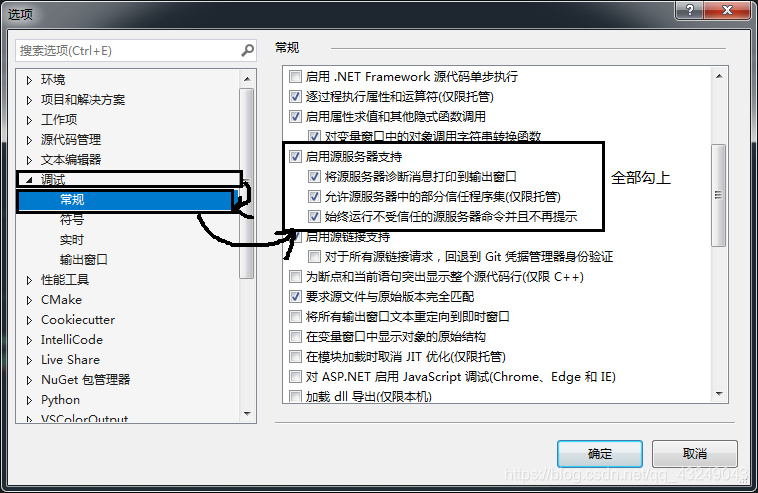
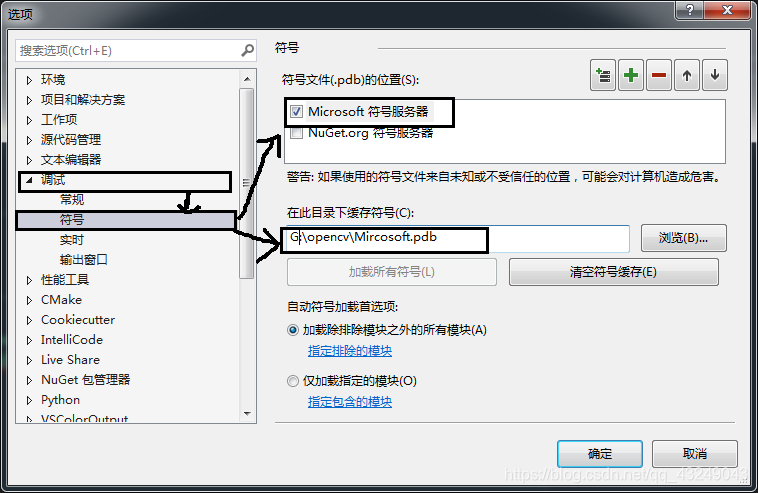
然后选择加载Misrcosoft的服务,不加载运行程序会报错缺少dll
************************************
在此目录下缓存符号,对着改自己的路径,先创个文件夹叫Misrcosoft.pdb
到这里就应该可以了,试试程序,记得跑x64的编译器,因为我们刚刚都是在x64上调试的

我的代码来源是 https://blog.csdn.net/lindamtd/article/details/80667826
精度挺高的,很好用
不过好像有个小地方报错了,我小小改动一下(不知道算不算转载,侵删哈
#include <iostream>
#include <vector>
#include <opencv2/xfeatures2d.hpp>
#include <opencv2/xfeatures2d/nonfree.hpp>
#include <opencv2/highgui.hpp>

#include<opencv.hpp>
#include <opencv2/core/core.hpp>
#include<opencv2/core.hpp>
#include<stdio.h>

using namespace cv;
using namespace std;
using namespace cv::xfeatures2d;

int main()
{


	Ptr<Feature2D> f2d = xfeatures2d::SIFT::create(500);
	//SiftFeatureDetector siftDetector;
	//Loading images
	Mat img_1 = imread("D:\\Desktop\\photos\\0002.png");
	Mat img_2 = imread("D:\\Desktop\\photos\\0001.png");
	if (!img_1.data || !img_2.data)
	{


		cout << "Reading picture error!" << endl;
		return false;
	}
	//Detect the keypoints
	double t0 = getTickCount();//当前滴答数
	vector<KeyPoint> keypoints_1, keypoints_2;
	f2d->detect(img_1, keypoints_1);
	f2d->detect(img_2, keypoints_2);
	cout << "The keypoints number of img1 is:" << keypoints_1.size() << endl;
	cout << "The keypoints number of img2 is:" << keypoints_2.size() << endl;
	//Calculate descriptors (feature vectors)
	Mat descriptors_1, descriptors_2;
	f2d->compute(img_1, keypoints_1, descriptors_1);
	f2d->compute(img_2, keypoints_2, descriptors_2);
	double freq = getTickFrequency();
	double tt = ((double)getTickCount() - t0) / freq;
	cout << "Extract SIFT Time:" << tt << "ms" << endl;
	//画关键点
	Mat img_keypoints_1, img_keypoints_2;

	//imshow("img_keypoints_1",img_keypoints_1);
	//imshow("img_keypoints_2",img_keypoints_2);

	//Matching descriptor vector using BFMatcher
	BFMatcher matcher;
	vector<DMatch> matches;
	matcher.match(descriptors_1, descriptors_2, matches);
	cout << "The number of match:" << matches.size() << endl;
	//绘制匹配出的关键点
	Mat img_matches;
	drawMatches(img_1, keypoints_1, img_2, keypoints_2, matches, img_matches);
	imshow("Match image",img_matches);
	//计算匹配结果中距离最大和距离最小值
	double min_dist = matches[0].distance, max_dist = matches[0].distance;
	for (int m = 0; m < matches.size(); m++)
	{


		if (matches[m].distance < min_dist)
		{


			min_dist = matches[m].distance;
		}
		if (matches[m].distance > max_dist)
		{


			max_dist = matches[m].distance;
		}
	}
	cout << "min dist=" << min_dist << endl;
	cout << "max dist=" << max_dist << endl;
	//筛选出较好的匹配点
	vector<DMatch> goodMatches;
	for (int m = 0; m < matches.size(); m++)
	{


		if (matches[m].distance < 0.6 * max_dist)
		{


			goodMatches.push_back(matches[m]);
		}
	}
	cout << "The number of good matches:" << goodMatches.size() << endl;
	//画出匹配结果
	Mat img_out;
	//红色连接的是匹配的特征点数,绿色连接的是未匹配的特征点数
	//matchColor – Color of matches (lines and connected keypoints). If matchColor==Scalar::all(-1) , the color is generated randomly.
	//singlePointColor – Color of single keypoints(circles), which means that keypoints do not have the matches.If singlePointColor == Scalar::all(-1), the color is generated randomly.
	//CV_RGB(0, 255, 0)存储顺序为R-G-B,表示绿色
	drawMatches(img_1, keypoints_1, img_2, keypoints_2, goodMatches, img_out, Scalar::all(-1),Scalar::all(-1), std::vector<char>(), DrawMatchesFlags::NOT_DRAW_SINGLE_POINTS);

	imshow("good Matches", img_out);

	//RANSAC匹配过程
	vector<DMatch> m_Matches;
	m_Matches = goodMatches;
	int ptCount = goodMatches.size();
	if (ptCount < 100)
	{


		cout << "Don't find enough match points" << endl;
		return 0;
	}

	//坐标转换为float类型
	vector <KeyPoint> RAN_KP1, RAN_KP2;
	//size_t是标准C库中定义的,应为unsigned int,在64位系统中为long unsigned int,在C++中为了适应不同的平台,增加可移植性。
	for (size_t i = 0; i < m_Matches.size(); i++)
	{


		RAN_KP1.push_back(keypoints_1[goodMatches[i].queryIdx]);
		RAN_KP2.push_back(keypoints_2[goodMatches[i].trainIdx]);
		//RAN_KP1是要存储img01中能与img02匹配的点
		//goodMatches存储了这些匹配点对的img01和img02的索引值
	}
	//坐标变换
	vector <Point2f> p01, p02;
	for (size_t i = 0; i < m_Matches.size(); i++)
	{


		p01.push_back(RAN_KP1[i].pt);
		p02.push_back(RAN_KP2[i].pt);
	}
	/*vector <Point2f> img1_corners(4);
	img1_corners[0] = Point(0,0);
	img1_corners[1] = Point(img_1.cols,0);
	img1_corners[2] = Point(img_1.cols, img_1.rows);
	img1_corners[3] = Point(0, img_1.rows);
	vector <Point2f> img2_corners(4);*/
	求转换矩阵
	//Mat m_homography;
	//vector<uchar> m;
	//m_homography = findHomography(p01, p02, RANSAC);//寻找匹配图像
	//求基础矩阵 Fundamental,3*3的基础矩阵
	vector<uchar> RansacStatus;
	Mat Fundamental = findFundamentalMat(p01, p02, RansacStatus, FM_RANSAC);
	//重新定义关键点RR_KP和RR_matches来存储新的关键点和基础矩阵,通过RansacStatus来删除误匹配点
	vector <KeyPoint> RR_KP1, RR_KP2;
	vector <DMatch> RR_matches;
	int index = 0;
	for (size_t i = 0; i < m_Matches.size(); i++)
	{


		if (RansacStatus[i] != 0)
		{


			RR_KP1.push_back(RAN_KP1[i]);
			RR_KP2.push_back(RAN_KP2[i]);
			m_Matches[i].queryIdx = index;
			m_Matches[i].trainIdx = index;
			RR_matches.push_back(m_Matches[i]);
			index++;
		}
	}
	cout << "RANSAC后匹配点数" << RR_matches.size() << endl;
	Mat img_RR_matches;
	drawMatches(img_1, RR_KP1, img_2, RR_KP2, RR_matches, img_RR_matches);
	imshow("After RANSAC", img_RR_matches);

	//等待任意按键按下
	waitKey(0);

}
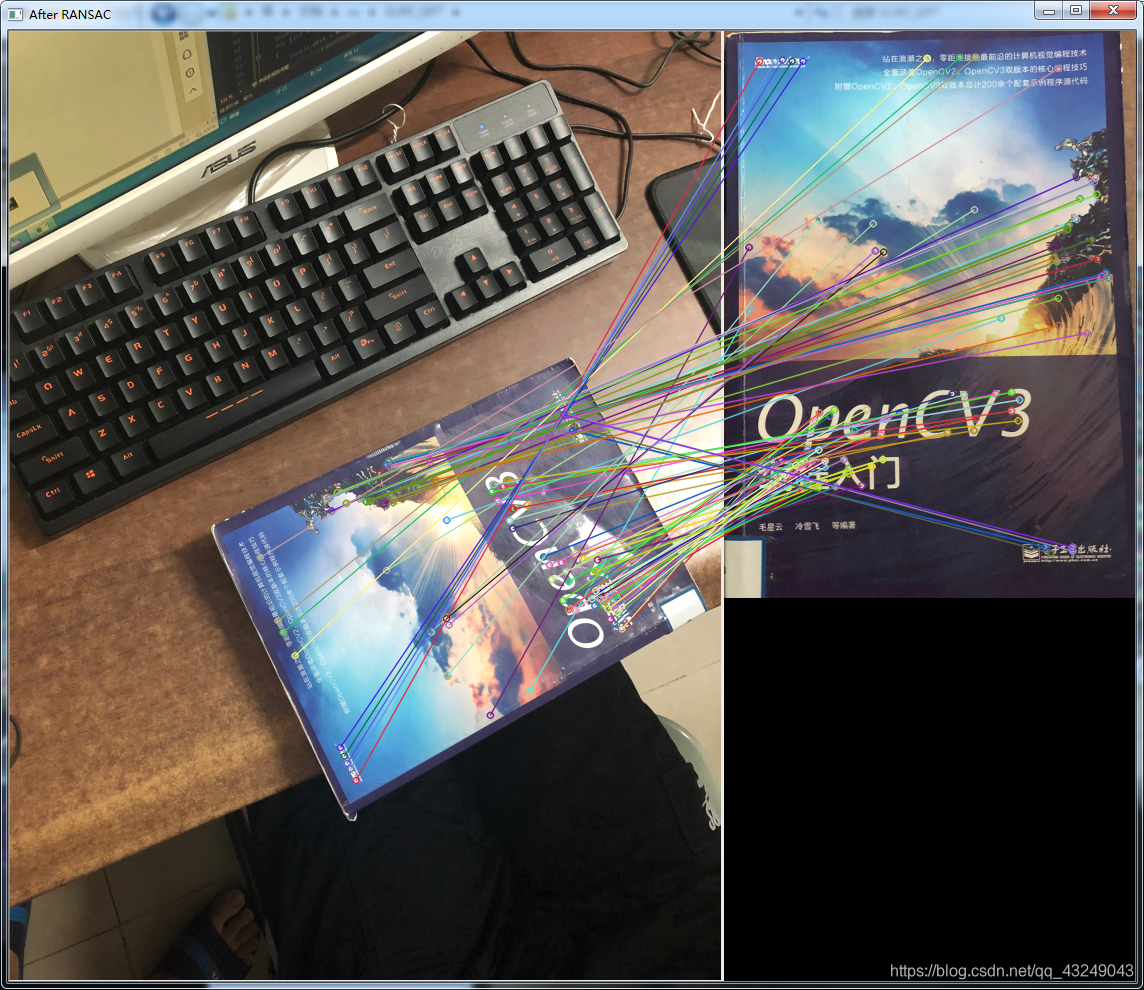
成功