1. 为什么要用 vuex ?
在vue开发当中需要使用数据管理,数据管理的目的是什么呢? <=> React中使用是Redux
首先,需要清楚为什么要用 vuex ,当我们的应用遇到 多个组件共享状态 时
- 多层级父子组件状态传递会特别繁琐
- 非嵌套父子组件状态传递也会特别繁琐(如几个组件非嵌套关系,而是平级关系)
- 视图之间的数据传递也是非常繁琐

2. vuex 是什么?
Vuex 是一个专为 Vue.js应用程序开发的 状态管理模式,类似 redux
它采用集中式存储管理应用的所有组件的状态,并以相应的规则保证状态以一种可预测的方式发生变化。Vuex 也集成到Vue的官方调试工具 devtools extension,提供了诸如零配置的time-travel调试、状态快照导入导出等高级调试功能。
这种状态管理模式包含:
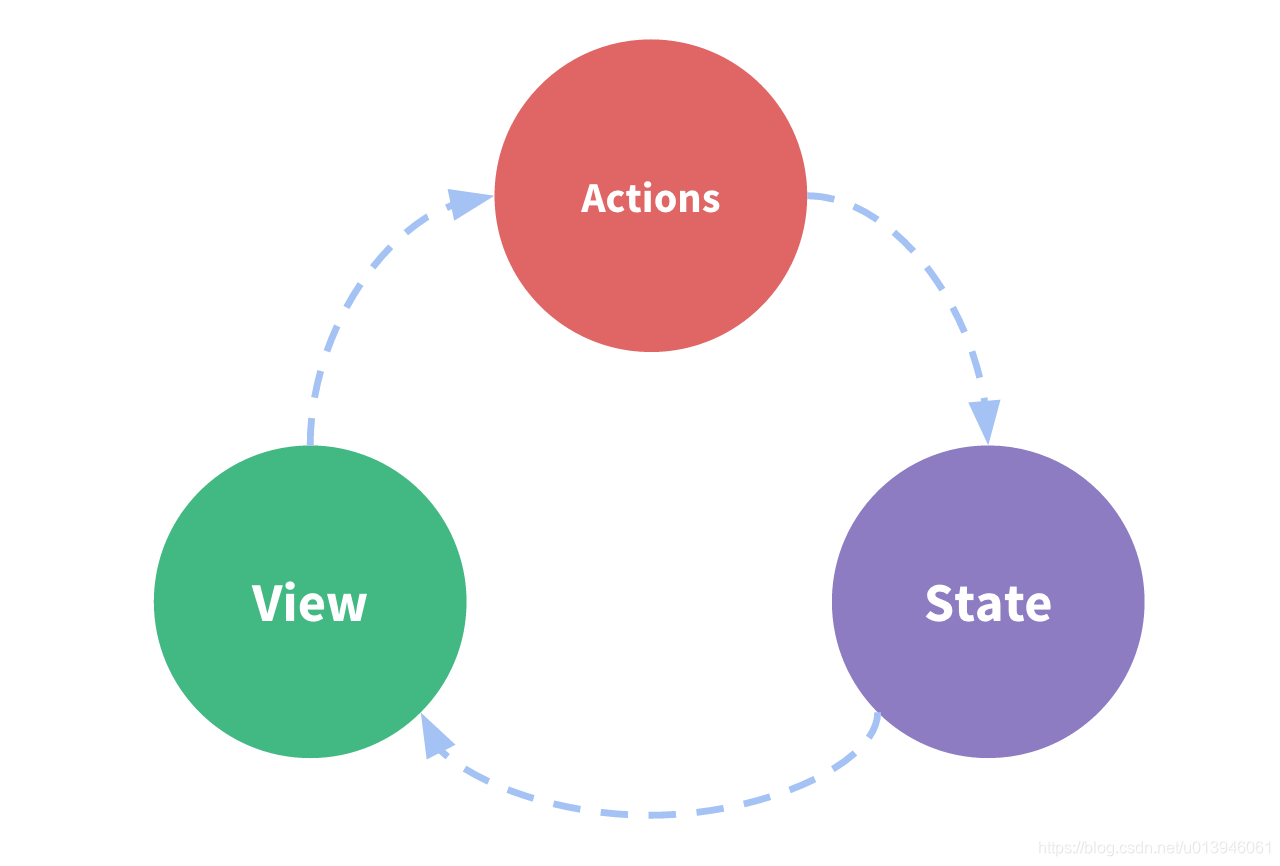
- State : 状态数据源
- View : 使用状态数据源的视图
- Actions : 修改更新数据源的操作
这种模式遵循的是 单向数据流 模式
2.1 单向数据流
以下是一个表示“单向数据流”理念的简单示意:
但是,当我们的应用遇到多个组件共享状态时,单向数据流的简洁性很容易被破坏:
- 多个视图依赖于同一状态。
- 来自不同视图的行为需要变更同一状态。
对于问题一,传参的方法对于多层嵌套的组件将会非常繁琐,并且对于兄弟组件间的状态传递无能为力。
对于问题二,我们经常会采用父子组件直接引用或者通过事件来变更和同步状态的多份拷贝。
以上的这些模式非常脆弱,通常会导致无法维护的代码。
因此,我们为什么不把组件的共享状态抽取出来,以一个全局单例模式管理呢?
在这种模式下,我们的组件树构成了一个巨大的“视图”,不管在树的哪个位置,任何组件都能获取状态或者触发行为!
通过定义和隔离状态管理中的各种概念并通过强制规则维持视图和状态间的独立性,我们的代码将会变得更结构化且易维护。
这就是 Vuex背后的基本思想,借鉴了 Flux、Redux 和 The Elm Architecture。与其他模式不同的是,Vuex是专门为 Vue.js设计的状态管理库,以利用 Vue.js 的细粒度数据响应机制来进行高效的状态更新。
2.1.1 单向数据流小结
单向数据流 模式 <=> 与Redux一致
数据存储在仓库当中,仓库中提供了数据的存储和数据的修改方式,那么这个时候(视图)消费者去使用仓库中的数据。
State是流向视图的(State => View),View需要修改数据的话,不能直接操作State,而是通过提交Actions或者Mutations来操作State,这就是整个循环的单向数据流。
实际这里单向数据流的概念与Redux的一致,但Vuex封装的更简单一些。
3. vuex 的工作流
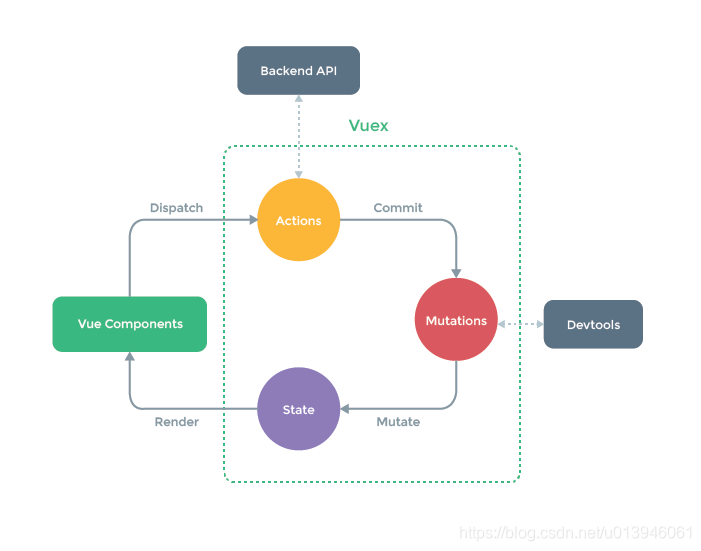
- State : 存储应用状态数据(
Redux中的State) - Vue Component : 消费 State
- Actions : 提交修改 State 的动作(包括异步行为)(
Redux中的action) - Mutations : 唯一更改 State 的位置(
Redux中的Reducer)
4. 安装 vuex
npm i vuex
// or
yarn add vuex
5. 引入 vuex
通过 <script> 引入
<script src="vue.js"></script>
<script src="vuex.js"></script>
通过 <script> 方式引入,vuex 会自动安装(也就是主动调用 Vue.use(Vuex))
通过 import 引入
import Vue from 'vue'
import Vuex from 'vuex'

Vue.use(Vuex)
通过 import 方式引入,需要手动安装(手动调用 Vue.use(Vuex))
6. 从 Store 开始
每一个 Vuex应用的核心就是 store(仓库)。“store”基本上就是一个容器,它包含着你的应用中大部分的状态 (state)。Vuex和单纯的全局对象有以下两点不同:
Vuex的状态存储是响应式的。当Vue组件从store中读取状态的时候,若store中的状态发生变化,那么相应的组件也会相应地得到高效更新。- 你不能直接改变
store中的状态。改变store中的状态的唯一途径就是显式地提交 (commit) mutation。这样使得我们可以方便地跟踪每一个状态的变化,从而让我们能够实现一些工具帮助我们更好地了解我们的应用。
Store 就是仓库,我们前面提到的 state 就存储在 store 中,同时提交动作、修改状态的方法也都由 store 提供和管理。
6.1 创建一个 Store
Vuex 之后,让我们来创建一个 store。
创建过程直截了当——仅需要提供一个初始 state 对象和一些 mutation(其他参数可选)
import Vue from 'vue'
import Vuex from 'vuex'

Vue.use(Vuex)

let store = new Vuex.Store({


    state: {

    },
    getters: {

    },
    mutations: {

    },
    actions: {

    }
})
必须在
Vue.use(Vuex)之后创建store
6.2 实例
6.2.1 初始化
我们暂时用小迪 Vue 0基础学习路线(27)案例代码
首先精简一下 => 初始化
\app\src\App.vue
<template>
  <div id="app">
    <h1>我的主页</h1>

    <div id="nav">
      <router-link to="/">Home</router-link>
      <span> | </span>
      <router-link to="/about">About</router-link>
      <span> | </span>
      <router-link to="/view">Detail</router-link>
    </div>

    <hr />

    <!--满足当前url的路由组件将被显示在 router-view 的位置-->
    <router-view></router-view>
  </div>
</template>

<script>

  export default {


    name: 'App'
  }
</script>

<style>
  .router-link-exact-active {


    color: red;
  }

  #nav {


    padding: 10px 0;
    position: fixed;
    width: 100%;
    left: 0;
    top: 0;
    background: rgba(0,255,0,.3);
  }
</style>
\app\src\views\Home.vue
<template>
    <div>
        <h2>商品列表</h2>

        <ul class="item-list">
            <li class="head">
                <span>名称</span>
                <span>价格</span>
                <span>操作</span>
            </li>
            <li v-for="item of items" :key="item.id">
                <span>
                    <router-link :to="{name: 'view', params: {id: item.id}}">{

   {item.name}}</router-link>
                </span>
                <span>{

   {item.price|RMB}}</span>
                <span>
                    <button>添加到购物车</button>
                </span>
            </li>
        </ul>
    </div>
</template>

<script>
    import * as apis from '@/apis'
    import {

     RMB} from "@/filters/RMB";

    export default {


        name: "Home",

        data() {


            return {


                sort: 'desc',
                items: []
            }
        },

        filters: {


            RMB
        }
    }
</script>

<style>
    ul {


        margin: 0;
        padding: 0;
    }

    li {


        list-style: none;
    }

    .item-list li {


        padding: 10px;
        display: flex;
        justify-content: space-between;
        height: 30px;
        line-height: 30px;
        border-bottom: 1px dotted #333;
    }
    .item-list li.head {


        font-weight: bold;
    }
    .item-list li span {


        min-width: 200px;
    }
</style>
\app\src\router\index.js
import Vue from 'vue';
import VueRouter from 'vue-router';


const Home = () => import('@/views/Home');


// 执行 VueRouter 的 install
Vue.use(VueRouter);

// 创建一个具体的路由对象,该对象就是我们应用中需要使用到的路由相关配置
let router = new VueRouter({


    mode: 'history',    // hash \  history

    // 存放了 url 与 组件的映射关系
    routes: [
        // 每一个对象就是一组url与组件的对应
        {


            path: '/',
            name: 'home',
            component: Home
        }
    ]
});


export default router;

参考:https://github.com/6xiaoDi/blog-Vuex-Novice/tree/a0.01
Branch: branch01commit description:a0.01(初始化)
tag:a0.01
6.2.2 example01
6.2.2.1 example01-1
安装
yarn add vuex

新建一个store仓库目录 =>index
引入Vue和Vuex,第一步将vuex丢到use中,它里面会提供一个类Store。
它是通过配置参数来使用 =>
state => 存数据 => 我们准备一个item数组,存到这里
暂时先把数据写死,存到全局变量 => 存入仓库
然后再把我们创建的仓库对象导出去
\app\src\store\index.js
import Vue from 'vue';
import Vuex from 'vuex';

Vue.use(Vuex);

let items = [{

    "id":3,"name":"Macbook Pro 15.4","vendor":"Apple","price":1949900},{

    "id":4,"name":"Apple iMac","vendor":"Apple","price":1629900},{

    "id":9,"name":"游戏本2019款","vendor":"XiaoMi","price":879900},{

    "id":6,"name":"Apple Watch Series 4","vendor":"Apple","price":599900},{

    "id":1,"name":"iPhone XR","vendor":"Apple","price":542500},{

    "id":11,"name":"HUAWEI P30 Pro","vendor":"HuaWei","price":498800},{

    "id":2,"name":"Apple iPad Air 3","vendor":"Apple","price":377700},{

    "id":10,"name":"HUAWEI P30","vendor":"HuaWei","price":368800},{

    "id":7,"name":"小米9","vendor":"XiaoMi","price":259900},{

    "id":12,"name":"华为平板 M6 10.8英寸","vendor":"HuaWei","price":229900},{

    "id":16,"name":"Redmi K20","vendor":"XiaoMi","price":199900},{

    "id":13,"name":"HUAWEI WATCH GT","vendor":"HuaWei","price":128800},{

    "id":5,"name":"Apple Magic Mouse","vendor":"Apple","price":72900},{

    "id":8,"name":"小米手环4","vendor":"XiaoMi","price":16900}];

let store = new Vuex.Store({


    state: {


        items
    }
});


export default store;
接下来如何通过视图取数据呢?
在main.js当中做一些事情,类似之前路由,直接把仓库对象引进来,配置到创建Vue的对象中去。
\app\src\main.js
import Vue from 'vue'
import App from './App.vue'
import router from "./router";
import store from './store'

Vue.config.productionTip = false

new Vue({


  router,
  store,
  render: h => h(App),
}).$mount('#app')
紧接着在视图中取仓库中的数据
在created周期,我们打印$store => 它实际就是我们在store文件的index中导出的仓库对象
\app\src\views\Home.vue
        created() {


                console.log(this.$store);
                console.log(this.$store.state);
        }
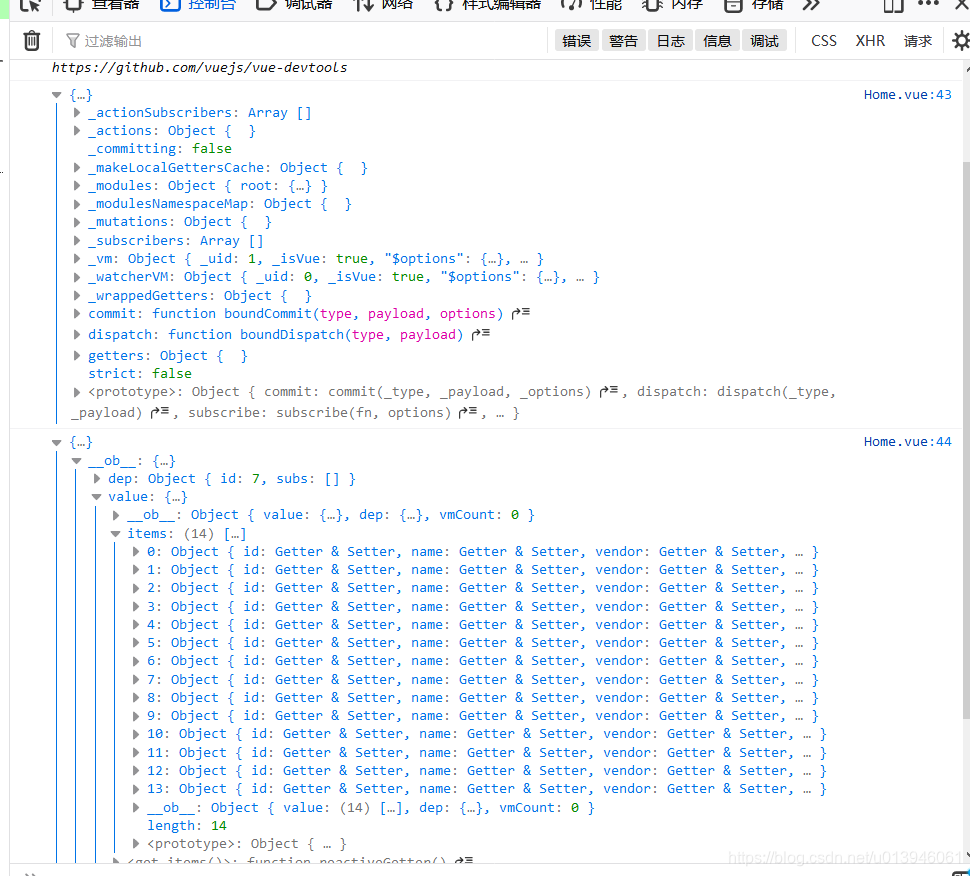
火狐打印的不是太好看,我们用谷歌看一下

直接将仓库中state下的items数据赋给视图的data中的items就行。
        created() {


            this.items = this.$store.state.items;
        }
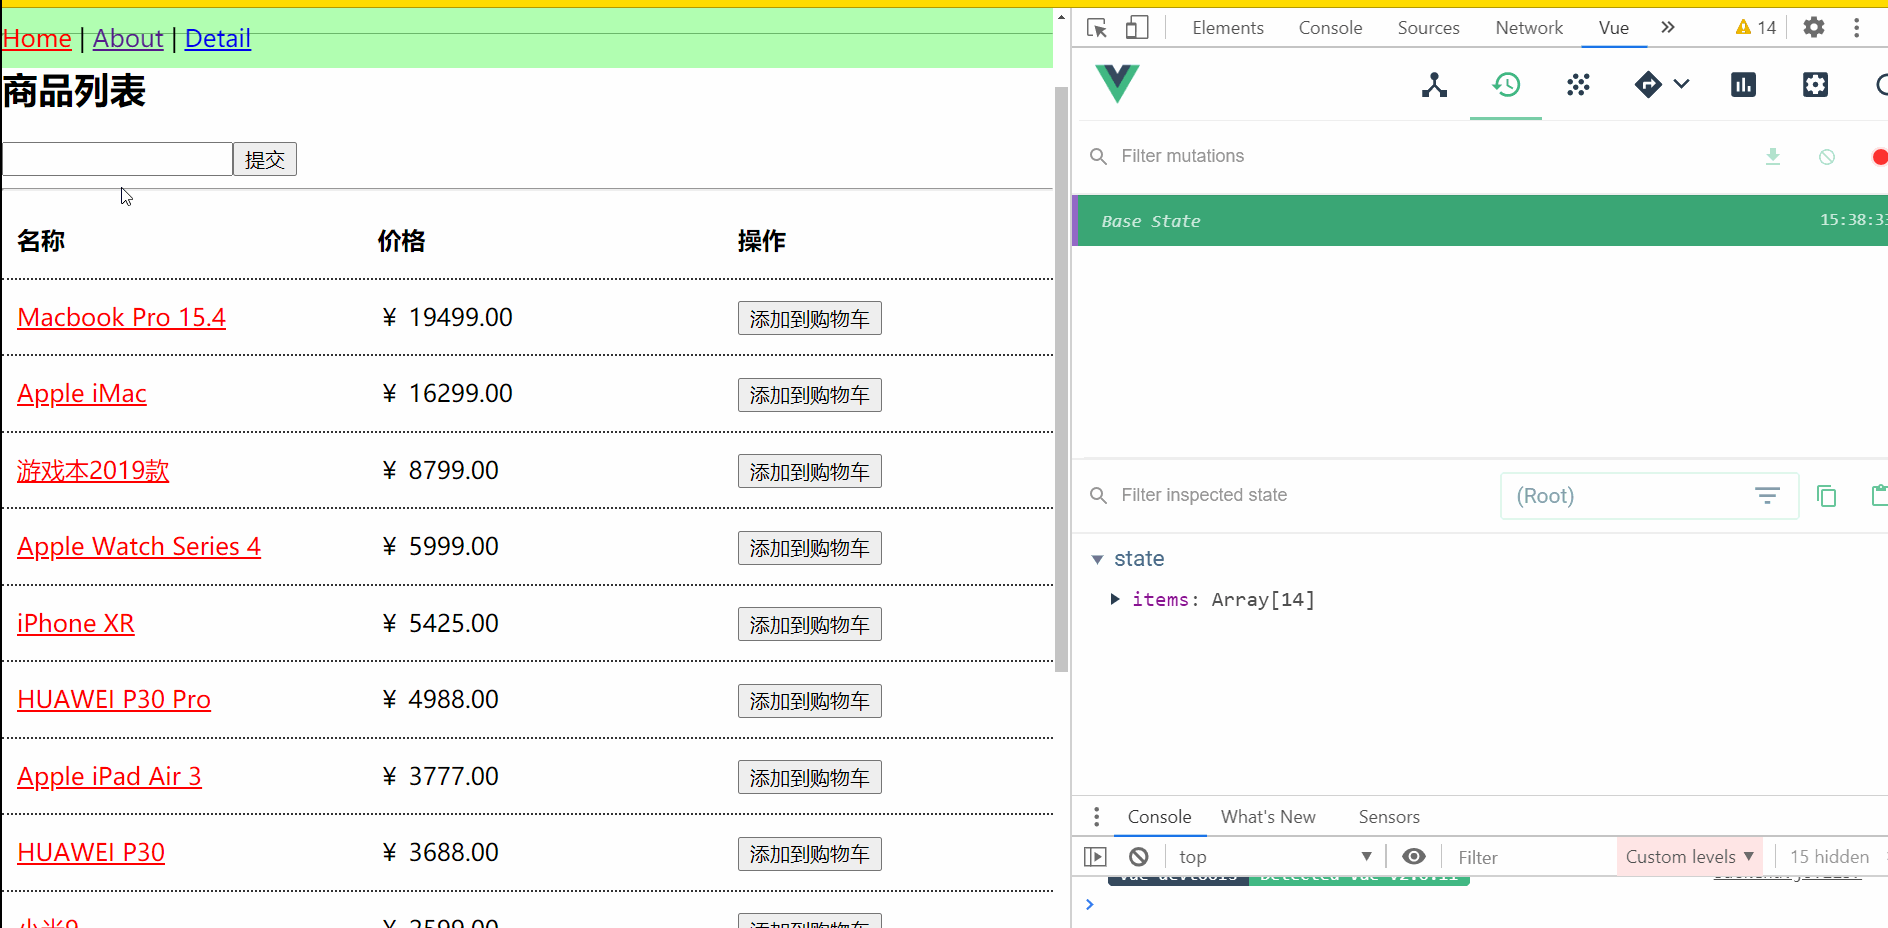
我们可以通过之前安装Vue插件工具查看数据即可。(插件如何安装参考Vue 0基础学习路线(16))
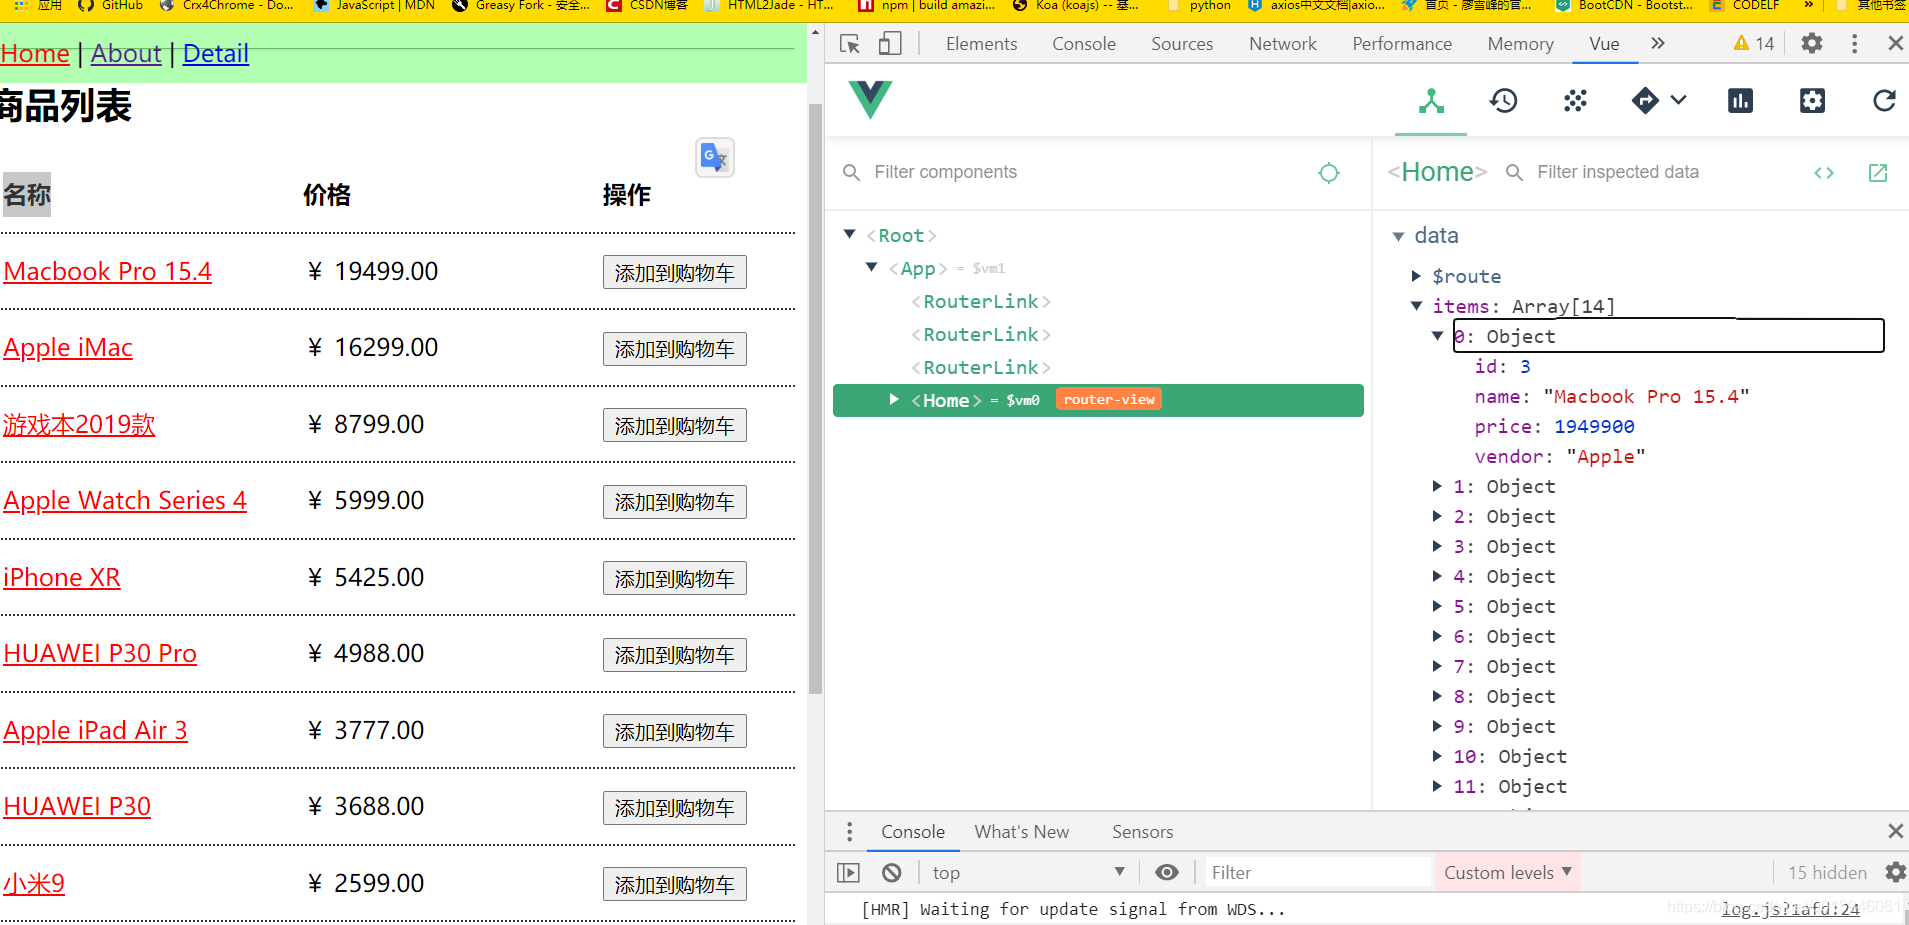
有一个vuex选项,导航中第二个选项,直接可以看到Vuex中的仓库数据。

通过这个Vue插件,就可以很快看到仓库中与组件中的数据了,方便我们开发调试。
参考:https://github.com/6xiaoDi/blog-Vuex-Novice/tree/a0.02
Branch: branch01commit description:a0.02(example01-1—使用仓库中的数据)
tag:a0.02
6.2.2.2 example01-2
现在读取仓库数据成功了,那如何修改仓库中的数据呢?我们做一个简单演示
在Home的html模板中准备一个input,及一个提交按钮,我们通过ref绑定input,提交按钮绑定一个提交事件 =>
在该事件处理函数中拿到input输入框的数据,如果不为空,就提交数据 =>
注意千万不能直接去修改仓库中的数据,我们试一下 this.$store.state.items.unshift 头部添加一个数据对象 =>
<template>
    <div>
        <h2>商品列表</h2>

        <input type="text" ref="input" /><button @click="addItem">提交</button>
        <hr>

        <ul class="item-list">
            <li class="head">
                <span>名称</span>
                <span>价格</span>
                <span>操作</span>
            </li>
            <li v-for="item of items" :key="item.id">
                <span>
                    <router-link :to="{name: 'view', params: {id: item.id}}">{

   {item.name}}</router-link>
                </span>
                <span>{

   {item.price|RMB}}</span>
                <span>
                    <button>添加到购物车</button>
                </span>
            </li>
        </ul>
    </div>
</template>

<script>
    import * as apis from '@/apis'
    import {

     RMB} from "@/filters/RMB";

    export default {


        name: "Home",

        data() {


            return {


                sort: 'desc',
                items: []
            }
        },

        filters: {


            RMB
        },

        created() {


            console.log(this.$store);
            console.log(this.$store.state);
            this.items = this.$store.state.items;
        },

        methods: {


            addItem() {


                let val = this.$refs.input.value;

                if (val !== '') {


                    this.$store.state.items.unshift({


                        "id":100,
                        "name": val,
                        "vendor":"Apple",
                        "price":1949900
                    });
                }
            }
        }
    }
</script>

<style>
    ul {


        margin: 0;
        padding: 0;
    }

    li {


        list-style: none;
    }

    .item-list li {


        padding: 10px;
        display: flex;
        justify-content: space-between;
        height: 30px;
        line-height: 30px;
        border-bottom: 1px dotted #333;
    }
    .item-list li.head {


        font-weight: bold;
    }
    .item-list li span {


        min-width: 200px;
    }
</style>
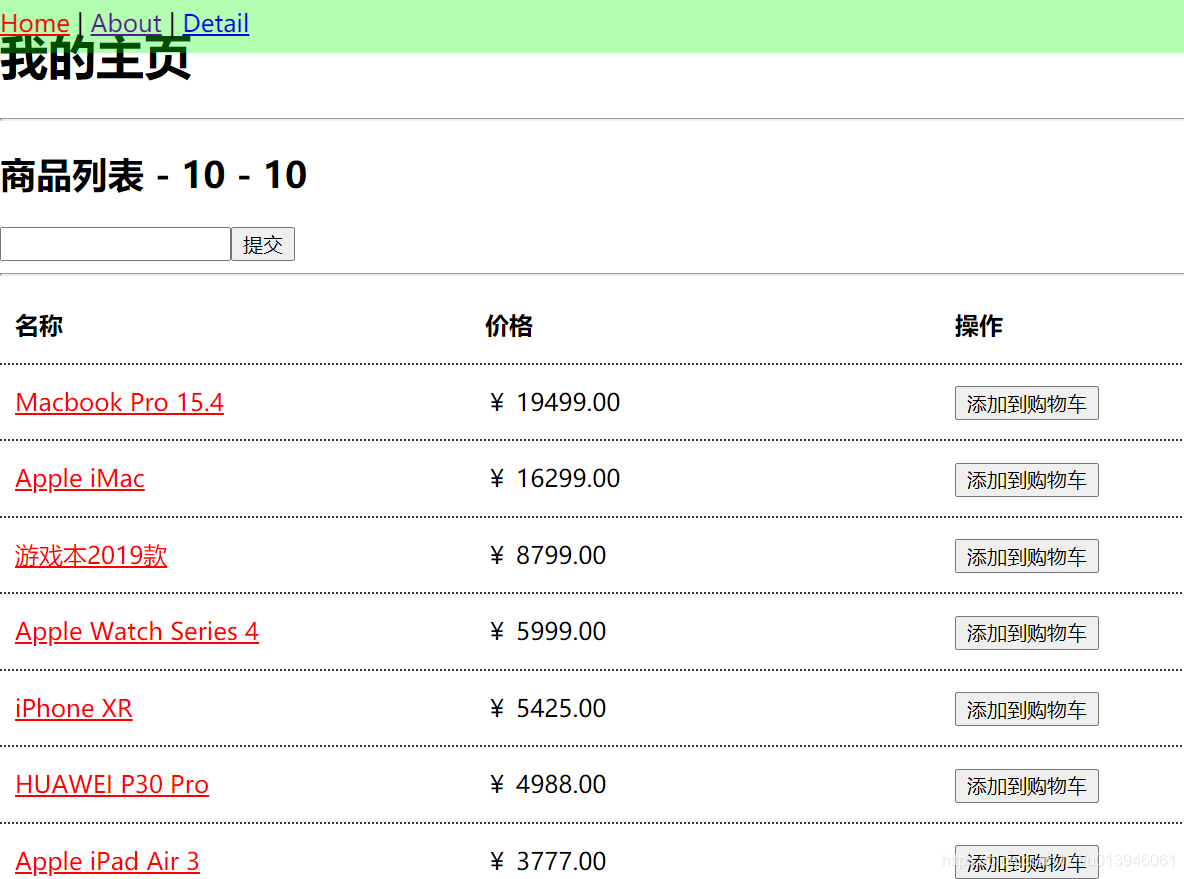
我们发现提交上去,貌似并没有问题,页面上也看到新增数据了。
但是实际上却存在很大的坑,首先这样的做法违背了我们的原则,因为这样子去修改数据,就跟直接在子组件中去修改父组件的数据一样。
这里的Home视图只是消费者之一,可能还会有很多其他组件也要消费仓库中的数据,如果都这样随意去更改数据的话,很容易导致仓库中的数据非常地乱,容易产生问题,并且难以排查,难以确定到底是哪个组件把数据改错了。所以实际上是不允许直接这样去修改仓库中的数据的。

参考:https://github.com/6xiaoDi/blog-Vuex-Novice/tree/a0.03
Branch: branch01commit description:a0.03(example01-2—使用仓库中的数据)
tag:a0.03
6.2.2.3 example01-3
第二,在仓库中我们设置数据的格式是数组,我们再添加一个n属性变量,存一个数字(初始化为10)。我们在Home组件也去消费这个n属性变量,我们在Home视图组件中默认n为0,我们在created中获取n,在标题商品列表中显示出来,我们发现它在页面显示没问题。
\app\src\store\index.js
let store = new Vuex.Store({


    state: {


        n: 10,
        items
    }
});
\app\src\views\Home.vue
<template>
    <div>
        <h2>商品列表 - {

   {n}} - {

   {$store.state.n}}</h2>

        <input type="text" ref="input" /><button @click="addItem">提交</button>
        <hr>

        <ul class="item-list">
            <li class="head">
                <span>名称</span>
                <span>价格</span>
                <span>操作</span>
            </li>
            <li v-for="item of items" :key="item.id">
                <span>
                    <router-link :to="{name: 'view', params: {id: item.id}}">{

   {item.name}}</router-link>
                </span>
                <span>{

   {item.price|RMB}}</span>
                <span>
                    <button>添加到购物车</button>
                </span>
            </li>
        </ul>
    </div>
</template>

<script>
    import * as apis from '@/apis'
    import {

     RMB} from "@/filters/RMB";

    export default {


        name: "Home",

        data() {


            return {


                items: [],
                n: 0
            }
        },

        filters: {


            RMB
        },

        created() {


            this.items = this.$store.state.items;
            this.n = this.$store.state.n;
        },

        methods: {


            addItem() {


                let val = this.$refs.input.value;

                if (val !== '') {


                    this.$store.state.items.unshift({


                        "id":100,
                        "name": val,
                        "vendor":"Apple",
                        "price":1949900
                    });
                }
            }
        }
    }
</script>

<style>
    ul {


        margin: 0;
        padding: 0;
    }

    li {


        list-style: none;
    }

    .item-list li {


        padding: 10px;
        display: flex;
        justify-content: space-between;
        height: 30px;
        line-height: 30px;
        border-bottom: 1px dotted #333;
    }
    .item-list li.head {


        font-weight: bold;
    }
    .item-list li span {


        min-width: 200px;
    }
</style>
参考:https://github.com/6xiaoDi/blog-Vuex-Novice/tree/a0.04
Branch: branch01commit description:a0.04(example01-3—仓库中的数据设置1个单独变量)
tag:a0.04
6.2.2.4 example01-4
我们在addItem事件处理函数中直接修改仓库中的n。
			addItem() {


                this.$store.state.n = 100;

            }
我们发现界面上仓库的数据变了但是Home里data没变
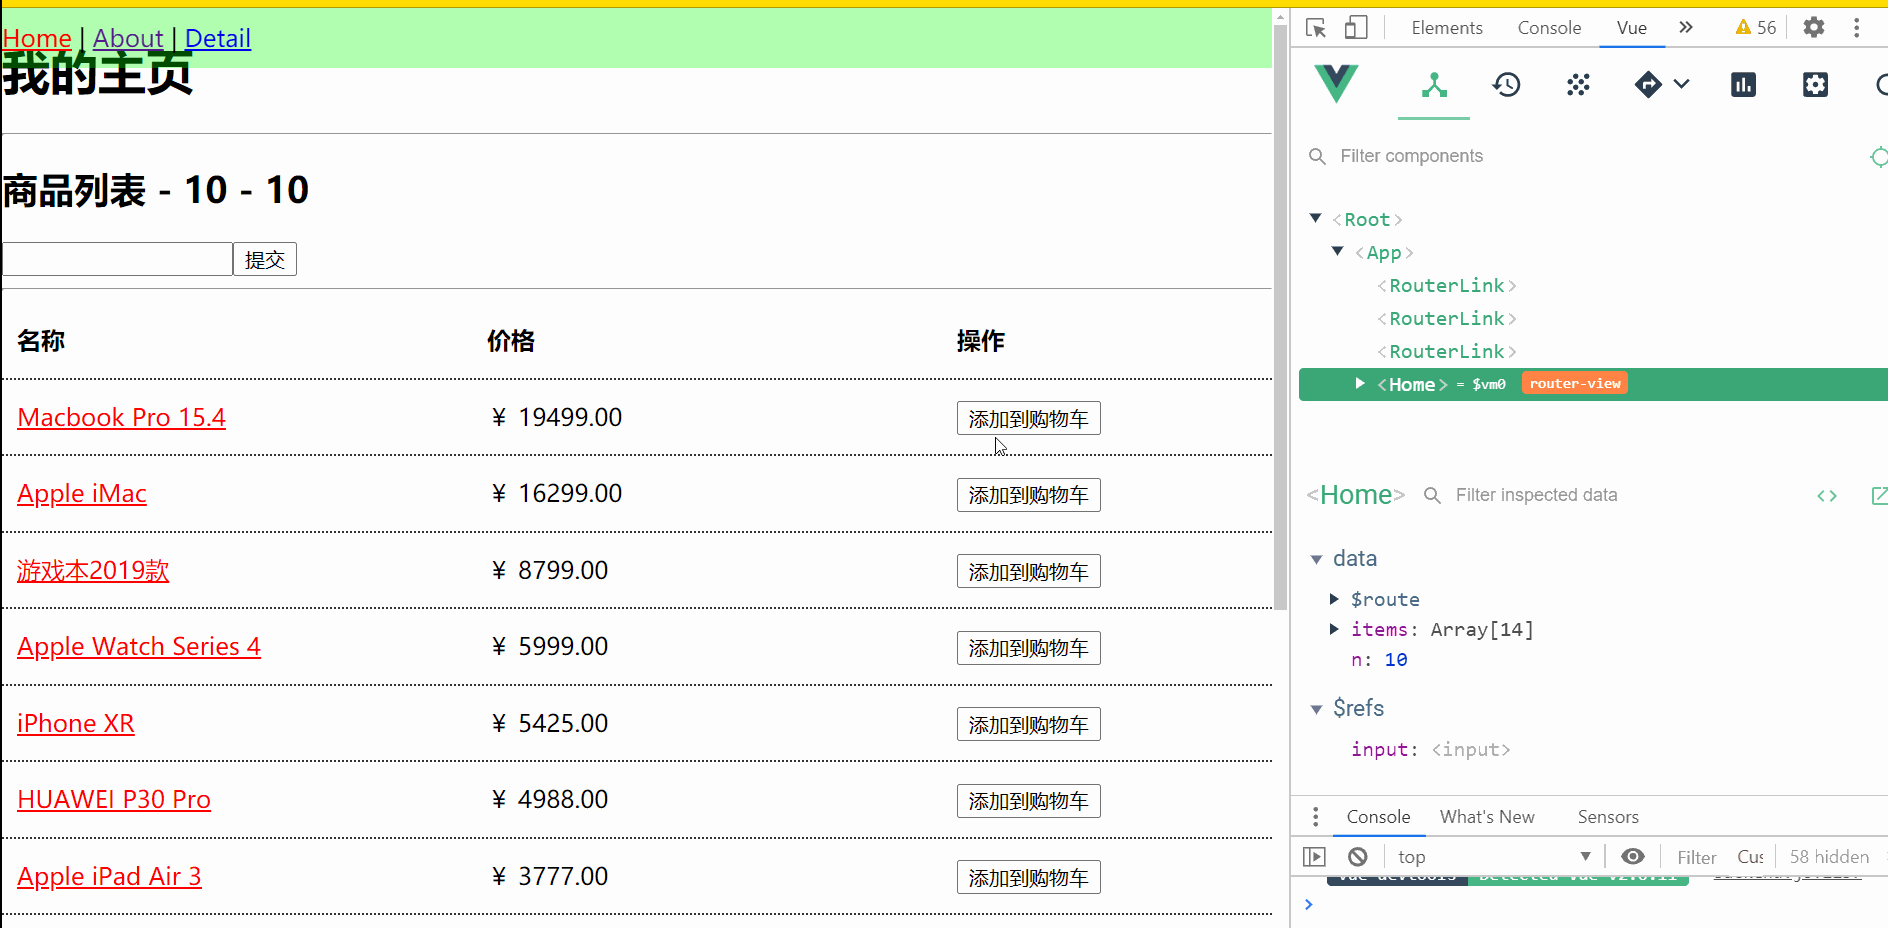
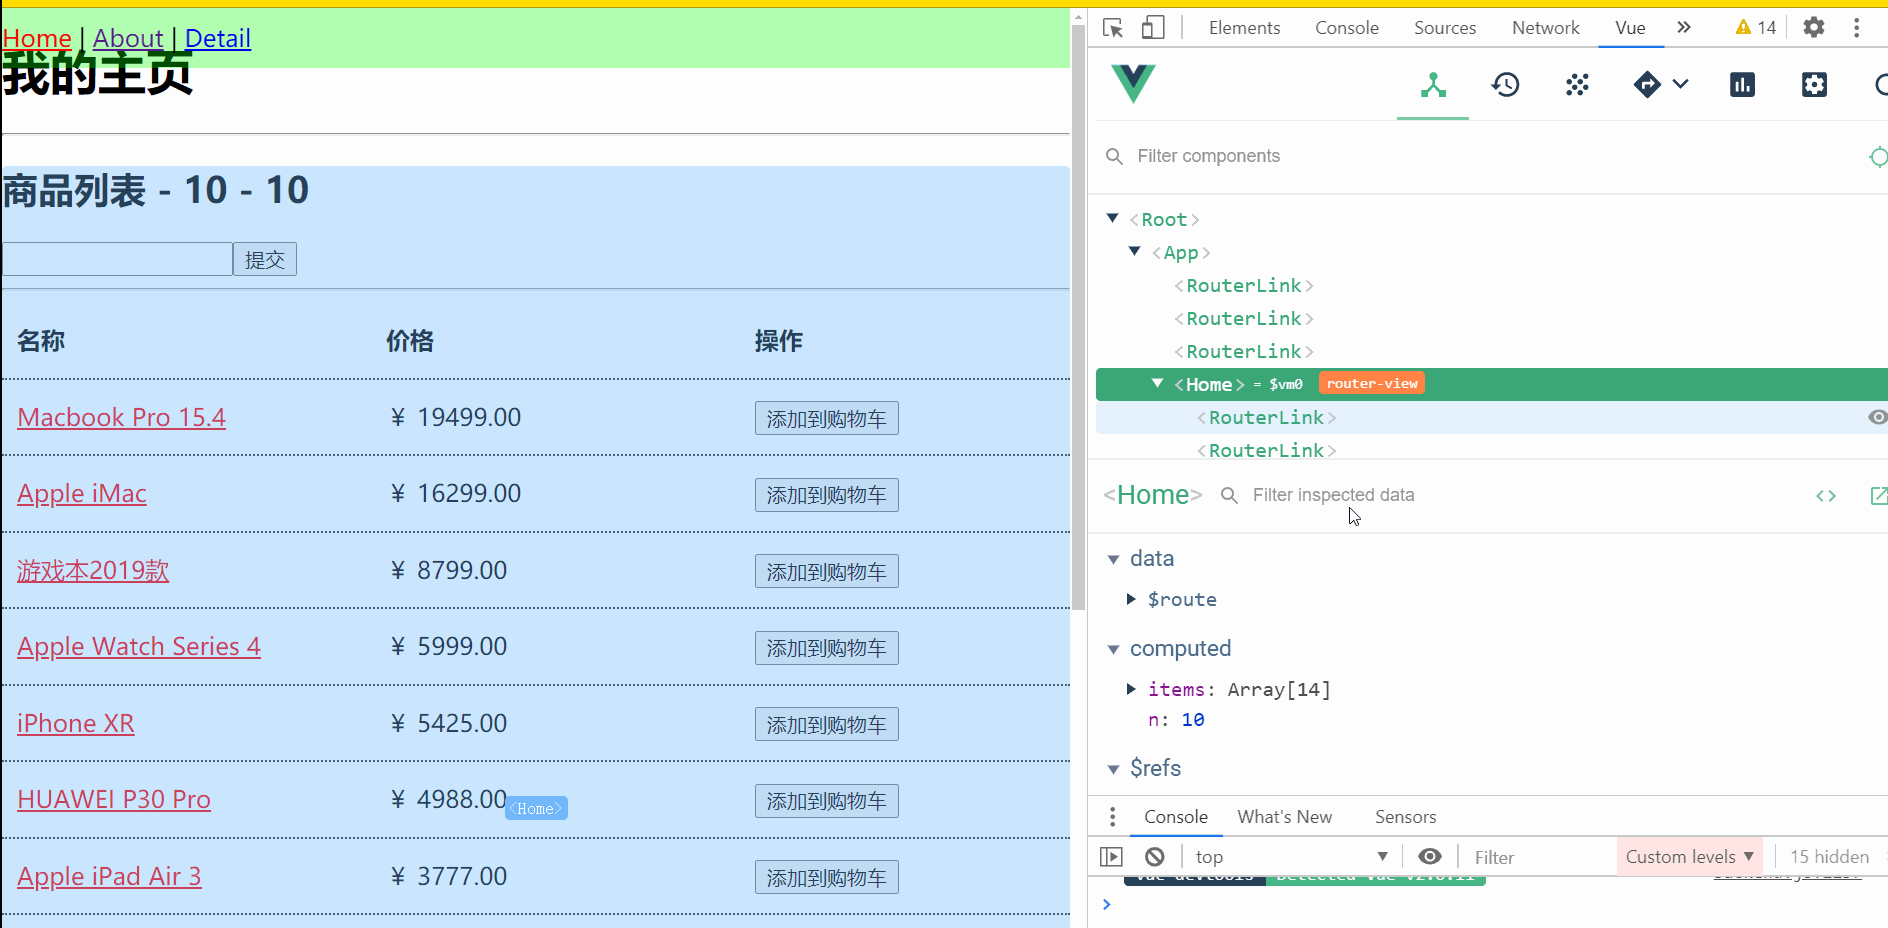
同时注意我们在调试工具的Vuex中追踪不到数据,但是实际我们已经修改仓库数据了 =>
这个问题的原因其实是纯函数的设计理念,关于这一点,小迪的之前再说Redux的时候已经说过了,如果想追寻原因请看 ,详细原因还求大神指教,小迪暂时也没差出来,不过这并不影响正常使用,我们正常开发时是不会这样使用的。(不过小迪肯定数据必然是改变了)
回归正题我们定义在Home组件数据却没有变化?
开始刚刚修改数组就变化了。那是因为数组在传递过程中是地址引用,即我们仔细观察代码。其中Home的data下的items实际引用的是仓库中items,他俩是一个东西,我们修改仓库中的items,肯定组件中引用的仓库数据发生改变了。
而对于变量n,那就很容易理解了,它只传值,因此Home组件下data中的n与当前组件仓库中的n不是同一个东西,我们修改仓库中的n,组件中对应data还是旧值,因此一般不推荐在created内给组件内数据赋值的。
参考:https://github.com/6xiaoDi/blog-Vuex-Novice/tree/a0.05
Branch: branch01commit description:a0.05(example01-4—在
addItem事件处理函数中直接修改仓库中的n)tag:a0.05
6.2.2.5 example01-5
一般我们在计算属性里,进行数据赋值,即可以实时更新组件数据了。关于计算属性的使用请看 。
<template>
    <div>
        <h2>商品列表 - {

   {n}} - {

   {$store.state.n}}</h2>

        <input type="text" ref="input" /><button @click="addItem">提交</button>
        <hr>

        <ul class="item-list">
            <li class="head">
                <span>名称</span>
                <span>价格</span>
                <span>操作</span>
            </li>
            <li v-for="item of items" :key="item.id">
                <span>
                    <router-link :to="{name: 'view', params: {id: item.id}}">{

   {item.name}}</router-link>
                </span>
                <span>{

   {item.price|RMB}}</span>
                <span>
                    <button>添加到购物车</button>
                </span>
            </li>
        </ul>
    </div>
</template>

<script>
    import * as apis from '@/apis'
    import {

     RMB} from "@/filters/RMB";

    export default {


        name: "Home",

        data() {


            return {


                // items: [],
                // n: 0
            }
        },

        filters: {


            RMB
        },


        computed: {


            items() {


                return this.$store.state.items;
            },
            n() {


                return this.$store.state.n;
            }
        },

        methods: {


            addItem() {


                this.$store.state.n = 100;
            }
        }
    }
</script>

<style>
    ul {


        margin: 0;
        padding: 0;
    }

    li {


        list-style: none;
    }

    .item-list li {


        padding: 10px;
        display: flex;
        justify-content: space-between;
        height: 30px;
        line-height: 30px;
        border-bottom: 1px dotted #333;
    }
    .item-list li.head {


        font-weight: bold;
    }
    .item-list li span {


        min-width: 200px;
    }
</style>
参考:https://github.com/6xiaoDi/blog-Vuex-Novice/tree/a0.06
Branch: branch01commit description:a0.06(example01-5—解决直接修改仓库数据而不能影响组件数据的问题)
tag:a0.06
6.2.2.6 example01-6
但是我们不能像上面这样直接这样修改仓库中的值,要先提交请求给仓库,告知仓库我们要修改里面数据了。
Store配置参数中的mutations => 这个封装了各种修改仓库的actions => 它内置回调函数名就是事件名,而函数实际就是事件处理函数。
如 => 配置一个changeN函数,它的第一个参数就是仓库state,changeN函数不是由我们执行的,而是我们发出请求后,由Vuex去调用的。第二个参数payload,其实就是传过去的想要修改的值。
=> state.n = payload
我们点击按钮,触发 addItem事件处理函数,在这里给仓库发送请求 => this.$store.commit('changeN', 100),第一个参数,就是我们需要仓库执行的函数,第二个参数是修改的值。
changeN其实就类似事件处理函数,然后我们在addItem中触发事件一样。
\app\src\store\index.js
import Vue from 'vue';
import Vuex from 'vuex';

Vue.use(Vuex);

let items = [{

    "id":3,"name":"Macbook Pro 15.4","vendor":"Apple","price":1949900},{

    "id":4,"name":"Apple iMac","vendor":"Apple","price":1629900},{

    "id":9,"name":"游戏本2019款","vendor":"XiaoMi","price":879900},{

    "id":6,"name":"Apple Watch Series 4","vendor":"Apple","price":599900},{

    "id":1,"name":"iPhone XR","vendor":"Apple","price":542500},{

    "id":11,"name":"HUAWEI P30 Pro","vendor":"HuaWei","price":498800},{

    "id":2,"name":"Apple iPad Air 3","vendor":"Apple","price":377700},{

    "id":10,"name":"HUAWEI P30","vendor":"HuaWei","price":368800},{

    "id":7,"name":"小米9","vendor":"XiaoMi","price":259900},{

    "id":12,"name":"华为平板 M6 10.8英寸","vendor":"HuaWei","price":229900},{

    "id":16,"name":"Redmi K20","vendor":"XiaoMi","price":199900},{

    "id":13,"name":"HUAWEI WATCH GT","vendor":"HuaWei","price":128800},{

    "id":5,"name":"Apple Magic Mouse","vendor":"Apple","price":72900},{

    "id":8,"name":"小米手环4","vendor":"XiaoMi","price":16900}];


let store = new Vuex.Store({


    state: {


        n: 10,
        items
    },

    mutations: {


        changeN(state, payload) {


            state.n = payload;
        }
    }
});


export default store;
\app\src\views\Home.vue
<template>
    <div>
        <h2>商品列表 - {

   {n}} - {

   {$store.state.n}}</h2>

        <input type="text" ref="input" /><button @click="addItem">提交</button>
        <hr>

        <ul class="item-list">
            <li class="head">
                <span>名称</span>
                <span>价格</span>
                <span>操作</span>
            </li>
            <li v-for="item of items" :key="item.id">
                <span>
                    <router-link :to="{name: 'view', params: {id: item.id}}">{

   {item.name}}</router-link>
                </span>
                <span>{

   {item.price|RMB}}</span>
                <span>
                    <button>添加到购物车</button>
                </span>
            </li>
        </ul>
    </div>
</template>

<script>
    import * as apis from '@/apis'
    import {

     RMB} from "@/filters/RMB";

    export default {


        name: "Home",

        data() {


            return {


                // items: [],
                // n: 0
            }
        },

        filters: {


            RMB
        },


        computed: {


            items() {


                return this.$store.state.items;
            },
            n() {


                return this.$store.state.n;
            }
        },

        methods: {


            addItem() {


                // 不能直接修改仓库的数据
                // this.$store.state.n = 100;
                this.$store.commit('changeN', 100);
            }
        }
    }
</script>

<style>
    ul {


        margin: 0;
        padding: 0;
    }

    li {


        list-style: none;
    }

    .item-list li {


        padding: 10px;
        display: flex;
        justify-content: space-between;
        height: 30px;
        line-height: 30px;
        border-bottom: 1px dotted #333;
    }
    .item-list li.head {


        font-weight: bold;
    }
    .item-list li span {


        min-width: 200px;
    }
</style>
同时我们在调试工具的Vuex中也可以追踪到数据的提交记录了,它可以把我们每次请求都记录下来,同时还可以看到每一次数据变动的历史记录。这个是如何做到呢?我们可以仔细回想之前学的Redux。
参考:https://github.com/6xiaoDi/blog-Vuex-Novice/tree/a0.07
Branch: branch01commit description:a0.07(example01-6—正确的方式修改仓库中的数据)
tag:a0.07
6.2.2.7 example01-7
完善代码
注意修改仓库的值,一定要用原来的值直接push,这样就破坏了原数据,就记录不了数据修改的历史记录了。我们用解构的方法,将旧数据合并起来,返回一个新数组。
在点击事件处理函数中,发送请求,对象数据中的id,我们在这里别手动传了。
我们应该封装一个方法,自动把id算出来 =>
我们在Mutation中的回调函数,解构的时候,单独调用一个方法,计算id。
function getMaxId() {


    let maxId = 0;
    items.forEach(item=> {


        if (item.id > maxId) {


            maxId = item.id;
        }
    });
    return maxId;
}
不过也有其他的方式,利用reduce函数计算最大值。
let maxId = items.reduce(function(maxId, item ) {


    return item.id > maxId ? item.id : maxId;
}, 0);
arr.reduce(callback(accumulator, currentValue[, index[, array]])[, initialValue])
参数
callback执行数组中每个值 (如果没有提供
initialValue则第一个值除外)的函数,包含四个参数:**
accumulator**累计器累计回调的返回值; 它是上一次调用回调时返回的累积值,或initialValue(见于下方)。currentValue数组中正在处理的元素。index可选数组中正在处理的当前元素的索引。 如果提供了initialValue,则起始索引号为0,否则从索引1起始。array可选调用reduce()的数组
initialValue可选作为第一次调用
callback函数时的第一个参数的值。 如果没有提供初始值,则将使用数组中的第一个元素。 在没有初始值的空数组上调用 reduce 将报错。返回值
函数累计处理的结果
\app\src\store\index.js
import Vue from 'vue';
import Vuex from 'vuex';

Vue.use(Vuex);

let items = [{

    "id":3,"name":"Macbook Pro 15.4","vendor":"Apple","price":1949900},{

    "id":4,"name":"Apple iMac","vendor":"Apple","price":1629900},{

    "id":9,"name":"游戏本2019款","vendor":"XiaoMi","price":879900},{

    "id":6,"name":"Apple Watch Series 4","vendor":"Apple","price":599900},{

    "id":1,"name":"iPhone XR","vendor":"Apple","price":542500},{

    "id":11,"name":"HUAWEI P30 Pro","vendor":"HuaWei","price":498800},{

    "id":2,"name":"Apple iPad Air 3","vendor":"Apple","price":377700},{

    "id":10,"name":"HUAWEI P30","vendor":"HuaWei","price":368800},{

    "id":7,"name":"小米9","vendor":"XiaoMi","price":259900},{

    "id":12,"name":"华为平板 M6 10.8英寸","vendor":"HuaWei","price":229900},{

    "id":16,"name":"Redmi K20","vendor":"XiaoMi","price":199900},{

    "id":13,"name":"HUAWEI WATCH GT","vendor":"HuaWei","price":128800},{

    "id":5,"name":"Apple Magic Mouse","vendor":"Apple","price":72900},{

    "id":8,"name":"小米手环4","vendor":"XiaoMi","price":16900}];

let maxId = items.reduce(function(maxId, item ) {


    return item.id > maxId ? item.id : maxId;
}, 0);

let store = new Vuex.Store({


    state: {


        n: 10,
        items
    },

    mutations: {


        changeN(state, payload) {


            state.n = payload;
        },

        addItem(state, payload) {


            state.items = [{


                id: ++maxId,
                ...payload
            }, ...state.items];
        }
    }
});


export default store;
\app\src\views\Home.vue
<template>
    <div>
        <h2>商品列表 - {

   {n}} - {

   {$store.state.n}}</h2>

        <input type="text" ref="input" /><button @click="addItem">提交</button>
        <hr>

        <ul class="item-list">
            <li class="head">
                <span>名称</span>
                <span>价格</span>
                <span>操作</span>
            </li>
            <li v-for="item of items" :key="item.id">
                <span>
                    <router-link :to="{name: 'view', params: {id: item.id}}">{

   {item.name}}</router-link>
                </span>
                <span>{

   {item.price|RMB}}</span>
                <span>
                    <button>添加到购物车</button>
                </span>
            </li>
        </ul>
    </div>
</template>

<script>
    import * as apis from '@/apis'
    import {

     RMB} from "@/filters/RMB";

    export default {


        name: "Home",

        data() {


            return {


            }
        },

        filters: {


            RMB
        },


        computed: {


            items() {


                return this.$store.state.items;
            },
            n() {


                return this.$store.state.n;
            }
        },

        methods: {


            addItem() {


                let val = this.$refs.input.value;

                if (val !== '') {


                    this.$store.commit('addItem', {


                        "name": val,
                        "vendor":"Apple",
                        "price":1949900
                    })
                }
            }
        }
    }
</script>

<style>
    ul {


        margin: 0;
        padding: 0;
    }

    li {


        list-style: none;
    }

    .item-list li {


        padding: 10px;
        display: flex;
        justify-content: space-between;
        height: 30px;
        line-height: 30px;
        border-bottom: 1px dotted #333;
    }
    .item-list li.head {


        font-weight: bold;
    }
    .item-list li span {


        min-width: 200px;
    }
</style>

参考:https://github.com/6xiaoDi/blog-Vuex-Novice/tree/a0.08
Branch: branch01commit description:a0.08(example01-7—正确的方式修改仓库中的数据-优化)
tag:a0.08
7. 小结
现在,你可以通过 store.state 来获取状态对象,以及通过 store.commit 方法触发状态变更:
store.commit('increment')

console.log(store.state.count) // -> 1
为了在 Vue 组件中访问 this.$store property,你需要为 Vue 实例提供创建好的 store。
Vuex 提供了一个从根组件向所有子组件,以 store 选项的方式“注入”该 store的机制:
new Vue({


  el: '#app',
  store: store,
})
提示
使用
ES6,可以以 ES6 对象的 property 简写 (用在对象某个 property 的 key 和被传入的变量同名时):new Vue({ el: '#app', store })
现在我们可以从组件的方法提交一个变更:
methods: {


  increment() {


    this.$store.commit('increment')
    console.log(this.$store.state.count)
  }
}
再次强调,我们通过提交mutation 的方式,而非直接改变 store.state.count,是因为我们想要更明确地追踪到状态的变化。这个简单的约定能够让你的意图更加明显,这样你在阅读代码的时候能更容易地解读应用内部的状态改变。此外,这样也让我们有机会去实现一些能记录每次状态改变,保存状态快照的调试工具。有了它,我们甚至可以实现如时间穿梭般的调试体验。
由于 store中的状态是响应式的,在组件中调用store中的状态简单到仅需要在计算属性中返回即可。触发变化也仅仅是在组件的 methods中提交mutation。
8. 官网实例
这是一个最基本的 Vuex 记数应用官网示例(不翻墙可能跳不过去)。
html
<div id="app">
  <p>{

   { count }}</p>
  <p>
    <button @click="increment">+</button>
    <button @click="decrement">-</button>
  </p>
</div>
vue
// make sure to call Vue.use(Vuex) if using a module system

const store = new Vuex.Store({


  state: {


    count: 0
  },
  mutations: {


  	increment: state => state.count++,
    decrement: state => state.count--
  }
})

new Vue({


  el: '#app',
  computed: {


    count () {


	    return store.state.count
    }
  },
  methods: {


    increment () {


      store.commit('increment')
    },
    decrement () {


    	store.commit('decrement')
    }
  }
})

考虑到在blog中不好体现代码更改的位置,小迪才用github托管代码,大家可以查看github,看到详细版本修改过程,搭配博客学习。
(后续待补充)