1.建立站点(test)略
2.建立四个php文件
①index.php 建立表单
②student 接受表单数据,使用php代码插入图片
③showphoto 展示图片
④connect.php 连接数据库
index.php
<!--index.php-->
<?php
	session_start();
?>
<!doctype html>
<html>
<head>
<meta charset="utf-8">
<title>index</title>
<!--css,对显示图片没有作用-->
<style>
	input{


		margin-left: 10px;
		margin-top: 10px;
	}
</style>
</head>

<body>
	<form action="student.php" method="post" enctype="multipart/form-data">
		name:<input type="text" name="name"><br />
		照片:<input type="file" name="photo" id="file" onchange="changepic(this)"><br>
		<img src="" id="show" width="100px" height="120px" style="border: 3px ridge; margin-bottom: 10px; background-color: #E3E3E3;"><br>
		<button type="submit">提交</button>
		<script>//当插入图片时候就显示的代码
		function changepic(obj) {


			//console.log(obj.files[0]);//这里可以获取上传文件的name
			var newsrc=getObjectURL(obj.files[0]);
			document.getElementById('show').src=newsrc;
		}
		//建立一個可存取到該file的url
		function getObjectURL(file) {


			var url = null ;
			// 下面函数执行的效果是一样的,只是需要针对不同的浏览器执行不同的 js 函数而已
			if (window.createObjectURL!=undefined) {

     // basic
				url = window.createObjectURL(file) ;
			} else if (window.URL!=undefined) {

     // mozilla(firefox)
				url = window.URL.createObjectURL(file) ;
			} else if (window.webkitURL!=undefined) {

     // webkit or chrome
				url = window.webkitURL.createObjectURL(file) ;
			}
			return url ;
		}
		function resetpic(){


			document.getElementById('show').src="";
		}
	</script>
	</form>

	<!-- 显示图片的框架-->
	<form action="showphoto.php" method="post" enctype="multipart/form-data">
		姓名<input name="name" type="text">
		<button type="submit">查询</button>

	</form>
	显示图片<br />
	<img width="80px" height="100px" src="data:image/png;base64,<?=base64_encode($_SESSION['picture'])?>"/>
</body>
</html>
student.php
<!--student.php-->
<!doctype html>
<html>
<head>
<meta charset="utf-8">
<title>index</title>
</head>

<body>
<?php
	$name = $_POST['name'];
	//12到15行是把这个图片压缩成二进制文件,然后赋值给picture
	$photo = $_POST['photo'];
	$tmp_file = $_FILES['photo']['tmp_name'];
	$handle = fopen($tmp_file,'rb');
	$picture = base64_encode(fread($handle,filesize($tmp_file)));
	include('connect.php');
	$sql = "insert into xs values('$name','$picture')";//执行sql语句
	$result = mysqli_query($conn,$sql);
	if(!$result)
	{


		echo "<script>alert(\"添加失败\")</script>";
	}else{


		echo "<script>alert(\"添加成功\")</script>";
	}
?>
	</body>
</html>
showphoto.php
<!--showphoto.php-->
<?php
	session_start();//开启会话
	include('connect.php');
	$name = $_POST['name'];
	$sql = "select * from xs where 姓名 = '$name'";//执行sql语句,查询该学生的照片
	$result = mysqli_query($conn,$sql);
	if(!$result){


		die("error:".mysqli_error($conn));//提示错误
	}else{


		$row = mysqli_fetch_array($result);
		$picture = $row['照片'];
		$image = base64_decode($picture);//把二进制代码解码
		$_SESSION['picture'] = $image;//用会话储存
		echo "<script>url=\"index.php\";window.location.href=url;</script>";//返回index.php文件,执行54行
	}
?>
connect
<!--connect.php-->

<?php

//连接数据库
$conn = mysqli_connect('localhost','root','123123.zzc');//123123.zzc为数据库的密码

//如果连接数据库失败就输出错误信息
if(!$conn){


	die("连接数据库错误:".mysqli_error($conn));
}

//选择数据库
mysqli_select_db($conn,'test_1');//test_1为该数据库名字

//选择字符集
mysqli_set_charset($conn,'utf8');//字符串规则

?>
然后是测试
1.存照片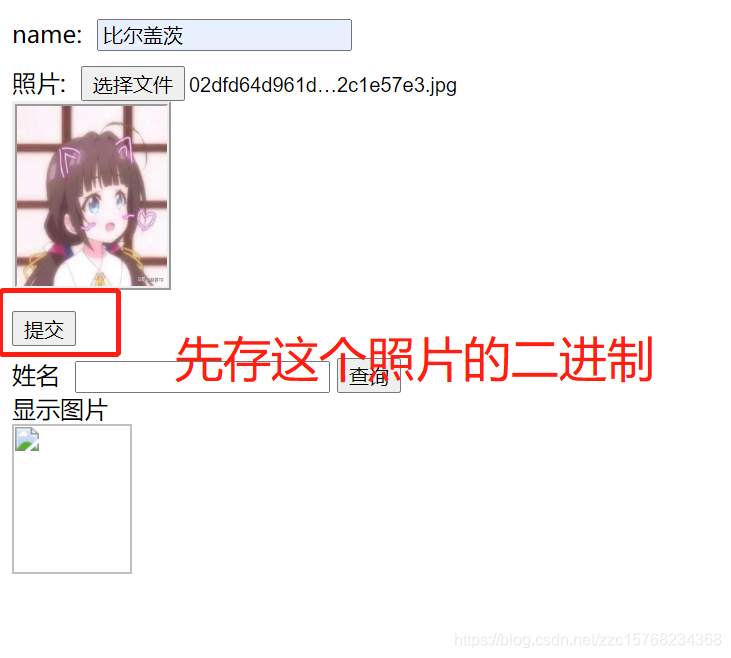
2.查看是否存入

3.已确定存入,接下来是查看图片
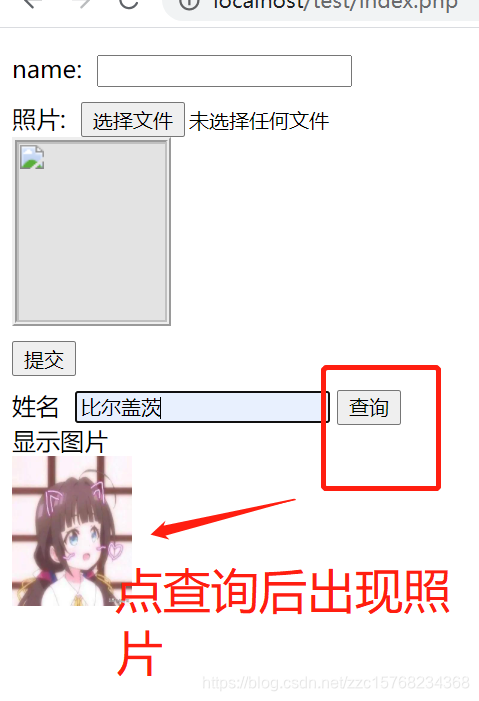
储存成功,显示成功。