用VUE实现一个具有登陆、注册等功能的网站【详细步骤】
用VUE实现一个具有登陆、注册等功能的网站【详细步骤】
一、主要功能
本次任务主要是使用VUE实现一个具有登陆、注册等功能的精美网站【详细步骤】
主要功能为:
1.要求三个页面 分别是登陆、注册、主页(尽量美观)。
2.记录存储已注册的用户信息列表。
3. 实现各个页面之间的跳转。
二、实现思路
1、页面设计
Register.vue 注册页面,包含输入用户名、输入密码、注册按钮等。
Login.vue登录页面,包含输入用户名、输入密码、登录按钮、保持登录选项、跳转注册页面按钮等。
Homepage.vue主页,具有退出登陆的功能。
2、功能设计
因为涉及到多个页面之间的相互跳转,所以一定要先在VUE项目中的index.js里面设置好对应的路由。另外我们需要用一个json数组来存储已注册的用户信息列表(虚拟数据)。
例如用户在完成注册后,需要更新用户列表,并把更新后的列表以传参数的方式传给登陆页面,并跳转到登陆页面;
而登陆时要根据用户列表的判断输入的用户是否存在,输入的密码是否和用户名相匹配等。
3、重点和难点
(1)盒子模型布局、css美化。
(2)页面之间的跳转以及参数传递。
(3)登陆注册的业务逻辑。
三、代码实现
1、项目结构
因为我们这次涉及到多个页面,那么弄清楚项目结构,并配置好相应的路由是十分重要的。
如果还不会怎么用VUE创建项目,可参考以下步骤。
(1)首先需要安装Node与配置npm
请去node官网下进行下载:http://nodejs.cn/download/
在安装完成后,可使用node -v 查看Node的安装结果,如果出现版本号则说明node安装成功。同理使用npm -v查看npm的安装结果,如果出现版本号则说明npm安装成功。
(2)下载vue脚手架:@vue/cli
npm install @vue/cli -g
(3)安装webpack
$ sudo npm install webpack -g
(4)安装vue-cli
$ sudo cnpm install --global vue-cli
(5)创建名字为test的 vue项目
$ vue init webpack test
(6)运行:
$ cd test $ npm run dev
可参考以下博客(更加详细的介绍了VUE搭配的环境以及初始化的项目结构):
https://blog.csdn.net/iiiliuyang/article/details/104185384
https://www.cnblogs.com/hellman/p/10985377.html
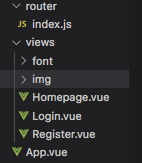
以本次项目为例子,可在view文件夹中存放我们三个页面,(登陆,注册,主页)
在index.js中配置相关的路由。
index.js 中相关代码

import Vue from 'vue'
import VueRouter from 'vue-router'

import Homepage from '@/views/Homepage' //主页
import Login from "@/views/Login" //登陆
import Register from "@/views/Register"; //注册

Vue.use(VueRouter)

const routes = [{


        path: '/',
        name: 'login',
        component: Login
    },
    {


        path: '/Register',
        name: 'Register',
        component: Register
    }, {


        path: '/Homepage',
        name: 'Homepage',
        component: Homepage
    },
]

const router = new VueRouter({


    mode: 'history',
    base: process.env.BASE_URL,
    routes
})

export default router
2、页面布局——html部分(以登陆界面为例)
既然我们想让我们的的页面尽量美观一些,那么一开始的页面设计是必不可少的。初学的时候可以参考一下别的网站的页面布局和设计。我参考的下图的界面布局。

那么我们来分析一下这个页面的布局,首先是一个大的登陆框,位于整个页面中心。大的登陆框中分为左右两部分,左边为登陆的功能,包含账号输入框、密码输入框、以及登陆按钮等,再看右边,是一张背景图并带有网站信息或“欢迎”等字样。(分析别人好看的页面布局对我们设计网站页面的时候有帮助)
按照这个思路,我们也可以设计出我们的页面啦~下图为本次任务的设计出来的页面。


html 代码 (登陆页面)
<template>
<div class="container">
<div class="main">
<!-- 整个注册盒子 -->
<div class="loginbox">
<!-- 左侧的注册盒子 -->
<div class="loginbox-in">
<div class="userbox">
<span class="iconfont"></span>
<input class="user" id="user" v-model="name" placeholder="用户名">
</div>
<br>
<div class="pwdbox">
<span class="iconfont"></span>
<input class="pwd" id="password" v-model="pwd" type="password" placeholder="密码">
</div>
<br>
<div class="pwdbox">
<span class="iconfont"></span>
<input class="pwd" id="re_password" v-model="repwd" type="password" placeholder="确认密码">
</div>
<br>
<button type="primary" class="register_btn" @click="register">Register</button>
</div>
<!-- 右侧的注册盒子 -->
<div class="background">
<div class="title">Welcome to WH System Management Center</div>
</div>
</div>
</div>
</div>
</template>
3、页面美化——css部分(以登陆界面为例)
关于页面的css美化其实也有很细节的地方。
(1)第一个难点就是如何使我们的登陆卡片不管窗口如何调整大小,都始终位于页面中心呢在这里我们可以使用到了position。
.loginbox{


    position:absolute;
    width:800px;
    height:400px;
    top:40%;
    left:50%;
    transform:translate(-50%,-50%);
}
其中top:40%;left:50%; 是指div(我们的登陆卡片)左顶点在页面的位置,并不是div的中心点哦~而我们想的是div的中心点在我们想要的位置的。
所以要使用tannsform 在X Y轴进行移动。可参考参考博客了解更多关于position https://www.cnblogs.com/gxsweb/p/5395243.html
(2)如何使用iconfont
我们本次任务使用到了一些小图标,可以使用png以图片的形式加载,也可以使用iconfont(字体图标)的方式,加载在我们的页面中。
想比于普通的图片,使用iconfont可以自由的变化大小并且也不会模糊,而且占用内存小,也可以任意改变颜色。
首先,我们需要在https://www.iconfont.cn/阿里矢量图表库中找到合适的图标
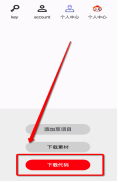
点击下载代码:
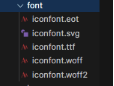
我们可以看到下载的压缩包中主要有这几项:
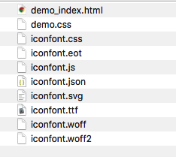
本次实验主要是unicode引用,所以我们真正会用到的文件只有这些
我们第一步要拷贝项目下生成的@font-face(在iconfont.css中)到自己页面的css中
@font-face {


    font-family: "iconfont";
    src: url('./font/iconfont.eot');
    src: url('./font/iconfont.eot?#iefix') format('embedded-opentype'), /* IE6-IE8 */
    url('./font/iconfont.woff2') format('woff2'), url('./font/iconfont.woff') format('woff'), url('./font/iconfont.ttf') format('truetype'), /* chrome, firefox, opera, Safari, Android, iOS 4.2+ */
    url('./font/iconfont.svg#iconfont') format('svg');
}
注意:这里面的url 一定要根据自己的文件目录进行更改!!!
第二步:定义使用 iconfont 的样式(颜色,字体大小等都可以随心更改哦~)
.iconfont {


    font-family: "iconfont" !important;
    font-size: 20px;
    font-style: normal;
    -webkit-font-smoothing: antialiased;
    -moz-osx-font-smoothing: grayscale;
    height:22px;
    color:#4E655D;
    margin-right:10px;
    margin-top:3px;
}
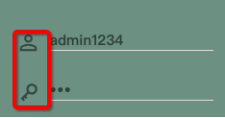
第三步:挑选相应图标并获取字体编码,应用于页面
<span class="iconfont"></span>
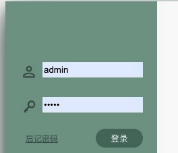
(3)如何修改input输入框自动填充的默认样式
因为我们有input账号、密码输入框,chrome会根据历史登陆过的账号与密码自动填input输入框,但是有个问题,虽然内容自动填充了,但是!!甚至样式也填充进去了,就是会覆盖掉我原来写的input输入框的样式。
比如:这个是我自己写的input输入框的样式
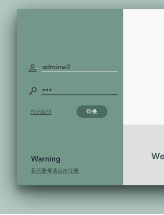
但这是chrome自动填充后的样式
就很和整个页面的样式很违和,解决方法如下(找遍了全网,东拼西凑,举一反三还真的成了!)
input:-webkit-autofill {


  /* 修改默认背景框的颜色 */
 box-shadow: 0 0 0px 1000px  #89AB9E inset !important;
 /* 修改默认字体的颜色 */
 -webkit-text-fill-color: #445b53;
}

input:-webkit-autofill::first-line {


  /* 修改默认字体的大小 */
 font-size: 15px;
 /* 修改默认字体的样式 */
 font-weight:bold;
 }
(4)为了使页面更美观,有动态效果,我们可以多使用hover等,还可以给卡片增加阴影等等。
** css代码 (登陆页面)**
.loginbox{


    display:flex;
    position:absolute;
    width:800px;
    height:400px;
    top:40%;
    left:50%;
    transform:translate(-50%,-50%);
    box-shadow: 0 12px 16px 0  rgba(0,0,0,0.24), 0 17px 50px 0 #4E655D;
}
.loginbox-in{


     background-color:#89AB9E;
     width:240px;
}
.userbox{


    margin-top:120px ;
    height:30px;
     width:230px;
     display: flex;
     margin-left:25px;
}
.pwdbox{


    height:30px;
    width:225px;
    display: flex;
    margin-left:25px;
}

.background{


    width:570px;
    background-image:url('./img/Christmas_Trees.png');
    background-size:cover;
    font-family:sans-serif;
}
.title{


    margin-top:320px;
    font-weight:bold;
    font-size:20px;
    color:#4E655D;

}
.title:hover{


     font-size:21px;
     transition: all 0.4s ease-in-out;
     cursor: pointer;
}
.uesr-text{


     position:left;
}
input{


    outline-style: none ;
    border: 0;
    border-bottom:1px solid #E9E9E9;
    background-color:transparent;
    height:20px;
     font-family:sans-serif;
    font-size:15px;
    color:#445b53;
    font-weight:bold;
}
 /* input::-webkit-input-placeholder{
    color:#E9E9E9;
 } */
input:focus{


    border-bottom:2px solid #445b53;
    background-color:transparent;
     transition: all 0.2s ease-in;
     font-family:sans-serif;
    font-size:15px;
     color:#445b53;
     font-weight:bold;

}
input:hover{


    border-bottom:2px solid #445b53;
    background-color:transparent;
     transition: all 0.2s ease-in;
     font-family:sans-serif;
    font-size:15px;
     color:#445b53;
     font-weight:bold;

}

input:-webkit-autofill {


  /* 修改默认背景框的颜色 */
 box-shadow: 0 0 0px 1000px  #89AB9E inset !important;
 /* 修改默认字体的颜色 */
 -webkit-text-fill-color: #445b53;
}

input:-webkit-autofill::first-line {


  /* 修改默认字体的大小 */
 font-size: 15px;
 /* 修改默认字体的样式 */
 font-weight:bold;
 }
.log-box{


    font-size:12px;
    display: flex;
    justify-content: space-between ;
    width:190px;
    margin-left:30px;
    color:#4E655D;
    margin-top:-5px;
    align-items: center;

}
.log-box-text{


    color:#4E655D;
    font-size:12px;
      text-decoration:underline;
    }
.login_btn{


    background-color: #5f8276; /* Green */
    border: none;
    color: #FAFAFA;
    padding: 5px 22px;
    text-align: center;
    text-decoration: none;
    font-size: 13px;
    border-radius: 20px;
    outline:none;
}
.login_btn:hover{


    box-shadow: 0 12px 16px 0 rgba(0,0,0,0.24), 0 17px 50px 0 rgba(0,0,0,0.19);
    cursor: pointer;
     background-color: #0b5137;
      transition: all 0.2s ease-in;
}

.warn{


    margin-top:60px;
    /* margin-right:120px; */
    margin-left:-120px;
    margin-bottom: 5px;
     font-weight:bold;
    font-size:17px;
}

.register_btn{


    background-color: transparent; /* Green */
    border: none;
    text-decoration: none;
    font-size: 12px;
    /* border-radius: 20px;   */
     color:#4E655D;
    font-size:12px;
    text-decoration:underline;
    display: flex;
    margin-left:25px;
    outline:none;

}
.register_btn:hover{


    font-weight:bold;
    cursor: pointer;
}
@font-face {


    font-family: "iconfont";
    src: url('./font/iconfont.eot');
    src: url('./font/iconfont.eot?#iefix') format('embedded-opentype'), /* IE6-IE8 */
    url('./font/iconfont.woff2') format('woff2'), url('./font/iconfont.woff') format('woff'), url('./font/iconfont.ttf') format('truetype'), /* chrome, firefox, opera, Safari, Android, iOS 4.2+ */
    url('./font/iconfont.svg#iconfont') format('svg');
}

.iconfont {


    font-family: "iconfont" !important;
    font-size: 20px;
    font-style: normal;
    -webkit-font-smoothing: antialiased;
    -moz-osx-font-smoothing: grayscale;
    height:22px;
    color:#4E655D;
    margin-right:10px;
    margin-top:3px;
}

.icon-key:before {


    content: "\e775";
}

.icon-account:before {


    content: "\e817";
}
4、功能设计
(1)登陆,注册,主页等页面之间跳转。
使用v-model监听获取到输入框中值。(上一期没有使用,这期更正)
如果用户名和密码都正确,那么可以跳转。
跳转的方式如下
如果有参数:(本次使用的是query的方式)
this.$router.push({


path: '/',
query: {


list: this.user_list,
}
})
如果没有参数:
this.$router.push"Homepage");//homepage为要跳转的页面
(2)注册页面的业务逻辑
使用一个json数组存储记录注册过的用户信息列表。(模拟数据库)
在使用某网站时,按照一般的操作逻辑为:当我们在登陆某个网站的时候,如果没有账号,就要去申请注册。
同样,我们这个项目也是,我们没有账号就要去注册。在当我们进入注册页面,并注册成功时,就会把我们的用户名和密码保存起来。
当然了,我们注册账号也要注意,不能让账号名字一样,而且也不能让我们两次输入的密码不一致。这就需要我们在js中加以判断。
具体如何实现,可参考代码以及相关的注释
Register.vue 判断是否可以注册成功
var flag=1;
      //如果用户名已存在,则需要换一个用户名
      this.user_list.forEach((item) => {


         if(item.username==this.name){


           alert('用户已存在,请换一个用户名');
           flag=0;}
        })
      //如果用户名不存在,则继续判断
      if(flag){


        //判断两次输入的密码是否一致,如果密码不一致,则需要重新输入
        if(this.pwd!=this.repwd){


        alert('两次输入的密码不一致,请重新输入'); }
当我们输入的值满足注册条件,项目会记录了我们的账号与密码,并更新用户列表user_list,此时注册就成功了,我们也需要把更新后的user_list 为参数跳转给登陆页面,此时我们直接输入刚注册的账号和密码,即可登陆成功。
当然,我们之所以要求用户注册的用户名不能和已经有了的用户名相一致是因为在这里我们把用户名作为我们用户列表的唯一标识符了,方便我们判断用户和密码是否匹配。
Register.vue 更新用户列表,并向Login.vue 传递参数
 else {


          var item ={

    };
          //获取到用户名
          item.username=this.name;
          //获取到密码
          item.password=this.pwd;
          //存储到用户列表
          this.user_list.push(item);
          alert('注册成功');
        //    this.user_list.forEach((item) => {


        //       console.log( item.username);
        // })

          this.$router.push({


            path: '/',
            query: {


              list: this.user_list,}
          })
        }
Login.vue 接收参数
var routerParams = this.$route.query.list;
this.user_list = routerParams;
(3)登陆页面的业务逻辑
我们在登陆的时候也要使用循环来判断是否有这个用户,并且要判断这个用户的密码和输入的密码是否相匹配。如果都匹配成功,则跳转到主页。(注意细节:要区别一下是直接输入账号密码进行登陆的,还是先注册再登陆的,否则会报错)
login(){


        var flag=0;
        //如果是有参数传递
        if(!this.$route.query.list){


        this.user_list.forEach((item) => {


         if(item.username==this.name){


           if(item.password==this.pwd){


            flag=1;//用户存在,并且密码正确
          }
         }
        }
      )
      if(flag==1){


        //可以跳转到主页
        this.$router.push("Homepage");
      }
      else{


        alert("用户名或密码错误,请重新输入");
      }
      }
      else{


        // 取到路由带过来的参数
        var routerParams = this.$route.query.list;
        this.user_list = routerParams;
        this.user_list.forEach((item) => {


         if(item.username==this.name){


           if(item.password==this.pwd){


            flag=1;//用户存在,并且密码正确
           }
         }
        }
      )
      if(flag==1){


        //可以跳转到主页
        // this.$router.push("Homepage");
        this.$router.push({


            path: '"Homepage',
          }
        )
      }
      else{


        alert("用户名或密码错误,请重新输入");}
      }
    },
四、效果展示
1、登陆页面
2、注册页面
3、主页

五、总结
虽然只是很小的一个demo,但涉及到的知识点也蛮多的,不过也在收获到了不少新的知识的同时,也对以前学过的知识加深了理解,并更加熟悉如何应用。虽然也有很多尚未完善的功能以及有待改进的点,但希望在一次一次的任务中,不断总结,不断提高,迅速成长!