SpringBoot是一款基于Spring的极速开发框架,它只需要少量的配置就可以。初次使用:
0.新建SpringBoot项目


初次学习我们就不用自动添加依赖了,我们选择手动添加依赖的方式。

[注]:1.如果有时候官方的网站链接延迟过大,也可以选择从阿里云下载项目骨架的方式:

[注]2:也可以直接新建一个空Maven项目,把缺少的东西拷贝进去。
[注]3:有时候SpringBoot骨架初次构建后,pom.xml文件会无效,此时需要将pom加进我们的Maven工程。

1.在pom.xml文件中配置文件过滤
        <!--配置资源过滤-->
        <resources>
            <resource>
                <directory>src/main/java</directory>
                <includes>
                    <include>**/*.xml</include>
                </includes>
            </resource>
            <resource>
                <directory>src/main/resources</directory>
                <includes>
                    <!--记住一定要配置SpringBoot主配置文件的包含-->
                    <include>**/*.properties</include>
                    <!--要使用自定义的banner需要包含txt-->
                    <include>**/*.txt</include>
                    <include>**/*.xml</include>
                </includes>
            </resource>
        </resources>
2.SpringBoot-main
1. run()方法返回值(run执行时,会根据项目类型选择启动的场景)
项目完成构建后,会产生一个类:
package com.zzt;

import org.springframework.boot.SpringApplication;
import org.springframework.boot.autoconfigure.SpringBootApplication;

@SpringBootApplication
public class DemoApplication {

	public static void main(String[] args) {
		SpringApplication.run(DemoApplication.class, args);
	}

}
它就是SpringBoot的启动器,也是SpringBoot的配置类(@SpringBootApplication注解),用于启动SpringBoot。实际上,SpringApplication.run(DemoApplication.class, args)返回一个容器,就是Spring IoC容器;


我们来做个实验,在Service包下新建一个类,加入@Service注解;在mian方法中使用该容器getBean:
package com.zzt.service;

import org.springframework.stereotype.Service;

@Service
public class StudentService {
}
public static void main(String[] args) {
ApplicationContext ctx = SpringApplication.run(DemoApplication.class, args);
StudentService bean = ctx.getBean(StudentService.class);
System.out.println(bean);
}
可以看到,StudentService被自动实力化并放入到了容器之中,这验证了我们刚刚所说,run()方法返回了一个Spring IoC容器。
2.main方法 预配置
    public static void main(String[] args) {
        SpringApplication app = new SpringApplication(DemoApplication.class);
        app.setBannerMode(Banner.Mode.CONSOLE); //在控制台打印输出启动logo  默认开启
        ApplicationContext ctx = app.run();
        StudentService bean = ctx.getBean(StudentService.class);
        System.out.println(bean);
    }
使用SpringApplication对象,我们可以做很多预配置。例如启动logo,我们只要在资源路径resources下新建banner.txt,并键入我们需要的logo:


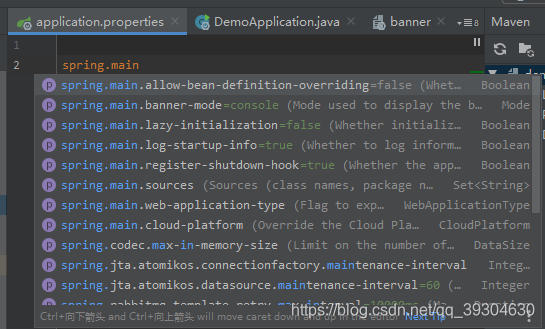
当然也可以不用代码,而在配置文件中配置:
3.main方法 构建器的使用
    public static void main(String[] args) {
        ApplicationContext ctx = new SpringApplicationBuilder().sources(DemoApplication.class).
                bannerMode(Banner.Mode.CONSOLE)
                .run();
        StudentService bean = ctx.getBean(StudentService.class);
        System.out.println(bean);
    }
[注]:现在我们应该明白,SpringBoot项目的启动,本质就是Spring IoC容器的创建。
4. CommandLineRunner接口
@SpringBootApplication
public class DemoApplication implements CommandLineRunner {

    public static void main(String[] args) {
        ApplicationContext ctx = new SpringApplicationBuilder().sources(DemoApplication.class).
                bannerMode(Banner.Mode.CONSOLE)
                .run();
        StudentService bean = ctx.getBean(StudentService.class);
        System.out.println(bean);
    }

    @Override
    public void run(String... args) throws Exception {
        System.out.println("Spring容器构建完成......");
    }
}
CommandLineRunner接口定义了run方法,该方法会在Spring IoC容器完成构建(同时实例化对象并放入容器)后进行回调。

[注]:1. 我们最好在配置类中或者配置文件中单独配置,以免引起冲突(虽然目前测试下来好像冲突时以配置文件为准)。
2.含有main方法的配置类本身也是bean,因此可以对他进行注入。
@SpringBootApplication
public class DemoApplication implements CommandLineRunner {

    @Autowired
    private StudentService studentService;

    public static void main(String[] args) {
        ApplicationContext ctx = new SpringApplicationBuilder().sources(DemoApplication.class).
                bannerMode(Banner.Mode.CONSOLE)
                .run();
        StudentService bean = ctx.getBean(StudentService.class);
        System.out.println(bean);
    }

    @Override
    public void run(String... args) throws Exception {
        System.out.println("Spring容器构建完成......" + studentService);
    }
}
3.项目结构
    <!--继承父项目-->
    <parent>
        <groupId>org.springframework.boot</groupId>
        <artifactId>spring-boot-starter-parent</artifactId>
        <version>2.3.1.RELEASE</version>
        <relativePath/> <!-- lookup parent from repository -->
    </parent>
在继承的父项目中,定义了许多jar包的版本,因此我们在引入依赖时,不手动增加<version>,他就会按照父项目定义的版本进行依赖添加。
4.启动器
        <dependency>
            <groupId>org.springframework.boot</groupId>
            <artifactId>spring-boot-starter-web</artifactId>
        </dependency>
使用启动器导入,他就会帮我们自动导入对应场景所需要的所有依赖,此处导入的是web环境依赖。SpringBoot会将所有的功能场景,变成一个个启动器。
5.SpringBoot自动配置原理简析

SpringBoot的所有自动配置都是在启动的时候扫描并加载配置文件:spring.factories,这里面有所有的自动配置类;但是并不会全部加载,配置类有@ConditionalXXX注解,用于表示仅有在条件均满足时才会加载。

@ConditionalOnClass表示仅有拥有这个类的时候,才会生效。