SpringApplication的初始化
前言
一直以来都没有系统化的研究过源码,除了先前单独搭建Mybatis的一个demo研究了下MyBatis的源码,基本上就是遇到问题的时候去看下源码把问题解决了,然后就没然后了。当时研究MyBatis看得还起劲,了解了Mybatis初始化的时候干了什么,然后我们调用接口的时候他去匹配Mapper的逻辑,不过这么久过去了,还记得的就很少了。所以最近闲来没事儿干脆看看SpringBoot源码,并且写博客记录下,先不管能看多少,管他的写博客又不要钱。看多少写多少,后面回来再看博客还可以帮助下回忆。
注:其实后面可能研究的不单单是SpringBoot的源码,众所周知,SpringBoot只是一个盒子,把其他框架和中间件什么的进行整合了而已。还有,本人英语不太好,再阅读注释的时候又什么理解错误的地方还望指正。
搭建一个简单的SpringBoot demo
直接搭个很简单的demo来帮助阅读源码,建个Maven项目,引入依赖:
		<dependency>
            <groupId>org.springframework.boot</groupId>
            <artifactId>spring-boot-starter-web</artifactId>
        </dependency>
        <dependency>
            <groupId>org.springframework.boot</groupId>
            <artifactId>spring-boot-starter-jdbc</artifactId>
        </dependency>
        <dependency>
            <groupId>mysql</groupId>
            <artifactId>mysql-connector-java</artifactId>
            <version>${mysql.version}</version>
        </dependency>
这里我把jdbc加进来了,所以再application.yml中配置下数据源吧:
spring:
  datasource:
    driverClassName: com.mysql.cj.jdbc.Driver
    url: jdbc:mysql://localhost:3306/demo?useUnicode=true&characterEncoding=utf8&useSSL=false&serverTimezone=Hongkong
    username: root
    password: 123456
最后写个启动类:
@RestController
@SpringBootApplication
public class MyApplication {
    @Autowired
    JdbcTemplate jdbcTemplate;

    public static void main(String[] args) {
        SpringApplication.run(MyApplication.class,args);
    }

    @GetMapping("list")
    public String list(){
        String sql = "select * from user";
        List<User> userList = jdbcTemplate.query(sql, BeanPropertyRowMapper.newInstance(User.class));
        return JSONUtil.toJsonStr(userList);
    }
}
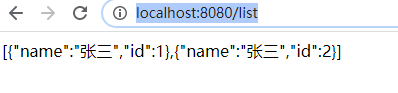
这样,一个springBoot项目就写好了,还顺便写了个接口去查下user信息,访问下http://localhost:8080/list看下效果:
开始研究
接下来我们开始研究SpringBoot的源码:
程序入口
public static void main(String[] args) {
        SpringApplication.run(MyApplication.class,args);
    }
众所周知,java代码的入口就是main方法,main里面就一行代码,SpringApplication.run
那我们先看看这个run方法吧。
	/**
	 * Static helper that can be used to run a {@link SpringApplication} from the
	 * specified source using default settings.
	 * 	大意就是:这个一个静态方法,可以用来以默认的配置和指定的source来启动SpringApplication
	 * @param primarySource the primary source to load    加载的主要source
	 * @param args the application arguments (usually passed from a Java main method) 应用程序参数(通常从Java主方法传递)
	 * @return the running {@link ApplicationContext}
	 */
	public static ConfigurableApplicationContext run(Class<?> primarySource, String... args) {
		return run(new Class<?>[] { primarySource }, args);
	}
从注释我们知道,这个方法就是默认配置启动SpringApplication用的,然后可以指定source,和输入一些参数,并且返回一个ConfigurableApplicationContext,那就是所我们项目启动后可以拿到一个ConfigurableApplicationContext,至于这个Context有什么,能干什么,我暂时不清楚,以前也没用过,先搁置。
接着追下去:
/**
	 * Static helper that can be used to run a {@link SpringApplication} from the
	 * specified sources using default settings and user supplied arguments.
	 * @param primarySources the primary sources to load
	 * @param args the application arguments (usually passed from a Java main method)
	 * @return the running {@link ApplicationContext}
	 */
	public static ConfigurableApplicationContext run(Class<?>[] primarySources, String[] args) {
		return `new SpringApplication(primarySources).run(args)`;
	}
诶,和上一个run的区别就是参数是数组,也就是说我们启动项目的时候可以指定多个sources,至于这个sources干什么用的,先不管,继续new SpringApplication(primarySources).run(args),这里慢点,先new了一个实例然后run with args,我们先看new的过程:
初始化SpringApplication实例
/**
	 * Create a new {@link SpringApplication} instance. The application context will load
	 * beans from the specified primary sources (see {@link SpringApplication class-level}
	 * documentation for details. The instance can be customized before calling
	 * {@link #run(String...)}.
	 * 创建一个新的SpringApplication实例,application contenxt将通过指定的sources来加载实例(beans);
	 *  SpringApplication class-level 文档有更详细描述,实例可以在调用run()之前定制化。
	 * @param primarySources the primary bean sources
	 * @see #run(Class, String[])
	 * @see #SpringApplication(ResourceLoader, Class...)
	 * @see #setSources(Set)
	 */
	public SpringApplication(Class<?>... primarySources) {
		this(null, primarySources);
	}
说SpringApplication 的class-level有详细说明,注释太多,就不贴了,可以自己去看,上面一大串注释看得头都大了,不过还有大致看了下,收获如下:
- 大多数情况下我们通过直接调用run的方式启动应用:
就这种方式SpringApplication.run(MyApplication.class, args); - 为了更多的配置一个SpringApplication实例,我们可以在实例化后自己启动:
SpringApplication application = new SpringApplication(MyApplication.class);
// ... customize application settings here
application.run(args)
- 还有其他种种,就不列举在这里了,遇到再说。
接着走:
/**
	 * Create a new {@link SpringApplication} instance. The application context will load
	 * beans from the specified primary sources (see {@link SpringApplication class-level}
	 * documentation for details. The instance can be customized before calling
	 * {@link #run(String...)}.
	 * @param resourceLoader the resource loader to use
	 * @param primarySources the primary bean sources
	 * @see #run(Class, String[])
	 * @see #setSources(Set)
	 */
	@SuppressWarnings({ "unchecked", "rawtypes" })
	public SpringApplication(ResourceLoader resourceLoader, Class<?>... primarySources) {
		this.resourceLoader = resourceLoader;   //前面传过来是null
		Assert.notNull(primarySources, "PrimarySources must not be null"); //必须制定sources,用了断言,get
		this.primarySources = new LinkedHashSet<>(Arrays.asList(primarySources));
		//WebApplicationType是一个枚举,从方法名上大致猜是通过classpath来设置应用的类型吧。
		this.webApplicationType = WebApplicationType.deduceFromClasspath();
		setInitializers((Collection) getSpringFactoriesInstances(ApplicationContextInitializer.class));
		setListeners((Collection) getSpringFactoriesInstances(ApplicationListener.class));
		this.mainApplicationClass = deduceMainApplicationClass();
	}
WebApplicationType
还是看看WebApplicationType 类:
/**
 * An enumeration of possible types of web application.
 *
 * @author Andy Wilkinson
 * @author Brian Clozel
 * @since 2.0.0
 */
public enum WebApplicationType {

	/**
	 * The application should not run as a web application and should not start an
	 * embedded web server.
	 *  应用不是web应用也不是嵌入的web服务
	 */
	NONE,

	/**
	 * The application should run as a servlet-based web application and should start an
	 * embedded servlet web server.
	 *  该应用程序应作为基于Servlet的Web应用程序运行,将启动一个嵌入的servlet web服务
	 */
	SERVLET,

	/**
	 * The application should run as a reactive web application and should start an
	 * embedded reactive web server.
	 * 这里没懂,reactive是什么意思?反应性的,百度了下都感觉和spring cloud相关,云?微服务?
	 */
	REACTIVE;

	private static final String[] SERVLET_INDICATOR_CLASSES = { "javax.servlet.Servlet",
			"org.springframework.web.context.ConfigurableWebApplicationContext" };

	private static final String WEBMVC_INDICATOR_CLASS = "org.springframework.web.servlet.DispatcherServlet";

	private static final String WEBFLUX_INDICATOR_CLASS = "org.springframework.web.reactive.DispatcherHandler";

	private static final String JERSEY_INDICATOR_CLASS = "org.glassfish.jersey.servlet.ServletContainer";

	private static final String SERVLET_APPLICATION_CONTEXT_CLASS = "org.springframework.web.context.WebApplicationContext";

	private static final String REACTIVE_APPLICATION_CONTEXT_CLASS = "org.springframework.boot.web.reactive.context.ReactiveWebApplicationContext";

	static WebApplicationType deduceFromClasspath() {
		if (ClassUtils.isPresent(WEBFLUX_INDICATOR_CLASS, null) && !ClassUtils.isPresent(WEBMVC_INDICATOR_CLASS, null)
				&& !ClassUtils.isPresent(JERSEY_INDICATOR_CLASS, null)) {
			return WebApplicationType.REACTIVE;
		}
		for (String className : SERVLET_INDICATOR_CLASSES) {
			if (!ClassUtils.isPresent(className, null)) {
				return WebApplicationType.NONE;
			}
		}
		return WebApplicationType.SERVLET;
	}

	static WebApplicationType deduceFromApplicationContext(Class<?> applicationContextClass) {
		if (isAssignable(SERVLET_APPLICATION_CONTEXT_CLASS, applicationContextClass)) {
			return WebApplicationType.SERVLET;
		}
		if (isAssignable(REACTIVE_APPLICATION_CONTEXT_CLASS, applicationContextClass)) {
			return WebApplicationType.REACTIVE;
		}
		return WebApplicationType.NONE;
	}

	private static boolean isAssignable(String target, Class<?> type) {
		try {
			return ClassUtils.resolveClassName(target, null).isAssignableFrom(type);
		}
		catch (Throwable ex) {
			return false;
		}
	}

}
这里没看懂REACTIVE是什么意思,像看看我们现在配置这个的类型是什么,debug下:
debug先解决ClassLoader的问题,我们看到穿classLoader的地方一直传的null,所以追了下代码,有个getDefaultClassLoader方法,看看:

也就是说我们springBoot也可以说spring用的默认ClassLoader是AppClassLoader,接着看刚才的问题,

至此,我们知道了,我们现在的应用是一个servlet引用。接着看:
ApplicationContextInitializer
/**
	 * Sets the {@link ApplicationContextInitializer} that will be applied to the Spring
	 * {@link ApplicationContext}.
	 * @param initializers the initializers to set
	 */
	public void setInitializers(Collection<? extends ApplicationContextInitializer<?>> initializers) {
		this.initializers = new ArrayList<>(initializers);
	}
设置一些初始化的东西(初始化器??翻译出来的),参数是集合,集合元素继承了ApplicationContextInitializer,我们先看看ApplicationContextInitializer是什么,在看输入参数。
/**
 * Callback interface for initializing a Spring {@link ConfigurableApplicationContext}
 * prior to being {@linkplain ConfigurableApplicationContext#refresh() refreshed}.
 *
 * <p>Typically used within web applications that require some programmatic initialization
 * of the application context. For example, registering property sources or activating
 * profiles against the {@linkplain ConfigurableApplicationContext#getEnvironment()
 * context's environment}. See {@code ContextLoader} and {@code FrameworkServlet} support
 * for declaring a "contextInitializerClasses" context-param and init-param, respectively.
 *
 * <p>{@code ApplicationContextInitializer} processors are encouraged to detect
 * whether Spring's {@link org.springframework.core.Ordered Ordered} interface has been
 * implemented or if the @{@link org.springframework.core.annotation.Order Order}
 * annotation is present and to sort instances accordingly if so prior to invocation.
 *
 * @author Chris Beams
 * @since 3.1
 * @param <C> the application context type
 * @see org.springframework.web.context.ContextLoader#customizeContext
 * @see org.springframework.web.context.ContextLoader#CONTEXT_INITIALIZER_CLASSES_PARAM
 * @see org.springframework.web.servlet.FrameworkServlet#setContextInitializerClasses
 * @see org.springframework.web.servlet.FrameworkServlet#applyInitializers
 */
public interface ApplicationContextInitializer<C extends ConfigurableApplicationContext> {

	/**
	 * Initialize the given application context.
	 * @param applicationContext the application to configure
	 */
	void initialize(C applicationContext);

}
英语不好,看个大意也不知道对不对,ApplicationContextInitializer是一个用于ConfigurableApplicationContext.refresh()执行后的回调接口。应该就是用于动态的改变配置用的吧。就像我们一般写的缓存,然后有改变的时候执行的更新接口。
看下他的实现:

这么多,先不惹了,看下刚才的入参:((Collection) getSpringFactoriesInstances(ApplicationContextInitializer.class)获取spring工厂实例??跟进过去,
private <T> Collection<T> getSpringFactoriesInstances(Class<T> type, Class<?>[] parameterTypes, Object... args) {
		ClassLoader classLoader = getClassLoader();  //应该就是AppClassLoader了
		// Use names and ensure unique to protect against duplicates
		Set<String> names = new LinkedHashSet<>(SpringFactoriesLoader.loadFactoryNames(type, classLoader));
		List<T> instances = createSpringFactoriesInstances(type, parameterTypes, classLoader, args, names);
		AnnotationAwareOrderComparator.sort(instances);
		return instances;
	}
debug看了下,加载了7个初始化器。

loadFactoryNames
先加载工厂名称?还有注释说要确保名称唯一。
/**
	 * Load the fully qualified class names of factory implementations of the
	 * given type from {@value #FACTORIES_RESOURCE_LOCATION}, using the given
	 * class loader.
	 * 用给的ClassLoader从FACTORIES_RESOURCE_LOCATION中加载出工厂的实现类的全类名
	 * @param factoryType the interface or abstract class representing the factory
	 * @param classLoader the ClassLoader to use for loading resources; can be
	 * {@code null} to use the default
	 * @throws IllegalArgumentException if an error occurs while loading factory names
	 * @see #loadFactories
	 */
	public static List<String> loadFactoryNames(Class<?> factoryType, @Nullable ClassLoader classLoader) {
		String factoryTypeName = factoryType.getName();
		return loadSpringFactories(classLoader).getOrDefault(factoryTypeName, Collections.emptyList());
	}
看下loadSpringFactories:
private static Map<String, List<String>> loadSpringFactories(@Nullable ClassLoader classLoader) {
		MultiValueMap<String, String> result = cache.get(classLoader);
		if (result != null) {
			return result;
		}

		try {
			Enumeration<URL> urls = (classLoader != null ?
					classLoader.getResources(FACTORIES_RESOURCE_LOCATION) :
					ClassLoader.getSystemResources(FACTORIES_RESOURCE_LOCATION));
			result = new LinkedMultiValueMap<>();
			while (urls.hasMoreElements()) {
				URL url = urls.nextElement();
				UrlResource resource = new UrlResource(url);
				Properties properties = PropertiesLoaderUtils.loadProperties(resource);
				for (Map.Entry<?, ?> entry : properties.entrySet()) {
					String factoryTypeName = ((String) entry.getKey()).trim();
					for (String factoryImplementationName : StringUtils.commaDelimitedListToStringArray((String) entry.getValue())) {
						result.add(factoryTypeName, factoryImplementationName.trim());
					}
				}
			}
			cache.put(classLoader, result);
			return result;
		}
		catch (IOException ex) {
			throw new IllegalArgumentException("Unable to load factories from location [" +
					FACTORIES_RESOURCE_LOCATION + "]", ex);
		}
	}


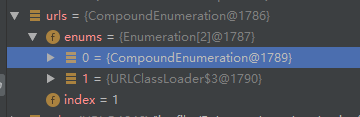
原来是这里来的,spring-boot-2.2.5.RELEASE.jar!/META-INF/spring.factories,去找来看看:

看完后面的源码后觉得这里有问题,明明初始化器只有5个,加载出来却是7个,然后有看了下,原来URL是两个,另一个加载的配置文件在spring-boot-autoconfigure-2.2.5.RELEASE.jar!/META-INF/spring.factories里面。这样加起来刚好7个。[手动捂脸]


太多了,先不管了,反正现在知道了现在已经把这堆名称加载到内存里面了:


createSpringFactoriesInstances
好了names设起了,继续createSpringFactoriesInstances:
private <T> List<T> createSpringFactoriesInstances(Class<T> type, Class<?>[] parameterTypes,
			ClassLoader classLoader, Object[] args, Set<String> names) {
		List<T> instances = new ArrayList<>(names.size());
		for (String name : names) {
			try {
				Class<?> instanceClass = ClassUtils.forName(name, classLoader);
				Assert.isAssignable(type, instanceClass);
				Constructor<?> constructor = instanceClass.getDeclaredConstructor(parameterTypes);
				T instance = (T) BeanUtils.instantiateClass(constructor, args);
				instances.add(instance);
			}
			catch (Throwable ex) {
				throw new IllegalArgumentException("Cannot instantiate " + type + " : " + name, ex);
			}
		}
		return instances;
	}
这里有看头,通过classLoader+全类名实例化对象:
- Class<?> instanceClass = ClassUtils.forName(name, classLoader); 先拿到Class。
- Constructor<?> constructor = instanceClass.getDeclaredConstructor(parameterTypes); 拿到构造函数对象。
- T instance = (T) BeanUtils.instantiateClass(constructor, args); 创建实例,
直呼牛批,这是以前没看到过的。
最后AnnotationAwareOrderComparator排个序,这里就不赘述AnnotationAwareOrderComparator,可以自己去看下,就是一个排序,注释巴拉巴拉一堆,什么为了更好的什么。
setListeners
参数(Collection) getSpringFactoriesInstances(ApplicationListener.class)逻辑和上面一样,就不看了,看下返回些什么吧。

看不懂,反正就是一些监听器的实现。
至此,一个SpringApplication的初始化完成了,接下来看应用如何启动运行吧。