Thrift远程通信教程
目标:实现Python通过Thrift实现服务器-客户端相互通信。
前期准备
- thrift.exe可执行文件
- 官方.thrift样例文件

无加密本地通信版本
修改.thrift文件
如图所示:

利用thrift脚本创建gen-py文件夹
在当前目录打开一个命令行工具:

在命令行工具里敲入以下命令:
.\thrift -r --gen py ./tutorial.thrift
其中.\thrift是打开当前目录下的名字叫thrift的程序,后面是参数。
通过直接打开的方式可以省去配置环境变量的过程。
安装python的thrift库
在任意目录下的命令行工具里敲入以下命令即可安装:
pip install -i https://pypi.tuna.tsinghua.edu.cn/simple thrift
有的同学的电脑安装到一半可能会断掉,这是因为访问外网太慢导致的,可以多执行几次,只要有一次安装成功即可。
修改PythonServer.py文件
在原来什么都不动的情况下,在CalculatorHandler 末尾加入一个刚才定义好的函数,进行这个函数的实现方法。
def echo(self, msg, cnt):
	print("%s,%d"%(msg,cnt))
	return cnt + 1

修改PythonClient.py文件
在PythonClient.py 中添加如下代码
flag=client.echo("hello server!",2020)
print("hello server!,%d"%flag)

运行
先运行Server端,再运行Client端。


加密本地通信版本
前期准备
相较于无加密版本需要有openssl软件来生成密钥和证书。

安装openssl


注意,此处安装目录为C:\OpenSSL-Win64。


测试openssl
打开命令行工具,输入:
C:\OpenSSL-Win64\bin\openssl version
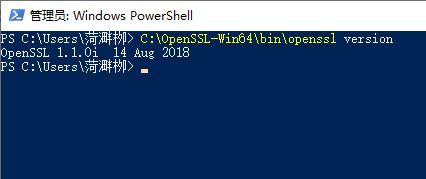
如果出现版本号就说明配置成功。
生成私钥和证书
- 在你想要存放密钥和证书的目录下打开命令行,输入如下命令
C:\OpenSSL-Win64\bin\openssl req -new -x509 -days 365 -nodes -out cert.pem -keyout key.pem
- 国家输入
CN
- 不重要的可以不填,直接按回车即可跳过。
- 到服务器这一个的时候填入本机地址:
127.0.0.1。
- 剩下的继续回车跳过。
- 可以看到目录下已经有了私钥和证书,其中"cert.pem"是客户端用的公钥(证书),"key.pem"是服务器用的私钥。

修改python文件,使用证书加密通信
利用thrift生成gen-py文件夹:

Server端:


将1处的代码修改为
from thrift.transport import TSSLSocket
将2处的代码修改为
transport = TSSLSocket.TSSLServerSocket(host="127.0.0.1", port=9090, certfile='cert.pem', keyfile='key.pem')
注意:其中certfile,keyfile记得替换为你生成公私钥的名字。
Client端

将1处的代码修改为
from thrift.transport import TSSLSocket
将2处的代码修改为
transport = TSSLSocket.TSSLSocket(host="127.0.0.1", port=9090, ca_certs='cert.pem')
注意:其中ca_certfile记得替换为你生成公私钥的名字。
Server完整代码
import sys
sys.path.append('./gen-py')

from tutorial import Calculator
from tutorial.ttypes import InvalidOperation, Operation

from shared.ttypes import SharedStruct

from thrift.transport import TSSLSocket
from thrift.transport import TTransport
from thrift.protocol import TBinaryProtocol
from thrift.server import TServer

class CalculatorHandler:
    def __init__(self):
        self.log = {

    }

    def ping(self):
        print('ping()')

    def add(self, n1, n2):
        print('add(%d,%d)' % (n1, n2))
        return n1 + n2

    def calculate(self, logid, work):
        print('calculate(%d, %r)' % (logid, work))

        if work.op == Operation.ADD:
            val = work.num1 + work.num2
        elif work.op == Operation.SUBTRACT:
            val = work.num1 - work.num2
        elif work.op == Operation.MULTIPLY:
            val = work.num1 * work.num2
        elif work.op == Operation.DIVIDE:
            if work.num2 == 0:
                raise InvalidOperation(work.op, 'Cannot divide by 0')
            val = work.num1 / work.num2
        else:
            raise InvalidOperation(work.op, 'Invalid operation')

        log = SharedStruct()
        log.key = logid
        log.value = '%d' % (val)
        self.log[logid] = log

        return val

    def getStruct(self, key):
        print('getStruct(%d)' % (key))
        return self.log[key]

    def zip(self):
        print('zip()')

    def echo(self, msg, cnt):
        print("%s,%d" % (msg, cnt))
        return cnt + 1

if __name__ == '__main__':
    handler = CalculatorHandler()
    processor = Calculator.Processor(handler)
    transport = TSSLSocket.TSSLServerSocket(host="127.0.0.1", port=9090, certfile='cert.pem', keyfile='key.pem')
    tfactory = TTransport.TBufferedTransportFactory()
    pfactory = TBinaryProtocol.TBinaryProtocolFactory()

    server = TServer.TSimpleServer(processor, transport, tfactory, pfactory)

    # You could do one of these for a multithreaded server
    # server = TServer.TThreadedServer(
    #     processor, transport, tfactory, pfactory)
    # server = TServer.TThreadPoolServer(
    #     processor, transport, tfactory, pfactory)

    print('Starting the server...')
    server.serve()
    print('done.')
Client完整代码
import sys
import glob
sys.path.append('./gen-py')

from tutorial import Calculator
from tutorial.ttypes import InvalidOperation, Operation, Work

from thrift import Thrift
from thrift.transport import TSSLSocket
from thrift.transport import TTransport
from thrift.protocol import TBinaryProtocol

def main():
    # Make socket
    transport = TSSLSocket.TSSLSocket(host="127.0.0.1", port=9090, ca_certs='cert.pem')

    # Buffering is critical. Raw sockets are very slow
    transport = TTransport.TBufferedTransport(transport)

    # Wrap in a protocol
    protocol = TBinaryProtocol.TBinaryProtocol(transport)

    # Create a client to use the protocol encoder
    client = Calculator.Client(protocol)

    # Connect!
    transport.open()

    client.ping()
    print('ping()')

    sum_ = client.add(1, 1)
    print('1+1=%d' % sum_)

    work = Work()

    work.op = Operation.DIVIDE
    work.num1 = 1
    work.num2 = 0

    try:
        quotient = client.calculate(1, work)
        print('Whoa? You know how to divide by zero?')
        print('FYI the answer is %d' % quotient)
    except InvalidOperation as e:
        print('InvalidOperation: %r' % e)

    work.op = Operation.SUBTRACT
    work.num1 = 15
    work.num2 = 10

    diff = client.calculate(1, work)
    print('15-10=%d' % diff)

    log = client.getStruct(1)
    print('Check log: %s' % log.value)

    flag = client.echo("hello server!", 2020)
    print("hello server!,%d" % flag)

    # Close!
    transport.close()

if __name__ == '__main__':
    try:
        main()
    except Thrift.TException as tx:
        print('%s' % tx.message)
运行结果:

加密远程通信版本
前期准备
- 有效的证书

修改代码
已经有了使用证书通信的经验,这次会容易得多。
首先PythonServer.py文件是没有用的,因为我们要连接的服务器在网络上,网络端是已经写好的,我们只需要写好客户端去连接即可,也就是PythonClient.py。
其次需要把要连接的服务器IP改成真实的服务器IP,把证书改成你的证书即可。
