对大部分系统来说都需要权限管理来决定不同用户可以看到哪些内容,那么如何在Spring MVC中实现权限验证呢?当然我们可以继续使用servlet中的过滤器Filter来实现。但借助于Spring MVC中的action拦截器我们可以实现注解式的权限验证。
一.首先介绍一下action拦截器:
HandlerInterceptor是Spring MVC为我们提供的拦截器接口,来让我们实现自己的处理逻辑,HandlerInterceptor 的内容如下:
public interface HandlerInterceptor {

	/**
	 * Intercept the execution of a handler. Called after HandlerMapping determined
	 * an appropriate handler object, but before HandlerAdapter invokes the handler.
	 * <p>DispatcherServlet processes a handler in an execution chain, consisting
	 * of any number of interceptors, with the handler itself at the end.
	 * With this method, each interceptor can decide to abort the execution chain,
	 * typically sending a HTTP error or writing a custom response.
	 * <p><strong>Note:</strong> special considerations apply for asynchronous
	 * request processing. For more details see
	 * {@link org.springframework.web.servlet.AsyncHandlerInterceptor}.
	 * @param request current HTTP request
	 * @param response current HTTP response
	 * @param handler chosen handler to execute, for type and/or instance evaluation
	 * @return {@code true} if the execution chain should proceed with the
	 * next interceptor or the handler itself. Else, DispatcherServlet assumes
	 * that this interceptor has already dealt with the response itself.
	 * @throws Exception in case of errors
	 */
	boolean preHandle(HttpServletRequest request, HttpServletResponse response, Object handler)
			throws Exception;

	/**
	 * Intercept the execution of a handler. Called after HandlerAdapter actually
	 * invoked the handler, but before the DispatcherServlet renders the view.
	 * Can expose additional model objects to the view via the given ModelAndView.
	 * <p>DispatcherServlet processes a handler in an execution chain, consisting
	 * of any number of interceptors, with the handler itself at the end.
	 * With this method, each interceptor can post-process an execution,
	 * getting applied in inverse order of the execution chain.
	 * <p><strong>Note:</strong> special considerations apply for asynchronous
	 * request processing. For more details see
	 * {@link org.springframework.web.servlet.AsyncHandlerInterceptor}.
	 * @param request current HTTP request
	 * @param response current HTTP response
	 * @param handler handler (or {@link HandlerMethod}) that started asynchronous
	 * execution, for type and/or instance examination
	 * @param modelAndView the {@code ModelAndView} that the handler returned
	 * (can also be {@code null})
	 * @throws Exception in case of errors
	 */
	void postHandle(
			HttpServletRequest request, HttpServletResponse response, Object handler, ModelAndView modelAndView)
			throws Exception;

	/**
	 * Callback after completion of request processing, that is, after rendering
	 * the view. Will be called on any outcome of handler execution, thus allows
	 * for proper resource cleanup.
	 * <p>Note: Will only be called if this interceptor's {@code preHandle}
	 * method has successfully completed and returned {@code true}!
	 * <p>As with the {@code postHandle} method, the method will be invoked on each
	 * interceptor in the chain in reverse order, so the first interceptor will be
	 * the last to be invoked.
	 * <p><strong>Note:</strong> special considerations apply for asynchronous
	 * request processing. For more details see
	 * {@link org.springframework.web.servlet.AsyncHandlerInterceptor}.
	 * @param request current HTTP request
	 * @param response current HTTP response
	 * @param handler handler (or {@link HandlerMethod}) that started asynchronous
	 * execution, for type and/or instance examination
	 * @param ex exception thrown on handler execution, if any
	 * @throws Exception in case of errors
	 */
	void afterCompletion(
			HttpServletRequest request, HttpServletResponse response, Object handler, Exception ex)
			throws Exception;

}
可以看到接口有3个方法,其含义如下:
preHandle:在执行action里面的处理逻辑之前执行,它返回的是boolean,这里如果我们返回true在接着执行postHandle和afterCompletion,如果我们返回false则中断执行。
postHandle:在执行action里面的逻辑后返回视图之前执行。
afterCompletion:在action返回视图后执行。
借助于HandlerInterceptor我们可以实现很多其它功能,比如日志记录、请求处理时间分析等,权限验证只是其中之一。
二.下面我们就来一步一步来完成注解式权限验证的功能。
首先添加一个账户的Controller和登录的Action及视图来模拟在没有权限时跳转到登陆页面,内容分别如下:
com.ray.controllers包中的AccountController.java:
/**
 * @author Ray
 * @date 2018/4/21 0021
 */
@Controller
@RequestMapping(value = "/account")
public class AccountController {

    @RequestMapping(value = "/login", method = RequestMethod.GET)
    public String login(){
        return "login";
    }
}
views文件夹下的视图login.jsp:
<%@ page language="java" contentType="text/html; charset=UTF-8"
         pageEncoding="UTF-8" %>
<%
    String path = request.getContextPath();
    String basePath = request.getScheme() + "://" + request.getServerName() + ":" + request.getServerPort() + path + "/";
%>
<!DOCTYPE HTML PUBLIC "-//W3C//DTD HTML 4.01 Transitional//EN">
<html>
<head>
    <base href="<%=basePath%>">
    <title>Insert title here</title>
    <meta http-equiv="pragma" content="no-cache">
    <meta http-equiv="cache-control" content="no-cache">
    <meta http-equiv="expires" content="0">
    <meta http-equiv="keywords" content="keyword1,keyword2,keyword3">
    <meta http-equiv="description" content="This is my page">
</head>
<body>
    这里是登录界面
</body>
</html>
新建包com.ray.auth,添加自定义注解AuthPassport,内容如下:
/**
 * @author Ray
 * @date 2018/4/21 0021
 */
@Documented
@Inherited
@Target(ElementType.METHOD)
@Retention(RetentionPolicy.RUNTIME)
public @interface AuthPassport {

    boolean validate() default true;
}
添加自己的拦截器实现AuthInterceptor继承于HandlerInterceptorAdapter,内容如下:
/**
 * @author Ray
 * @date 2018/4/21 0021
 */
public class AuthInterceptor extends HandlerInterceptorAdapter {

    @Override
    public boolean preHandle(HttpServletRequest request, HttpServletResponse response, Object handler) throws Exception {

        if(handler.getClass().isAssignableFrom(HandlerMethod.class)){
            AuthPassport authPassport = ((HandlerMethod)handler).getMethodAnnotation(AuthPassport.class);

            //没有声明需要权限,或者声明不验证权限
            if(authPassport == null || authPassport.validate() == false){
                return true;
            }else{
                //在这里实现自己的权限验证逻辑
                if(false){
                    return true;
                }else{//如果验证失败
                    //返回到登录界面
                    response.sendRedirect("account/login");
                    return false;
                }
            }
        }
        else{
            return true;
        }
    }
}
配置项目的springservlet-config.xml添加如下内容:
<mvc:interceptors>
        <!-- 国际化操作拦截器 如果采用基于(请求/Session/Cookie)则必需配置 -->
        <bean class="org.springframework.web.servlet.i18n.LocaleChangeInterceptor"/>
        <!-- 如果不定义 mvc:mapping path 将拦截所有的URL请求 -->
        <bean class="com.ray.auth.AuthInterceptor"></bean>
    </mvc:interceptors>
这样在执行每个action方法是都会调用AuthInterceptor处理,当判断action上有我们定义AuthPassport注解时就会执行里面的权限验证逻辑。
测试项目所需的Controller和视图indexs.jsp
/**
 * @author Ray
 * @date 2018/4/21 0021
 */
@Controller
public class IndexController {

    @RequestMapping(value = "/hello")
    public ModelAndView index(){
        ModelAndView modelAndView = new ModelAndView();
        modelAndView.addObject("message","Hello World!!");
        modelAndView.setViewName("indexs");
        return modelAndView;
    }
}
<%@ page language="java" contentType="text/html; charset=UTF-8"
         pageEncoding="UTF-8" %>
<%
    String path = request.getContextPath();
    String basePath = request.getScheme() + "://" + request.getServerName() + ":" + request.getServerPort() + path + "/";
%>
<!DOCTYPE HTML PUBLIC "-//W3C//DTD HTML 4.01 Transitional//EN">
<html>
<head>
    <base href="<%=basePath%>">
    <title>Insert title here</title>
    <meta http-equiv="pragma" content="no-cache">
    <meta http-equiv="cache-control" content="no-cache">
    <meta http-equiv="expires" content="0">
    <meta http-equiv="keywords" content="keyword1,keyword2,keyword3">
    <meta http-equiv="description" content="This is my page">
</head>
<body>
    ${message}
</body>
</html>
运行项目:
访问:http://localhost:8080/StringMVC/hello
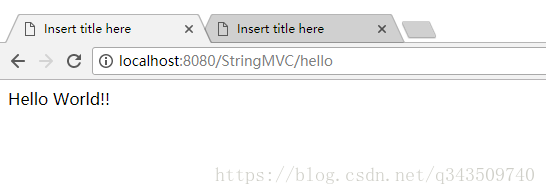
Controller是正常的.
下面我们在HelloworldController的index方法上加上自定义注解AuthPassport:
/**
 * @author Ray
 * @date 2018/4/21 0021
 */
@Controller
public class IndexController {

    @AuthPassport
    @RequestMapping(value = "/hello")
    public ModelAndView index(){
        ModelAndView modelAndView = new ModelAndView();
        modelAndView.addObject("message","Hello World!!");
        modelAndView.setViewName("indexs");
        return modelAndView;
    }
}
重新运行项目:
访问:http://localhost:8080/StringMVC/hello

可以看到正确执行了权限判断逻辑,这样我们只需要在我们在需要权限验证的action上加上这个注解就可以实现权限控制功能了。