
1 安装测试
(1)安装
CMD>conda activate python36
CMD>pip install docutils pygments pypiwin32 kivy.deps.sdl2 kivy.deps.glew
CMD>pip install kivy.deps.gstreamer
CMD>pip install kivy
CMD>pip install kivy_examples
(2)举例
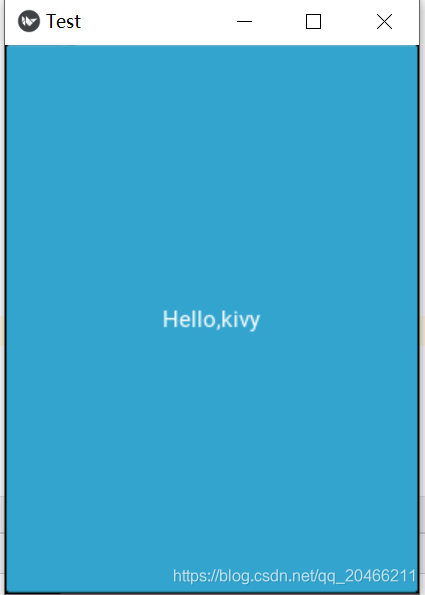
from kivy.app import App
from kivy.uix.button import Button

class TestApp(App):
    def build(self):
        return Button(text='Hello,kivy')

TestApp().run()
运行后输出
[INFO   ] [Logger      ] Record log in C:\Users\user\.kivy\logs\kivy_21-02-07_37.txt
[INFO   ] [deps        ] Successfully imported "kivy_deps.gstreamer" 0.3.1
[INFO   ] [deps        ] Successfully imported "kivy_deps.angle" 0.3.0
[INFO   ] [deps        ] Successfully imported "kivy_deps.glew" 0.3.0
[INFO   ] [deps        ] Successfully imported "kivy_deps.sdl2" 0.3.1
[INFO   ] [Kivy        ] v2.0.0
[INFO   ] [Kivy        ] Installed at "D:\Anaconda3\envs\python36\lib\site-packages\kivy\__init__.py"
[INFO   ] [Python      ] v3.6.10 |Anaconda, Inc.| (default, Jan  7 2020, 15:18:16) [MSC v.1916 64 bit (AMD64)]
[INFO   ] [Python      ] Interpreter at "D:\Anaconda3\envs\python36\python.exe"
[INFO   ] [Factory     ] 186 symbols loaded
[INFO   ] [Image       ] Providers: img_tex, img_dds, img_sdl2 (img_pil, img_ffpyplayer ignored)
[INFO   ] [Text        ] Provider: sdl2
[INFO   ] [Window      ] Provider: sdl2
[INFO   ] [GL          ] Using the "OpenGL" graphics system
[INFO   ] [GL          ] GLEW initialization succeeded
[INFO   ] [GL          ] Backend used <glew>
[INFO   ] [GL          ] OpenGL version <b'4.6.0 - Build 26.20.100.8141'>
[INFO   ] [GL          ] OpenGL vendor <b'Intel'>
[INFO   ] [GL          ] OpenGL renderer <b'Intel(R) UHD Graphics 620'>
[INFO   ] [GL          ] OpenGL parsed version: 4, 6
[INFO   ] [GL          ] Shading version <b'4.60 - Build 26.20.100.8141'>
[INFO   ] [GL          ] Texture max size <16384>
[INFO   ] [GL          ] Texture max units <32>
[INFO   ] [Window      ] auto add sdl2 input provider
[INFO   ] [Window      ] virtual keyboard not allowed, single mode, not docked
[INFO   ] [Base        ] Start application main loop
[INFO   ] [GL          ] NPOT texture support is available
[INFO   ] [Base        ] Leaving application in progress...
2 打包为手机apk【各种小问题】
2.1 安装工具
python-for-android:以下简称p4a,是Kivy官方推荐的打包方式。
WSL:是Windows Subsystem for Linux,就是Windows下的Linux子系统,比较新版的Win10都可以安装。而且WSL和Windows主系统共享一个文件系统,拷贝文件也非常方便。
2.1.1 Windows下的Linux子系统WSL
(1)启用或关闭Windows功能
首先在搜索栏中搜索并打开“启用或关闭Windows功能”,勾选“适用于Linux的Windows子系统”项。只有开启这项设置才能正常安装WSL。
(2)安装 WSL
下载地址列表【https://www.jianshu.com/p/8a62c020a553】。
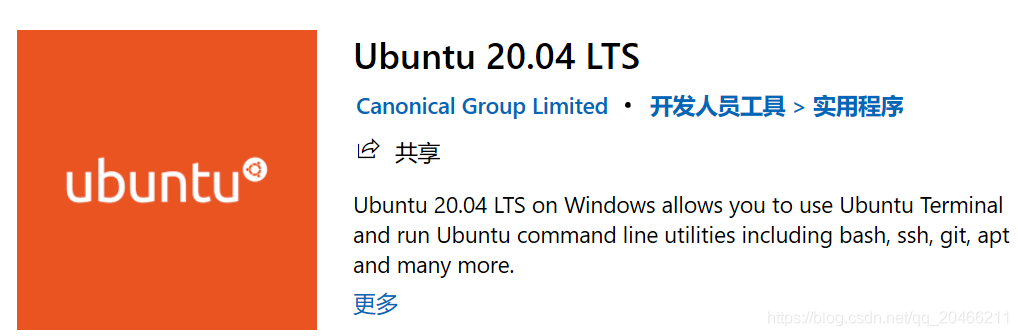
如下下载ubuntu18.04。
https://wslstorestorage.blob.core.windows.net/wslblob/Ubuntu_1804.2019.522.0_x64.appx
如下下载ubuntu18.04 arm。
https://wsldownload.azureedge.net/Ubuntu_1804.2018.726.0_ARM.appx
或者通过microsoft store搜索安装
(3)下载完成后直接双击安装即可
安装完成后,在开始菜单中即可找到自己安装的Linux发行版。在这里,每一个Linux发行版都是一个windows 应用。
设置用户名和密码phone/bigdata。
$ sudo passwd root修改密码bigdata。
$ lsb_release -c【Codename:       focal】
$ uname -a
Linux 2SBT3Z2 4.4.0-18362-Microsoft #1049-Microsoft Thu Aug 14 12:01:00 PST 2020 x86_64 x86_64 x86_64 GNU/Linux
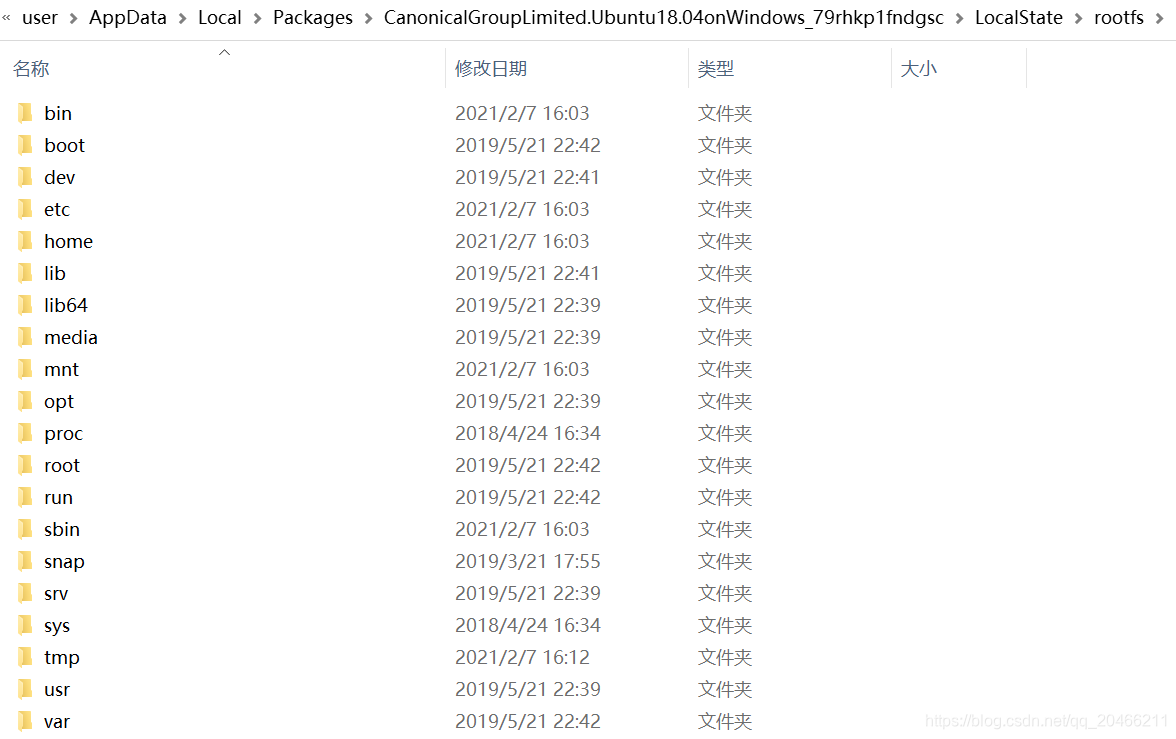
在 Windows 下查看 WSL 文件位置
C:\Users\user\AppData\Local\Packages\CanonicalGroupLimited.Ubuntu20.04onWindows_79rhkp1fndgsc\LocalState\rootfs
 如果想在 Linux 查看其他分区,WSL 将其它盘符挂载在 /mnt 下。
(4)更新源
$sudo vim /etc/apt/sources.list
deb http://mirrors.aliyun.com/ubuntu/ focal main restricted universe multiverse
deb-src http://mirrors.aliyun.com/ubuntu/ focal main restricted universe multiverse
deb http://mirrors.aliyun.com/ubuntu/ focal-security main restricted universe multiverse
deb-src http://mirrors.aliyun.com/ubuntu/ focal-security main restricted universe multiverse
deb http://mirrors.aliyun.com/ubuntu/ focal-updates main restricted universe multiverse
deb-src http://mirrors.aliyun.com/ubuntu/ focal-updates main restricted universe multiverse
deb http://mirrors.aliyun.com/ubuntu/ focal-proposed main restricted universe multiverse
deb-src http://mirrors.aliyun.com/ubuntu/ focal-proposed main restricted universe multiverse
deb http://mirrors.aliyun.com/ubuntu/ focal-backports main restricted universe multiverse
deb-src http://mirrors.aliyun.com/ubuntu/ focal-backports main restricted universe multiverse
18.04 bionic

deb http://mirrors.aliyun.com/ubuntu/ bionic main restricted universe multiverse
deb-src http://mirrors.aliyun.com/ubuntu/ bionic main restricted universe multiverse
deb http://mirrors.aliyun.com/ubuntu/ bionic-security main restricted universe multiverse
deb-src http://mirrors.aliyun.com/ubuntu/ bionic-security main restricted universe multiverse
deb http://mirrors.aliyun.com/ubuntu/ bionic-updates main restricted universe multiverse
deb-src http://mirrors.aliyun.com/ubuntu/ bionic-updates main restricted universe multiverse
deb http://mirrors.aliyun.com/ubuntu/ bionic-proposed main restricted universe multiverse
deb-src http://mirrors.aliyun.com/ubuntu/ bionic-proposed main restricted universe multiverse
deb http://mirrors.aliyun.com/ubuntu/ bionic-backports main restricted universe multiverse
deb-src http://mirrors.aliyun.com/ubuntu/ bionic-backports main restricted universe multiverse
python3【3.6.7】
更新和升级
$ sudo apt-get update
$ sudo apt-get upgrade
2.1.2 安装buildozer的依赖
(1)buildozer基于p4a
sudo apt-get install git zip unzip python3-pip autoconf libtool pkg-config zlib1g-dev libncurses5-dev libncursesw5-dev libtinfo5 cmake libffi-dev libssl-dev lld
(2)设置python3-pip的国内源
$mkdir ~/.pip
$vim ~/.pip/pip.conf
编辑文件内容如下
[global]
index-url = https://mirrors.aliyun.com/pypi/simple/
(3)安装 Cython注意p4a依赖特定版本
$pip3 install --upgrade Cython==0.29.21 virtualenv
2.1.3 安装p4a
(1)安装p4a的依赖
网址https://python-for-android.readthedocs.io/en/latest/quickstart/查看依赖。
sudo dpkg --add-architecture i386
sudo apt-get update
sudo apt-get install build-essential ccache git zlib1g-dev python3 python3-dev libncurses5:i386 libstdc++6:i386 zlib1g:i386  unzip ant ccache autoconf libtool libssl-dev
上面的命令如果出现Package … is not configured yet.的报错,解决方法如下:
sudo mv /var/lib/dpkg/info/ /var/lib/dpkg/info_old/
sudo mkdir /var/lib/dpkg/info/
sudo apt-get update
sudo apt-get -f install
没有报错之后,再执行如下命令
sudo mv /var/lib/dpkg/info/* /var/lib/dpkg/info_old/
sudo rm -rf /var/lib/dpkg/info
sudo mv /var/lib/dpkg/info_old /var/lib/dpkg/info
sudo apt-get update
(2)安装p4a
$ pip3 install python-for-android
2.1.4 安装Android SDK/NDK
注意SDK/NDK的版本,请安装推荐的版本
(1)下载SDK
在下列网页下载Android-SDK,放置于C:\Users\user\Desktop文件夹
https://developer.android.google.cn/studio?hl=zh-cn#downloads
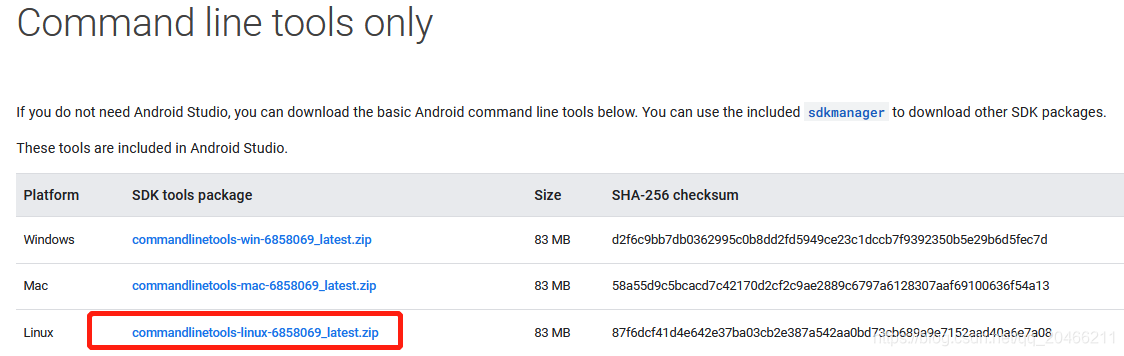 文件名commandlinetools-linux-6858069_latest.zip
(2)下载NDK
下载Android-NDK,放置于C:\Users\user\Desktop文件夹,官方要求版本r19b。可以直接点击r19b下载链接: https://dl.google.com/android/repository/android-ndk-r19b-linux-x86_64.zip?hl=zh_cn
(3)安装
$ mkdir ~/androidsdk
$ cd ~/androidsdk/
$ unzip /mnt/c/Users/user/Desktop/commandlinetools-linux-6858069_latest.zip

$ mkdir ~/Android
$ cd ~/Android
$ mkdir SDK
$ unzip /mnt/c/Users/user/Desktop/android-ndk-r19b-linux-x86_64.zip
(4)部署cmdline-tools
$ cd ~/androidsdk/cmdline-tools/bin
$ ./sdkmanager --sdk_root=$HOME/Android/SDK "cmdline-tools;latest"
(5)添加环境变量
$ vi ~/.bashrc
export ANDROID_SDK_ROOT="$HOME/Android/SDK"
export PATH=$PATH:~/.local/bin/:$ANDROID_SDK_ROOT/cmdline-tools/latest/bin/:$ANDROID_SDK_ROOT/tools/:$ANDROID_SDK_ROOT/platform-tools/

export ANDROIDSDK="$HOME/Android/SDK"
export ANDROIDNDK="$HOME/Android/android-ndk-r19b"
export ANDROIDAPI="27"  # Target API version of your application
export NDKAPI="21"      # Minimum supported API version of your application
删除之前zip文件解压缩的sdk文件夹
$ rm -rf androidsdk/
Ctrl+D关闭窗口,然后再次打开Ubuntu
2.1.5 安装API platform和build-tools
安装 API platform,推荐的API level是27。
$ sdkmanager “platforms;android-27”
$ sdkmanager “build-tools;29.0.0”
可以列举所有可以安装的build-tools的版本
$ sdkmanager --list | grep build-tools
2.1.6 安装jdk
$ sudo apt-get remove openjdk* 卸载自带的openjdk
$ cp /mnt/c/Users/user/Desktop/jdk-8u181-linux-x64.tar.gz /home/phone
$ tar -xzvf jdk-8u181-linux-x64.tar.gz -C /home/phone
$ sudo ln -s /home/phone/jdk1.8.0_181/bin/java /usr/bin/java
2.2 打包使用
To build your application, you need to specify name, version, a package identifier, the bootstrap you want to use (sdl2 for kivy or sdl2 apps) and the requirements:
2.2.1 创建工程
$ mkdir ~/helloworld
$ cd ~/helloworld
$ vi main.py
from kivy.app import App
from kivy.uix.button import Button

class TestApp(App):
    def build(self):
        return Button(text='Hello,kivy')
TestApp().run()
2.2.2 打包命令
$p4a apk --private $HOME/helloworld --package=org.example.myapp --name “My application” --version 0.1 --bootstrap=sdl2 --requirements=python3,kivy==2.0.0
需要注意的是–private $HOME/helloworld是为了指定项目所在的文件夹。
下载后的文件所在位置C:\Users\user\AppData\Local\Packages\CanonicalGroupLimited.Ubuntu20.04onWindows_79rhkp1fndgsc\LocalState\rootfs\home\phone.local\share\python-for-android\packages。
Downloading hostpython3 from https://www.python.org/ftp/python/3.8.1/Python-3.8.1.tgz
SDL2_image-2.0.4.tar.gz
$sudo apt-get update
$sudo apt-get upgrade
$sudo apt-get dist-upgrade
$sudo apt-get install build-essential python-dev python-setuptools python-pip python-smbus
$sudo apt-get install build-essential libncursesw5-dev libgdbm-dev libc6-dev
$sudo apt-get install zlib1g-dev libsqlite3-dev tk-dev
$sudo apt-get install libssl-dev openssl
$sudo apt-get install libffi-dev
$sudo apt-get update
$sudo apt-get install build-essential python-dev python-setuptools python-pip python-smbus
$sudo apt-get install build-essential libncursesw5-dev libgdbm-dev libc6-dev
$sudo apt-get install zlib1g-dev libsqlite3-dev tk-dev
$sudo apt-get install libssl-dev openssl
$sudo apt-get install libffi-dev
$sudo apt-get install libxpm-dev libxext-dev
$sudo apt-get install zlib1g-dev libbz2-dev libssl-dev libncurses5-dev libsqlite3-dev
Cython.Compiler.Errors.InternalError: Internal compiler error: ‘config.pxi’ not found
编译的软件在这个目录下
/home/phone/.local/share/python-for-android/build/other_builds
如果重新打包,可通过下面的命令清除所有下载和构建的内容:
p4a clean_all
如果只想清理内部版本以避免重新下载依赖项,执行下面的命令:
p4a clean_builds && p4a clean_dists
2.2.3 测试
在我的电脑上,用Windows资源管理器访问
C:\Users\user\AppData\Local\Packages\CanonicalGroupLimited.Ubuntu18.04onWindows_79rhkp1fndgsc\LocalState\rootfs\home\phone
可以看到apk文件,你的目录位置也许不同,不过搜索apk的文件名总是可以找到相应位置的。
拷贝那个apk文件到手机里,运行,安装……就可以在手机屏幕上看到安装好的Hello World软件了。
点击它,就可以运行。
2.3 异常及解决
(1)ubuntu configure: error: C compiler cannot create executables
$sudo apt-get install clang && rvm install 1.9.3 --with-gcc=clang
$ sudo apt-get install build-essential
$ sudo apt-get install --reinstall build-essential
$ sudo apt-get install --reinstall gcc
$ sudo dpkg-reconfigure build-essential
$ sudo dpkg-reconfigure gcc
$ sudo apt install gobjc++
(2)无法安装Kivy(Windows 10,python 3.8)
$p4a apk --private $HOME/helloworld --package=org.example.myapp --name “My application” --version 0.1 --bootstrap=sdl2 --requirements=python3,kivy
未指定kivy的版本,默认下载kivy-1.11.1有问题。
$p4a apk --private $HOME/helloworld --package=org.example.myapp --name “My application” --version 0.1 --bootstrap=sdl2 --requirements=python3,kivy==2.0.0
最新的Kivy稳定版确实支持Python 3.8,它可以正常工作
3 使用系统镜像【成功】
将Py文件打包成apk文件,暂有如下3个方法:
(1)通过Buildozer;(在linux环境下实现,集成式框架比较容易实现)。
(2)通过python for android,(这种可以在windows下实现,但需要安装和配置许多内容,较为繁琐)。
(3)通过Kivy Launcher上打包(需要用到谷歌市场,鉴于网络,建议选择别的)。
3.1 虚拟机镜像
(1)安装virtualbox
(2)下载镜像文件LXLE14.04.3(32bit).vdi.zip
解压后大小在10G。
(3)virtualbox创建新的虚拟机
选择linux和ubuntu 32bit,选择已有镜像。
(4)操作系统
用户名和密码osboxes.org/osboxes.org
3.1.1 ubuntu配置网卡
(1)查看网卡信息
#ifconfig【eth0】
(2)配置网卡文件
virtualbox桥接网卡
vi /etc/network/interfaces
默认内容如下
auto lo
iface lo inet loopback
动态IP设置为
auto eth0
iface eth0 inet dhcp
dns-nameservers 223.5.5.5
3.2 使用Buildozer打包
$ cd ~/Desktop/kivycode在这个目录下进行操作。
3.2.1 buildozer.spec文件
使用cd命令进入需要打包项目的同级目录,执行以下命令:
$ buildozer init
这将在项目同级目录中生成一个buildozer.spec文件。使用该文件可以对打包的App进行配置(包括App名称、图标、版本等)。
[app]

# 应用名称(笔者改为“ImportV”)
title = ImportV

# 包名(App故障排除时会用到)
package.name = myapp

# 域名(App故障排除时会用到)
package.domain = org.test

# main.py文件所在位置(由于该配置文件与项目在同级目录,故默认为“.”)
source.dir = .

# 需要打包进来的文件的扩展名
source.include_exts = py,png,jpg,kv,atlas

# 不需要打包进来的文件的扩展名
#source.include_patterns = assets/*,images/*.png

# 不需要打包进来的文件的扩展名
#source.exclude_exts = spec

# 排除的目录
#source.exclude_dirs = tests, bin

# 排除的列表
#source.exclude_patterns = license,images/*/*.jpg

# 应用的版本(写法一)
version = 0.1

# 应用的版本(写法二)
# version.regex = __version__ = ['"](.*)['"]
# version.filename = %(source.dir)s/main.py

# 需安装的依赖包(很重要!!!大部分打包出来的App闪退就是因为有依赖包没有打包进来)
# comma separated e.g. requirements = sqlite3,kivy
requirements = python3,kivy

# 自定义源文件
# Sets custom source for any requirements with recipes
# requirements.source.kivy = ../../kivy

# 通过Garden安装包
#garden_requirements =

# 预加载的图片文件(修改时需要把前面的“#”删掉)
#presplash.filename = %(source.dir)s/data/presplash.png

# 应用图标(修改时需要把前面的“#”删掉),笔者修改为项目中images文件夹下的icon.png
icon.filename = %(source.dir)s/images.icon.png

# 应用支持的方向(landscape, sensorLandscape, portrait 或者 all)
orientation = portrait

# 声明的服务列表
#services = NAME:ENTRYPOINT_TO_PY,NAME2:ENTRYPOINT2_TO_PY

#
# OSX 配置(Android打包不需理会)
#

#
# author = © Copyright Info

# change the major version of python used by the app
osx.python_version = 3

# Kivy version to use
osx.kivy_version = 1.9.1

#
# Android 配置
#

# 全屏显示设为1,非全屏显示设为0
fullscreen = 0

# 预加载的颜色
# Supported formats are: #RRGGBB #AARRGGBB or one of the following names:
# red, blue, green, black, white, gray, cyan, magenta, yellow, lightgray,
# darkgray, grey, lightgrey, darkgrey, aqua, fuchsia, lime, maroon, navy,
# olive, purple, silver, teal.
#android.presplash_color = #FFFFFF

# 申请的权限
#android.permissions = INTERNET

# 支持的Android API版本,越高兼容性越好
#android.api = 27

# 支持最低的Android API版本,越低越好
#android.minapi = 21

# 使用的Android SDK版本
#android.sdk = 20

# 使用的Android NDK版本
#android.ndk = 19b

# 支持的最低的Android NDK API版本
#android.ndk_api = 21

# 使用私有储存(True)或者公有储存(False)
#android.private_storage = True

# Android NDK路径(为空将自动下载)
#android.ndk_path =

# Android SDK路径(为空将自动下载)
#android.sdk_path =

# ANT路径(为空将自动下载)
#android.ant_path =

# 是否跳过更新Android sdk
# This can be useful to avoid excess Internet downloads or save time
# when an update is due and you just want to test/build your package
# android.skip_update = False

# 是否自动接收SDK协议
# agreements. This is intended for automation only. If set to False,
# the default, you will be shown the license when first running
# buildozer.
# android.accept_sdk_license = False

# 默认入口
#android.entrypoint = org.renpy.android.PythonActivity

# Android应用程序的主题,默认适用于kivy开发的应用程序
# android.apptheme = "@android:style/Theme.NoTitleBar"

# 项目白名单
#android.whitelist =

# 白名单路径
#android.whitelist_src =

# 黑名单路径
#android.blacklist_src =

# 添加的Android jar包
# their classes. Don't add jars that you do not need, since extra jars can slow
# down the build process. Allows wildcards matching, for example:
# OUYA-ODK/libs/*.jar
#android.add_jars = foo.jar,bar.jar,path/to/more/*.jar

# 使用的Java文件
# directory containing the files)
#android.add_src =

# 添加Android AAR文档(目前只适用于sdl2_gradle 和 bootstrap)
#android.add_aars =

# 添加Gradle依赖(目前只适用于sdl2_gradle 和 bootstrap)
#android.gradle_dependencies =

# 添加java编译选项
# this can for example be necessary when importing certain java libraries using the 'android.gradle_dependencies' option
# see https://developer.android.com/studio/write/java8-support for further information
# android.add_compile_options = "sourceCompatibility = 1.8", "targetCompatibility = 1.8"

# Gradle存储库添加(对于某些android.gradle_dependencies可能是必需的)
# please enclose in double quotes
# e.g. android.gradle_repositories = "maven { url 'https://kotlin.bintray.com/ktor' }"
#android.add_gradle_repositories =

# 要添加的打包选项
# see https://google.github.io/android-gradle-dsl/current/com.android.build.gradle.internal.dsl.PackagingOptions.html
# can be necessary to solve conflicts in gradle_dependencies
# please enclose in double quotes
# e.g. android.add_packaging_options = "exclude 'META-INF/common.kotlin_module'", "exclude 'META-INF/*.kotlin_module'"
#android.add_gradle_repositories =

# 添加的Java类
#android.add_activities = com.example.ExampleActivity

# 控制台类别,应设置为GAME 或者 APP
# If you leave this blank, OUYA support will not be enabled
#android.ouya.category = GAME

# 控制台图标文件,必须是732x412 的png图片
#android.ouya.icon.filename = %(source.dir)s/data/ouya_icon.png

# XML 文件过滤器
#android.manifest.intent_filters =

# 设置启动模式为主活动
#android.manifest.launch_mode = standard

# Android附加库复制进 libs/armeabi
#android.add_libs_armeabi = libs/android/*.so
#android.add_libs_armeabi_v7a = libs/android-v7/*.so
#android.add_libs_arm64_v8a = libs/android-v8/*.so
#android.add_libs_x86 = libs/android-x86/*.so
#android.add_libs_mips = libs/android-mips/*.so

# 屏幕是否常亮
# Don't forget to add the WAKE_LOCK permission if you set this to True
#android.wakelock = False

# Android应用程序元数据设置(key=value format)
#android.meta_data =

# 要添加的Android库
#android.library_references =

# Android共享库添加
#android.uses_library =

# Android日志过滤
#android.logcat_filters = *:S python:D

# 用复制库取代生成的libpymodules.so
#android.copy_libs = 1

# 主要后构建的Android框架,可选项: armeabi-v7a, arm64-v8a, x86, x86_64
android.arch = armeabi-v7a

# 覆盖版本计算(在build.gradle中使用)
# this is not the same as app version and should only be edited if you know what you're doing
# android.numeric_version = 1

#
# Python for android 配置
#

# 使用python-for-android fork分支,默认为upstream (kivy)
#p4a.fork = kivy

# 使用python-for-android branch分支,默认为master
#p4a.branch = master

# Python-for-Android下载路径,为空默认为从git下载
#p4a.source_dir =

# 本地的构建方法
#p4a.local_recipes =

# p4a相关文件
#p4a.hook =

# 用于构建Android的Bootstrap
# p4a.bootstrap = sdl2

# P4a端口号
#p4a.port =


#
# iOS 配置(Android打包不必理会)
#

# (str) Path to a custom kivy-ios folder
#ios.kivy_ios_dir = ../kivy-ios
# Alternately, specify the URL and branch of a git checkout:
ios.kivy_ios_url = https://github.com/kivy/kivy-ios
ios.kivy_ios_branch = master

# Another platform dependency: ios-deploy
# Uncomment to use a custom checkout
#ios.ios_deploy_dir = ../ios_deploy
# Or specify URL and branch
ios.ios_deploy_url = https://github.com/phonegap/ios-deploy
ios.ios_deploy_branch = 1.7.0

# (str) Name of the certificate to use for signing the debug version
# Get a list of available identities: buildozer ios list_identities
#ios.codesign.debug = "iPhone Developer: <lastname> <firstname> (<hexstring>)"

# (str) Name of the certificate to use for signing the release version
#ios.codesign.release = %(ios.codesign.debug)s


[buildozer]

# (int) Log level (0 = error only, 1 = info, 2 = debug (with command output))
log_level = 2

# (int) Display warning if buildozer is run as root (0 = False, 1 = True)
warn_on_root = 1

# (str) Path to build artifact storage, absolute or relative to spec file
# build_dir = ./.buildozer

# (str) Path to build output (i.e. .apk, .ipa) storage
# bin_dir = ./bin

#    -----------------------------------------------------------------------------
#    List as sections
#
#    You can define all the "list" as [section:key].
#    Each line will be considered as a option to the list.
#    Let's take [app] / source.exclude_patterns.
#    Instead of doing:
#
#[app]
#source.exclude_patterns = license,data/audio/*.wav,data/images/original/*
#
#    This can be translated into:
#
#[app:source.exclude_patterns]
#license
#data/audio/*.wav
#data/images/original/*
#


#    -----------------------------------------------------------------------------
#    Profiles
#
#    You can extend section / key with a profile
#    For example, you want to deploy a demo version of your application without
#    HD content. You could first change the title to add "(demo)" in the name
#    and extend the excluded directories to remove the HD content.
#
#[app@demo]
#title = My Application (demo)
#
#[app:source.exclude_patterns@demo]
#images/hd/*
#
#    Then, invoke the command line with the "demo" profile:
#
#buildozer --profile demo android debug
3.2.2 打包
$ buildozer android debug deploy run
该命令将在同级目录bin文件夹下生成一个调试版的apk文件。首次打包过程需要安装很多依赖和包,且需要同意一个协议。
打包完成后,将apk文件安装到Android手机中,安装后即可打开。