定义
Java Database Connection = Java数据库连接

使用方法
首先导入依赖
<dependency>
    <groupId>mysql</groupId>
    <artifactId>mysql-connector-java</artifactId>
    <version>5.1.47</version>
</dependency>
1. 注册驱动
    DriverManager.registerDriver(new Driver());

2. 获取连接
    Connection connection = DriverManager.getConnection("url","username","password");

3. 创建Statement对象,构建sql请求
    Statement statement = connection.getStatement();

4. 执行sql,拿到返回结果
    Resultset resultSet = statement.executeQuery("select * from users");

5. 处理返回结果,解析
    while (resultSet.next()){


         String name = resultSet.getString("name");
    }

6. 关闭资源
    connection.close();
    statement.close();
    resultSet.close();
原始案例
package com.cskaoyan;
import com.mysql.jdbc.Driver;
import java.sql.*;
public class JDBCTest {
public static void main(String[] args) throws SQLException {
//注册驱动
DriverManager.registerDriver(new Driver());
//获取连接
Connection connection = DriverManager.getConnection("jdbc:mysql://localhost:3306/db1", "root", "123456");
//创建statement对象
Statement statement = connection.createStatement();
//执行sql语句,获得resultSet对象
ResultSet resultSet = statement.executeQuery("select * from users");
//处理返回结果
while (resultSet.next()){
//只处理user表中的name用来演示
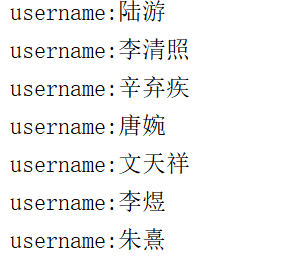
String username = resultSet.getString("username");
System.out.println("username:" + username);
}
//释放资源
connection.close();
statement.close();
resultSet.close();
}
}
对象解析:
- DriverManager
驱动管理器,提供了两个API
第一个API是注册驱动
DriverManager.registerDriver(new Driver());
第二个API是获取连接
Connection conn = DriverManager.getConnection(url,username,password); - Connection
这个就是一个连接对象,它表示了我们Java程序和Mysql服务器之间的连接 - Statement
这个对象用于我们的JDBC向数据库发送SQL语句,并执行获取返回结果 - ResultSet
这个对象是用来封装查询的结果
resultSet.next(); 这个API就类似于我们的Iterator里面维护的游标,执行一次next() 方法,游标就移动一个位置
输出结果:
优化一:把连接、用户名、密码都放到配置文件
首先在properties文件中配置如下:
url=jdbc:mysql://localhost:3306/db1?characterEncoding=utf-8&userSSL=false
username=root
password=123456
driverClassName=com.mysql.jdbc.Driver
注意:在url的尾部加入了characterEncoding=utf-8使我们能向数据库中写入中文。
源代码改为:
package com.cskaoyan;

import com.mysql.jdbc.Driver;

import java.io.IOException;
import java.io.InputStream;
import java.sql.*;
import java.util.Properties;

public class JDBCTest {


    private static String url;
    private static String username;
    private static String password;

    static {


        try {


            //创建properties对象
            Properties properties = new Properties();
            //获得类加载器
            ClassLoader classLoader = JDBCTest.class.getClassLoader();
            //获得输入流
            InputStream inputStream = classLoader.getResourceAsStream("jdbc.properties");
            //加载到properties对象里
            properties.load(inputStream);

            url = properties.getProperty("url");
            username = properties.getProperty("username");
            password = properties.getProperty("password");
        } catch (IOException e) {


            e.printStackTrace();
        }

    }
    public static void main(String[] args) throws SQLException {


        //注册驱动
        DriverManager.registerDriver(new Driver());

        //获取连接
        Connection connection = DriverManager.getConnection(url, username, password);

        //创建statement对象
        Statement statement = connection.createStatement();

        //执行sql语句,获得resultSet对象
        ResultSet resultSet = statement.executeQuery("select * from users");

        //处理返回结果
        while (resultSet.next()){


            //只处理user表中的name用来演示
            String username = resultSet.getString("username");
            System.out.println("username:" + username);
        }

        //释放资源
        connection.close();
        statement.close();
        resultSet.close();
    }
}
得到的结果与原始代码一致
优化二:升级为JDBCUtils
我们可以将以上代码写到一个工具类中
使用工具类中的getConnection()方法就能获取到与数据库的连接。使用releaseSources()方法就可以释放资源。
这样,我们调用工具类的那两个方法就能获得连接和释放资源了。
package com.cskaoyan.utils;

import com.cskaoyan.JDBCTest;

import java.io.IOException;
import java.io.InputStream;
import java.sql.*;
import java.util.Properties;

public class JDBCUtils {


    private static String url;
    private static String username;
    private static String password;
    private static String driverClassName;

    static {


        try {


            //创建properties对象
            Properties properties = new Properties();
            //获得类加载器
            ClassLoader classLoader = JDBCTest.class.getClassLoader();
            //获得输入流
            InputStream inputStream = classLoader.getResourceAsStream("jdbc.properties");
            //加载到properties对象里
            properties.load(inputStream);

            url = properties.getProperty("url");
            username = properties.getProperty("username");
            password = properties.getProperty("password");
            driverClassName = properties.getProperty("driverClassName");

        } catch (IOException e) {


            e.printStackTrace();
        }
    }

    public static Connection getConnection(){


        Connection connection = null;

        try {


            //注册驱动
            Class.forName(driverClassName);

            //获取连接
            connection = DriverManager.getConnection(url, username, password);
        } catch (ClassNotFoundException e) {


            e.printStackTrace();
        } catch (SQLException e) {


            e.printStackTrace();
        }

        //将获取到的连接返回
        return connection;
    }

    public static void releaseSources(Connection connection, Statement statement, ResultSet resultSet){


        try {


            connection.close();
            statement.close();
            resultSet.close();
        } catch (SQLException e) {


            e.printStackTrace();
        }
    }
}
注意:这次我们在配置文件中用到了刚刚配置的driverClassName=com.mysql.jdbc.Driver,我们使用Class.forName(driverClassName);来注册驱动,以后如果需要换MySQL以外的数据库我们只需要改配置文件即可。
使用测试类
首先导入依赖
 <dependency>
    <groupId>junit</groupId>
    <artifactId>junit</artifactId>
    <version>4.12</version>
</dependency>
一、注解的执行顺序

二、对数据库进行增删改查
package com.cskaoyan;

import com.cskaoyan.utils.JDBCUtils;
import org.junit.AfterClass;
import org.junit.BeforeClass;
import org.junit.Test;

import java.sql.Connection;
import java.sql.ResultSet;
import java.sql.SQLException;
import java.sql.Statement;

public class JDBCTest {


    static Connection connection = null;
    static Statement statement = null;
    static ResultSet resultSet = null;


    // 初始化资源
    @BeforeClass
    public static void init() throws SQLException {


        connection = JDBCUtils.getConnection();
        statement = connection.createStatement();

    }

    // 关闭资源
    @AfterClass
    public static void destroy(){


        JDBCUtils.releaseSources(connection,statement,resultSet);
    }

    @Test
    public void testAdd() throws SQLException {


        String sql = "insert into users values (3,'苏轼','888888',41,'male')";

        // 返回的结果是影响的行数
        int affectedRows = statement.executeUpdate(sql);

        System.out.println("影响的行数:" + affectedRows);
    }

    @Test
    public void testDelete() throws SQLException {


        String sql = "delete from users where id=10";

        // 返回的结果是影响的行数
        int affectedRows = statement.executeUpdate(sql);

        System.out.println("影响的行数:" + affectedRows);

    }

    @Test
    public void testUpdate() throws SQLException {


        String sql = "update users set username='岳飞' where id=8";

        // 返回的结果是影响的行数
        int affectedRows = statement.executeUpdate(sql);

        System.out.println("影响的行数:" + affectedRows);
    }

    @Test
    public void testFind() throws SQLException {


        String sql = "select * from users";

        resultSet = statement.executeQuery(sql);

        while (resultSet.next()){


            int id = resultSet.getInt("id");
            String username = resultSet.getString("username");
            String password = resultSet.getString("password");
            int age = resultSet.getInt("age");
            String gender = resultSet.getString("gender");
            System.out.println(id + username + password + age + gender);
        }

    }

}
数据库注入问题
所谓SQL注入,就是通过把SQL命令插入到Web表单提交或输入域名或页面请求的查询字符串,最终达到欺骗服务器执行恶意的SQL命令
在刚刚的案例中我们使用statement.excuteQuery(String sql) 这个API的时候,假如我们的sql是由字符串拼接而来, 那么在我们拼接字符串的时候,假如字符串里面加入了 or 1=1 这样的关键字,那么就会去做全局匹配,可能就会导致我们的sql语句跳过验证逻辑,产生安全隐患。
模拟数据库注入问题:
package com.cskaoyan;

import com.cskaoyan.utils.JDBCUtils;
import org.junit.AfterClass;
import org.junit.BeforeClass;
import org.junit.Test;

import java.sql.Connection;
import java.sql.ResultSet;
import java.sql.SQLException;
import java.sql.Statement;

public class JDBCTest2 {


    static Connection connection = null;
    static Statement statement = null;
    static ResultSet resultSet = null;

    // 初始化资源
    @BeforeClass
    public static void init() throws SQLException {


        connection = JDBCUtils.getConnection();
        statement = connection.createStatement();

    }

    // 关闭资源
    @AfterClass
    public static void destroy(){


        JDBCUtils.releaseSources(connection,statement,resultSet);
    }

    @Test //正常登录
    public void testNormalLogin() throws SQLException {


        //输入正确的账号和密码
        login("苏轼","888888");
    }

    @Test
    public void testAbnormalLogin() throws SQLException {


        //输入随机的账号和含有sql命令的密码
        login("韩寒","111111' or '1=1");
    }


    //核对用户名和密码
    public Boolean login(String username,String password) throws SQLException {


        String sql = "select * from users where username = '"+ username + "' and password  = '"+ password + "'";

        resultSet = statement.executeQuery(sql);

        if(resultSet.next()){


            System.out.println("欢迎您:" + resultSet.getString("username"));
            return true;
        }

        return false;
    }


}
观察到testNormalLogin()和testAbnormalLogin()都能登录进去,出现了sql注入问题。
解决办法:使用connection.prepareStatement();
package com.cskaoyan;

import com.cskaoyan.utils.JDBCUtils;
import org.junit.AfterClass;
import org.junit.BeforeClass;
import org.junit.Test;

import java.sql.*;

public class JDBCTest3 {


    static Connection connection = null;
    static Statement statement = null;
    static ResultSet resultSet = null;

    // 初始化资源
    @BeforeClass
    public static void init() throws SQLException {


        connection = JDBCUtils.getConnection();
        statement = connection.createStatement();

    }

    // 关闭资源
    @AfterClass
    public static void destroy(){


        JDBCUtils.releaseSources(connection,statement,resultSet);
    }

    @Test //正常登录
    public void testNormalLogin() throws SQLException {


        //输入正确的账号和密码
        login("苏轼","888888");
    }

    @Test
    public void testAbnormalLogin() throws SQLException {


        //输入随机的账号和含有sql命令的密码
        login("韩寒","111111' or '1=1");
    }


    //核对用户名和密码
    public Boolean login(String username,String password) throws SQLException {


        // ? 表示占位符
        String sql = "select * from users where username = ? and password = ?";
        //这一句话,会对我们的sql语句去进行预编译,后续我们只需要把 ?填充进来即可,填充进来的都是值,不会是关键字
        PreparedStatement preparedStatement = connection.prepareStatement(sql);
        //填充?
        preparedStatement.setString(1,username);
        preparedStatement.setString(2,password);

        ResultSet resultSet = preparedStatement.executeQuery();

        if (resultSet.next()){


            System.out.println("欢迎您:" + resultSet.getString("username"));
            return true;
        }

        return false;
    }


}
我只改变了login()方法,发现testNormalLogin()可以登录,而testAbnormalLogin()已经不能正常登录了,sql注入问题解决。
批处理
不管是 Statement 还是 PreparedStatement,执行一条 SQL 语句,客户端都要和服务器进行一次通信,这样效率就比较低下。因此,MySQL 提供了批处理功能。
一般使用到如下方法:
-
void addBatch(String sql)
将给定的 SQL 命令添加到此 Statement 对象的当前(批处理的)命令列表中。 -
int[] executeBatch()
将一批命令提交给数据库来执行,如果全部命令执行成功,则返回更新计数组成的数组。 -
void clearBatch()
清空此 Statement 对象的当前 SQL (批处理的)命令列表。
注意:rewriteBatchedStatements=true才是jdbc实现批量操作的关键,需要在url后面加上这句话。
url=jdbc:mysql://localhost:3306/db1?characterEncoding=utf-8&userSSL=false&rewriteBatchedStatements=true
测试代码:
package com.cskaoyan;

import com.cskaoyan.utils.JDBCUtils;
import org.junit.AfterClass;
import org.junit.BeforeClass;
import org.junit.Test;

import java.sql.*;

public class BatchTest {


    static Connection connection = null;
    static Statement statement = null;
    static ResultSet resultSet = null;

    // 初始化资源
    @BeforeClass
    public static void init() throws SQLException {


        connection = JDBCUtils.getConnection();
        statement = connection.createStatement();

    }

    // 关闭资源
    @AfterClass
    public static void destroy(){


        JDBCUtils.releaseSources(connection,statement,resultSet);
    }

    // 用statement批处理
    @Test
    public void staTest() throws SQLException {


        long startTime = System.currentTimeMillis();

        String sql = "insert into person values (null,'卡卡西',34)";
        //插入100w条数据
        for (int i = 0; i < 1000000; i++) {


            statement.addBatch(sql);
        }
        statement.executeBatch();

        long endTime = System.currentTimeMillis();

        //记录需要的时间
        System.out.println(endTime - startTime);//604477
    }

    //用prepareStatement批处理
    @Test
    public void preTest() throws SQLException {


        long startTime = System.currentTimeMillis();

        PreparedStatement preparedStatement = connection.prepareStatement("insert into person values(null,?,?)");
        //插入100w条数据
        for (int i = 0; i < 1000000; i++) {


            preparedStatement.setString(1, "鸣人");
            preparedStatement.setString(2, "13");

            preparedStatement.addBatch();
        }
        preparedStatement.executeBatch();

        long endTime = System.currentTimeMillis();

        //记录需要的时间
        System.out.println(endTime - startTime);//5072
    }

}
我们发现用statement批处理需要604.477秒,而用prepareStatement批处理只需要5.072秒。