准备工作
- maven添加依赖AOP切入点表达式
<!--        用于解析AOP切入点表达式-->
        <dependency>
            <groupId>org.aspectj</groupId>
            <artifactId>aspectjweaver</artifactId>
            <version>1.9.6</version>
        </dependency>
使用注解配置实现AOP
- 编写业务类
//将该类交给spring来管理
@Service
public class AccountServiceImpl implements AccountService {


    public void saveAccount() {


        System.out.println("保存了数据");
       // int i=1/0;
    }

    public void updateAccount(String i) {


        System.out.println("更新了数据"+i);
    }

    public int deleteAccount() {


        System.out.println("删除了数据");
        return 0;
    }

}
- 编写切入类:
//将该类交给spring来管理
@Component
//表明当前类是一个切面类
@Aspect
//使用该注解可以开启注解AOP的支持,不必在spring核心配置文件beans.xml配置<aop:aspectj-autoproxy/>
//@EnableAspectJAutoProxy
public class Logger {


    @Pointcut("execution(* com.chenhui.service.AccountServiceImpl.*(..))")
    private void pc(){

    }


    //用于打印日志,计划让其在切入点方法执行之前执行(前置通知)
    @Before("pc()")
    public void beforePrintLog(){


        System.out.println("Logger类中的beforePrintLog()方法开始记录日志了");
    }
    //(后置通知)
    @AfterReturning("pc()")
    public void afterReturningPrintLog(){


        System.out.println("Logger类中的afterReturningPrintLog()方法开始记录日志了");
    }
    //异常通知
    @AfterThrowing("pc()")
    public void afterThrowingPrintLog(){


        System.out.println("Logger类中的afterThrowingPrintLog()方法开始记录日志了");
    }
    //最终通知
    @After("pc()")
    public void afterPrintLog(){


        System.out.println("Logger类中的afterPrintLog()方法开始记录日志了");
    }
}
- 在spring核心配置文件配置
<?xml version="1.0" encoding="UTF-8"?>
<beans xmlns="http://www.springframework.org/schema/beans"
       xmlns:xsi="http://www.w3.org/2001/XMLSchema-instance"
       xmlns:context="http://www.springframework.org/schema/context"
       xmlns:aop="http://www.springframework.org/schema/aop"
       xsi:schemaLocation="http://www.springframework.org/schema/beans
        https://www.springframework.org/schema/beans/spring-beans.xsd
        http://www.springframework.org/schema/context
        https://www.springframework.org/schema/context/spring-context.xsd
        http://www.springframework.org/schema/aop
        https://www.springframework.org/schema/aop/spring-aop.xsd">

<!--    配置spring容器创建时需要扫描的包-->
        <context:component-scan base-package="com.chenhui"></context:component-scan>

<!--配置Spring开启注解AOP的支持-->
        <aop:aspectj-autoproxy></aop:aspectj-autoproxy>
</beans>
测试类:
public class TestMain {


    public static void main(String[] args) {


        ApplicationContext applicationContext=new ClassPathXmlApplicationContext("beans.xml");
        //注意:此时获取出的bean对象是一个proxy类型的类,它是AccountService的一个实现类,也是代理类,
        //此时不能传入AccountServiceImpl.class,因为他们是同级,不能转化,只能通过接口转化,他们都是实现了AccountService接口
        AccountService accountService = applicationContext.getBean("accountServiceImpl", AccountService.class);
        //执行方法
        accountService.saveAccount();

    }
}
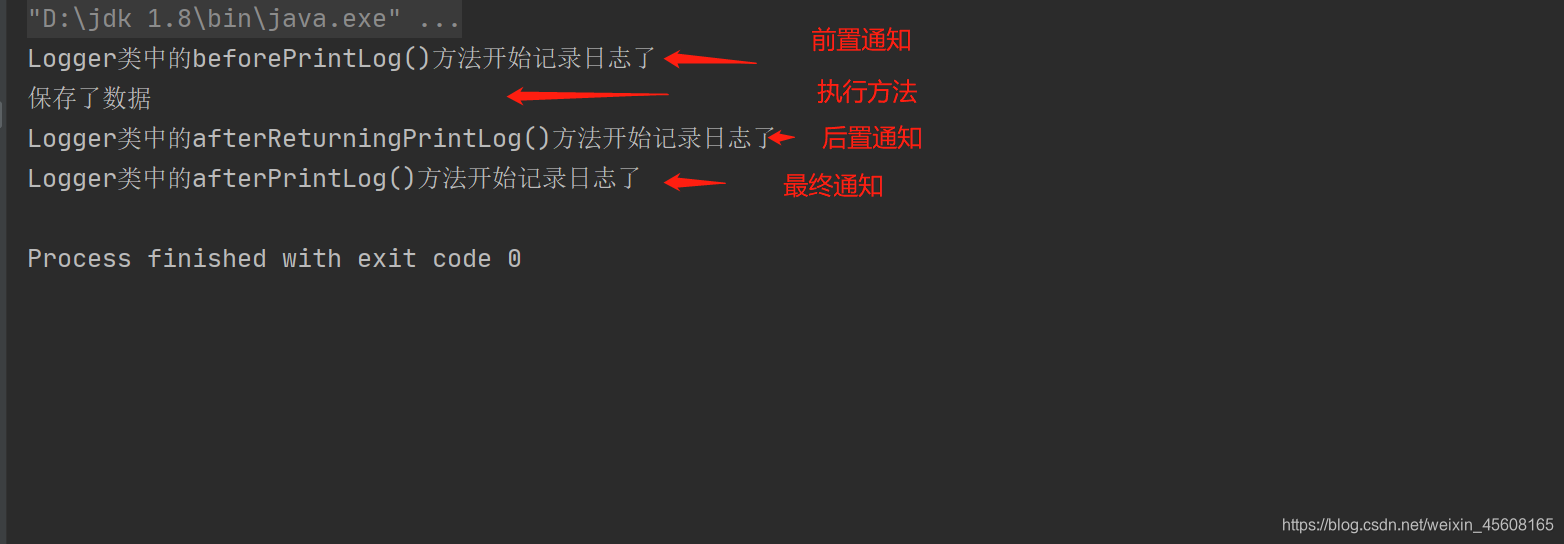
结果:

注意:
通过aop命名空间的<aop:aspectj-autoproxy />声明自动为spring容器中那些配置@aspectJ切面的bean创建代理,织入切面。当然,spring 在内部依旧采用AnnotationAwareAspectJAutoProxyCreator进行自动代理的创建工作,但具体实现的细节已经被<aop:aspectj-autoproxy />隐藏起来了
<aop:aspectj-autoproxy />有一个proxy-target-class属性,默认为false,表示使用jdk动态代理织入增强,当配为<aop:aspectj-autoproxy poxy-target-class=“true”/>时,表示使用CGLib动态代理技术织入增强。不过即使proxy-target-class设置为false,如果目标类没有声明接口,则spring将自动使用CGLib动态代理。