一、IDEA新建项目
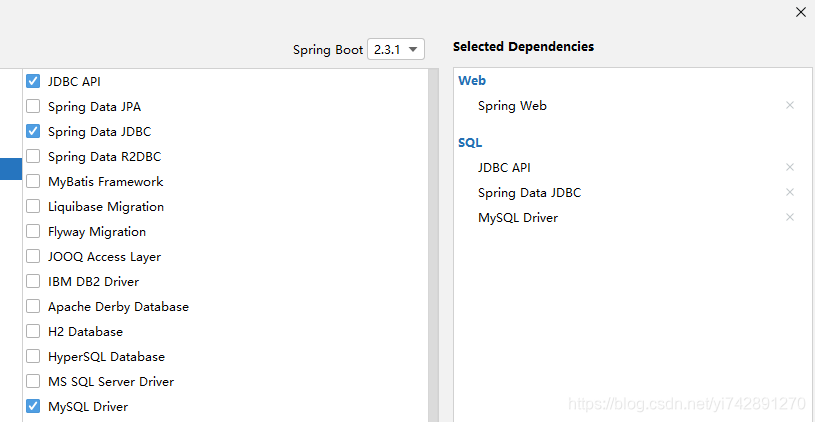
在新建的时候选择这些,就会自动导入依赖,就是这几个依赖
<dependency>
	<groupId>org.springframework.boot</groupId>
	<artifactId>spring-boot-starter-jdbc</artifactId>
</dependency>
<dependency>
	<groupId>mysql</groupId>
	<artifactId>mysql-connector-java</artifactId>
	<scope>runtime</scope>
</dependency>
二、连接本地数据库
1、先类一个测试类
首先,进入`application.yml修改配置
spring:
  datasource:
    url: jdbc:mysql://localhost:3306/jdbc?useUnicode=true&characterEncoding=UTF-8&useSSL=false&autoReconnect=true&failOverReadOnly=false&serverTimezone=GMT%2B8
    username: root
    password: root
    driver-class-name: com.mysql.jdbc.Driver
url:后面接的是jdbc:mysql://地址:端口号/jdbc[?其他设置]useUnicode=true:是否使用编译码characterEncoding=UTF-8:传统艺能UTF8useSSL=false:是否使用SSL协议进行连接autoReconnect=true:连接数据库超时设置failOverReadOnly:自动重连成功后,连接是否设置为只读?serverTimezone=GMT%2B8指定时区,否则会出错,北京时间东八区
在测试类里面测试一下
@SpringBootTest
class DemoApplicationTests {


    @Autowired
    DataSource dataSource;

    @Test
    void contextLoads() throws SQLException {


    	//看看是哪个类
        System.out.println(dataSource.getClass());
        //获得连接
        Connection connection = dataSource.getConnection();
        //输出连接的地址
        System.out.println(connection);
        //关闭连接
        connection.close();

    }

}
这个是启动的时候有的
Loading class
com.mysql.jdbc.Driver'. This is deprecated. The new driver class iscom.mysql.cj.jdbc.Driver’. The driver is automatically registered via the SPI and manual loading of the driver class is generally unnecessary.
该方法的控制台
class com.zaxxer.hikari.HikariDataSource
HikariProxyConnection@289336712 wrapping com.mysql.cj.jdbc.ConnectionImpl@5f0677f3
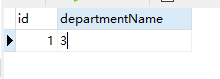
2、创造表,并且把数据显示到网页上
比如department.sql,创建一个表并且插入一个数据
DROP TABLE IF EXISTS `department`;
CREATE TABLE `department` (
  `id` int(11) NOT NULL AUTO_INCREMENT,
  `departmentName` varchar(255) DEFAULT NULL,
  PRIMARY KEY (`id`)
) ENGINE=InnoDB AUTO_INCREMENT=1 DEFAULT CHARSET=utf8;

INSERT into department values(1,3);
yml文件
spring:
  datasource:
    url: jdbc:mysql://localhost:3306/jdbc?useUnicode=true&characterEncoding=UTF-8&useSSL=false&autoReconnect=true&failOverReadOnly=false&serverTimezone=GMT%2B8
    username: root
    password: root
    driver-class-name: com.mysql.jdbc.Driver
    schema:
      classpath:department.sql
    initialization-mode: always
initialization-mode: always:SpringBoot中配置启动时的数据库初始化脚本,检查在resources下是否有schema.sql,有的话就执行(schema.sql是每次运行程序都会执行的sql文件),没有的话看下面是否有schemaschema: classpath:department.sql:添加一个指定的sql文件,名字随便起但要对应得上,放在resources下- 记得这个SQL文件是放在resources下的,要是放在resources/sql下,要
classpath:sql/department.sql
控制类:
package com.qiang.controller;
import org.springframework.beans.factory.annotation.Autowired;
import org.springframework.jdbc.core.JdbcTemplate;
import org.springframework.web.bind.annotation.GetMapping;
import org.springframework.web.bind.annotation.RequestMapping;
import org.springframework.web.bind.annotation.RestController;
import java.util.List;
import java.util.Map;
@RestController
public class HelloController {
//自动获得数据库的东西
@Autowired
JdbcTemplate jdbcTemplate;
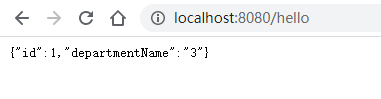
@RequestMapping("/hello")
public Map<String, Object> map(){
List<Map<String, Object>> list = jdbcTemplate.queryForList("select * from department");
System.out.println(list.get(0));
return list.get(0);
}
}
@RestController:@ResponseBody+@Controller,记得要返回HTML去掉@ResponseBodyJdbcTemplate:JdbcTemplate是Spring对JDBC的封装,目的是使JDBC更加易于使用,可以使用@Autowired匹配对应的数据库.queryForList("SQL命令"):返回List
三、整合Druid数据源
虽然Hikari是默认的数据库类,但是,我们还可以更方便。比如PHP的Phpmyadmin,那个可以在网页端查看数据库的东西,改资料什么的,Druid也差不多是这个
- 导入maven
- 配置yml中的值
- 在配置类里面把Druid添加到容器中,然后注册Servlet,Filter
<!-- https://mvnrepository.com/artifact/com.alibaba/druid -->
 <dependency>
     <groupId>com.alibaba</groupId>
     <artifactId>druid</artifactId>
     <version>1.1.23</version>
 </dependency>
yml:
spring:
  datasource:
    url: jdbc:mysql://localhost:3306/jdbc?useUnicode=true&characterEncoding=UTF-8&useSSL=false&autoReconnect=true&failOverReadOnly=false&serverTimezone=GMT%2B8
    # useUnicode=true是否
    # useSSL=false:进行SSL协议
    username: root
    password: root
    driver-class-name: com.mysql.jdbc.Driver
    schema:
      - classpath:sql/department.sql
    initialization-mode: always
    type: com.alibaba.druid.pool.DruidDataSource

    initialSize: 5
    minIdle: 5
    maxActive: 20
    maxWait: 60000
    timeBetweenEvictionRunsMillis: 60000
    minEvictableIdleTimeMillis: 300000
    validationQuery: SELECT 1 FROM DUAL
    testWhileIdle: true
    testOnBorrow: false
    testOnReturn: false
    poolPreparedStatements: true
#    #   配置监控统计拦截的filters,去掉后监控界面sql无法统计,'wall'用于防火墙
    filters: stat,wall,slf4j
    maxPoolPreparedStatementPerConnectionSize: 20
    useGlobalDataSourceStat: true
    connectionProperties: druid.stat.mergeSql=true;druid.stat.slowSqlMillis=500
- 其中,下面那一大堆数据都是Druid特有的配置,但我也不知道是什么。。。就配置而已,查一下就可以得到的
- 最重要的是
filters: stat,wall,slf4j,看你自己的日志文件是什么,要对应上
DruidConfig.java:
@Configuration
public class DruidConfig {
@ConfigurationProperties(prefix = "spring.datasource")
@Bean
public DataSource dataSource(){
return new DruidDataSource();
}
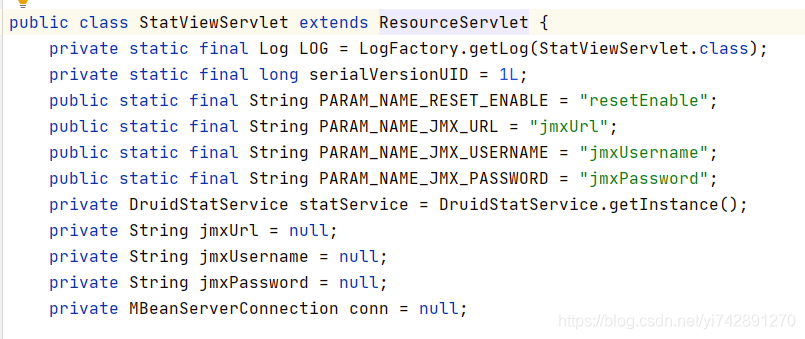
@Bean
public ServletRegistrationBean statViewServlet(){
ServletRegistrationBean bean = new ServletRegistrationBean(new StatViewServlet(),"/druid/*");
Map<String ,String > initParams =new HashMap<>();
initParams.put("loginUsername","root");
initParams.put("loginPassword","root");
initParams.put("allow","");
bean.setInitParameters(initParams);
return bean;
}
@Bean
public FilterRegistrationBean webStatusFilter(){
FilterRegistrationBean bean=new FilterRegistrationBean();
bean.setFilter(new WebStatFilter());
Map<String ,String > initParams =new HashMap<>();
initParams.put("exclusions", "*.js,*.css,/druid/*");
bean.setInitParameters(initParams);
bean.setUrlPatterns(Arrays.asList("/*"));
return bean;
}
}
dataSource():要用到那个@ConfigurationProperties,获得对应的yml值。然后返回一个Druid类型的对象statViewServlet():这是一个注册Servlet的函数,创建new StatViewServlet()对象,请求为/druid/*,其中/druid/*以下的内容就是druid的页面
里面可以创建一个Map<String ,String >,用来设置Druid的参数,然后再用setInitParameters
webStatusFilter():过滤器类,过滤器类为WebStatFilter(),也是Druid的东西,里面设置参数一样是创建一个Map,然后用setInitParameters,
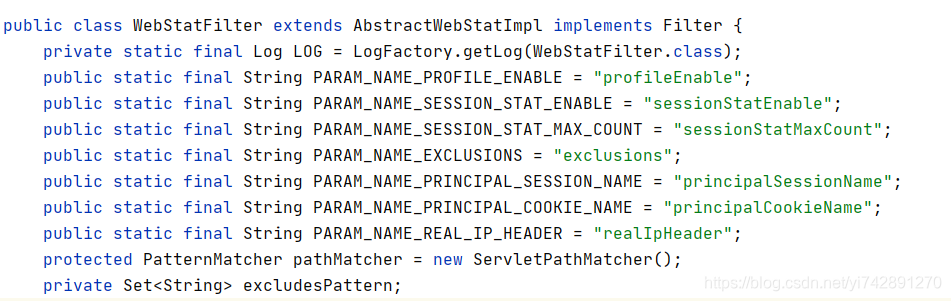
exclusions用来不过滤谁setUrlPatterns过滤谁
Druid界面
localhost:8080/druid然后登陆进去,账号密码就是上面设置的

四、mybatis
mybatis是一个可以让java和SQL进行更加简单操作的东西
<dependency>
      <groupId>org.mybatis.spring.boot</groupId>
      <artifactId>mybatis-spring-boot-starter</artifactId>
      <version>2.1.3</version>
  </dependency>
1、注解版
1)事先准备
比如我们还是用到那个Department表,先创建表,还有实体类
CREATE TABLE `department` (
  `id` int(11) NOT NULL AUTO_INCREMENT,
  `departmentName` varchar(255) DEFAULT NULL,
  PRIMARY KEY (`id`)
) ENGINE=InnoDB AUTO_INCREMENT=1 DEFAULT CHARSET=utf8;
public class Department {


    private int id;
    private String departmentName;
   }
要创建该表的记得在YML中加该SQL路径
2)创建Mapper接口
Mapper是一个【数据库层,里面全部写有关数据库操作的事,增删改查】
@Mapper
public interface DepartmentMapper {


    @Select("select * from department where id = #{id}")
    public Department getDeptById(int id);

    @Delete("delete from department where id = #{id}")
    public int deleteDeptById(int id);

    @Options(useGeneratedKeys = true,keyProperty = "id") //使用自增长,并且说明id是自增长的
    @Insert("insert into department(departmentName) values(#{departmentName})")
    public int insertDept(Department department);

    @Update("update department set departmentName = #{departmentName} where id = #{id}")
    public int updateDept(Department department);
}
@Mapper:表明这是一个Mapper- 可以看到啊,查找的就用
@Select,删除用@Delete,都是一一对应的 - 就比如查的id是动态的,那么就用
#{id},这里的id对应的是函数里面的参数,这个要一一对应。这里还有个特殊的,比如插入:注解里面写的是#{departmentName},而函数里面是Department department。这里的类型看起来都对应不上,但是departmentName是Department的属性,mybatis会自动识别的,这就很简单了
3)控制层
和所有的一样,我们的操作都是从浏览器的请求,通过控制层用Mapping ,获得数据。然后再用相对应的请求,去做相对应的数据库操作。
@RestController
public class DeptController {
@Autowired
DepartmentMapper departmentMapper;
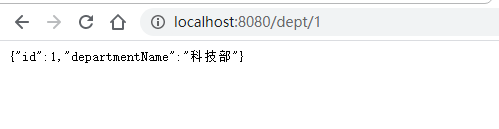
@GetMapping("/dept/{id}")
public Department getDept(@PathVariable("id") int id){
return departmentMapper.getDeptById(id);
}
@GetMapping("/dept")
public Department insertDept(Department department){
departmentMapper.insertDept(department);
return department;
}
}
DepartmentMapper可以进行@Autowired自动导入getDept():比如发送请求/dept/1,通过@PathVariable("id")得到id=1,然后调用departmentMapper下的getDeptById(id)。那边就得到id=1,进行查询where id = 1insertDept():这个只是个测试而已,插入我们是要用POST请求的,然后通过input获得Department的属性。测试就用http://localhost:8080/dept?departmentName=财务部,就获得department.departmentName=财务部,Mapper层就会进行插入数据了

2、mybatis的设置
给容器中添加一个ConfigurationCustomizer
@org.springframework.context.annotation.Configuration
public class MybatisConfig {


    public ConfigurationCustomizer configurationCustomizer(){


        return new ConfigurationCustomizer() {


            @Override
            public void customize(Configuration configuration) {


                //进行对应的设置,比如开启驼峰法命名
                configuration.setMapUnderscoreToCamelCase(true);
            }
        };
    }
}
3、使用MapperScan批量扫描所有的Mapper接口
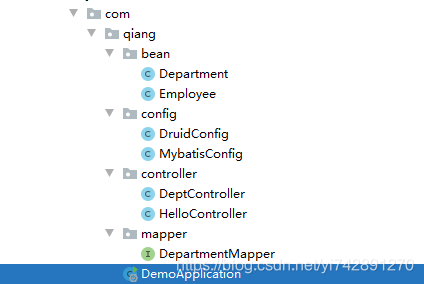
众所周知,每一个Mapper文件都要在前面加一个@Mapper,但是我们可以在主程序加一个@MapperScan(value = "com.qiang.mapper"),这样就可以扫描mapper文件夹下的所有mapper文件
@MapperScan(value = "com.qiang.mapper")
@SpringBootApplication
public class DemoApplication {


    public static void main(String[] args) {


        SpringApplication.run(DemoApplication.class, args);
    }

}
4、配置文件版
1)事先准备
我们用另外一个表吧。
CREATE TABLE `employee` (
  `id` int(11) NOT NULL AUTO_INCREMENT,
  `lastName` varchar(255) DEFAULT NULL,
  `email` varchar(255) DEFAULT NULL,
  `gender` int(2) DEFAULT NULL,
  `d_id` int(11) DEFAULT NULL,
  PRIMARY KEY (`id`)
) ENGINE=InnoDB AUTO_INCREMENT=1 DEFAULT CHARSET=utf8;
要用的话记得在YML加该SQL路径
public class Employee {


    private int id;
    private String lastName;
    private String email;
    private int gender;
    private int d_id;
    }
2)配置mybatis
上面我们是用注解版,但是,听说什么动态SQL用不了。这个是原生版的而且很复杂
官方文档
官方文档说,我们要在XML创建一个SqlSessionFactory,并且给出了代码例子
mybatis-config.xml:
<?xml version="1.0" encoding="UTF-8" ?>
<!DOCTYPE configuration
        PUBLIC "-//mybatis.org//DTD Config 3.0//EN"
        "http://mybatis.org/dtd/mybatis-3-config.dtd">
<configuration>
<!--    这里面写配置的东西,比如开启驼峰命名法-->
    <settings>
        <setting name="mapUnderscoreToCamelCase" value="true"/>
    </settings>
</configuration>
<!--全局配置文件-->
3)EmployeeMapper
这里的Mapper,只不过没有注解
@Mapper
public interface EmployeeMapper {


    public Employee getById(int id);
    public void insertEmp(Employee employee);
}
4)controller
@RestController
public class DeptController {
@Autowired
EmployeeMapper employeeMapper;
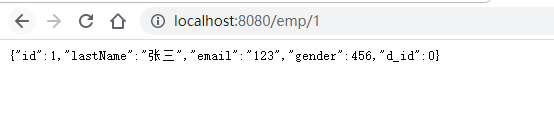
@GetMapping("/emp/{id}")
public Employee getEmpById(@PathVariable("id") int id){
return employeeMapper.getById(id);
}
}
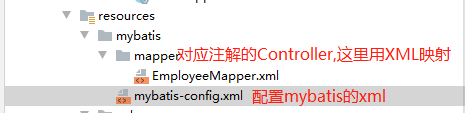
5)映射,就是相当于上面的注解
<?xml version="1.0" encoding="UTF-8" ?>
<!DOCTYPE mapper
        PUBLIC "-//mybatis.org//DTD Mapper 3.0//EN"
        "http://mybatis.org/dtd/mybatis-3-mapper.dtd">
<mapper namespace="com.qiang.mapper.EmployeeMapper">
<!--public Employee getById(int id);
    public void insertEmp(Employee employee);-->
    <select id="getById" resultType="com.qiang.bean.Employee">
        select * from employee where id=#{id}
    </select>
    <insert id="insertEmp">
        insert into employee(lastName,email,gender,d_id) values (#{lastName},#{email},#{gender},#{d_id})
    </insert>
</mapper>
mapper namespace用的是哪个Mapper- 可以看到select标签做
@Select()的东西,insert标签做@Insert的东西
6)YML添加配置
mybatis:
  config-location: classpath:mybatis/mybatis-config.xml
  mapper-locations:
    - classpath:mybatis/mapper/EmployeeMapper.xml
看到这么多,我都不知道配置文件版哪里好了,写这么多。注解版就一个Mapper里面全写注解,一个Controller就好了,这个还要配YML,还要写两个XML
到目前为止的代码 选springboot-JDBC下载
五、JPA
JPA:Java 持久化 API。这个是个Java用来简化SQL的东西,可以让你少写SQL语句甚至不写SQL语句,就是这么神奇
创建项目
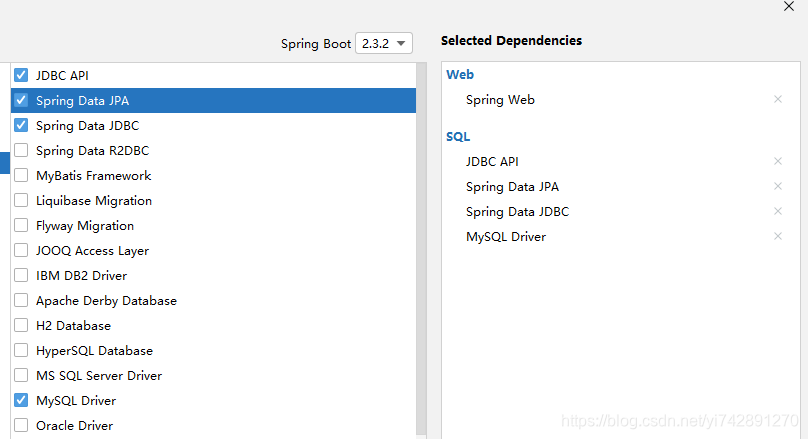
<dependency>
    <groupId>org.springframework.boot</groupId>
    <artifactId>spring-boot-starter-data-jpa</artifactId>
</dependency>
1、MYSQL创建数据库与YML配置数据库
创建数据库就行,因为表会在Java用JPA创建的
spring:
  datasource:
    url: jdbc:mysql://localhost:3306/jpa?useUnicode=true&characterEncoding=UTF-8&useSSL=false&autoReconnect=true&failOverReadOnly=false&serverTimezone=GMT%2B8
    # useUnicode=true是否
    # useSSL=false:进行SSL协议
    username: root
    password: root
    driver-class-name: com.mysql.jdbc.Driver
#进行有关JPA的设置
  jpa:
    hibernate:
#     更新或者创建数据表,如果已经创建表了的,就不再创了
      ddl-auto: update
#   控制台显示SQL
    show-sql: true
2、创建实体类
这个和在上面的mybatis的有点类似,也是要弄个实体类,不过也有点不同。这里的实体类是创建数据库表的
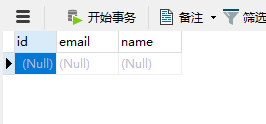
@Entity
@Table(name = "user")
@JsonIgnoreProperties(value={

    "hibernateLazyInitializer"})
public class User {


    @Id//主键
    @GeneratedValue(strategy = GenerationType.IDENTITY)//自增长
    private Integer id;

    @Column(name = "name",length = 50)//对应数据表的一个列
    private String name;
    @Column//省略默认列名就是属性名
    private String email;

//剩下的get与set,空容器和满容器,tostring重写,一定都要写,不写识别不了
- 这里表明了id为主键,并且是自增长的:
id int(11) NOT NULL AUTO_INCREMENT, PRIMARY KEY (id) @Entity表明这是一个实体类@Table可以起表名,如果不写的话,表名就是小写的类名@JsonIgnoreProperties为了能让Java把数据转成JSON传入到数据库中@Column//省略默认列名就是属性名name varchar(50)email varchar(255)
3、DAO层(继承JpaRepository类)
编写一个Dao接口来操作实体类对应的数据表(Repository)
/*
继承JpaRepository进行数据库的操作
泛型的第一个参数是实体类,第二个参数是实体类的主键(数据库主键)
 */
public interface UserRepository extends JpaRepository<User,Integer> {


}
这个时候,如果启动程序,就会创建表的了

4、控制类
控制类老传统艺能了
@RestController
public class UserController {
@Autowired
UserRepository userRepository;
@GetMapping("/user/{id}")
public User getUserById(@PathVariable("id") Integer id){
User user = userRepository.findById(id).get();
return user;
}
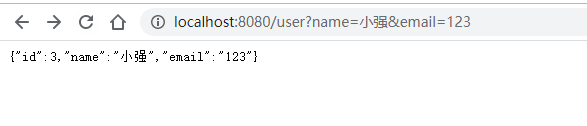
@GetMapping("/user")
public User insertUser(User user){
User save = userRepository.save(user);
return save;
}
@GetMapping("/delete/{id}")
public void deleteUser(@PathVariable("id") Integer id){
userRepository.deleteById(id);
}
}
UserRepository你记得这是要自动注入就对了userRepository.findById(id).get();这个findById()嘛,就是查找id了,返回类型是Optional<T>,这个类型有个方法.get()。返回User类型的。这一行就完成了select * from user where id = #{id}了,是不是很神奇- 然后下面的
save也是一样 - 改的话,这个有点不一样,但哪个视频说要是深入JPA就要去看深入的视频
JPA代码:下载springboot-JPA