一、开发步骤
- 导入spring-jdbc和spring-tx坐标
- 创建数据库表和实体
- 创建JdbcTemplate对象
- 执行数据库操作
二、具体步骤
- 导入坐标
<dependency>
  <groupId>mysql</groupId>
  <artifactId>mysql-connector-java</artifactId>
  <version>8.0.25</version>
</dependency>
<dependency>
  <groupId>com.alibaba</groupId>
  <artifactId>druid</artifactId>
  <version>1.2.7</version>
</dependency>
<dependency>
  <groupId>org.springframework</groupId>
  <artifactId>spring-jdbc</artifactId>
  <version>5.3.10</version>
</dependency>
<dependency>
  <groupId>org.springframework</groupId>
  <artifactId>spring-tx</artifactId>
  <version>5.3.10</version>
</dependency>
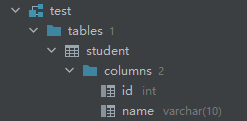
- 在mysql中创建一个test数据库和student数据表,设置id和name两个字段
- 创建一个student.class,设置两个属性id与name,设置getter和setter方法
@Controller
public class Student {


    private String name;
    private int age;

    public String getName() {


        return name;
    }

    public void setName(String name) {


        this.name = name;
    }

    public int getAge() {


        return age;
    }

    public void setAge(int age) {


        this.age = age;
    }

    @Override
    public String toString() {


        return "Student{" +
                "name='" + name + '\'' +
                ", age=" + age +
                '}';
    }
}
- 使用Junit测试JdbcTemplate的插入操作
@Test
public void test1(){
DruidDataSource dataSource = new DruidDataSource();
dataSource.setDriverClassName("com.mysql.jdbc.Driver");
dataSource.setUrl("jdbc:mysql://192.168.10.134:3306/test");
dataSource.setUsername("root");
dataSource.setPassword("970725");
JdbcTemplate jdbcTemplate = new JdbcTemplate();
jdbcTemplate.setDataSource(dataSource);
int row = jdbcTemplate.update("insert into student value (?,?)", 12, "qwe");
System.out.println(row);
}
三、简化操作,将JDBCTemplate对象交由spring产生
- 在resources目录下创建applicationContext文件
    <bean id="dataSource" class="com.alibaba.druid.pool.DruidDataSource">
        <property name="driverClassName" value="com.mysql.jdbc.Driver"/>
        <property name="url" value="jdbc:mysql://192.168.10.134:3306/test"/>
        <property name="username" value="root"/>
        <property name="password" value="970725"/>
    </bean>
    <bean id="jdbcTemplate" class="org.springframework.jdbc.core.JdbcTemplate">
        <property name="dataSource" ref="dataSource"/>
    </bean>
- 使用Junit测试插入操作
@Test
public void test1(){


    ApplicationContext app = new ClassPathXmlApplicationContext("applicationContext.xml");
    JdbcTemplate jdbcTemplate = (JdbcTemplate) app.getBean("jdbcTemplate");
    int row = jdbcTemplate.update("insert into student (id,name) values (?,?);", 13, "asd");
    System.out.println(row);
}
四、抽取JdbcTemplate类
五、使用JdbcTemplate进行查询操作
- 查询全部
@Test
public void test1(){


    ApplicationContext app = new ClassPathXmlApplicationContext("applicationContext.xml");
    JdbcTemplate jdbcTemplate = (JdbcTemplate) app.getBean("jdbcTemplate");
    List<Student> students = jdbcTemplate.query("select * from student", new BeanPropertyRowMapper<Student>(Student.class));
    for (Student s:students){


        System.out.println(s);
    }
}
- 查询单个
@Test
public void test1(){


    ApplicationContext app = new ClassPathXmlApplicationContext("applicationContext.xml");
    JdbcTemplate jdbcTemplate = (JdbcTemplate) app.getBean("jdbcTemplate");
    Student student = jdbcTemplate.queryForObject("select * from student where id=?", new BeanPropertyRowMapper<Student>(Student.class), 12);
    System.out.println(student);
}
- 查询总数
@Test
public void test1(){


    ApplicationContext app = new ClassPathXmlApplicationContext("applicationContext.xml");
    JdbcTemplate jdbcTemplate = (JdbcTemplate) app.getBean("jdbcTemplate");
    Integer integer = jdbcTemplate.queryForObject("select count(*) from student", Integer.class);
    System.out.println(integer);
}