1.创建文件
1-1.新建可视化的dataModel
新建文件 -> core data -> Data Model -> .xcdatamodeld (格式)
在.xcdatamodeld可视化界面,Add Entity 创建实体。
实体,就是跟数据库进行映射的对象。
NSManagedObject — 对应数据库中的一条记录。
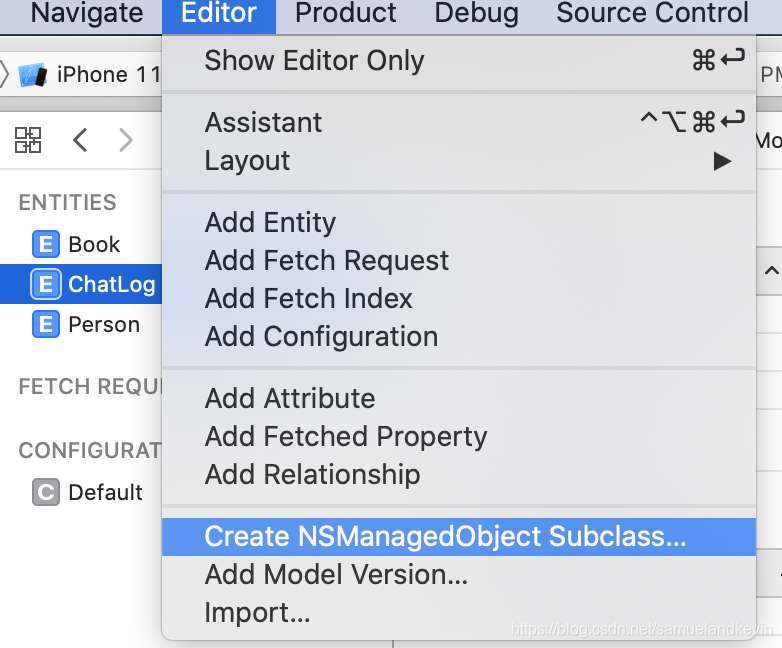
2-2.新建NSManagedObject
选中某个Entity,点击Editor,Create NSManagedObject Subclass…
NSManagedObject 是对应着Entity,管理实体对象的代码。
如下图:
3.api说明
NSManagedObjectContext 管理对象,上下文,持久性存储模型对象,处理数据与应用的交互
NSManagedObjectModel 被管理的数据模型,数据结构
NSPersistentStoreCoordinator 添加数据库,设置数据存储的名字,位置,存储方式
NSManagedObject 被管理的数据记录
NSFetchRequest 数据请求
NSEntityDescription 表格实体结构
4.增删改查
打开数据库,初始化环境
/**
 *  打开数据库
 */
- (void)openDB
{
    /*
     回顾SQLite的操作方式(持久化)

     1. opendb打开数据库,如果第一次运行,会在沙盒中创建数据库
     2. 打开数据库之后,会生成一个数据库连接的句柄->_db,后续的数据库操作均基于该句柄进行
     3. 创建数据表(IF NOT EXISTS)

     ** Core Data的操作方式
     1. 将所有定义好的数据模型文件合并成为一个数据模型(NSManagedObjectModel)
        建立起针对实体对应的数据表的SQL语句,以便创建数据表
     2. 用数据模型来创建持久化存储调度,此时就具备了创建表的能力
     3. 为存储调度添加持久化的数据存储(SQLite数据库),如果没有,新建并创建数据表
        如果已经存在,直接打开数据库。

        在打开数据库之后,会判断实体当前的结构与数据表的描述结构是否一致,如果不一致,会提示打开失败!
     */
    // 创建数据库
    // 1. 实例化数据模型(将所有定义的模型都加载进来)
    // merge——合并
    NSManagedObjectModel *model = [NSManagedObjectModel mergedModelFromBundles:nil];

    // 2. 实例化持久化存储调度,要建立起桥梁,需要模型
    NSPersistentStoreCoordinator *store = [[NSPersistentStoreCoordinator alloc] initWithManagedObjectModel:model];

    // 3. 添加一个持久化的数据库到存储调度
    // 3.1 建立数据库保存在沙盒的URL
    NSArray *docs = NSSearchPathForDirectoriesInDomains(NSDocumentDirectory, NSUserDomainMask, YES);
    NSString *path = [docs[0] stringByAppendingPathComponent:@"my.db"];
    NSURL *url = [NSURL fileURLWithPath:path];

    // 3.2 打开或者新建数据库文件
    // 如果文件不存在,则新建之后打开
    // 否者直接打开数据库
    NSError *error = nil;
    [store addPersistentStoreWithType:NSSQLiteStoreType configuration:nil URL:url options:nil error:&error];

    if (error) {
        NSLog(@"打开数据库出错 - %@", error.localizedDescription);
    } else {
        NSLog(@"打开数据库成功!");

        _context = [[NSManagedObjectContext alloc] init];

        _context.persistentStoreCoordinator = store;
    }
}
删除
#pragma mark - 数据库操作方法

/**
 *  删除记录
 */
- (void)removePerson
{
    // 1. 实例化查询请求
    NSFetchRequest *request = [NSFetchRequest fetchRequestWithEntityName:@"Person"];

    // 2. 设置谓词条件
    request.predicate = [NSPredicate predicateWithFormat:@"name = '张老头'"];

    // 3. 由上下文查询数据
    NSArray *result = [_context executeFetchRequest:request error:nil];

    // 4. 输出结果
    for (Person *person in result) {
        NSLog(@"%@ %@ %@", person.name, person.age, person.phoneNo);

        // 删除一条记录
        [_context deleteObject:person];
        break;
    }

    // 5. 通知_context保存数据
    if ([_context save:nil]) {
        NSLog(@"删除成功");
    } else {
        NSLog(@"删除失败");
    }
}
更新
/**
 *  更新数据
 *
 *  在常规开发中,应该首先加载所有的数据,帮顶到UITableView中,该数组中保存所有的Person记录,
 *  如果是这种情况,在修改个人记录时,是无需再次去查询数据库的。
 *
 *  在实际开发中,通常是从表格中选中某一行,获取到对应的NSManagedObject,然后进行修改
 *  如此,便可以只修改唯一一条记录了。
 */
- (void)updatePerson
{
    // 1. 实例化查询请求
    NSFetchRequest *request = [NSFetchRequest fetchRequestWithEntityName:@"Book"];

    // 2. 设置谓词条件
    request.predicate = [NSPredicate predicateWithFormat:@"author CONTAINS '大忽悠'"];

    // 3. 由上下文查询数据
    NSArray *result = [_context executeFetchRequest:request error:nil];

    // 4. 输出结果
    for (Book *book in result) {
        NSLog(@"%@ %@ %@", book.name, book.author, book.price);

        // 更新书名
        book.name = @"西游记";
    }

    // 通知上下文保存保存
    [_context save:nil];
}
查询
/**
 *  查询所有用户记录
 */
- (void)allPersons
{
    // 1. 实例化一个查询(Fetch)请求
    NSFetchRequest *request = [NSFetchRequest fetchRequestWithEntityName:@"Person"];

    // 3. 条件查询,通过谓词来实现的
//    request.predicate = [NSPredicate predicateWithFormat:@"age < 60 && name LIKE '*五'"];
    // 在谓词中CONTAINS类似于数据库的 LIKE '%王%'
//    request.predicate = [NSPredicate predicateWithFormat:@"phoneNo CONTAINS '1'"];
    // 如果要通过key path查询字段,需要使用%K
//    request.predicate = [NSPredicate predicateWithFormat:@"%K CONTAINS '1'", @"phoneNo"];
    // 直接查询字表中的条件

    // 2. 让_context执行查询数据
    NSArray *array = [_context executeFetchRequest:request error:nil];

    for (Person *p in array) {
        NSLog(@"%@ %@ %@", p.name, p.age, p.phoneNo);

        // 在CoreData中,查询是懒加载的
        // 在CoreData本身的SQL查询中,是不使用JOIN的,不需要外键
        // 这种方式的优点是:内存占用相对较小,但是磁盘读写的频率会较高
        for (Book *b in p.books) {
            NSLog(@"%@ %@ %@", b.name, b.price, b.author);
        }
    }

//    for (Book *b in array) {
//        NSLog(@"%@ %@ %@", b.name, b.price, b.author);
//    }
}
新增
/**
 新增个人记录
 */
- (void)addPerson
{
    /**
     回顾SQL新增记录的过程

     1. 拼接一个INSERT的SQL语句
     2. 执行SQL
     */
    // 1. 实例化并让context“准备”将一条个人记录增加到数据库
    Person *p = [NSEntityDescription insertNewObjectForEntityForName:@"Person" inManagedObjectContext:_context];

    // 2. 设置个人信息
    p.name = @"张老头";
    p.age = @10;
    p.phoneNo = @"100";
    p.image = UIImagePNGRepresentation([UIImage imageNamed:@"头像1"]);

    // 3. 新增书,实例化并通知上下文准备加书
    Book *b = [NSEntityDescription insertNewObjectForEntityForName:@"Book" inManagedObjectContext:_context];
    b.name = @"太极真经";
    b.price = @20000.99;
    b.author = @"太极忽悠";

    Book *b2 = [NSEntityDescription insertNewObjectForEntityForName:@"Book" inManagedObjectContext:_context];
    b2.name = @"一阳神功";
    b2.price = @0.99;
    b2.author = @"老忽悠";

    NSSet *bookSet = [NSSet setWithObjects:b, b2, nil];
    p.books = bookSet;

    // 3. 保存(让context保存当前的修改)
    if ([_context save:nil]) {
        NSLog(@"新增成功");
    } else {
        NSLog(@"新增失败");
    }
}
版本迁移
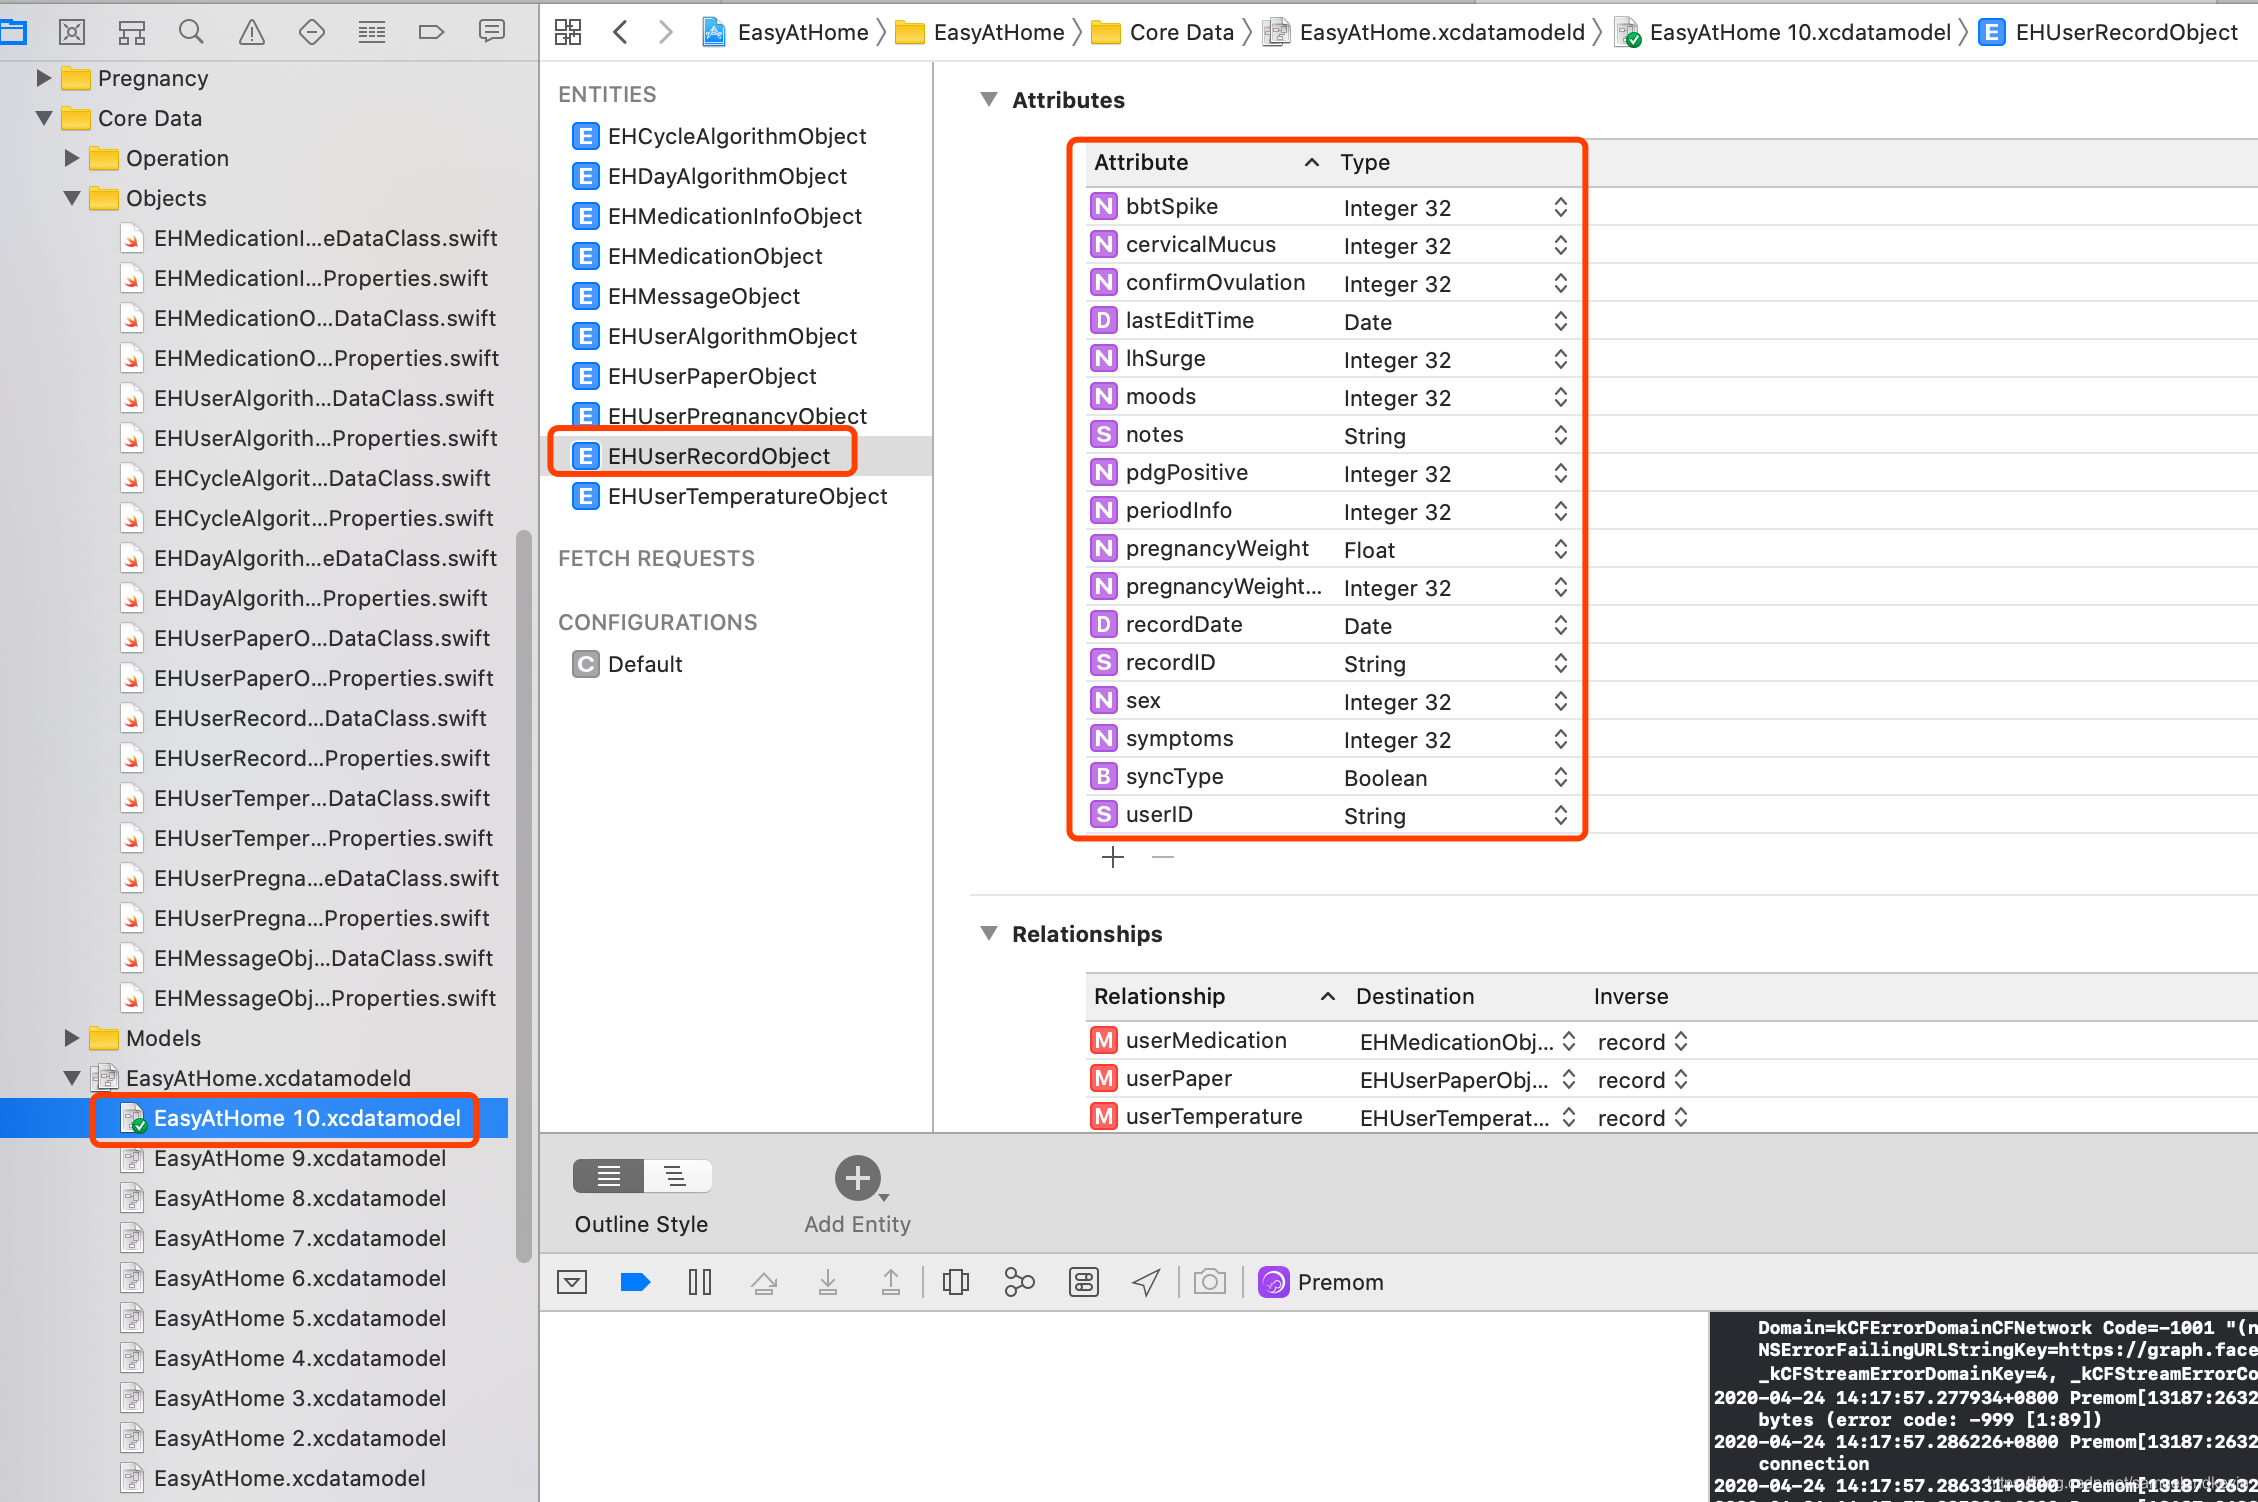
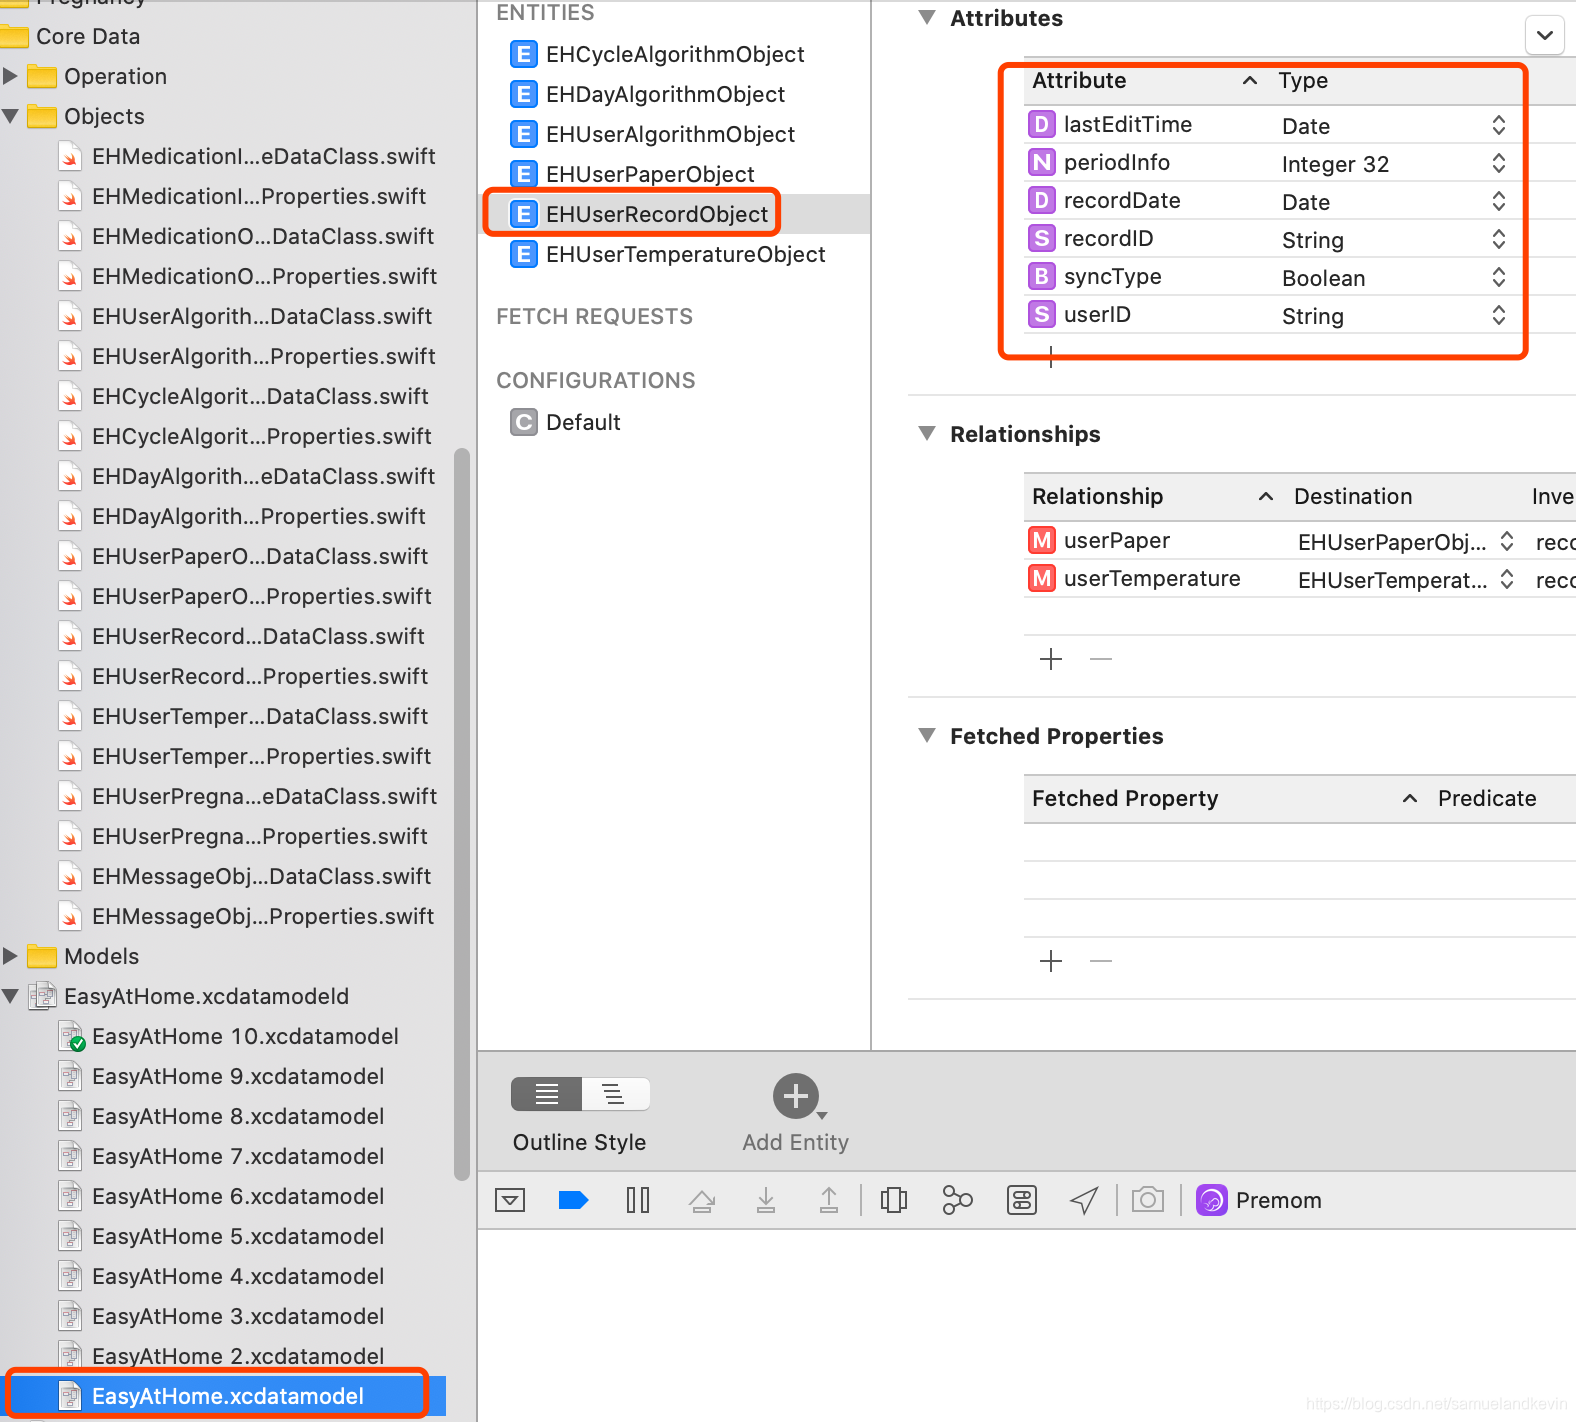
数据库第一版:
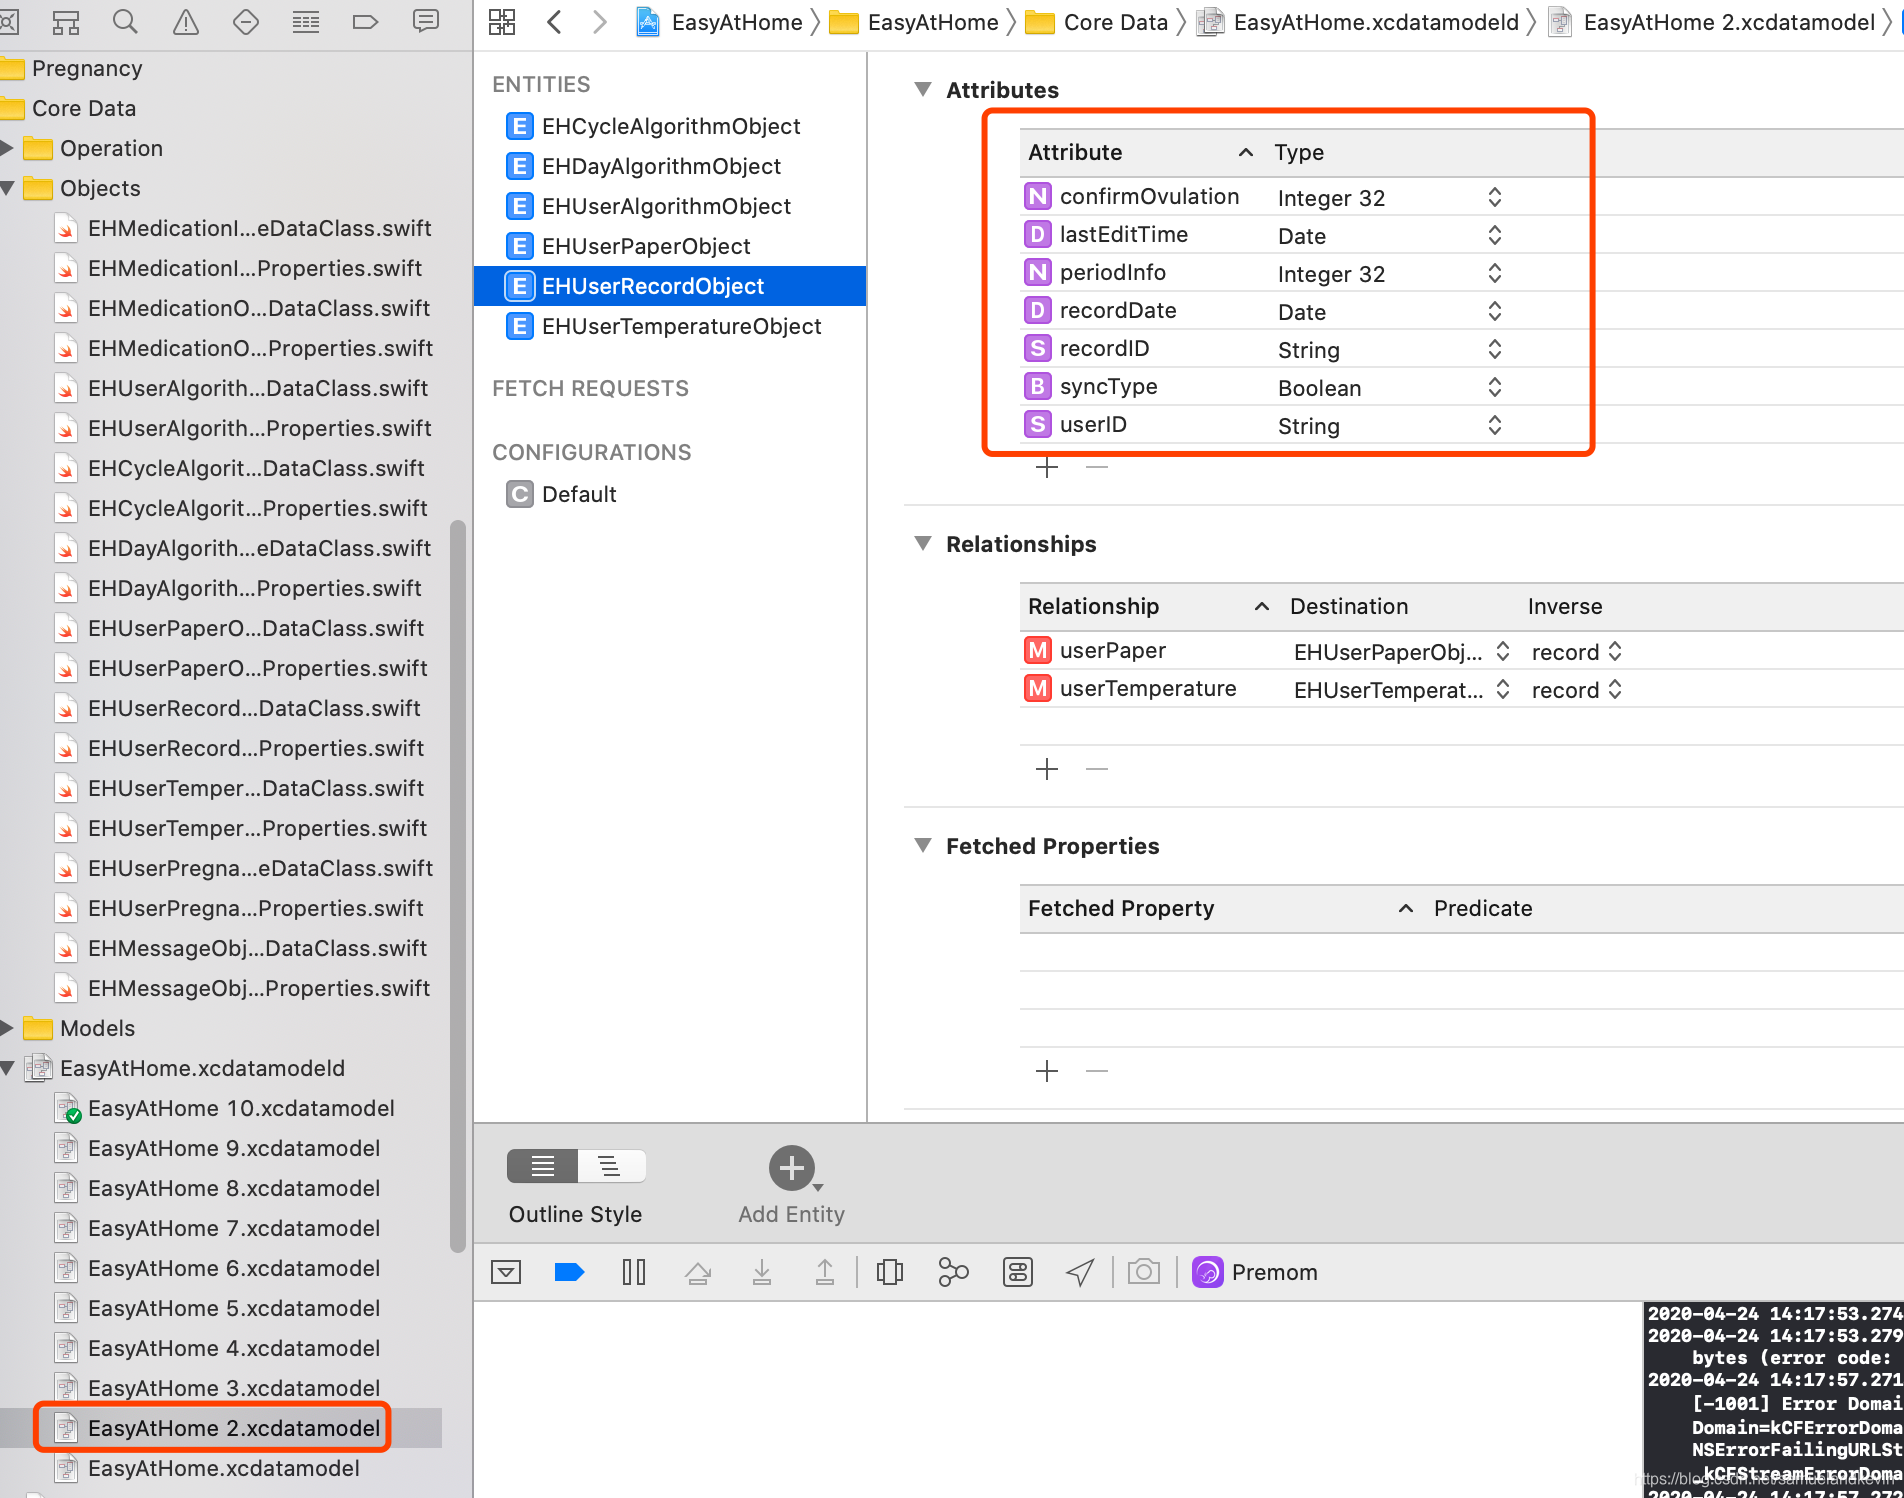
数据库第二版:
数据库第10版: