介绍下项目功能
全部采用组件化封装思想,尽可能的去符合企业级项目,封装了自定义指令、app换肤等...
1、点击登录会判断正则,同时有小图标提示,错误显 X 正确显 ✔
2、登录按钮默认灰色,账号密码全部正确则变绿色
3、css布局 (最基础!)
4、Vue3 动画库
5、输入框搜索
6、。。。
![]() 前期回顾
前期回顾 
综合热榜前6,js榜单第一,建议查看
我故意写成两个项目,一个单独写登录注册和图书商城,但是没有js逻辑。另一个项目,单独写图书商城有js,这样将俩个分开,如果大家想要练习最适合不过,可以去写js逻辑,有一个项目是写好的,一个是没写的,方便 练习

效果图
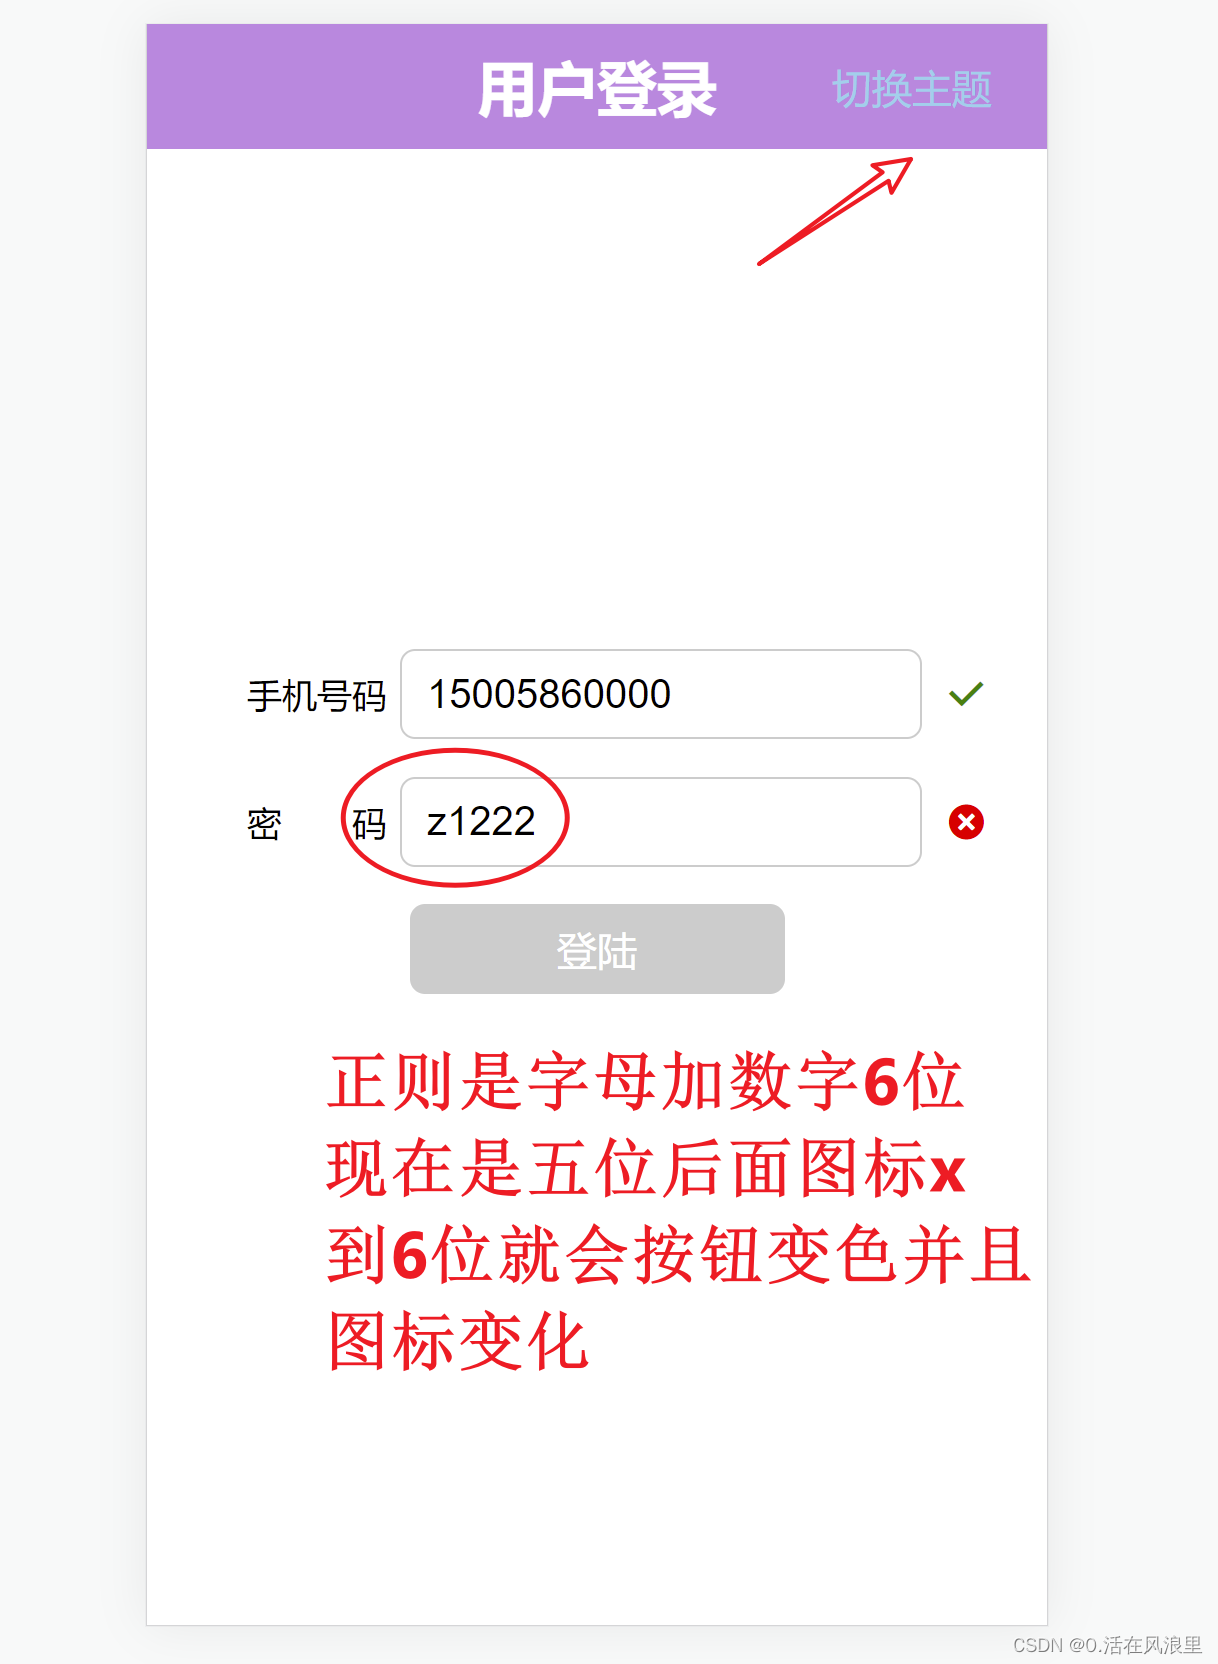


登录
<template>
  <div class="home">
    <my-header
      v-back="$store.state.backColor"
      right-text="切换主题"
      title="用户登录"
      @right-click="rightClick"
    />
    <div class="form">
      <my-input
        label="手机号码"
        placeholder="请输入手机号码"
        :icon="mobileIcon"
        v-model="mobile"
      ></my-input>
      <my-input
        label="密码"
        placeholder="请输入密码"
        :icon="pwdIcon"
        v-model="pwd"
      ></my-input>
      <button class="btn" :disabled="disabled" @click="$router.push('/about')">
        登陆
      </button>
    </div>
  </div>
</template>

<script>
import myHeader from "@/components/myHeader";
import myInput from "@/components/myInput";
import { ref, watch, watchEffect } from "vue";
import { useStore } from "vuex";
export default {
  name: "Home",
  components: {
    myHeader,
    myInput,
  },

  setup() {
    const disabled = ref(true);
    const mobile = ref("");
    const pwd = ref("");
    const mobileIcon = ref("");
    const pwdIcon = ref("");
    const color = ref("#cccccc");
    const store = useStore();
    // 手机号码正则表达式
    let regMobile = /^1[356789]\d{9}$/;
    let regPwd = /^[a-zA-Z]\w{5}$/;
    // watchEffect兼容数据变化的方法 但是只能用来兼容ref数据
    watchEffect(() => {
      if (regMobile.test(mobile.value) && regPwd.test(pwd.value)) {
        disabled.value = false;
        // 判断成功则将变量颜色赋值按钮
        color.value = store.state.backColor;
      } else {
        disabled.value = true;
      }
    });

    watch(
      () => mobile.value,
      () => {
        if (regMobile.test(mobile.value)) {
          mobileIcon.value = "iconfont duihao";
        } else {
          mobileIcon.value = "iconfont chahao";
        }
      }
    );

    watch(
      () => pwd.value,
      () => {
        // console.log(regPwd.test(pwd.value));
        if (regPwd.test(pwd.value)) {
          pwdIcon.value = "iconfont duihao";
        } else {
          pwdIcon.value = "iconfont chahao";
        }
      }
    );

    function rightClick() {
      // console.log(1);
      store.commit("changeBackColor");
    }

    return {
      rightClick,
      disabled,
      mobile,
      pwd,
      mobileIcon,
      pwdIcon,
      color,
    };
  },
};
</script>
<style lang="scss" scoped>
.form {
  width: 100%;
  margin-top: 200px;
  padding: 0 40px;
}
.btn {
  display: block;
  margin: 0 auto;
  width: 150px;
  height: 36px;
  border: none;
  outline: none;
  border-radius: 6px;
  background-color: v-bind(color);
  color: #fff;
}
.btn[disabled] {
  background-color: #ccc;
  color: #fff;
}
</style>
vuex store/index.js
import { createStore } from 'vuex'
import axios from 'axios'
export default createStore({
    state: {
        // 默认颜色
        backColor: '#cccccc',
        // 存放数据,页面默认渲染的数据
        books: [],
        // 用于搜索
        _books: [],
    },
    mutations: {
        changeBackColor(state) {
            state.backColor = '#' + Math.round(Math.random() * 16777216).toString(16)
        },
        changeBooks(state, arr) {
            state.books = arr
            state._books = deepClone(arr)

            function deepClone(obj) {
                if (typeof obj !== 'object' || obj == null) {
                    return obj
                }
                let result
                if (obj instanceof Array) {
                    result = []
                } else {
                    result = {}
                }
                for (let key in obj) {
                    if (obj.hasOwnProperty(key)) {
                        result[key] = deepClone(obj[key])
                    }
                }
                return result
            }
        },
    },

    actions: {
        async getDate({ commit }) {
            //将请求的数据中的 list取出来
            let data = await axios.get('/goods.json')
            console.log(data.data.list);
            commit('changeBooks', data.data.list)
        }
    },
    modules: {}
})
登录子组件
<template>
    <div class="my-header">
        <span class="left">{

   {leftText}}</span><span class="title">{

   {title}}</span><span class="right" @click="clickEve">{

   {rightText}}</span>
    </div>
</template>
<script>
export default {
    //  props接受数据有两种形式 一种是数组 另外一种是对象
    // 数组用法简单不多介绍
    // 对象
    props: {
        show: Boolean, // 只定义需要接受的数据的数据类型时的写法
        leftText: {
            type: String, // 要求接收的数据时字符串
            required: false, // 该数据不是必须传递的
            default: ''
        },
        rightText: {
            type: String,
            required: false,
            default: ''
        },
        title: String
    },

    setup(props, { emit }) {
        function clickEve() {
            emit('right-click')
        }

        return {
            clickEve
        }
    }
}
</script>
<style lang="scss" scoped>
    .my-header {
        width: 100%;
        height: 50px;
        display: flex;
        justify-content: space-between;
        background-color: orangered;
        align-items: center;
        .left,.right {
            flex-basis: 30%;
            text-align: center;
        }
        .right {
            color: skyblue;
        }
        .title {
            color: #fff;
            font-size: 24px;
            font-weight: bold;
        }
    }
</style>
<template>
<div class="my-input">
<label>{
{label}}</label>
<input type="text" :placeholder="placeholder" :value="modelValue" @input="iptChange">
<span :class="icon" ></span>
</div>
</template>
<script>
export default {
props: {
label: String,
placeholder: String,
icon: String,
modelValue: String
},
setup(props, { emit }) {
function iptChange(e) {
emit('update:modelValue', e.target.value)
}
return {
iptChange
}
}
}
</script>
<style lang="scss" scoped>
.my-input {
width: 100%;
display: flex;
align-items: center;
margin-bottom: 15px;
label {
width: 56px;
flex-shrink: 0;
font-size: 14px;
overflow: hidden;
white-space: nowrap;
text-align: justify;
text-align-last: justify;
}
input {
height: 36px;
margin-left: 5px;
border: 1px solid #ccc;
outline: none;
border-radius: 6px;
padding-left: 10px;
margin-right: 10px;
}
.duihao {
color: green;
font-weight: 900;
}
.chahao {
color: red;
}
}
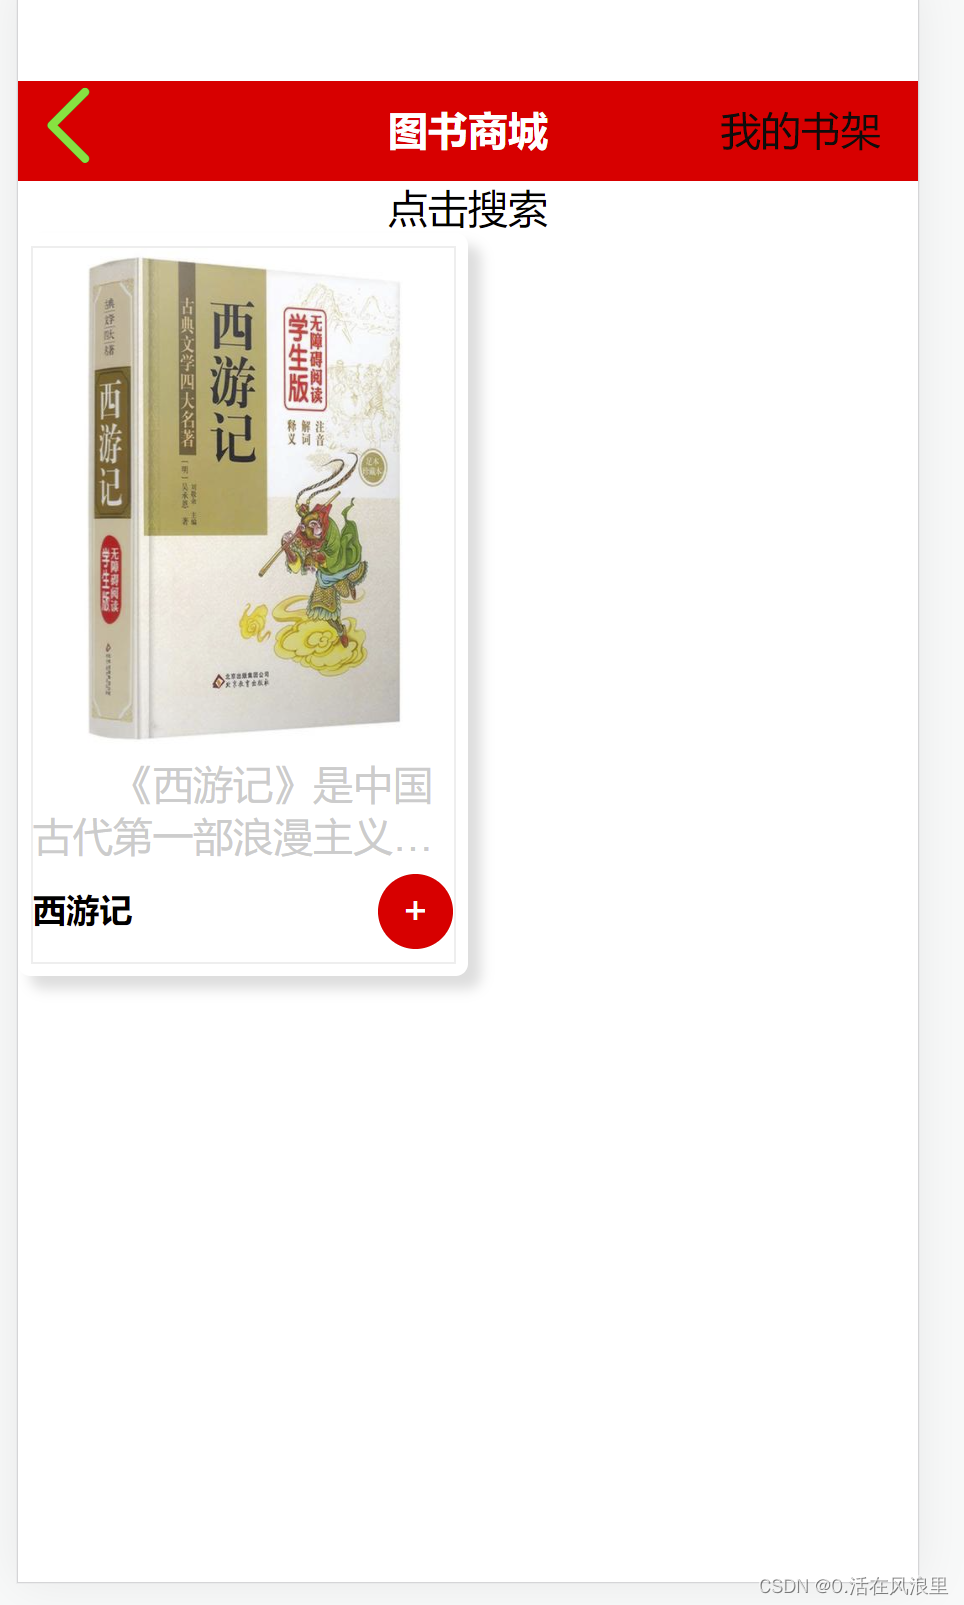
</style>登录后页面
<template>
  <div class="about">
    <myHeader left-text="" title="图书商城" right-text="我的书架"></myHeader>
    <div class="search">
      <input type="text" placeholder="请根据书名进行搜素" />
    </div>
    <div class="my-card">
      <!-- 子组件负责接受父组件数据,定义结构样式,父组件负责传值 念及此 为封装思路 -->
      <myCard v-for="item in books" :key="item._id" :item="item"></myCard>
    </div>
  </div>
</template>
<script>
import myHeader from "../components/myHeader";
import myCard from "../components/myCard.vue";
import { useStore } from "vuex";
import { computed } from "vue";
export default {
  setup() {
    const store = useStore();
    store.dispatch("getDate");
    // 在计算属性拿到这个值赋值一个变量,就不用每次都$store.state.books
    const books = computed(() => store.state.books);

    return {
      books,
    };
  },
  components: {
    myHeader,
    myCard,
  },
};
</script>
<style lang="scss" scoped>
.search {
  width: 100%;
  height: 40px;
  background-color: #ccc;
  padding: 5px;
  input {
    width: 100%;
    height: 30px;
    border: none;
    font-size: 17px;
    background-color: transparent;
    outline: none;
    padding-left: 10px;
  }
}
.my-card {
  height: calc(100% - 90px);
  overflow: auto;
  display: flex;
  flex-wrap: wrap;
}
</style>
源码推送到主页的资源里了,需要的哥们儿到主页资源,down
如果感觉对你有帮助,收藏下方便找时快速翻到