如果想要提供一个简单功能,比如提供一个简单的OPEN API接口,我们该如何做?
传统方式我们估计会创建一个WEB项目,然后生成war包放到tomcat下运行。
但是有了Spring Boot我们就不必那么麻烦,因为它内置了很多框架,比如tomcat,maven等。我们可以很容易的下载出模板,然后修改使用。
下面我们演示如何生成一个提供简单RESTFUL接口的jar包。
1、访问http://start.spring.io/
2.选择Spring Boot版本,点击“Switch to the full version.”选择JDK版本和Packageing类型。
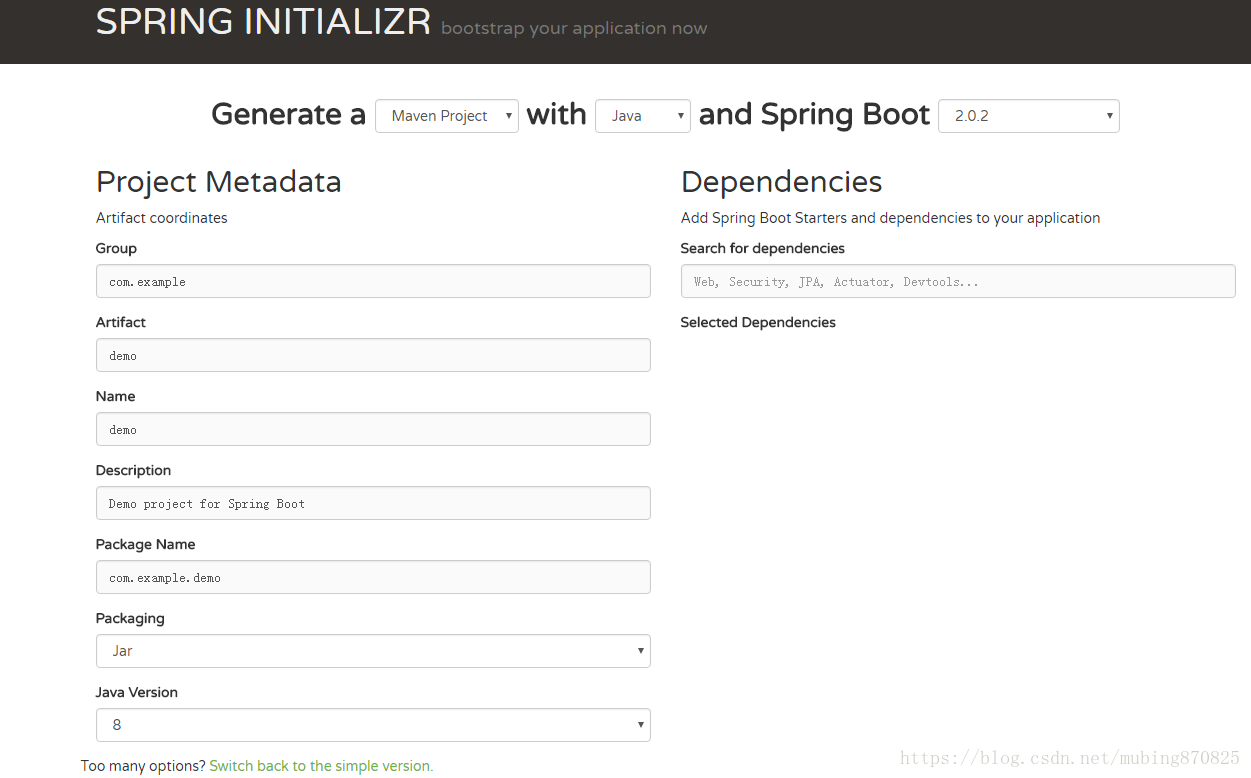
3、点击Generate Project下载项目压缩包
4、解压后,使用eclipse,Import -> Existing Maven Projects -> Next ->选择解压后的文件夹-> Finsh,OK done!
就这么简单,一个项目就搭建好了,是不是感觉之前传统的操作都日了狗了!
接下来我们开始创建接口。
1,pom.xml添加支持web的模块。
<dependency>
        <groupId>org.springframework.boot</groupId>
        <artifactId>spring-boot-starter-web</artifactId>
 </dependency>
pom.xml文件中默认有两个模块:
spring-boot-starter:核心模块,包括自动配置支持、日志和YAML;
spring-boot-starter-test:测试模块,包括JUnit、Hamcrest、Mockito。
2.编写controller内容
import org.springframework.web.bind.annotation.RequestMapping;
import org.springframework.web.bind.annotation.RestController;

@RestController
public class HelloWorldController {
    @RequestMapping("/hello")
    public String index() {
        return "Hello World";
    }
}
然后启动项目,打开浏览器访问http://localhost:8080/hello,就可以看到效果了。
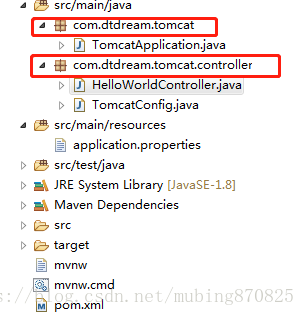
注意:有很多小伙伴访问http://localhost:8080/hello可能会出现WHITE PAGE提示,原因在于目录的问题,Application.java一定要放在根package下。
比如Application.java的package名是com.example.project,你的controller类的package名应当是com.example.project.controller。