文章目录
0. 准备环境
* 1. 新建一个项目, 不创建模板层

* 2. 将rest_framework注册到app应用列表中.
# settings.py 文件app列表属性中注册rest_framework
INSTALLED_APPS = [
	...
    'rest_framework'
]
* 3. 自定义正常响应类与异常响应类
# 正常响应, 继承Response重写响应方法
from rest_framework.response import Response
from rest_framework import status


class NormalResponse(Response):
    def __init__(self, code=200, msg='访问成功!', data=None, status=status.HTTP_200_OK, **kwargs):
        # 组成成字典
        back_info = {

    'code': code, 'msg': msg}
        # 判断data是否有值, 有值则添加到返回信息字典中
        if data:
            back_info.update(data=data)

        # 如果传递了其他的参数将其他参数的值添加到字典中
        back_info.update(kwargs)

        # 调用父类生成对象
        super().__init__(data=back_info, status=status)


# 异常响应
from rest_framework.views import exception_handler


def exception_response(exc, context):
    # 调用内置异常处理程序exception_handler
    response = exception_handler(exc, context)
    # 返回值为空则是认证外的异常
    if not response:
        # 判断错误的类型
        if isinstance(exc, Exception):
            # 获取exc中的异常信息调用自定义的正常响应返回
            error_info = f'遇到异常>>>:{

      exc}'
            return NormalResponse(500, '访问失败', error_info, status.HTTP_500_INTERNAL_SERVER_ERROR)
        # 可细分...

    # 获取内置封装的信息
    error_info = response.data.get('detail')
    # 如果获取不到则是代码编写错误
    if error_info:
        error_info = response.data

    return NormalResponse(500, '访问失败!!', error_info, status.HTTP_500_INTERNAL_SERVER_ERROR)
项目配置文件settings.py中, 全局配置dispatch异常响应.
     只能全局配置, 自定义的异常响应, 值就是一个字符串, 不能是列表['自定义的异常响应']
# DRF配置
REST_FRAMEWORK = {


    # dispatch异常响应, 值只能是一个字符串, 不要使用列表
    'EXCEPTION_HANDLER': 'utils.response.exception_response',
}
* 4. 建立一个测试路由(采用路由分发)
# 主路由
from django.conf.urls import url, include
from django.contrib import admin

# 导入app01的路由层
from app01 import urls
urlpatterns = [
    url(r'^admin/', admin.site.urls),
    # app01 路由
    url(r'^app01/api/', include(urls))
]
# app01 路由
from django.conf.urls import url


# 导入app01的视图层
from app01 import views

urlpatterns = [
    # 测试路由
    url(r'^test1/', views.Test1.as_view())
]
* 5. 测试视图类
# 测试路由
from rest_framework.views import APIView
from utils.reponse import NormalResponse


class Test1(APIView):
    def get(self, request):
        return NormalResponse(data='Test1')
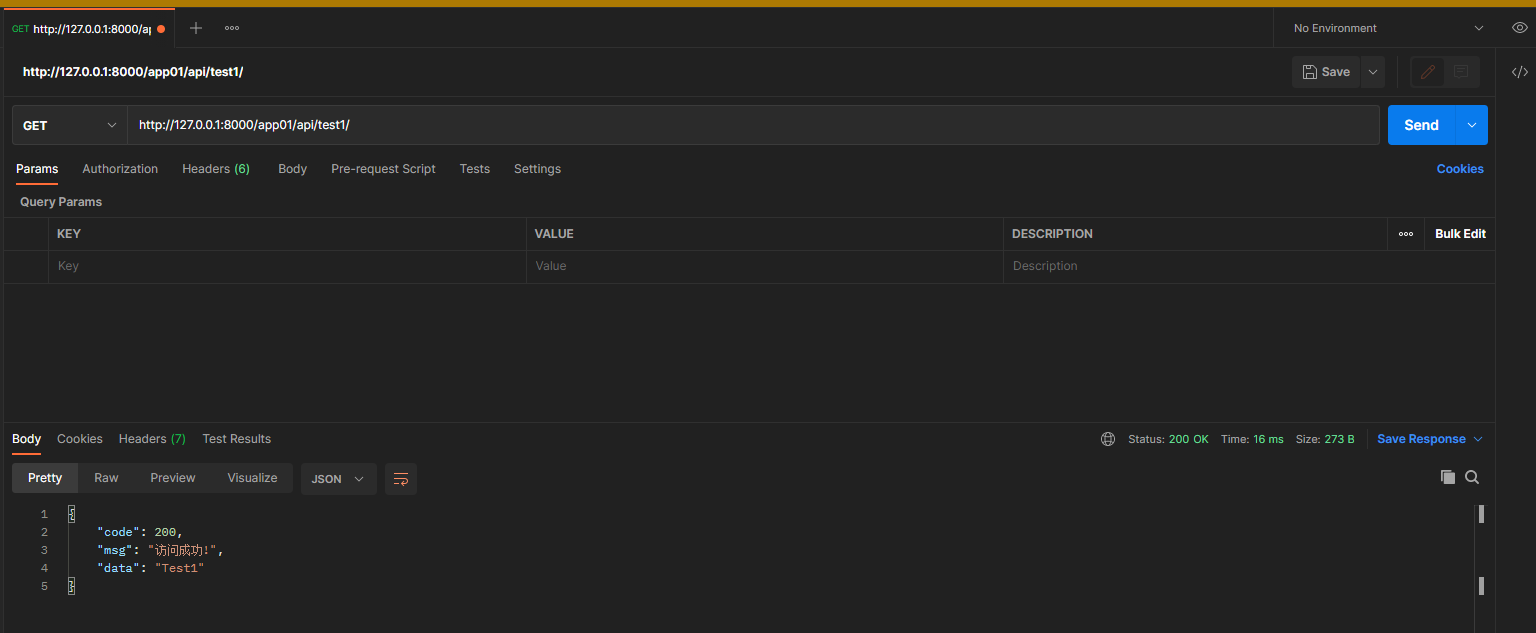
* 6. 测试
get请求: 127.0.0.1:8000/app01/api/test1/
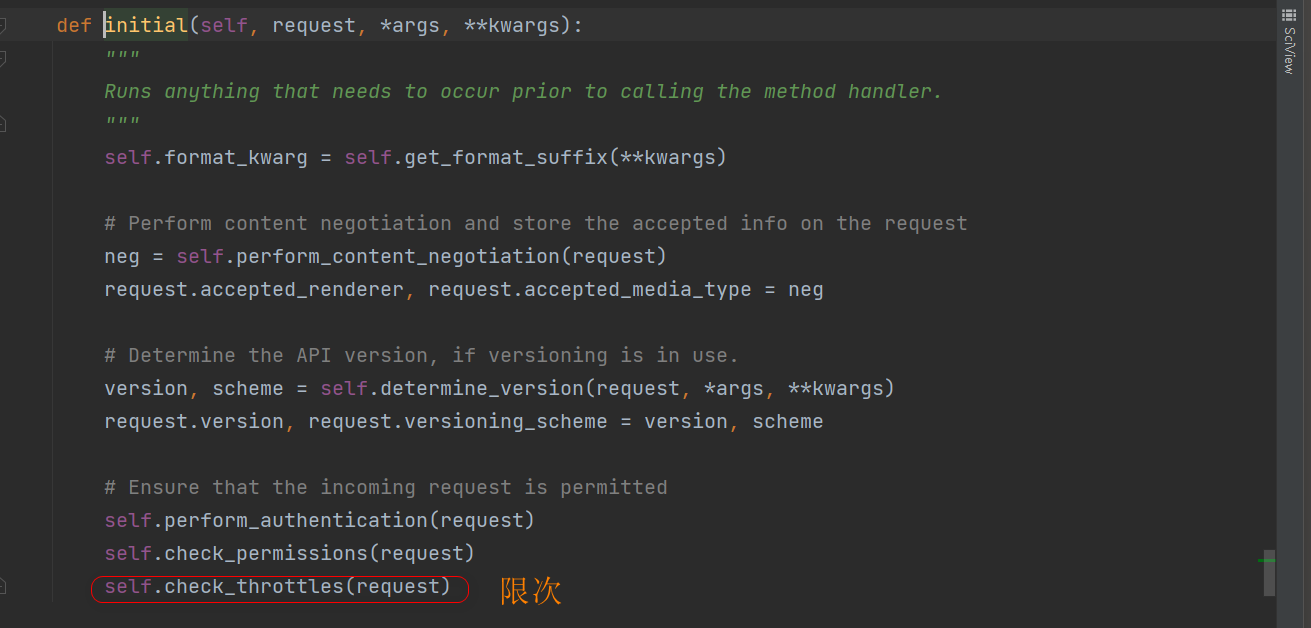
1. 自定义频率限制
1.1 SimpleRateThrottle源码

class SimpleRateThrottle(BaseThrottle):
    cache = default_cache
    timer = time.time
    cache_format = 'throttle_%(scope)s_%(ident)s'
    scope = None
    THROTTLE_RATES = api_settings.DEFAULT_THROTTLE_RATES

    def __init__(self):
        # 通过反射去查找rate属性的值
        if not getattr(self, 'rate', None):
            # 没找到了执行.get_rate()去获取  需要得到一个配置信息, 3/m
            self.rate = self.get_rate()
        # 将 3/m 传递到parse_rate方法中         num_requests 3次, duration 60秒
        self.num_requests, self.duration = self.parse_rate(self.rate)

    def get_cache_key(self, request, view):
        raise NotImplementedError('.get_cache_key() must be overridden')

    def get_rate(self):

        # 通过反射去获取scope属性的值, 没有获取到则抛出异常
        if not getattr(self, 'scope', None):
            msg = ("You must set either `.scope` or `.rate` for '%s' throttle" %
                   self.__class__.__name__)
            raise ImproperlyConfigured(msg)

        try:
            # 去配置文件中找scope属性的值, 3/m
            return self.THROTTLE_RATES[self.scope]
        # 没有找打抛异常
        except KeyError:
            msg = "No default throttle rate set for '%s' scope" % self.scope
            raise ImproperlyConfigured(msg)

    def parse_rate(self, rate):
        if rate is None:
            return (None, None)
        # rate 是'3/m', 通过/切分得到一个列表 ['3', 'm']
        num, period = rate.split('/')
        # 限制的次数
        num_requests = int(num)
        # ['m'][0] 值要列表值的第一个字符, 在命名的时候只要是smhd开头即可, {}[]通过这个字符把对应的秒速取出来,
        duration = {

    's': 1, 'm': 60, 'h': 3600, 'd': 86400}[period[0]]
        # 3次, 60秒
        return (num_requests, duration)

    def allow_request(self, request, view):
        # 判断对象的rete属性是否是否为None, 如果为None, 则不做限制, 直接返回True
        if self.rate is None:
            return True

        # 执行get_cache_key方法, 该方法必须自己重写, 接收request与view参数, 返回一个键 eg: 用户的ip
        self.key = self.get_cache_key(request, view)
        # 如果键为None 则不做限制
        if self.key is None:
            return True

        # cache是缓存, 通过自己设置的键, 去缓存中找对应的列表值, 第一个找不到则是一个空列表
        self.history = self.cache.get(self.key, [])
        # 获取当前时间
        self.now = self.timer()

        # Drop any requests from the history which have now passed the
        # throttle duration
        # 循环 记录列表不为空 and 列表最后一个值 <= 当前时间 - 6os (时间超过60了)
        while self.history and self.history[-1] <= self.now - self.duration:
            # 从末尾开始, 只要时间超过60了, 就pop掉
            self.history.pop()
        # 统计列表的长度 >= 3
        if len(self.history) >= self.num_requests:
            # 执行throttle_failure方法 return False 限制访问
            return self.throttle_failure()
        # 执行throttle_success 将当前时间添加到列表中... 访问成功
        return self.throttle_success()

    def throttle_success(self):
        # 将当前时间,
        self.history.insert(0, self.now)
        # 将数据缓存,   键 值[..,..] 缓存超时时间
        self.cache.set(self.key, self.history, self.duration)
        return True

    def throttle_failure(self):
        return False

    def wait(self):
        # 列表有值
        if self.history:
            # 剩余时间 = 60 - (当前时间 - 最后开发访问的时间)
            remaining_duration = self.duration - (self.now - self.history[-1])
        else:
            # 没有值则 剩余时间 = 60
            remaining_duration = self.duration
        # 可用请求 = 3 - len([]) + 1
        available_requests = self.num_requests - len(self.history) + 1
        # 可用请求小于等于0
        if available_requests <= 0:
            return None
        # 剩余时间 / 可用请求
        return remaining_duration / float(available_requests)
1.2 SimpleRateThrottle使用
限制用户请求的ip每分钟只能访问三次.
请求ip在request.META中. request.META.get('REMOTE_ADDR') 获取.
* 1. 定义限制类
# 项目/utils.throttling.py
from rest_framework.throttling import SimpleRateThrottle


# 定义限制类
class Limit(SimpleRateThrottle):
    scope = 'ip'  # 定义一个名称, 最为限制的key

    def get_cache_key(self, request, view):
        # REMOTE_ADDR': '127.0.0.1'
        ip_addr = request.META.get('REMOTE_ADDR')
        # 返回值, 会被添加到一世界列表个列表中, 一分钟内该列表只能有三个值
        return ip_addr
从配置文件DEFAULT_THROTTLE_RATES中根据scope得到频率配置(次数/时间单位)
类的scope数据作为频率认证类的数据值的key
* 2. 全局配置限制类
# DRF配置
REST_FRAMEWORK = {


    # dispatch异常响应, 值只能是一个字符串, 不要使用列表
    'EXCEPTION_HANDLER': 'utils.response.exception_response',
    # 限制类
    'DEFAULT_THROTTLE_CLASSES': ['utils.throttling.Limit',],
    # 每分钟只能访问3次
    'DEFAULT_THROTTLE_RATES': {

    'ip': '3/m', },
}
* 3. 测试
1.3 自定义模块
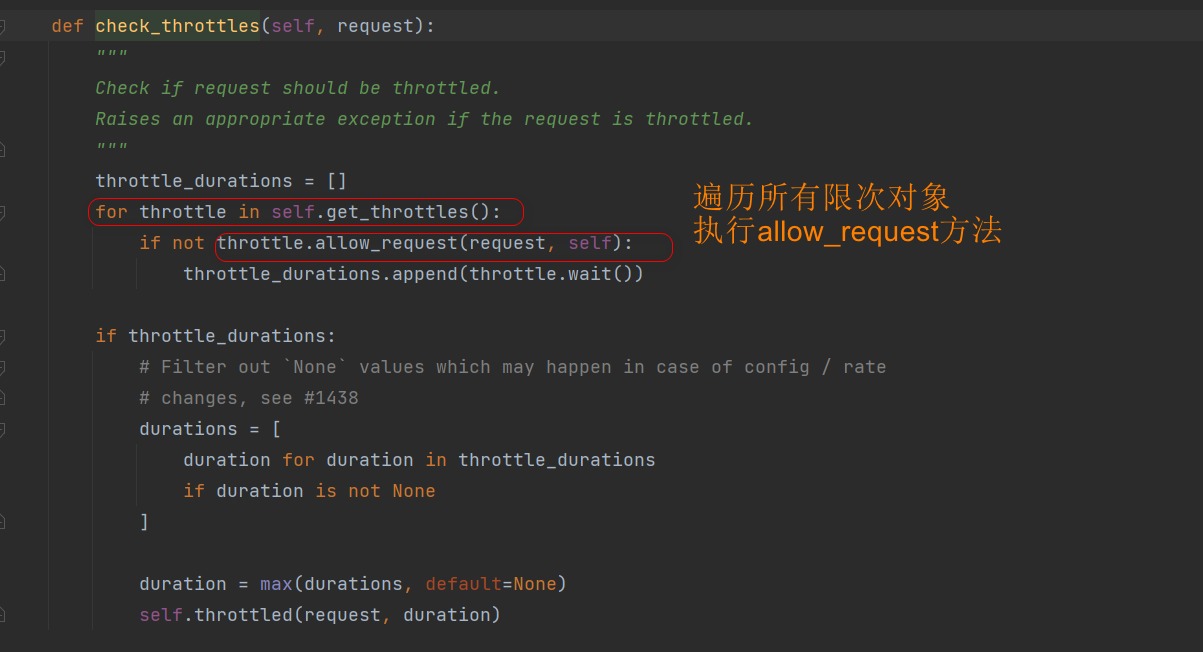
自定义频率限制类, 需要有写两个方法:
1. allow_request(self, request, view)
   如果应该允许请求,则返回True(不限次),否则返回False (限次)。
2. wait(seif) (可选)返回在下一个请求之前等待的建议秒数。
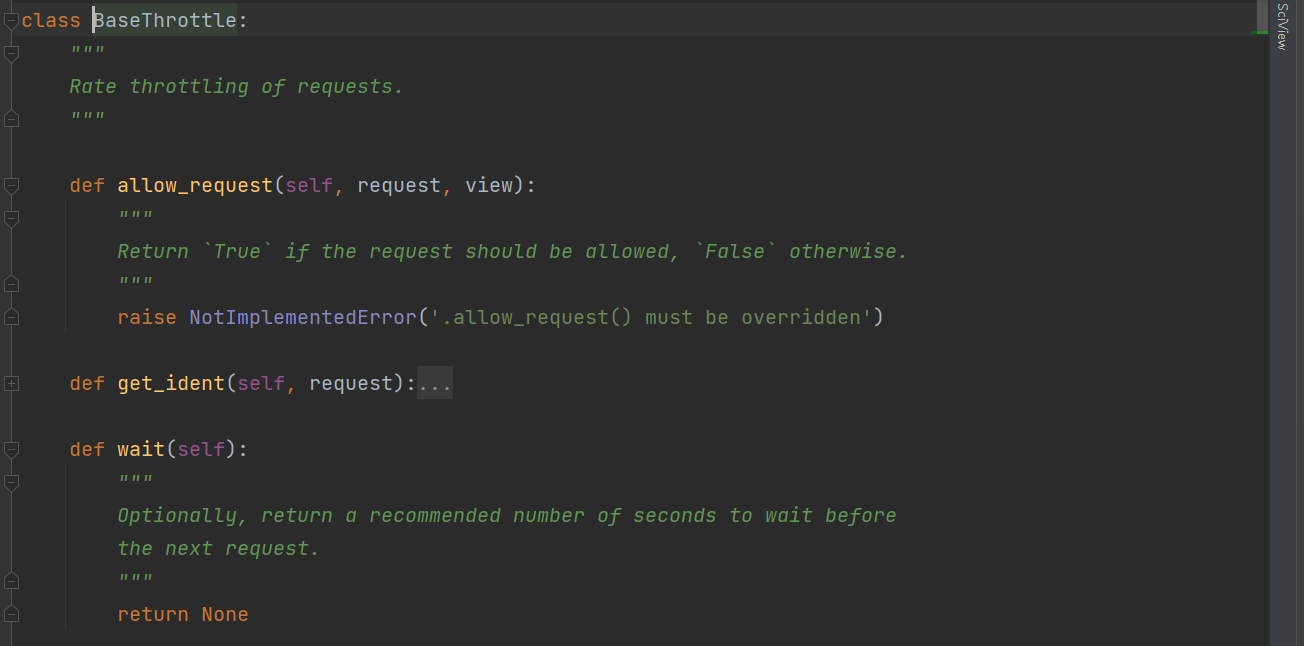
继承BaseThrottle, 该类中规范了子类的行为, 也可以不继承, 倒是类中必须有
源码中必须要执行allow_request方法.
BaseThrottle源码
代码逻辑:
0. 建立一个空字段 -->访问字典. {

    }
1. 从request.META.get('REMOTE_ADDR')中取出访问的ip.
2. 判断当前的ip在不在访问字典中, 若不在则以ip为键, 时间为值添加到字典中, 并且放回True, 表示第一次访问.
   {

    'xxxip': [访问时间1, ]}
3. ip存在, 循环将列表取出来, 循环判断列表中每个值是否超过了60秒, 超过60秒的pop掉. 保证列表中只存60秒内
   访问的时间信息, 退出循环.
   {

    'xxxip': [访问时间3, 访问时间2, 访问时间1,]}
   [1650897168.0505562, 1650897167.4371457, 1650897166.5577233] 时间戳
4. 统计列表所有的元素, 如果超过三次直接返回False, 访问失败
   没有超过三次, 将当时时间插入到列表中, 访问成功
import time


class Limit2():
    # 定义一个类属性存放访问的记录
    access_info = {

    }
    # 定义一个属性存放当前放回的ip
    ip = None

    # 限次逻辑
    def allow_request(self, request, view):
        # 获取ip
        ip = request.META.get('REMOTE_ADDR')
        # 将ip保存, wait中使用
        self.ip = ip
        # 判断ip是都在字典中, 不则在添加到字典中, 放回True
        if ip not in self.access_info:
            # ip为键 列表为值
            self.access_info[ip] = []
            # 并将当前时间最为参数添加到列表中
            self.access_info[ip].append(time.time())
            return True
        print(self.access_info[ip])

        # 对ip对应的列表的值进行判断, 将超过时间超过60s的值pop掉, 并将当时时间条件到列表中
        while True:
            if time.time() - self.access_info[ip][-1] > 60:
                self.access_info[ip].pop()
            break
        print(self.access_info[ip])

        # 判断ip访问记录是否超过三次, 超过三次返回False访问失败
        if len(self.access_info[ip]) > 3:
            return False

        # 如果没有超过三次将当时时间插入到列表中, 访问成功
        self.access_info[ip].insert(0, time.time())
        return True


    def wait(self):
        """
        当前时间 - 列表第一次访问的时间 =  0 1 2 ↑
        60 - (当前时间 - 列表第一次访问的时间 0 1 2) = 60 59 58 ↓
        """
        return 60 - (time.time() - self.access_info[self.ip][-1])
2. API接口文档
rest_framework 可以自动生成接口文档, 文档以网页方式呈现.
1. 安装依赖库coreapi
2. 继承自APIView及其子类的视图.
* 1. 安装依赖库
     pip install coreapi
* 2. 在总路由中设置接口文档访问路径.
	 from rest_framework.documentation import include_docs_urls
	 url('^docs/', include_docs_urls(title='站点页面标题'))
* 3. 继承APIView类及其子类
1. 继承APIView在, 在视图类的请求方法的文档字符串中写帮助信息.
class BookAPIView(APIView):
	def get(...):
        """
		获取所有书籍信息
        """
2. 单一方法的视图, 可以直接在视图类的文档字符串中写帮助信息.
class BookListView(ListAPIView):
	"""
	返回所有的图书信息
	"""
3. 多方法的图书, 在视图类的文档字符串中, 为每个方法定义帮助信息.
class BookListCreateView(ListCreateAPIView):
	"""
	get: 返回所有图书信息
	post: 新建图书
	"""
4. 对于数图集ViewSet, 在视图类的文档字符串中定义, 使用action的名称区分.
class BookViewSet(ListModelMinxin, ...):
	"""
	list: 返回图书列表数据
	retrieve: 返回图书详情数据
	latest: 放回最新的图书数据
	...
	"""
* 4. 在配置文文件这添加core接口
	AutoSchema' object has no attribute 'get_link
REST_FRAMEWORK = {


    'DEFAULT_SCHEMA_CLASS': 'rest_framework.schemas.coreapi.AutoSchema'
}
* 5. 需要session的信息, 执行数据库迁移命令, 否则会报错 no such table:django_session
	python manage.py makemigrations
	python manaage.py migrate
* 6. 浏览器中访问 127.0.0.1:8000/docs/ 便可以看见自动生成的接口文档.
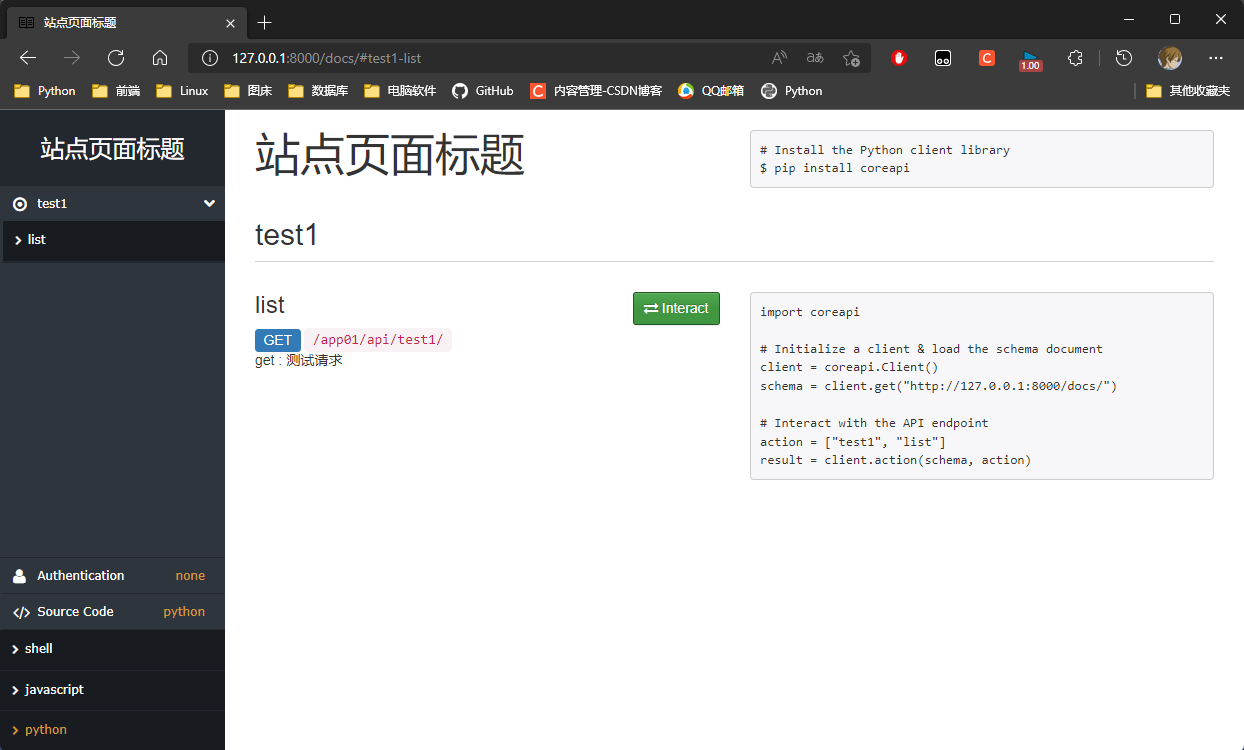
视图集的retrieve名称, 在接口文档网站叫做read
参数的Description需要在模型类或序列化器的字段中以help_text中定义
3. JWT
jwt: Json Web token
3.1 原理
1. jwt分三段式: 头.体.签名 (head.payload.sgin)
2. 头与体是可逆加密, 让服务器可以反解析出user对象, 签名是不可逆加密, 保证整个token的安全性.
3. 头体签名三部分, 都是采用json格式的字符串进行加密, 可逆加密一般采用base64算法,
   不可逆加密一般采用hash(例: md5)算法.
4. 头中的内容是基本信息: 公司信息, 项目信息. token采用的加密方式信息
    {


        "company": "公司信息"
        ...
    }
5. 体中的内容是关键信息: 用户主键, 用户名, 签发时客户端信息(设备号, 地址), 过期时间
	{


		"uese_id": 1,
		...
	}
6. 签名中内容安全信息: 头的加密结果 + 体的加密结果 + 服务器不对外公开的安全码 进行md5加密
	{


		"head": "头的加密结果",
		"payload": "体的加密结果",
		"secret_key": "安全码"
	}
签名的过程, 实际上是对头部以及载荷内容进行签名.
一般而言, 加密算法对于不同的输入产生的输出总是不一样的.

如果对头部以及载荷的内容解码之后进行修改, 再进行编码的话,
那么新的头部和载荷的签名和之前的签名就将是不一样的.
如果不知道服务器加密的时候用的密钥, 得出来的签名也一定会是不一样的.

服务器应用在接受到JWT后, 会首先对头部和载荷的内容用同一算法再次签名.(JWT的头部中指定使用的算法)
服务器应用对头部和载荷再次以同样方法签名, 判断计算出来的签名和接受到的签名是否一致,
如果不一致说明Token的内容被动过的, 应该拒绝这个Token
3.2 base64
base64是一种编码格式.
导入模块:
import base64
方法: (针对二进制数据)
.b64encode 编码
.b64decode 解码
# 导入base64
import base64
# 导入json
import json

# 定义一个字典
dic = {

    'name': 'kid', 'age': 18}

json_dic = json.dumps(dic)
print(json_dic, type(json_dic))  # {"name": "kid", "age": 18} <class 'str'>

# 将字符串格式数据转为二进制
b_dic = json_dic.encode('utf8')
print(b_dic)  # b'{"name": "kid", "age": 18}'

# 使用base64编码
base_dic = base64.b64encode(b_dic)
print(base_dic)  # b'eyJuYW1lIjogImtpZCIsICJhZ2UiOiAxOH0='

# 解码
b_dic = base64.b64decode(base_dic)
print(b_dic)  # b'{"name": "kid", "age": 18}'

json_dic = b_dic.decode('utf8')
print(json_dic)  # {"name": "kid", "age": 18}

dic = json.loads(json_dic)
print(dic)  # {'name': 'kid', 'age': 18}
3.3 签发/校验
签发: 根据登入请求提交的账户+密码+设备信息 签发token
	用基本信息存储json字典, 采用base64算法加密得到 头字符串
	用关键信息存储json字段, 采用base64算法加密得到 体字符串
	用头, 体的加密字符串再加安全存储到json字典, 采用hash md5算法加密得到 签名字符串
	账户密码能够根据User表得到user对象, 形成三段字段串用.拼接成token返回给前端

校验:根据客户端带token的请求反解出user对象
	将token按.拆分成三端
	第一段 头的加密信息, 一般不需要做任何处理
	第二段 体的加密字符串, 要反解析出用户信息, 过期时间和设备信息都是安全信息, 确保token没过期,
	      且是同一个设备发送的请求.
	再用 第一段 + 第二段 + 服务器安全密码 通过不可逆md5加密 与第三端签名字符串进程碰撞校验,
    校验成功:通过用户信息从User表中得到登入的用户, 将用户返回, 最后被存放到request.user中
    检验不成功:
        情况1: 拒绝访问, 直接放回错误提示信息!  (request.user中有有户信息)
        情况2: 给与访问, 通过权限类限制, 返回匿名能访问的信息! (request.user是匿名有户)
3.4 自动签发
1. 用账户/密码访问登入接口, 登入接口逻辑中调用签发token算法, 得到token, 返回给客户端, 并保存到cookie中
2. 校验token算法因该写在认证类中, 反解析出数据去数据库中校验得到user对象, 将对象放回即可,
   源码中保存到requesr.user中, 全局配置给认证组件, 所有视图类请求都进行校验, 所有请求携带token访问.
* 登入接口的认证与权限局部禁用
1. 安装模块
* 1. rest_framework 有对应的jwt模块.
     安装: pip install djangorestframework_jwt
2.继承内置模型表
* 2. 继承AbstractUser内置用户表表, 拓展两个字段
项目中一开始没继承AbstractUser表, 之后再继承执行生成表记录命令就会报错!
1. 新建项目
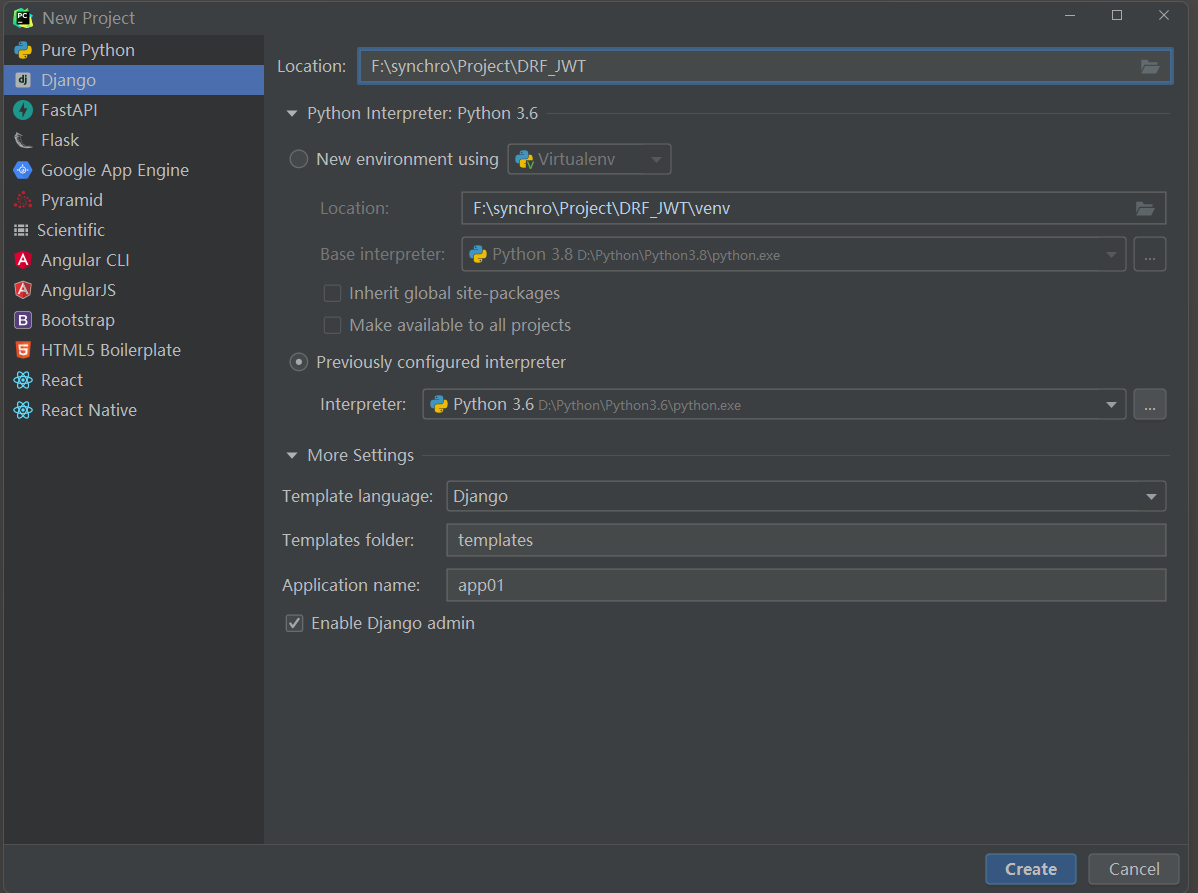
2. 解决templates路径问题, 将正常正常响应与异常响应代码复制过来. 将rest_framework注册.
   修改语言/时区
# settings.py
INSTALLED_APPS = [
    ...
    'rest_framework',
]
# 中文简体
LANGUAGE_CODE = 'zh-hans'

# 亚洲上海
TIME_ZONE = 'Asia/Shanghai'
3. 继承AbstractUser写表模型
from django.db import models

# Create your models here.
from django.contrib.auth.models import AbstractUser


class User(AbstractUser):
    phone = models.CharField(max_length=11, verbose_name='手机号')
在settings.py中,添加使用UserInfo的配置选项:
AUTH_USER_MODEL = 'app名.扩展表的表名'
# settings.py
AUTH_USER_MODEL = 'app01.UserInfo'
4. 新建媒体文件夹, 并设置媒体文件存放路径
# settings.py
MEDIA_URL = '/media/'
MEDIA_ROOT = Path(BASE_DIR, 'media')  # python 3.8 Django3.10
5. 创建表的命令:
python manage.py makemigrations
python manage.py migrate
3. 创建超级用户
PS F:\synchro\Project\DRF_JWT> python manage.py createsuperuser
用户名: root
电子邮件地址: 136@qq.com
Password: zxc123456
Password (again): zxc123456
这个密码太常见了。
Bypass password validation and create user anyway? [y/N]: y

4. 测试路由
使用rest_framework_jwt提供的视图类
三个可用的视图类:
ObtainJSONWebToken, VerifyJSONWebToken, RefreshJSONWebToken  -继承-> JSONWebTokenAPIView
一个基类:
JSONWebTokenAPIView -继承-> APIView
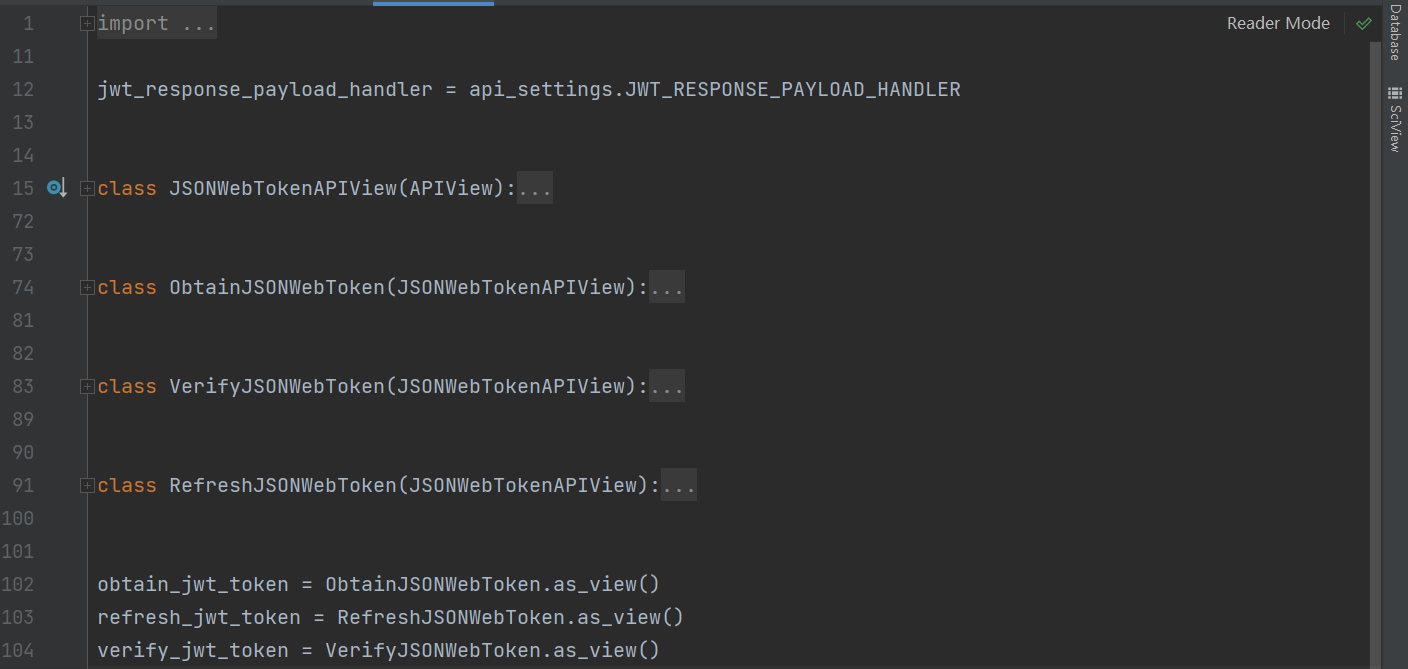
由于在模块中, 视图类执行了.as_view()方法, 得到一个函数的内存地址给变量名, 在路由中直接使用函数名即可.
obtain_jwt_token方法中有登入校验, 登入成功之后, 返回token.
from django.contrib import admin
from django.urls import path, re_path

# 导入获取 获取 JSON Web Token 模块
from rest_framework_jwt.views import obtain_jwt_token
urlpatterns = [
    path('admin/', admin.site.urls),
    # 登入路由, CBV --> FBV
    re_path(r'^login/', obtain_jwt_token)
]
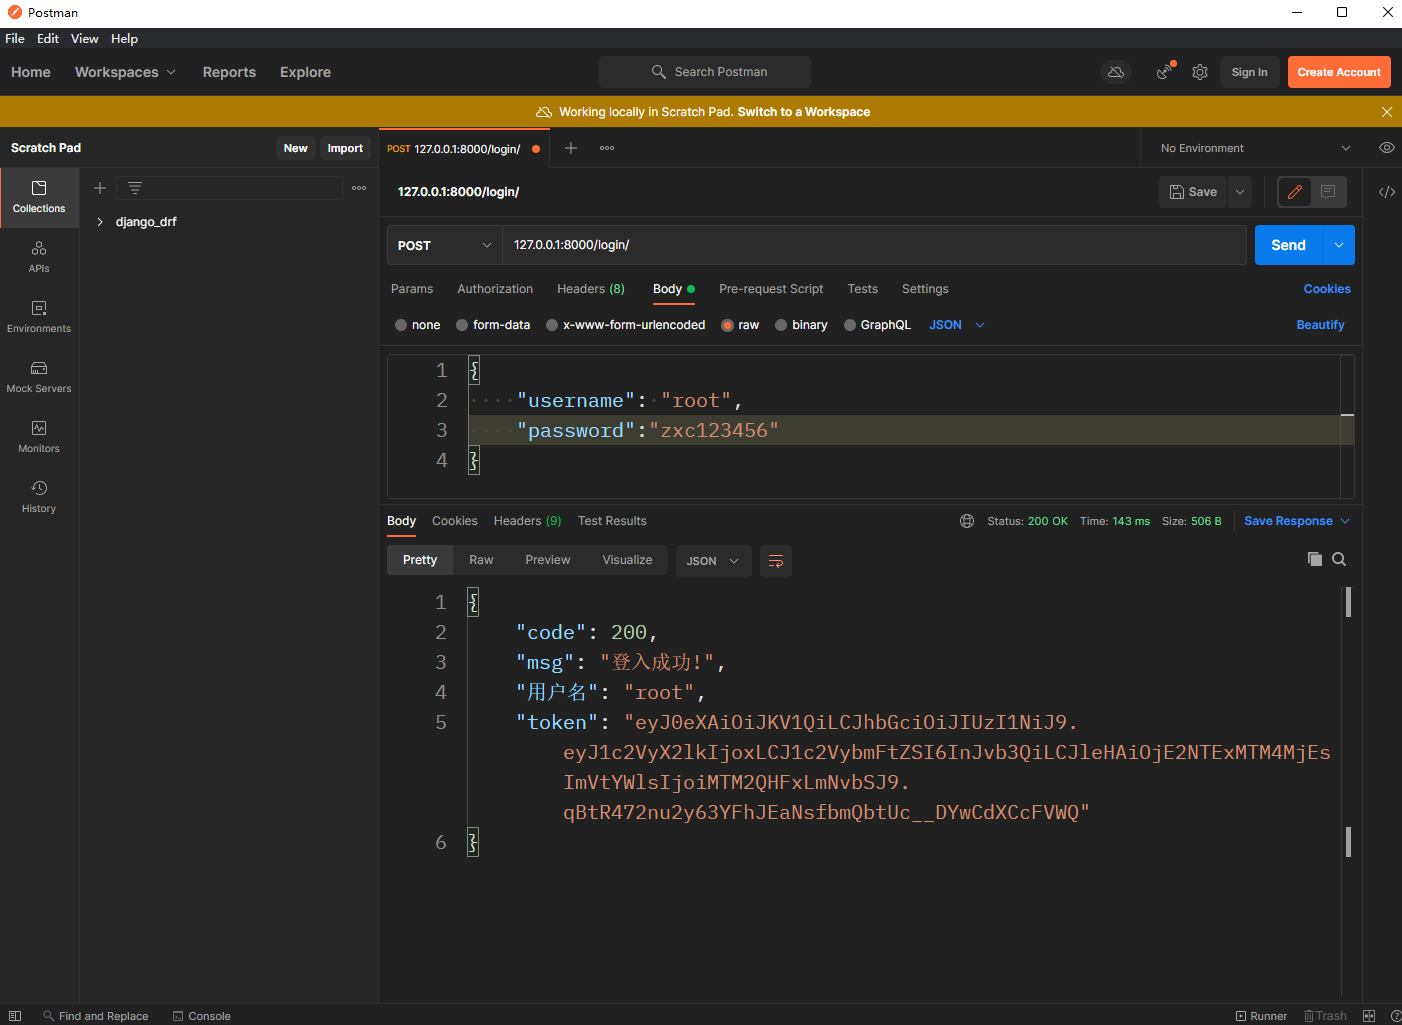
5.登入
使用POST请求提交账户/密码进行登入: 127.0.0.1:8000/login
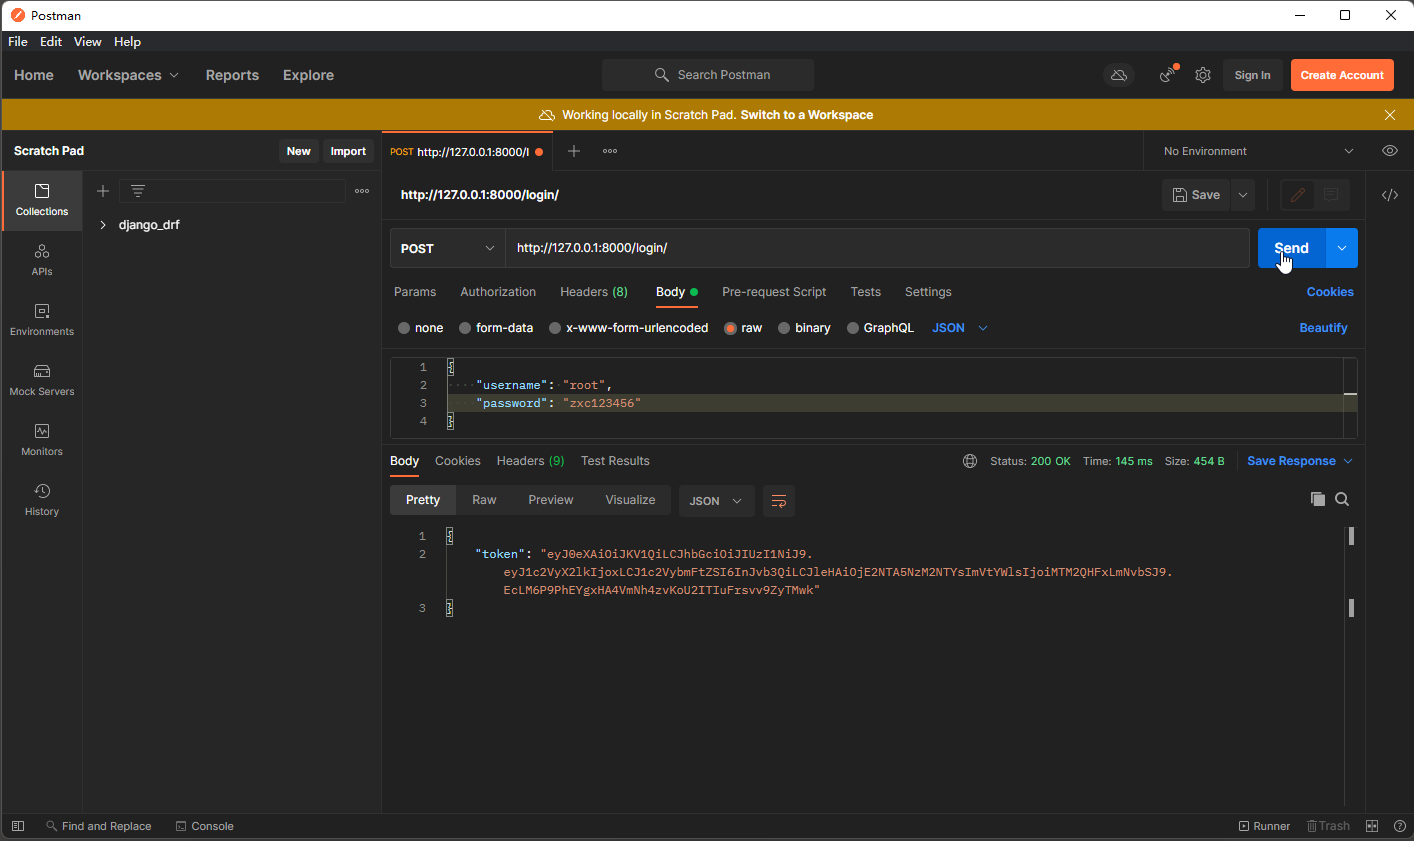
登入成功之后, 返回token.
第一次登入...
{


"token": "eyJ0eXAiOiJKV1QiLCJhbGciOiJIUzI1NiJ9.eyJ1c2VyX2lkIjoxLCJ1c2VybmFtZSI6InJvb3QiLCJleHAiOjE2NTA5NzM2NTYsImVtYWlsIjoiMTM2QHFxLmNvbSJ9.EcLM6P9PhEYgxHA4VmNh4zvKoU2ITIuFrsvv9ZyTMwk"
}
第二次登入...
{


    "token": "eyJ0eXAiOiJKV1QiLCJhbGciOiJIUzI1NiJ9.eyJ1c2VyX2lkIjoxLCJ1c2VybmFtZSI6InJvb3QiLCJleHAiOjE2NTA5NzM5MjQsImVtYWlsIjoiMTM2QHFxLmNvbSJ9.caseIhIg7VWNiSRhrJOPmzc0gTJ_ilo_b4sgGwoJoKk"
}
obtain_jwt_token方法中将登入时间作为第二端的一个参数, 每次登入第二段的信息一定会表.
第二段的信息发生了变化, 第三段的签名信息一定会变.
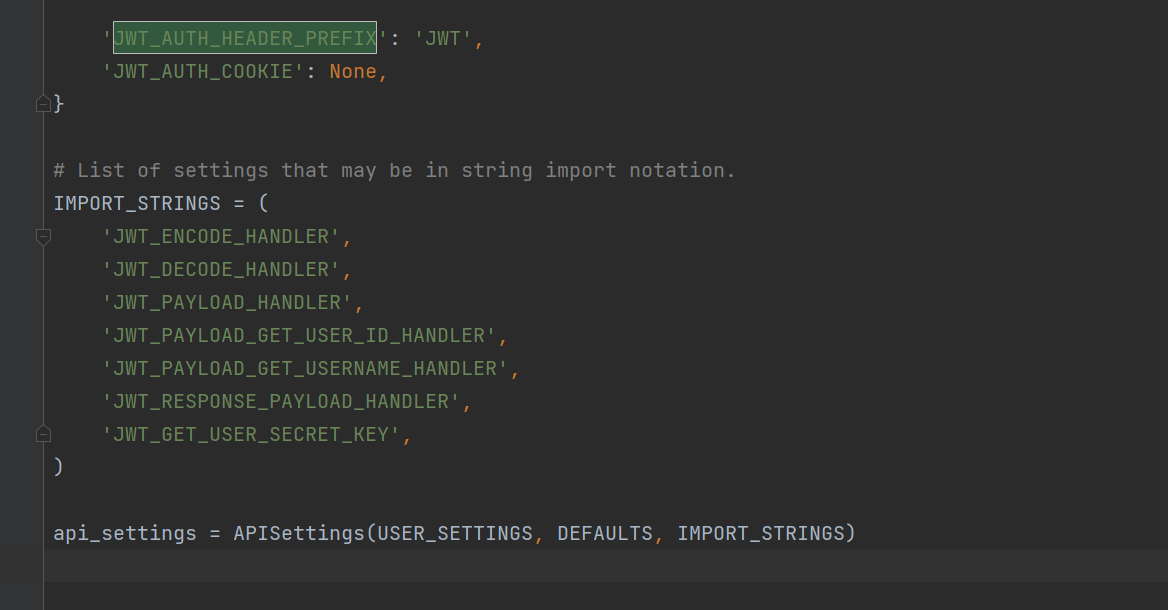
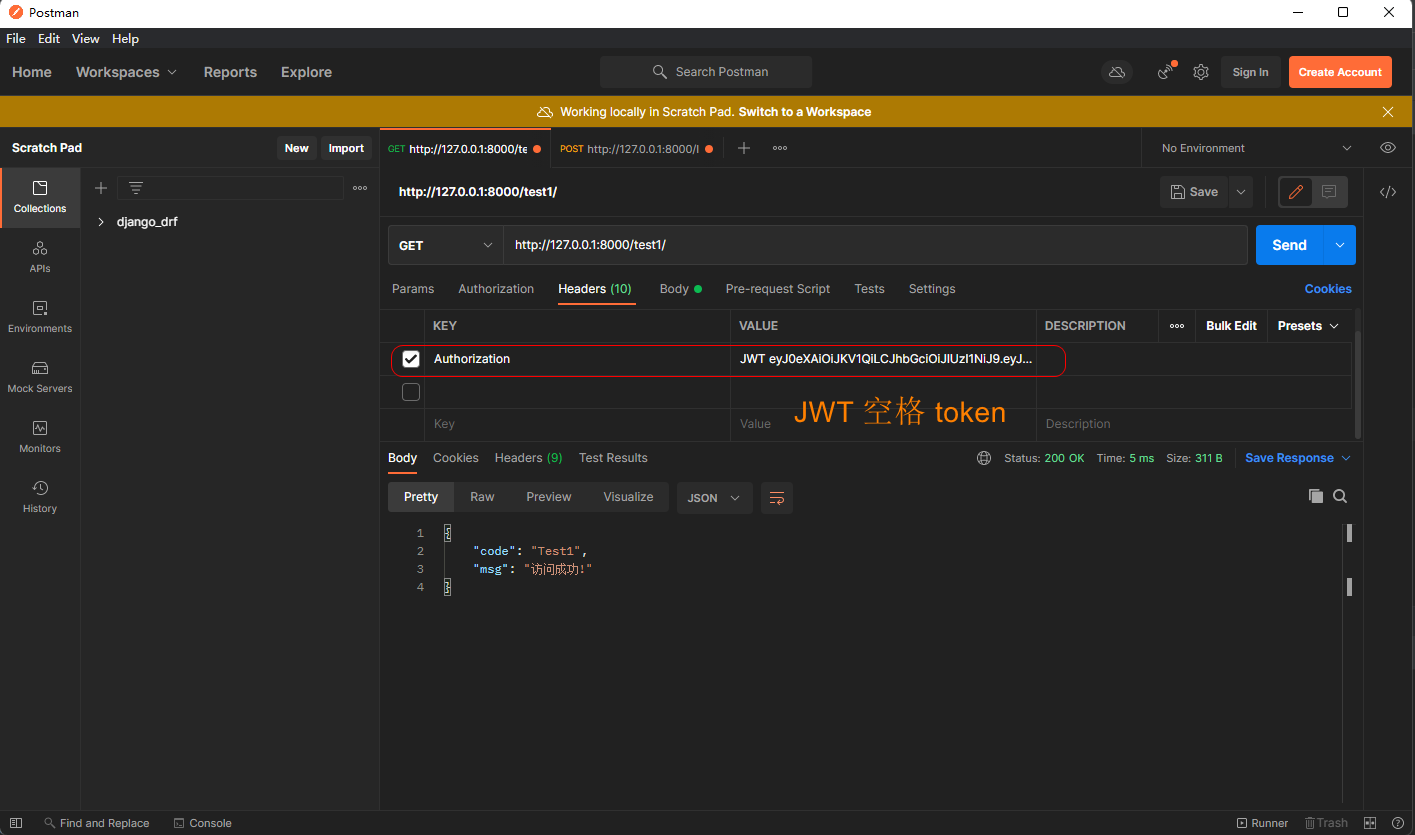
3.4 JSONWebTokenAuthentication源码
在访问的时候携带的token值要以JWT空格开头...
如果不按这个要求不做校验, 直接可以访问...
JSONWebTokenAuthentication 继承 BaseJSONWebTokenAuthentication
BaseJSONWebTokenAuthentication有两个方法:
authenticate 认证方法
authenticate_credentials 数据token校验方法

JSONWebTokenAuthentication有主要方法:
get_jwt_value 获取token的值
class BaseJSONWebTokenAuthentication(BaseAuthentication):
def authenticate(self, request):
# 将request传入 获取jwt值方法中, 拿到token值
jwt_value = self.get_jwt_value(request)
# 如果值为None, 直接返回None, 不做验证
if jwt_value is None:
return None
try:
# 校验token, 成功之后获取到数据的数据对象-->字典
payload = jwt_decode_handler(jwt_value)
except jwt.ExpiredSignature:
msg = _('Signature has expired.')
raise exceptions.AuthenticationFailed(msg)
except jwt.DecodeError:
msg = _('Error decoding signature.')
raise exceptions.AuthenticationFailed(msg)
except jwt.InvalidTokenError:
raise exceptions.AuthenticationFailed()
# 获取用户的数据对象
user = self.authenticate_credentials(payload)
# 将用户对象和token返回, 分别给request.user 与 request.auth
return (user, jwt_value)
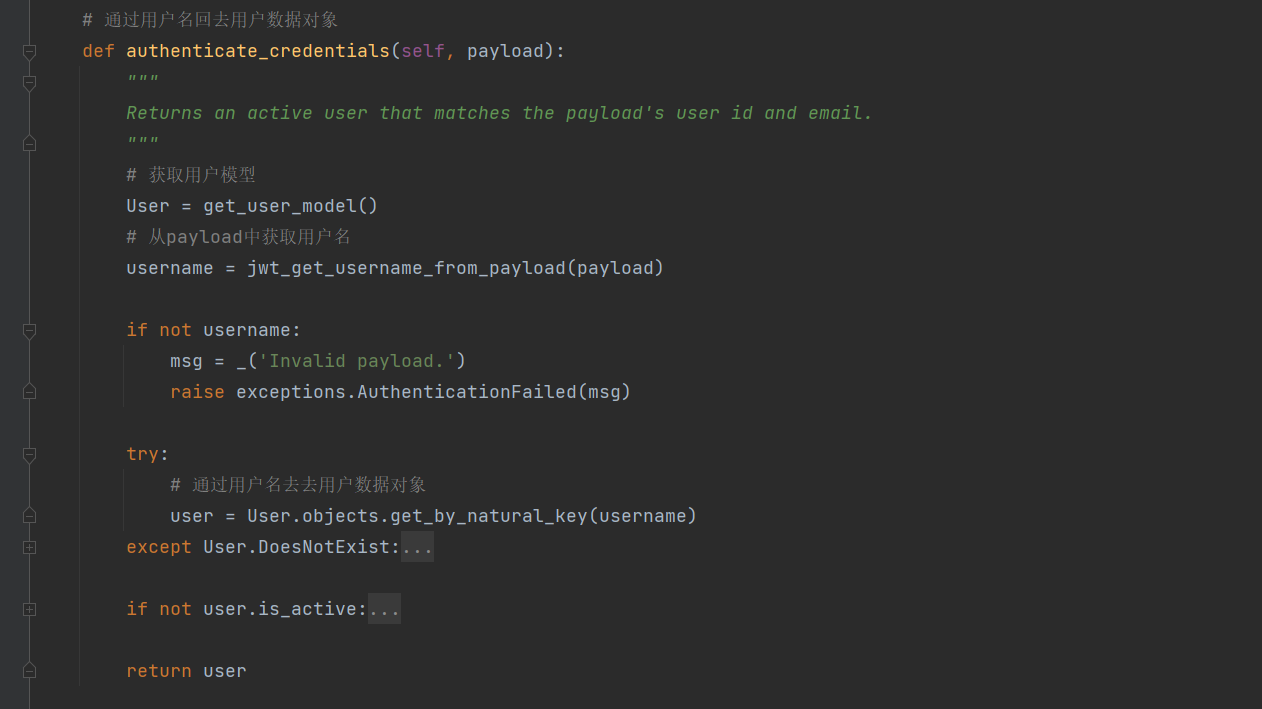
# 通过用户名回去用户数据对象
def authenticate_credentials(self, payload):
"""
Returns an active user that matches the payload's user id and email.
"""
# 获取用户模型
User = get_user_model()
# 从payload中获取用户名
username = jwt_get_username_from_payload(payload)
if not username:
msg = _('Invalid payload.')
raise exceptions.AuthenticationFailed(msg)
try:
# 通过用户名去去用户数据对象
user = User.objects.get_by_natural_key(username)
except User.DoesNotExist:
msg = _('Invalid signature.')
raise exceptions.AuthenticationFailed(msg)
if not user.is_active:
msg = _('User account is disabled.')
raise exceptions.AuthenticationFailed(msg)
return user
class JSONWebTokenAuthentication(BaseJSONWebTokenAuthentication):
www_authenticate_realm = 'api'
# 获取值
def get_jwt_value(self, request):
# 得到二进制的空值或 b'JWT xxx.xxx.xx', 对值进行按空格切分 [b'JWT', b'xxx.xxx.xxx']
auth = get_authorization_header(request).split()
# 将JWT转为小写
auth_header_prefix = api_settings.JWT_AUTH_HEADER_PREFIX.lower()
# 如果值为空则不做校验
if not auth:
if api_settings.JWT_AUTH_COOKIE:
return request.COOKIES.get(api_settings.JWT_AUTH_COOKIE)
return None
# auth[0].lower() 也就是jwt | smart_text(jwt) 的结果还是jwt | jwt不等于 jwt, 则不做校验
if smart_text(auth[0].lower()) != auth_header_prefix:
return None
# 如果 auth的元素 没有两个 或超出两个 则抛出异常
if len(auth) == 1:
msg = _('Invalid Authorization header. No credentials provided.')
raise exceptions.AuthenticationFailed(msg)
elif len(auth) > 2:
msg = _('Invalid Authorization header. Credentials string '
'should not contain spaces.')
raise exceptions.AuthenticationFailed(msg)
# 将 token返回
return auth[1]
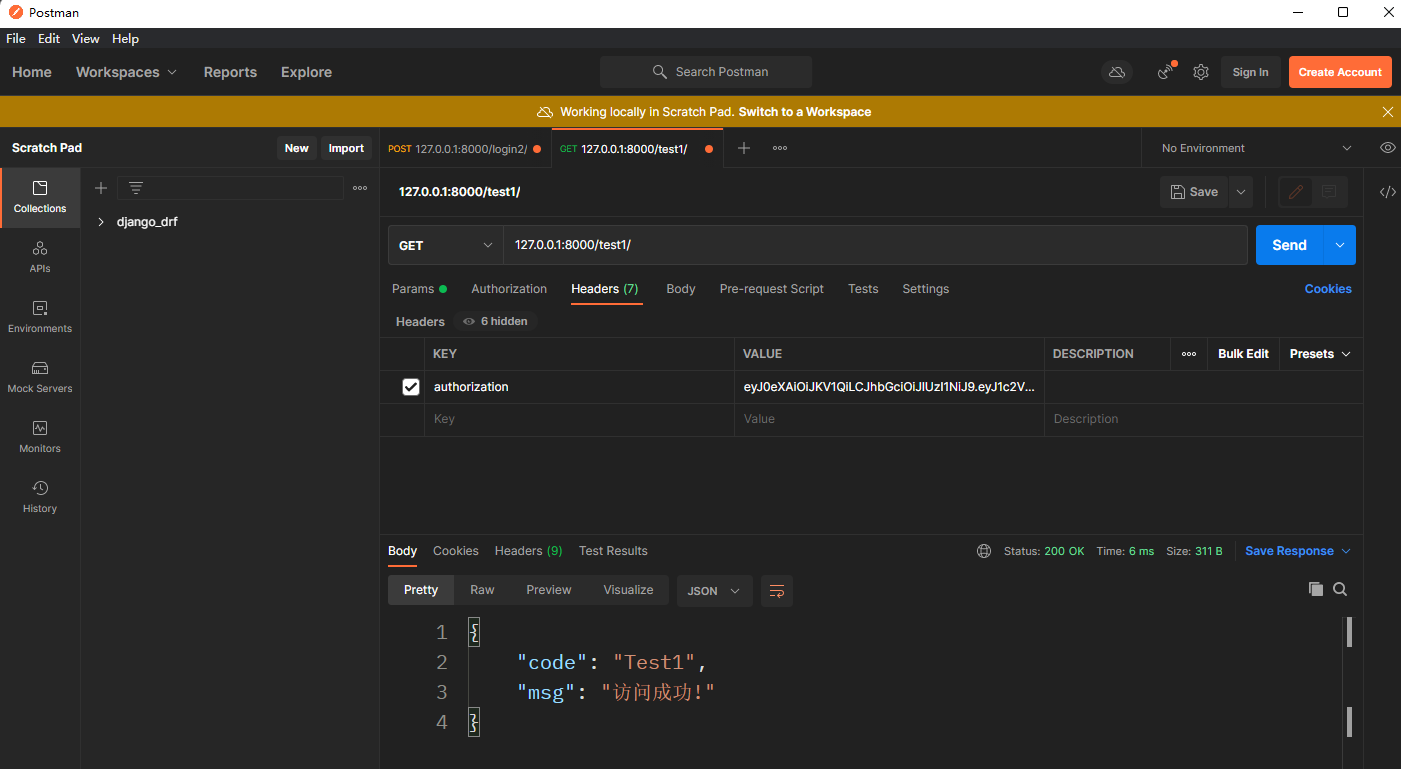
规定authorization携带token
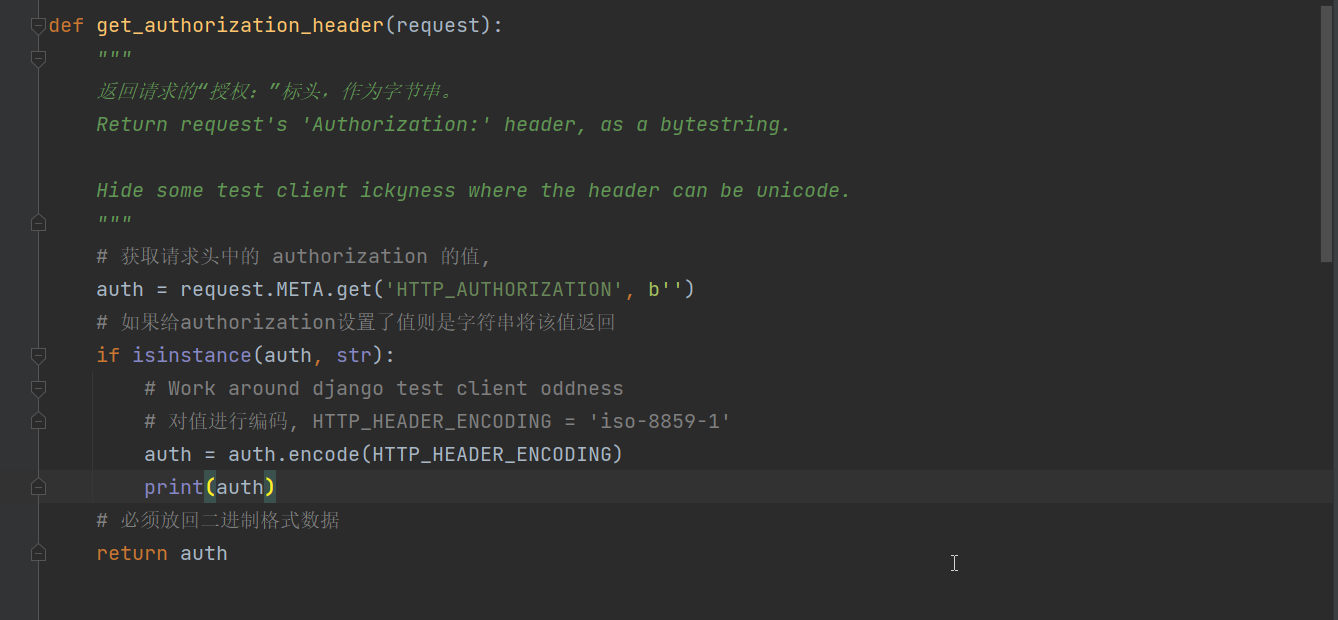
内置的校验程序
设置token前缀 JWT
3.5 携带token访问
* 1. 测试路由
from django.contrib import admin
from django.urls import path, re_path
from app01 import views
# 导入获取 获取 JSON Web Token 模块
from rest_framework_jwt.views import obtain_jwt_token
urlpatterns = [
    path('admin/', admin.site.urls),
    # 登入路由, CBV --> FBV
    re_path(r'^login/', obtain_jwt_token),
    # 测试API接口路由
    re_path(r'^test1/', views.Test1.as_view())
]
* 2. 测试视图类
# Create your views here.
from rest_framework.views import APIView
from utils.response import NormalResponse


class Test1(APIView):
    def get(self, request):
        return NormalResponse('Test1')
* 3. 添加认证, 局部配置
     from rest_framework_jwt.authentication import JSONWebTokenAuthentication
     authentication_classes = [JSONWebTokenAuthentication, ]
from rest_framework.views import APIView
from utils.response import NormalResponse
# JSON Web 令牌认证
from rest_framework_jwt.authentication import JSONWebTokenAuthentication


class Test1(APIView):
    authentication_classes = [JSONWebTokenAuthentication, ]

    def get(self, request):
        return NormalResponse('Test1')
* 4. 添加认证, 全局配置
REST_FRAMEWORK = {


    'DEFAULT_AUTHENTICATION_CLASSES': ['rest_framework_jwt.authentication.JSONWebTokenAuthentication',]
}
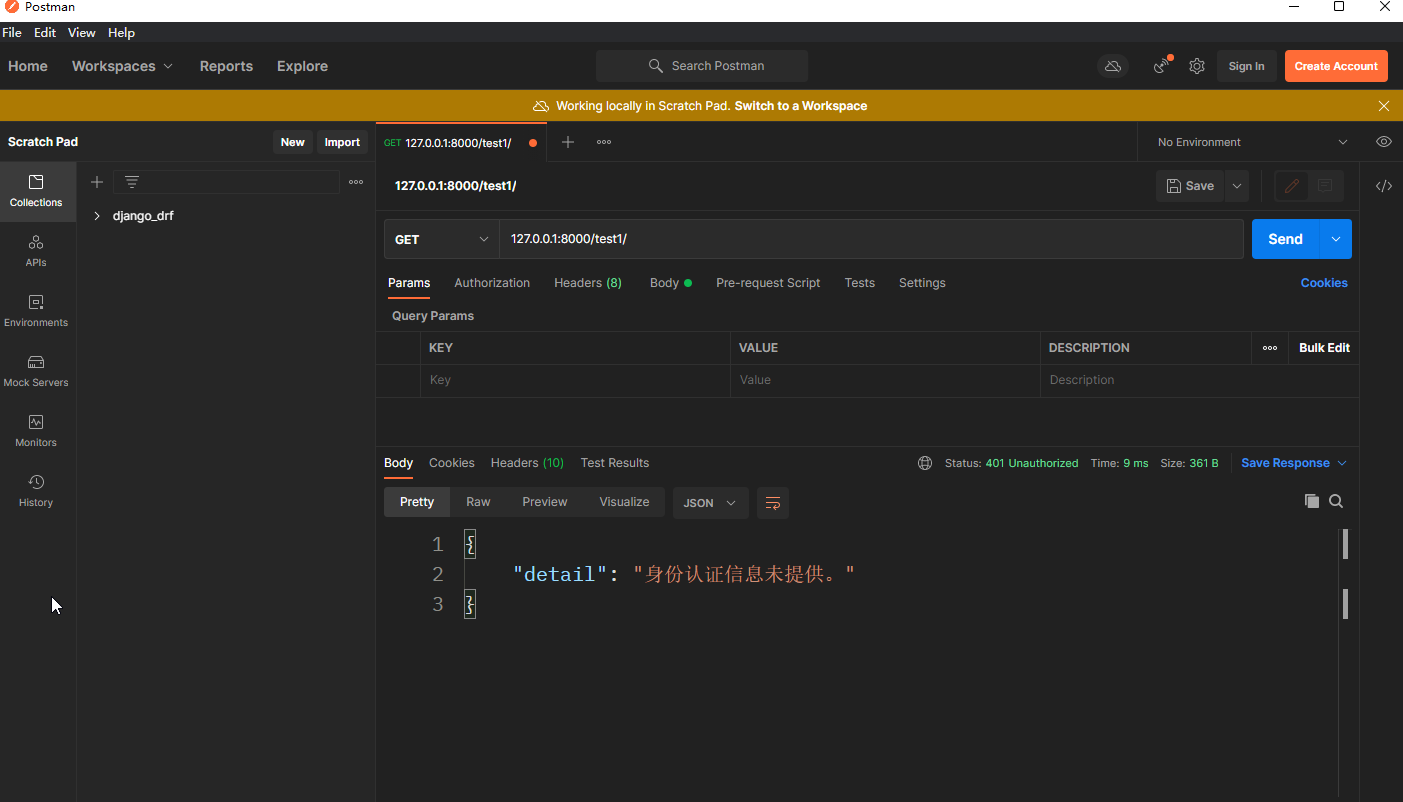
4. J WT认证+权限认证
单独使用rest_framework_jwt.authentication.JSONWebTokenAuthentication的话所有游客都可以访问,
在不提供authorization参数携带token, 或不会要求提交都能正常访问到接口的信息. 这样认证之后,
request.user 是AnonymousUser 匿名用户, 使用rest_framework内置权限类, 对登入用户进行校验,
匿名用户禁止访问!
以后在使用rest_framework_jwt.authentication.JSONWebTokenAuthentication全局配置的时候,
需要限制登入用户才能访问的接口为该类添加上权限类认证, 不需要限制的就什么都不做.
from rest_framework.views import APIView
from utils.response import NormalResponse
# JSON Web 令牌认证
from rest_framework_jwt.authentication import JSONWebTokenAuthentication
from utils.JWT import JsonWenToken
# 导入认证类
from rest_framework.permissions import IsAuthenticated


class Test1(APIView):
    # 登入认证
    authentication_classes = [JSONWebTokenAuthentication, ]
    # 权限认证类
    permission_classes = [IsAuthenticated, ]

    def get(self, request):
        print(request.user)
        return NormalResponse('Test1')
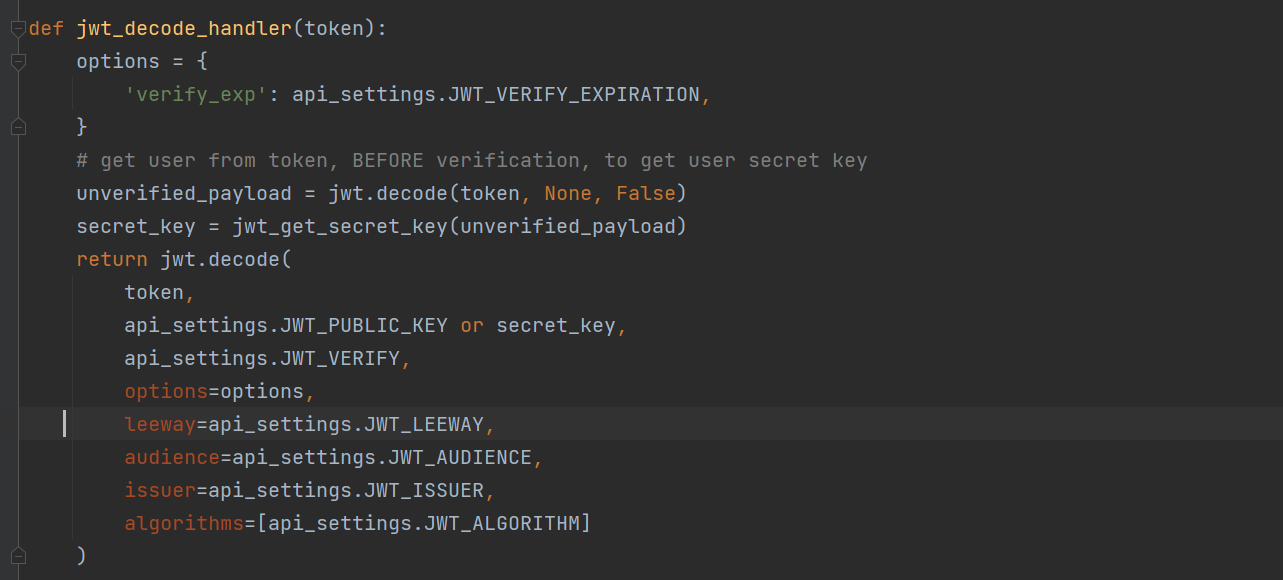
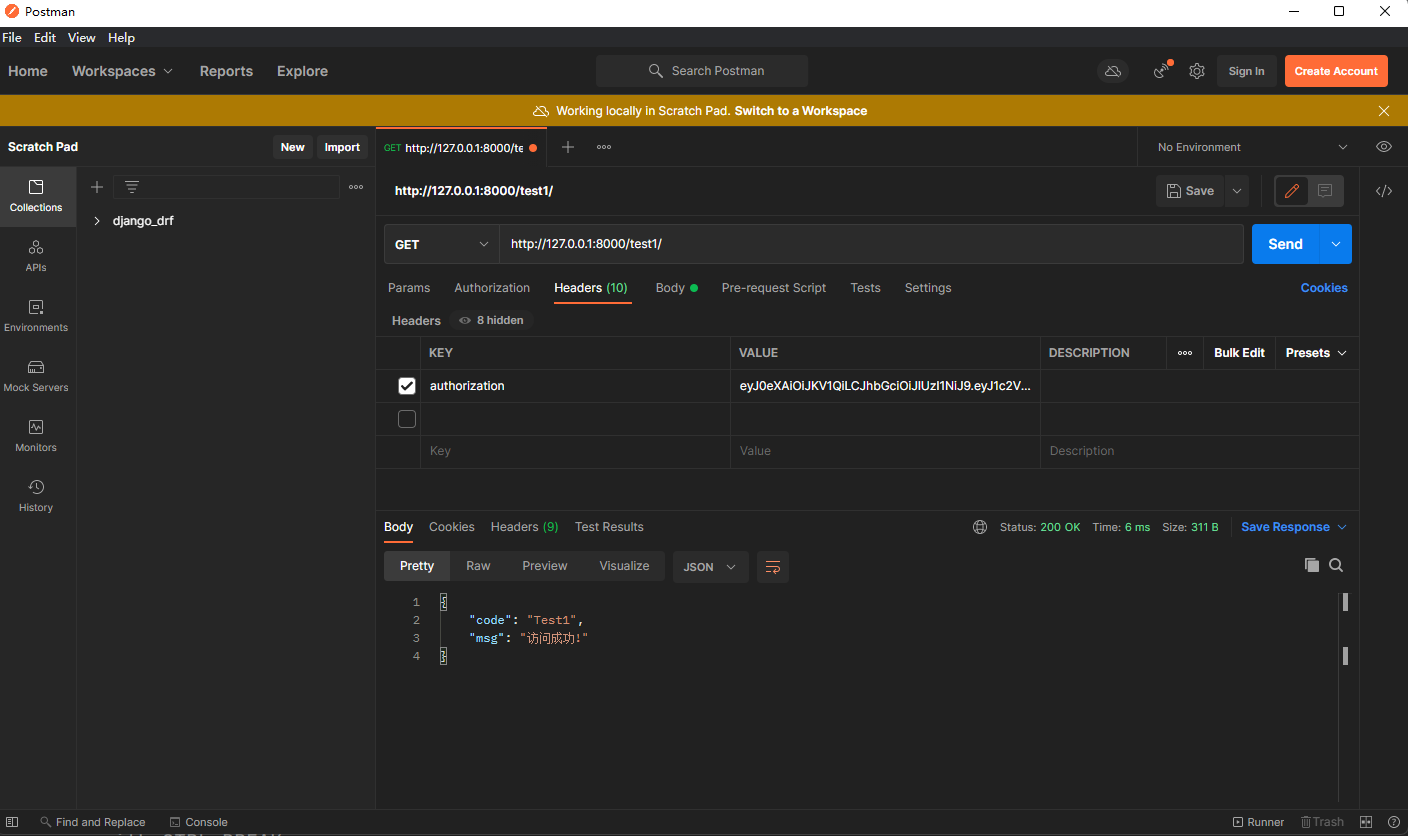
5. 自定义JWT认证类
# 导入内置的校验程序
from rest_framework_jwt.utils import jwt_decode_handler

BaseJSONWebTokenAuthentication有两个方法:
authenticate 认证方法
authenticate_credentials 数据token校验方法

继承 BaseJSONWebTokenAuthentication, 重写authenticate认证方法,
自己获取请求头的token值, 使用jwt_decode_handler方法对值进行校验, 解析出字第二端的用户信息-->dict
获取用户数据对象authenticate_credentials
Pythonn内置jwt模块, 其中收录了rest_framework_jwt校验出现的异常
import jwt
# jwt模块的exceptions.py文件中
# 无效令牌错误
class InvalidTokenError(PyJWTError):
# 解码错误
class DecodeError(InvalidTokenError):
# 无效签名错误
class InvalidSignatureError(DecodeError):
# 过期签名错误
class ExpiredSignatureError(InvalidTokenError):
# 无效的观众错误
class InvalidAudienceError(InvalidTokenError):
# 无效的发行人错误
class InvalidIssuerError(InvalidTokenError):
# 错误发出无效
class InvalidIssuedAtError(InvalidTokenError):
# 不成熟的签名错误
class ImmatureSignatureError(InvalidTokenError):
# 无效密钥错误
class InvalidKeyError(PyJWTError):
# 无效算法错误
class InvalidAlgorithmError(InvalidTokenError):
# 缺少必需的声明错误
class MissingRequiredClaimError(InvalidTokenError):
# 导入基本 JSON Web 令牌身份验证模块
from rest_framework_jwt.authentication import BaseJSONWebTokenAuthentication
# 导入异常模块
from rest_framework.exceptions import AuthenticationFailed

# 导入内置的校验程序
from rest_framework_jwt.utils import jwt_decode_handler
# 导入 jwt模块
import jwt
# 导入模型层
from app01 import models


class JsonWenToken(BaseJSONWebTokenAuthentication):
    # 定义authenticate认证方法
    def authenticate(self, request):
        # 获取token值
        jwt_value = request.META.get('HTTP_AUTHORIZATION')
        print(jwt_value)
        # 如果没有token值则直接抛出异常
        if not jwt_value:
            raise AuthenticationFailed('没有携带token')

        try:
            # 使用内置模块校验数据得到payload中用户信息字段
            payload = jwt_decode_handler(jwt_value)
            print(payload)
        except jwt.ExpiredSignatureError:
            raise AuthenticationFailed('签名过期!')
        except jwt.DecodeError:
            raise AuthenticationFailed('无效的负载字符串!')
        # 兜底
        except Exception:
            raise AuthenticationFailed('token无效!')
        # 通过用户信息字段得到用户对象
        # 方式1
        user_obj = models.UserInfo.objects.get(username=payload.get('username'))

        # 方式2, 生成一个对象, 对象不具备什么功能, 仅携带了用户名, 但是不查数据库, 执行速度快
        user_obj2 = models.UserInfo(username=payload.get('username'))
        print(user_obj2)
        return user_obj, jwt_value
内置的获取用户数据对象模块
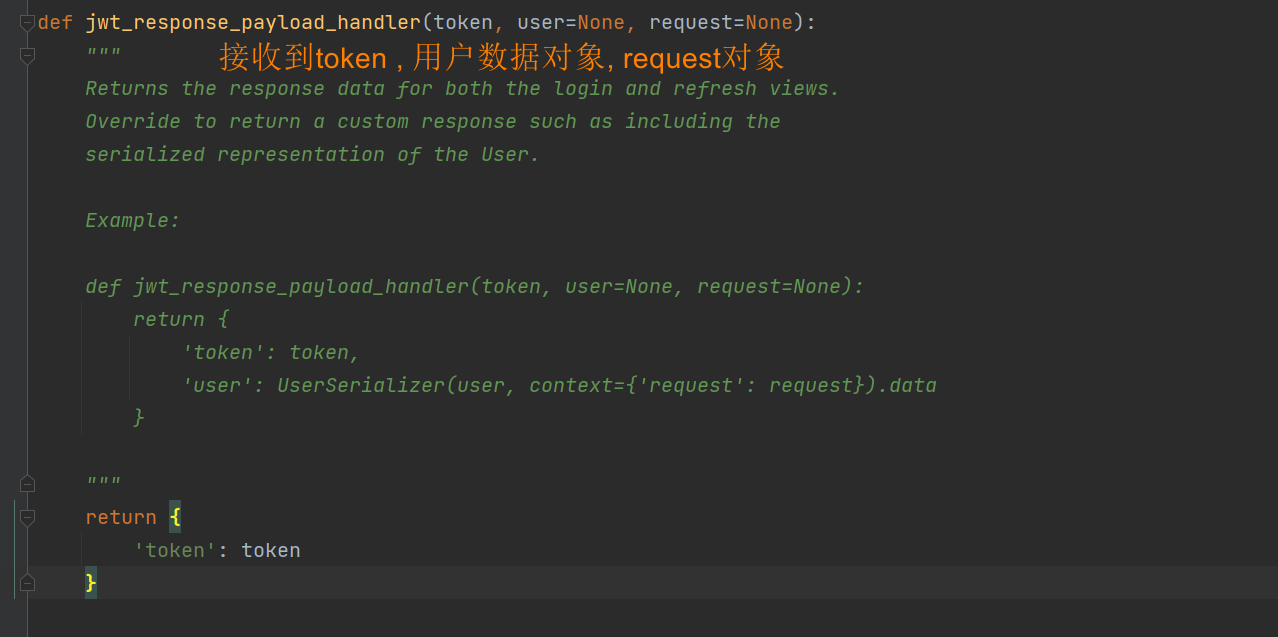
6. 自定义返回数据格式
第一种方案: JWT模块预留返回格式的配置, 重新定义登入接口返回的数据格式, 更改配置即可. jwt的配置文件:
	'JWT_RESPONSE_PAYLOAD_HANDLER': 'rest_framework_jwt.utils.jwt_response_payload_handler'
* 1. 自定义返回数据的格式
# 自定义
def customize_jwt_response_payload_handler(token, user=None, request=None):

	# 返回的数据就是响应的数据
    return {


        'code': 200,
        'msg': '登入成功!',
        '用户名': user.username,
        'token': token,
    }
* 2. 修改配置文件
# jwt的配置
JWT_AUTH = {


    'JWT_RESPONSE_PAYLOAD_HANDLER': 'utils.JWT.customize_jwt_response_payload_handler',
}
7. 多种登入自动签发token
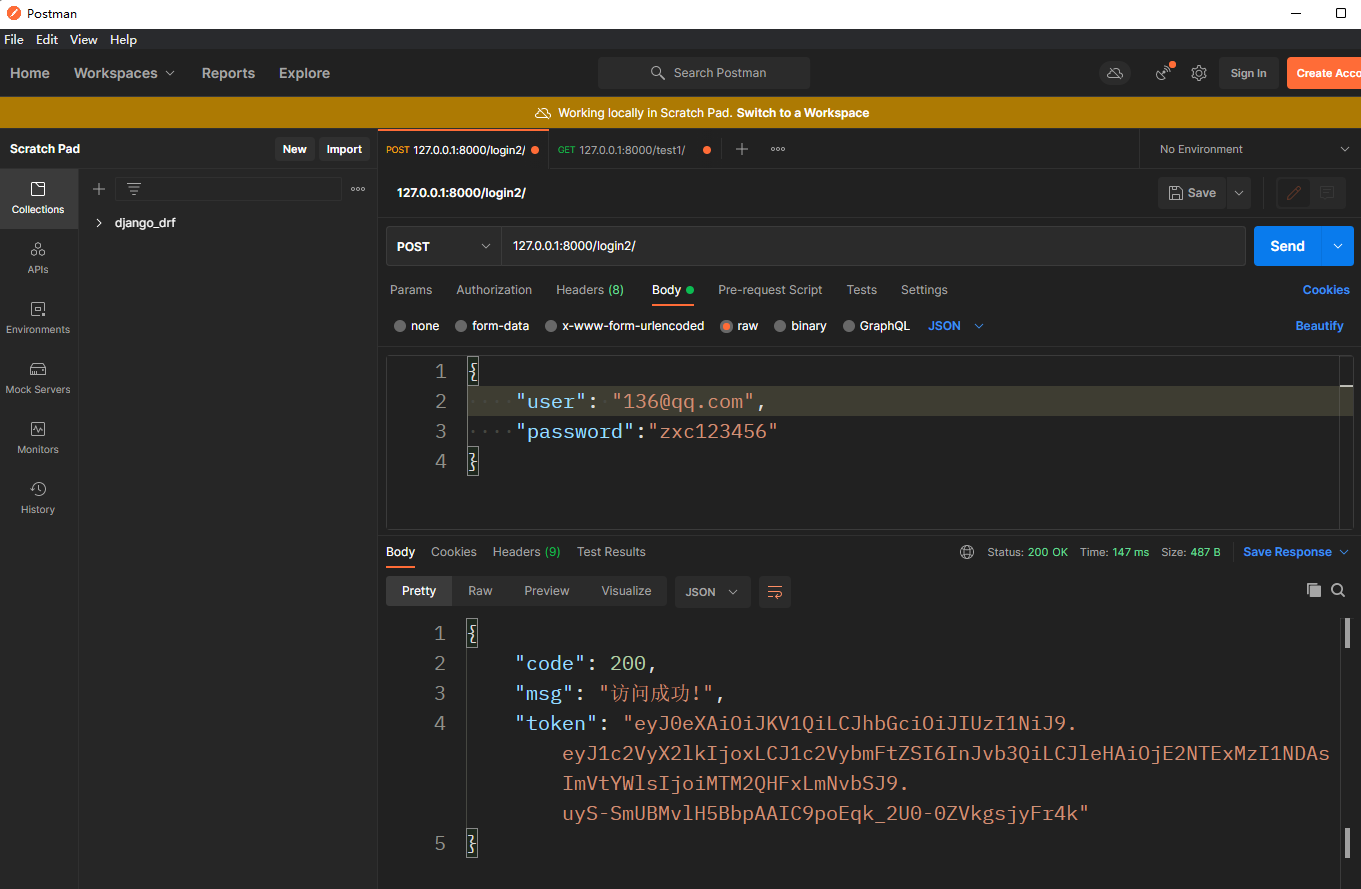
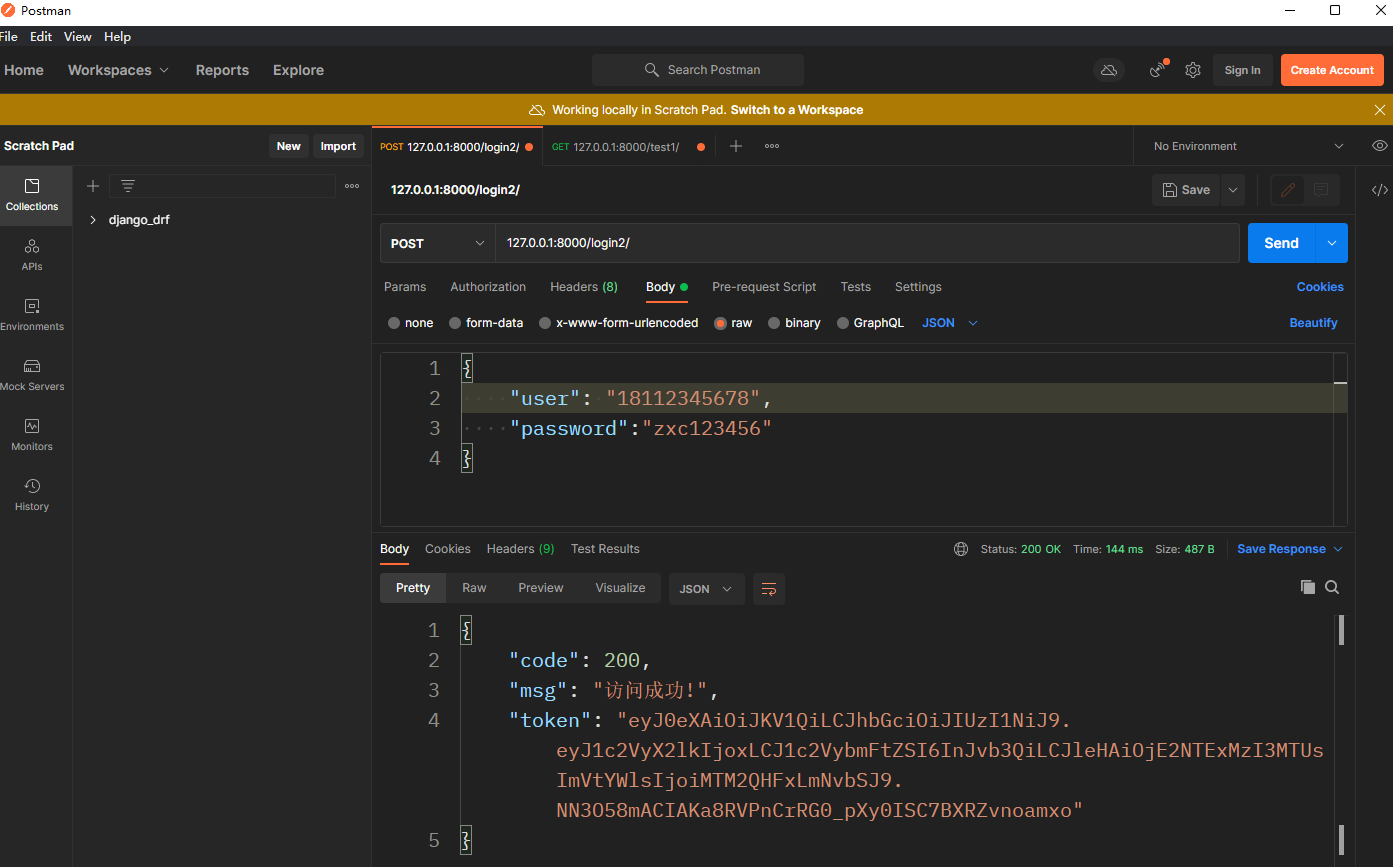
可以通过用户名, 邮箱, 手机号登入
登入签发过程:
	1. post提交(用户名/邮箱/手机号)与密码登入
	2. 使用序列化器对数据进行校验
	3. 在序列化器中按照 用户名/邮箱/手机号 获取到用户的数据对象
	4. 密文校验用户密码
	5. 使用用户对象生成token, 并将token返回

# 内置的加密模块
from rest_framework_jwt.utils import jwt_payload_handler, jwt_encode_handler

payload  = jwt_payload_handler(user)   # 将用户数据对象传入 得到 payload
token = jwt_encode_handler(payload)  # 将payload传入, 得到token
# 模型序列化器
from rest_framework import serializers
# 导入模型层
from app01 import models
# 导入正则模块
import re
# 导入异常模块
from rest_framework.exceptions import ValidationError
# 导入内置的加密模块
from rest_framework_jwt.utils import jwt_payload_handler, jwt_encode_handler


class UserInfoModelSerializer(serializers.ModelSerializer):
    # 定义用户名的校验, 用户名可以是账户名, 邮箱, 手机号码... 做数据检验不为空 必填即可
    user = serializers.CharField()

    # 定义,Meta类
    class Meta:
        model = models.UserInfo
        fields = ['user', 'password']

    # 全局钩子, 在第一层校验之后就会触发全局钩子
    def validate(self, attrs):
        # 使用正则判断user是 账户名 还是 邮箱 还是 手机号
        user = attrs.get('user')
        password = attrs.get('password')
        print(user)
        # 13 - 19 开头占两位, 0-9 9位, 共11位
        if re.match('^1[3-9][0-9]{9}$', user):
            # 通过手机号去获取数据对象
            user_obj = models.UserInfo.objects.filter(phone=user).first()
        # 只有有@符号就是邮箱
        elif re.match('^.*@.*$', user):
            user_obj = models.UserInfo.objects.filter(email=user).first()
        # 通过用户名获取用户数据对象
        else:
            user_obj = models.UserInfo.objects.filter(username=user).first()

        # 判断用户对象是否获取到了值
        if not user_obj:
            raise ValidationError('提供的用户名/邮箱/手机号不正确')

        # 密文校验
        if not user_obj.check_password(password):
            # 校验不成功抛异常
            raise ValidationError('密码不正确')

        # 校验成功 生成token 并将值返回
        payload = jwt_payload_handler(user_obj)  # 将用户数据对象传入 得到 payload
        token = jwt_encode_handler(payload)  # 将payload传入, 得到token

        """
        token 存放在
        序列化器有一个参数context 可以用于视图与序列化器的信息交互
        视图类中 序列化器(序列化器有一个参数context={'request': request}), 在序列化器中便可以拿到request
        class BaseSerializer(Field):
            def __init__(..., **kwargs)
                self._context = kwargs.pop('context', {}) 自己不提供值则是一个空字典
        """
        # 将token放静_context中
        self._context['token'] = token
        # user是虚拟的字段, 之后不需要操作数据库, 不需要将值pop掉
        return attrs
用户名登入
邮箱登入
手机号码登入
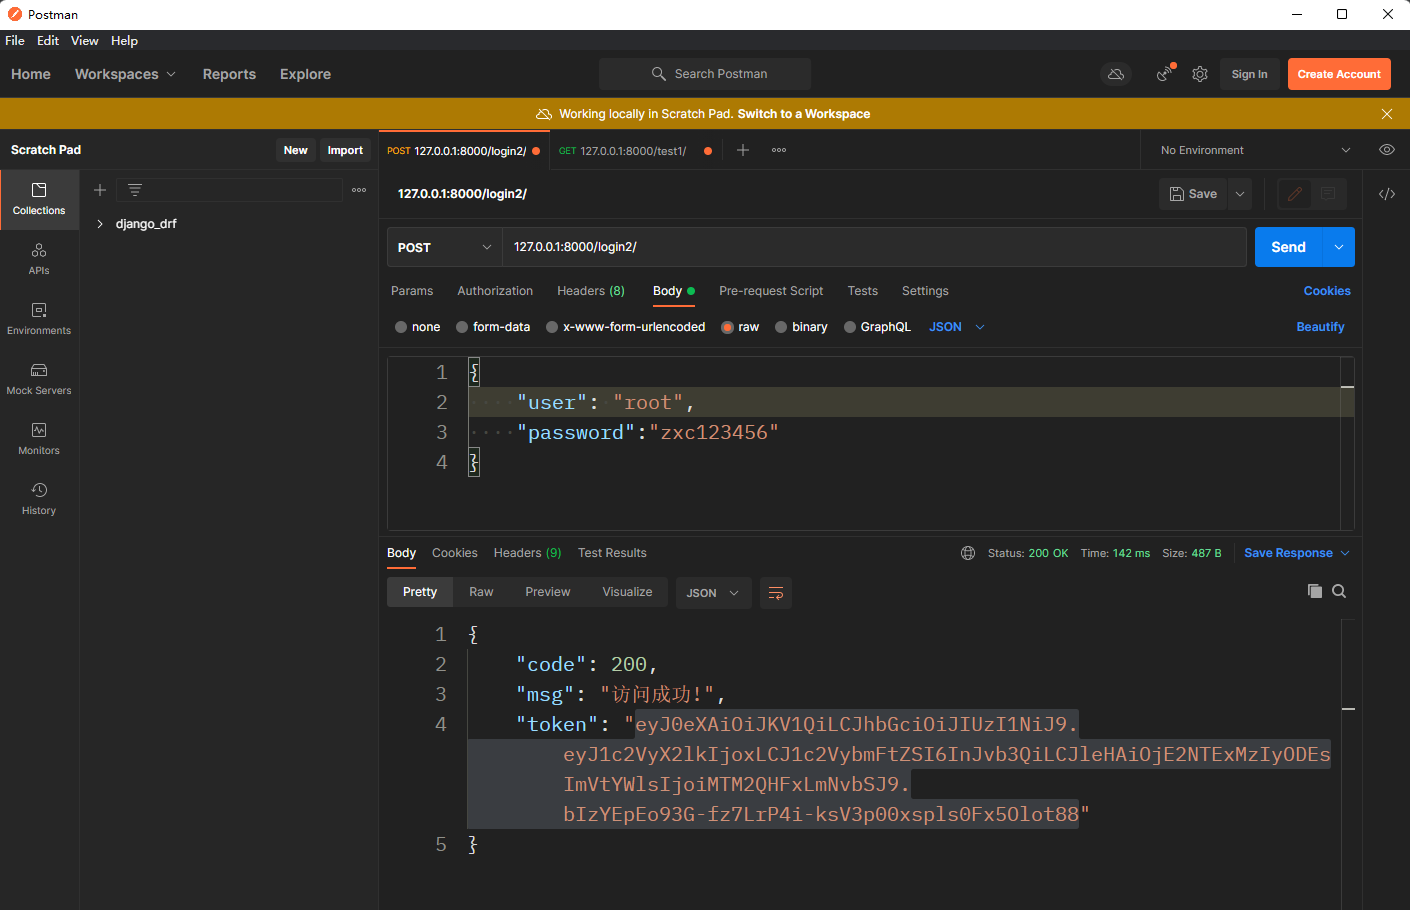
访问测试
8. 过期时间配置
# 时间参数
datetime.timedelta(days=0, seconds=0, microseconds=0,
                   milliseconds=0, minutes=0, hours=0, weeks=0)
# jwt的配置
JWT_AUTH = {


    # 过期时间配置
    'JWT_EXPIRATION_DELTA': datetime.timedelta(days=7)}  # 七天过期
9. RBAC权限
RBAC权限: 是基于角色的访问控制,
Django的Auth组件, 才有的认证规则就是RBAC
适用于人员权限管理CRM系统, 公司内部使用数据量在10w以下, 效率要求不高.
用户量大的项目, 会分两种用户. 前台用户(三大认证) 和后台用户(RBAC管理)
没有特殊要求的Django项目可以直接采用Auth组件的权限六表.
9.1 前后台权限控制
后台用户对各表操作, 可以直接借助admin后台控制.
后期也可以使用xadmin框架来做后台用户权限管理'

前台用户的权限, 定义一堆数据接口的视图类, 不同的登入用户是否能访问这些视图类, 能则代表有权限
不能则代表无权限, 前台用户权限用DRF框架的三大认证
9.2 Django内置RBAC六表
Django依据六张表做后台的权限的控制
userinfo 用户表
auth_group 分组表
auth_permission 权限表
userinfo_groups 用户与分组的中间表
userinfo_user_permissions 用户与权限的中间表
auth_group_permissions 分组与权限的中间表
1.权限三表
| User 用户表 | |
|---|---|
| id | name 用户名 |
| 1 | kid |
| 2 | |
| 3 | qaq |
| 4 | root |
| Group 分组表 | |
|---|---|
| id | dep_name 部门名字 |
| 1 | 经理 |
| 2 | 人事 |
| 3 | 财务 |
| Permission 权限表 | |
|---|---|
| id | function 能操作功能 |
| 1 | 管理 |
| 2 | 招人 |
| 3 | 发工资 |
| 4 | 外挂 |
2. 关系表
表与表之间不直接关联, 而是使用第三张表关联.
| U_G 关系表 | ||
|---|---|---|
| id | u_id | g_id |
| 1 | 1 | 1 |
| 2 | 2 | 2 |
| 3 | 3 | 3 |
| G_P 关系表 | ||
|---|---|---|
| id | g_id | p_id |
| 1 | 1 | 1 |
| 2 | 2 | 2 |
| 3 | 3 | 3 |
| U_P 关系表 | ||
|---|---|---|
| id | u_id | p_id |
| 1 | 4 | 4 |
U_P 用户没有部门, 直接拥有权限...
9.3 后台管理
* 1. 添加几张表
from django.db import models

# Create your models here.
from django.contrib.auth.models import AbstractUser


# 用户表
class UserInfo(AbstractUser):
    phone = models.CharField(max_length=11, verbose_name='手机号')
    icon = models.ImageField(upload_to='icon')  # ImageField字段依赖pillow模块


# 部门表
class Dep(models.Model):
    dep_name = models.CharField(max_length=32, verbose_name='部门名称')
    dep_num = models.IntegerField(verbose_name='部门人数')


# 工作
class Work(models.Model):
    work_name = models.CharField(max_length=32, verbose_name='工作的名称')
    desc = models.CharField(max_length=64, verbose_name='工作的描述')
 生成表操作记录, 数据库迁移
 python manage.py makemigrations
 python manage.py migrate
* 2. 在admim表中注册展示的表
from django.contrib import admin

# Register your models here.
from app01 import models


admin.site.register(models.UserInfo)
admin.site.register(models.Dep)
admin.site.register(models.Work)
* 3. 登入到后台管理, 超级用户拥有所有的操作权限
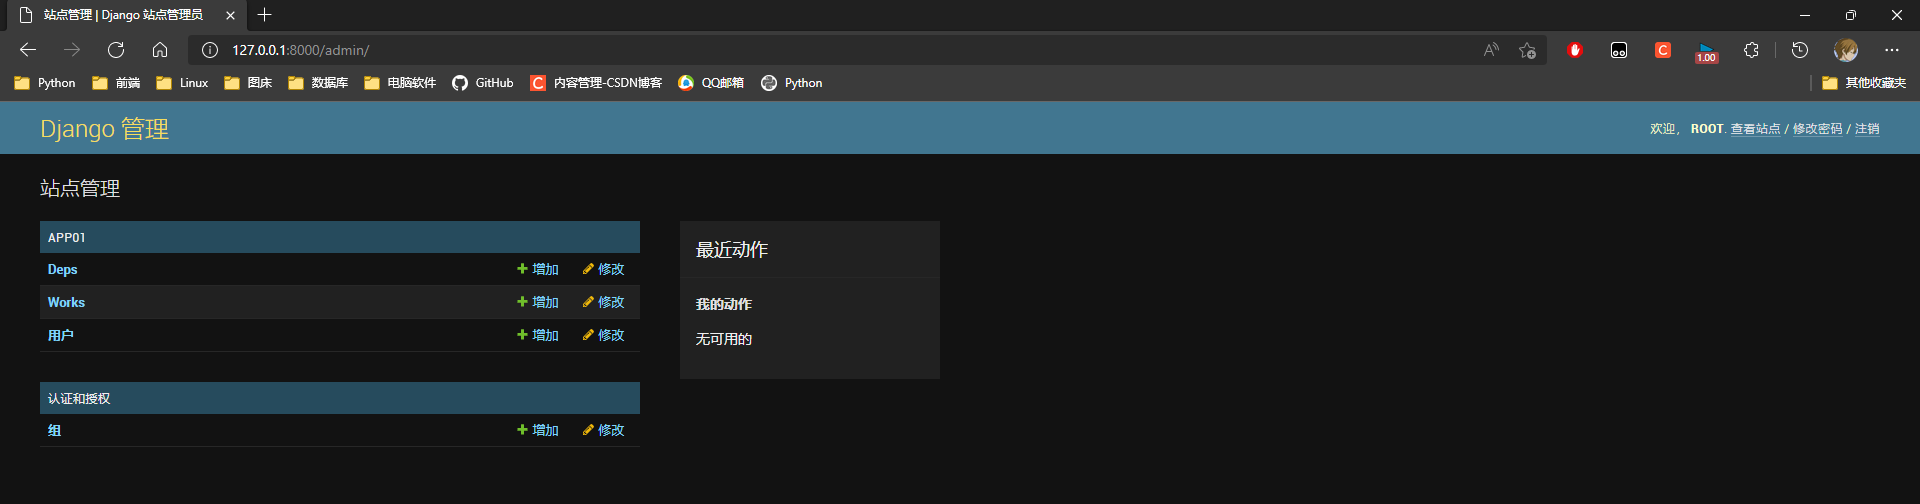
可以为用户设置分组, 再为分组设置权限,
可以直接为用户设置权限
[外链图片转存失败,源站可能有防盗链机制,建议将图片保存下来直接上传(img-cgmxFwiP-1651290505821)(D:/%E6%88%AA%E5%9B%BE/2022-04-28_00392.png)]
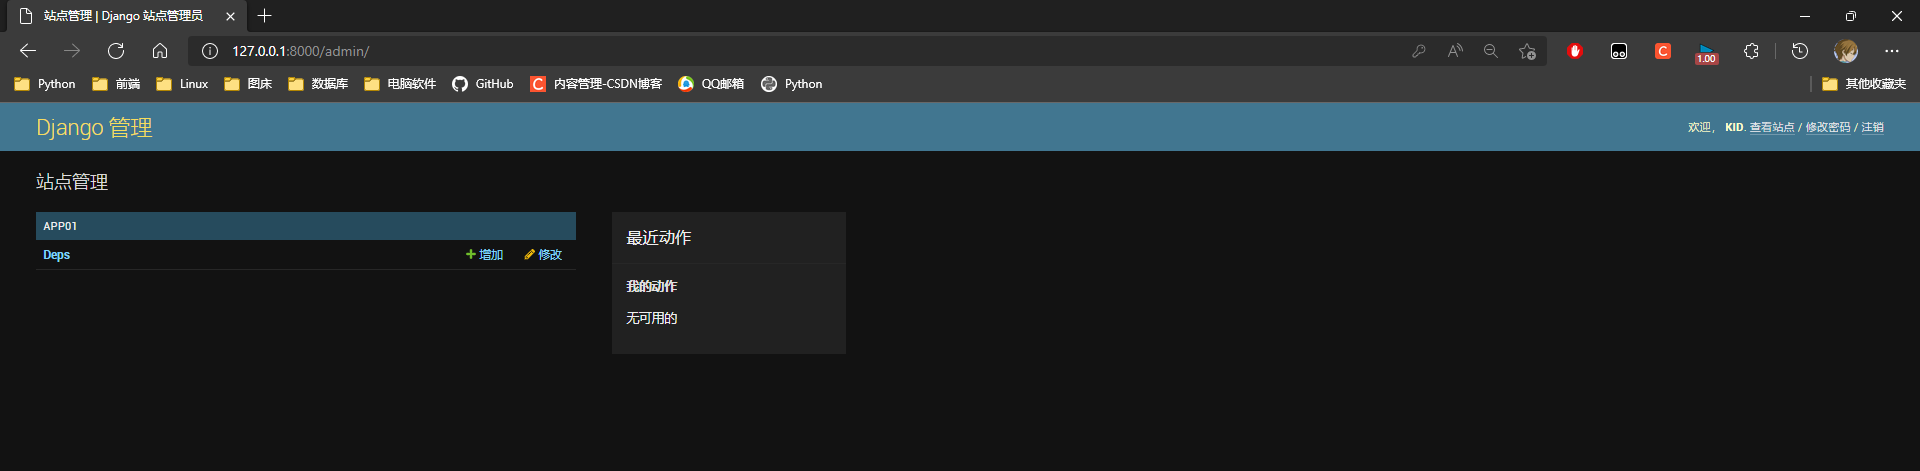
* 4. 添加用户, 设置工作人员状态才能登入后台
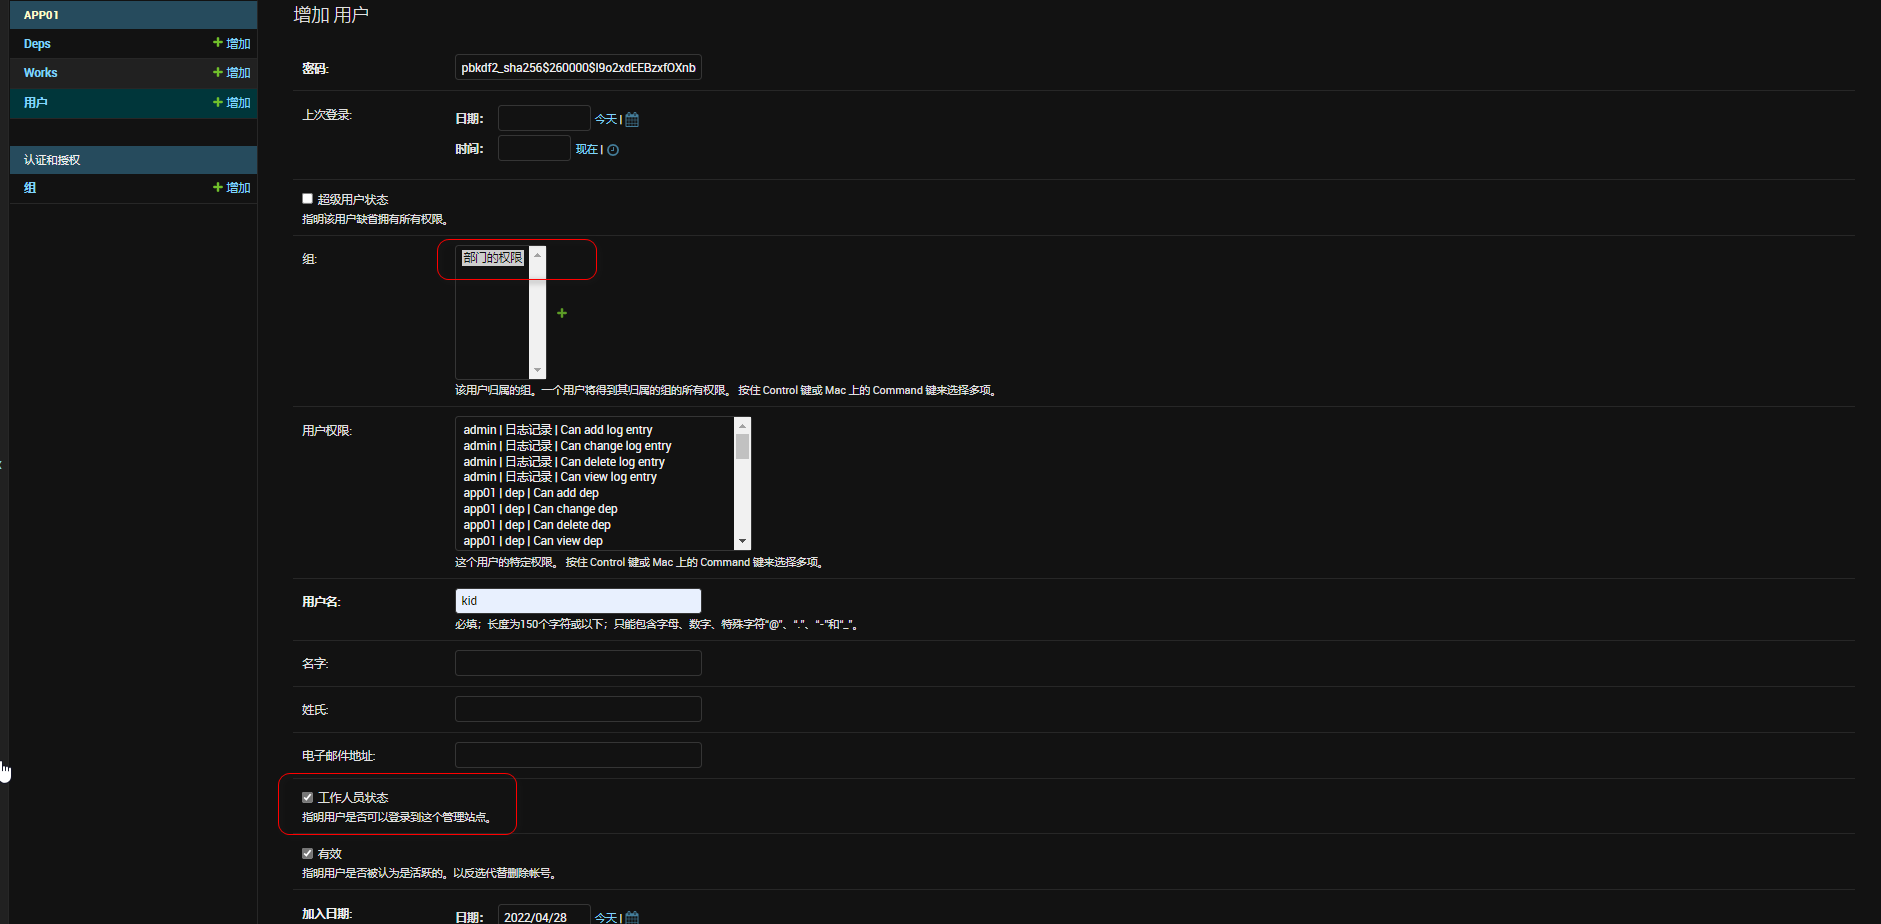
* 5. 使用新建的用户登入站点, 仅有对部分的操作权限
10. Django缓存机制
10.1 缓存介绍
在动态网站中, 用户所有的请求, 服务器都会去数据库中进行相应的增, 删, 改, 查渲染模板, 执行业务逻辑,
最后生成用户看到的页面.
当一个网站的用户访问量很大的时候, 每一个的后台操作, 都会消耗很多的服务端资源, 所有必须使用缓存来减轻后端
服务端的压力.
缓存是将一些常用的数据保存到内存中或memcache中, 在一定时间内有人来访问这些数据则不在去执行数据库及渲染
等操作, 而是慧姐从内存或memcache的缓存中去取到数据, 然后返回给用户.
10.2 Django的6种缓存方式
1. 开发调试缓存
2. 内存缓存
3. 文件缓存
4. 数据库缓存
5. Memcache缓存 使用 python-mamcached模块
6. Memcache缓存 使用 pylibmc模块
10.3 测试
1. 测试环境
* 1. 路由
    # 单页面缓存
    re_path(r'^index/', views.index),
* 2. 视图函数
# 单页面缓存
import time


def index(request):
    # 获取当前时间
    new_time = time.ctime
    # 使用context参数将变量传递给模板页面
    return render(request, 'index.html', context={

    'new_time': new_time})
* 3. 模型层
<!DOCTYPE html>
<html lang="en">
<head>
    <meta charset="UTF-8">
    <title>index</title>
</head>
<body>
    页面:
    {

   { new_time }}
</body>
</html>
* 4. 在settings.py 配置文件中配置信息
# 缓存的配置信息
CACHES = {


    # 默认配置
    'default': {


        # 指定缓存使用的引擎
        'BACKEND': 'django.core.cache.backends.filebased.FileBasedCache',
        # 指定缓存的路径
        'LOCATION': '/D/XXX/',
        # 缓存超时时间, (默认300秒, None表示永远不超时)
        'TIMEOUT': 300,
        # 选项
        'OPTIONS': {


            # 最大缓存记录的数量 默认300
            'MAX_ENTRIES': 300,
            # 缓存到达最大个数之后, 随机剔除的百分比, 1/CULL_FREQUENCY  33.33%
            'CULL_FREQUENCY': 3,
        }
    }
}
2. 单页面缓存
* 1. 使用缓存装饰器
# 导入单页缓存模块
from django.views.decorators.cache import cache_page

# 单页面缓存
import time

# 5秒过去
@cache_page(5)
def index(request):
    # 获取当前时间
    new_time = time.ctime
    # 使用context参数将变量传递给模板页面
    return render(request, 'index.html', context={

    'new_time': new_time})
缓存之后会生成一些文件, 如果缓存没有过去, 删除文件之后, 缓存也不就不存在了

3. 页面局部缓存
导入cache
{

    % load cache %}
   超时时间 '唯一标识的键'
{

    % cache 5 'key_name' %}
 局部缓存的内容
{

    % endcache %}
<!DOCTYPE html>
<html lang="en">
<head>
    <meta charset="UTF-8">
    <title>index</title>
</head>
<body>
    页面:
    {

   { new_time }}
    <hr>
    {% load cache %}
    局部缓存:
    {% cache 5 'key_name' %}
        {

   { new_time }}
    {% endcache %}
</body>
</html>
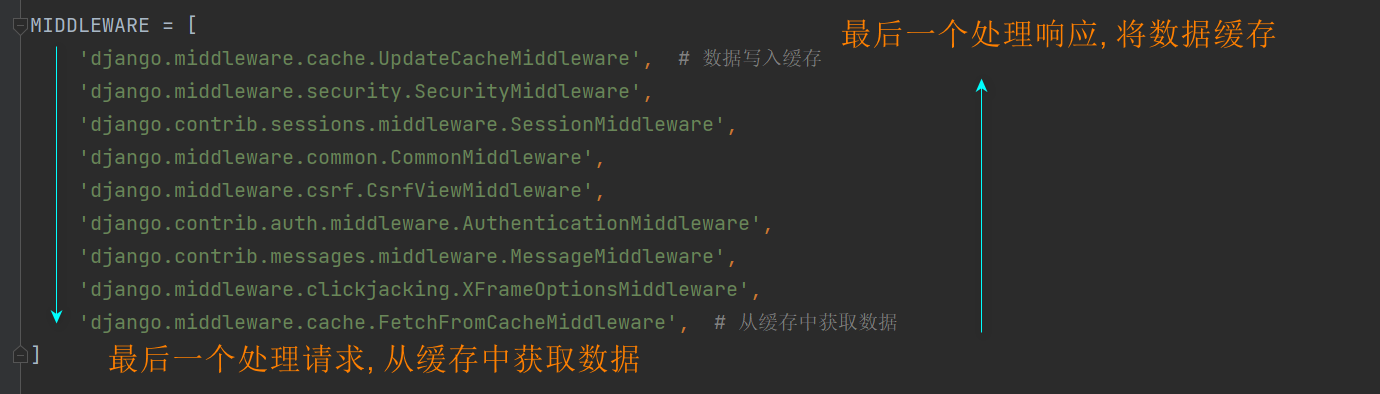
4. 全栈缓存
# 中间件
MIDDLEWARE = [
'django.middleware.cache.UpdateCacheMiddleware',  # 数据写入缓存
	...
'django.middleware.cache.FetchFromCacheMiddleware',  # 从缓存中获取数据
]
CACHE_MIDDLEWARE_SECONDS=5  # 全站缓存时间
1. 请求来的时候, 经过所有中间的 process_request到最后一个django.middleware.cache.FetchFromCacheMiddleware, 该中间件中重写了process_request请求方法
该方法实现了从缓存中获取数据

2. 请求走的时候经过所有中间的 process_response到最后一个
django.middleware.cache.UpdateCacheMiddleware, 该中间件中重写了process_response响应方法
该方法实现了数据缓存
5. 前后端分离缓存
使用模块 caches
# 导入模块 caches对象
from django.core.cache import caches
.set('key': 'value') value可以是任意类型数据, 将数据序列化之后再存.
.get('key') 通过键取值
* 1. 路由
# 前后端分离
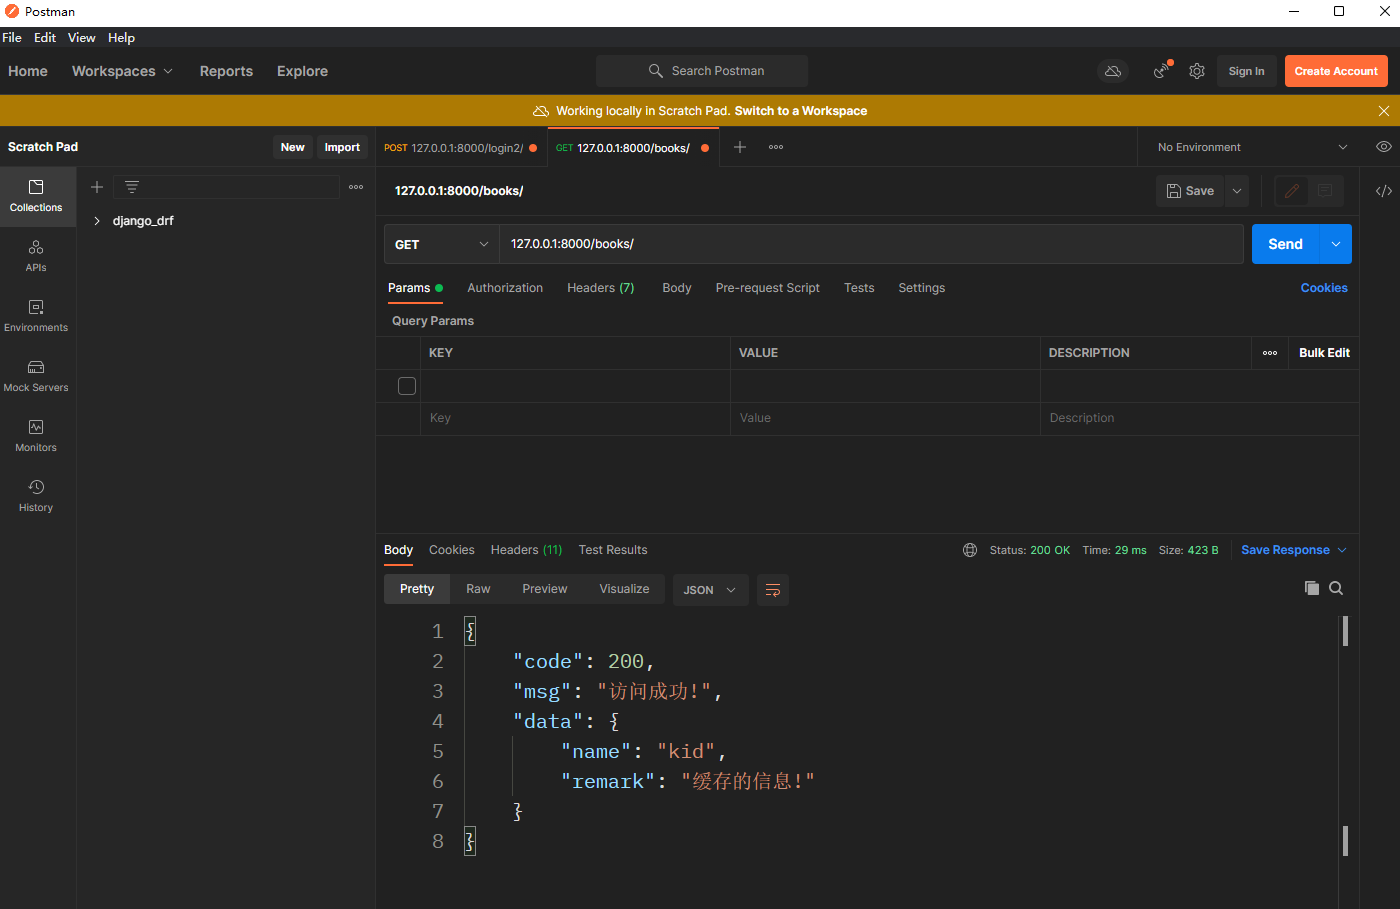
re_path(r'^books/', views.BookAPI.as_view())
* 2. 视图类
# 导入缓存对象
from django.core.cache import cache


class BookAPI(APIView):
    def get(self, request):
        # 判断缓存中是否有值

        data = cache.get('book_dic')
        if data:
            data.update({

    'remark': '缓存的信息!'})
            return NormalResponse(data=data)

        # 获取数据的处理程序
        data = {

    'name': 'kid'}

        # 存数据
        cache.set('book_dic', data)
        return NormalResponse(data=data)
第一次访问, 获取不到数据则执行获取数据, 存数据的操作.
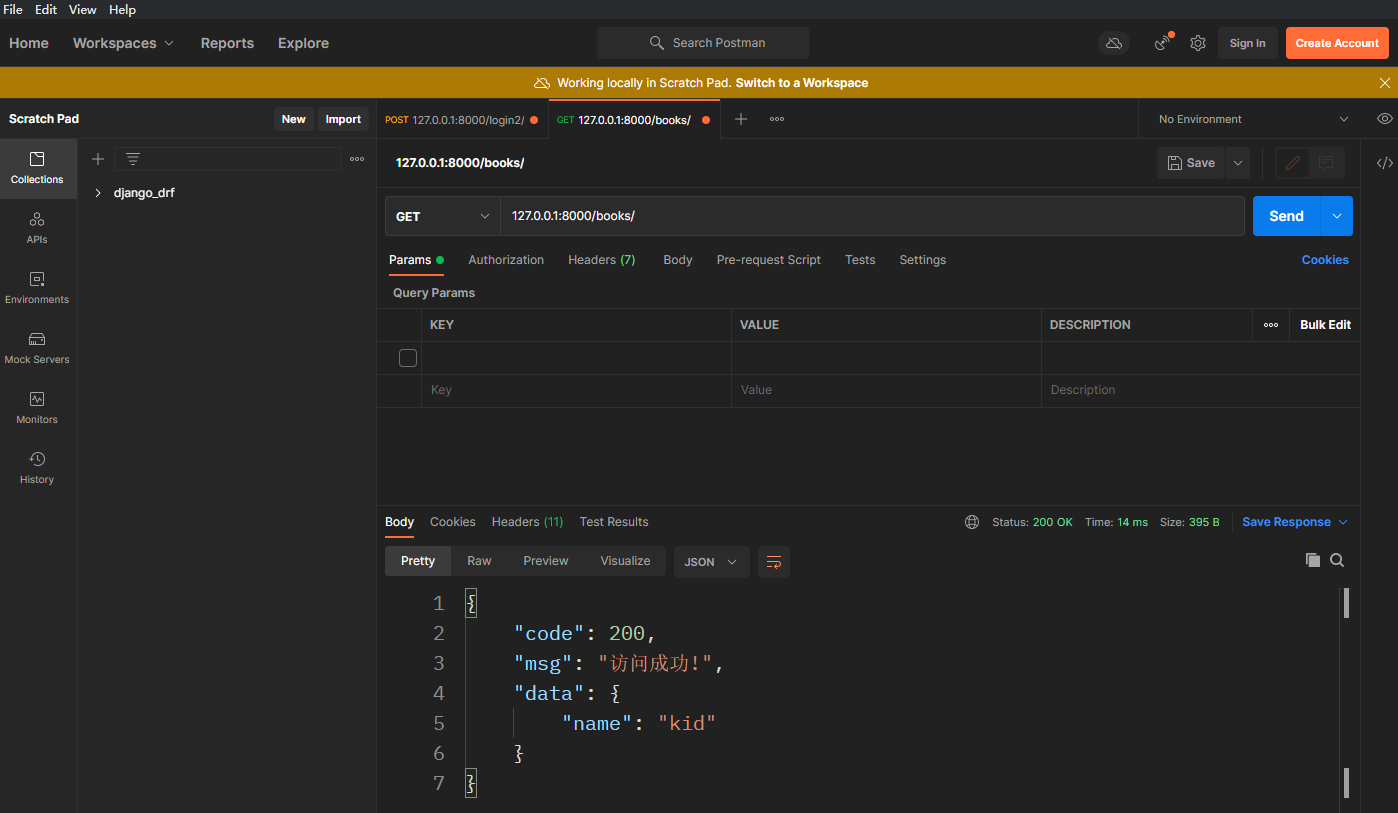
第一次访问, 从缓存中获取到值, 直接返回.