为什么用swiftUI构建页面
随着AGC SDK功能逐步完善,并且开始兼容Mac OS平台,我们迫切需要构建跨平台应用来适应不断进步的AGC SDK。同时,Xcode也已经推出了Multiplatform类型App,但是开发Multiplatform类型App,强制使用swiftUI来构建页面。
什么是swiftUI
swiftUI是在苹果设备上创建用户界面的一种现代方式,可以更快的创建漂亮且充满活力的应用。声明式描述任何状态下的视图内容和布局。swiftUI知道视图何时发生状态改变,并及时刷新对应状态下的视图内容。把多个目标单一的小视图组合成功能复杂的大视图今儿组合成复杂的用户界面。同时自定义视图还可以在不同的苹果设备应用开发中复用。创建流畅的动画效果仅仅需要添加一个方法调用就可以完成。swiftUI负责在必要时进行动画效果的内部计算和转场处理。
swiftUI实战
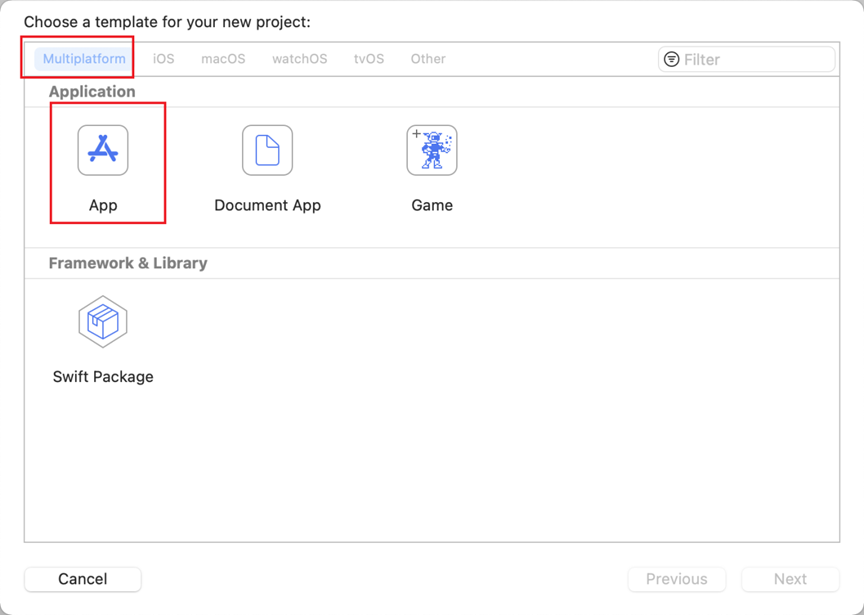
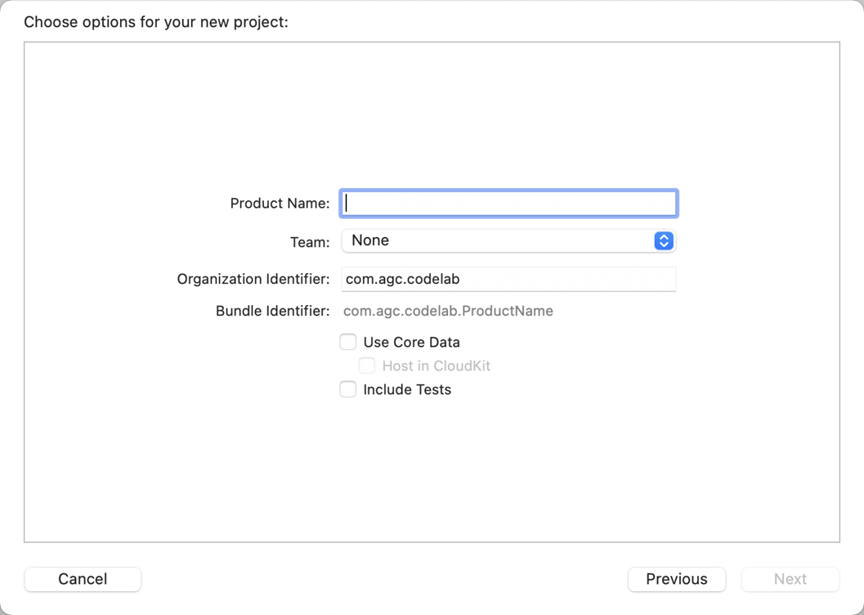
1、新建跨平台工程:打开Xcode,创建一个新工程,选择Multiplatform->App,输入项目名称。这样就创建了一个跨平台的工程。
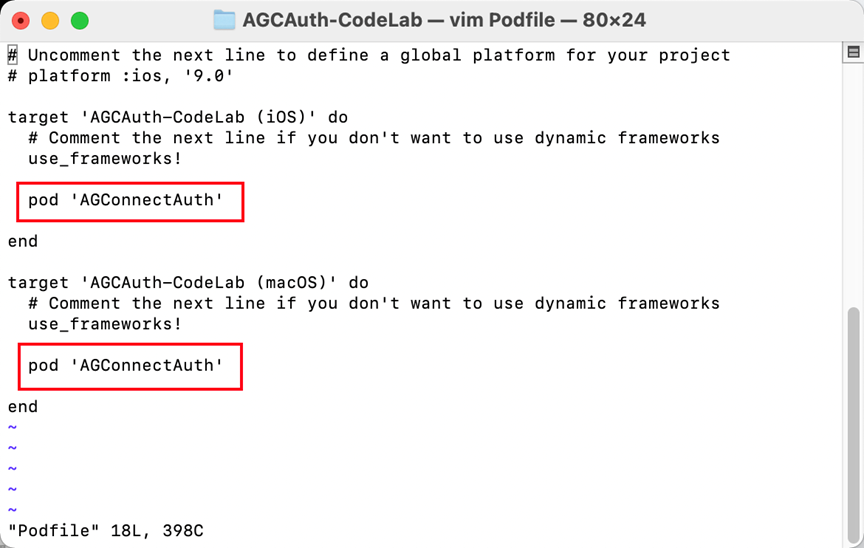
2、集成SDK:进入到项目根目录,执行pod init。

生成Podfile文件后,执行vim Podfile,修改Podfile文件,如下图添加AGConnectAuth的pod仓。
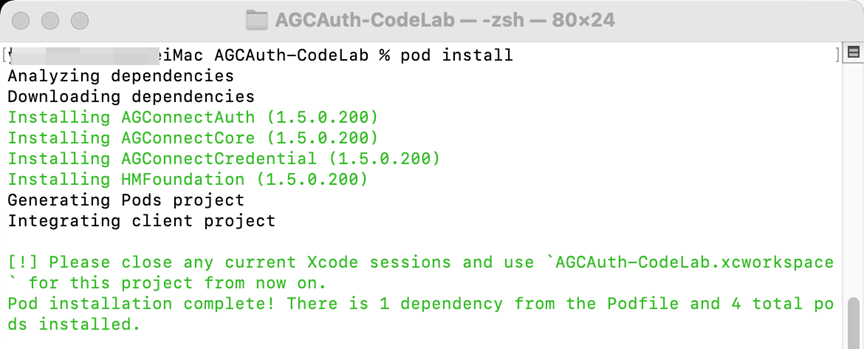
修改完成后,按下Esc键,输入:wq退出并保存。执行pod install,下载SDK。
3、初始化:用Xcode打开工程,在AGCAuth_CodeLabApp.swift文件中,引入AGConnectCore,初始化方法中执行startUp。代码如下:
import SwiftUI
import AGConnectCore
@main
struct AGCAuth_CodeLabApp: App {
    var body: some Scene {
        WindowGroup {
            ContentView()
        }
    }
    init() {
        AGCInstance.startUp()
    }
}
4、构建页面:构建一个登录注册页面,通过Picker组件来切换登录方式,根据offset来显示当前是手机号登录或邮箱登录。
import SwiftUI
import AGConnectAuth
let rectWidth: CGFloat = 300
let rectHeight: CGFloat = 35
let accountTypes = ["phone number", "email account"]
struct ContentView: View {
@State var index = 0
@State var offset: CGFloat = 0
var body: some View {
VStack {
GeometryReader{ geo in
Picker(selection: $index, label: Text("")) {
ForEach(0 ..< accountTypes.count) {
Text(accountTypes[$0]).tag($0)
}
}.pickerStyle(SegmentedPickerStyle())
.frame(width: rectWidth, height: rectHeight, alignment: .center)
.padding(.top, 50)
.onChange(of: index, perform: { value in
if index == 0 {
offset = 0
}else {
offset = -geo.frame(in: .global).width
}
})
HStack(spacing: 0){
ForEach(0 ..< accountTypes.count) { index in
LoginView(index: index)
.frame(width: geo.frame(in: .global).width, height: geo.frame(in: .global).height)
}
}.offset(x: offset)
}
}
}
}
struct LoginView: View {
@State var index: Int
@State var account: String = ""
@State var vertifyCode: String = ""
@State var password: String = ""
var body: some View {
VStack(alignment: .center, spacing: 0, content: {
VStack {
TextField("please input" + accountTypes[index], text: $account)
.textFieldStyle(RoundedBorderTextFieldStyle())
.frame(width: rectWidth, height: rectHeight, alignment: .center)
.padding(.bottom, 10)
HStack {
TextField("vertify code", text: $vertifyCode)
.textFieldStyle(RoundedBorderTextFieldStyle())
.frame(width: rectWidth-120, height: rectHeight, alignment: .center)
Button("send vertify code") {
//
}
.frame(width: 100, height: rectHeight, alignment: .center)
.buttonStyle(PlainButtonStyle())
.background(Color.blue)
.foregroundColor(.white)
}
TextField("please input password", text: $password)
.textFieldStyle(RoundedBorderTextFieldStyle())
.frame(width: rectWidth, height: rectHeight, alignment: .center)
.padding(.bottom, 10)
Button("register") {
//
}
.frame(width: rectWidth, height: rectHeight, alignment: .center)
.buttonStyle(PlainButtonStyle())
.background(Color.orange)
.foregroundColor(.white)
.padding(.bottom, 10)
Button("login") {
//
}
.frame(width: rectWidth, height: rectHeight, alignment: .center)
.buttonStyle(PlainButtonStyle())
.background(Color.red)
.foregroundColor(.white)
.padding(.bottom, 10)
Button("logout") {
AGCAuth.instance().signOut()
}
.frame(width: rectWidth, height: rectHeight, alignment: .center)
.buttonStyle(PlainButtonStyle())
.background(Color.blue)
.foregroundColor(.white)
.padding(.bottom, 10)
}
})
}
}
struct ContentView_Previews: PreviewProvider {
static var previews: some View {
ContentView()
}
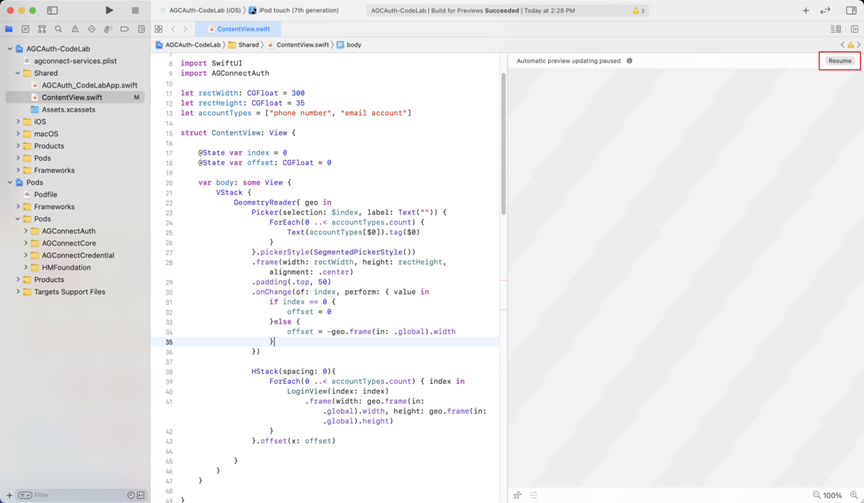
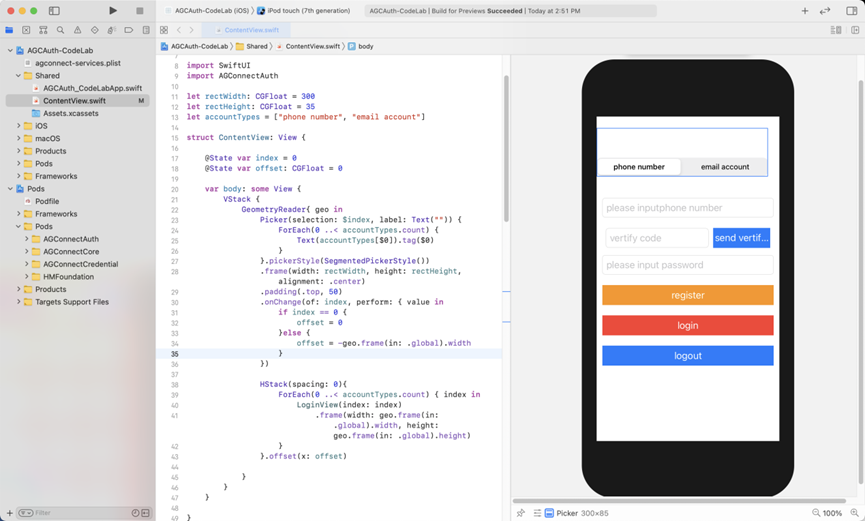
}5、预览视图功能:点击右侧区域的Resume按钮或快捷键Command+Option+P刷新画布,即可看到当前布局的静态页面。
验证
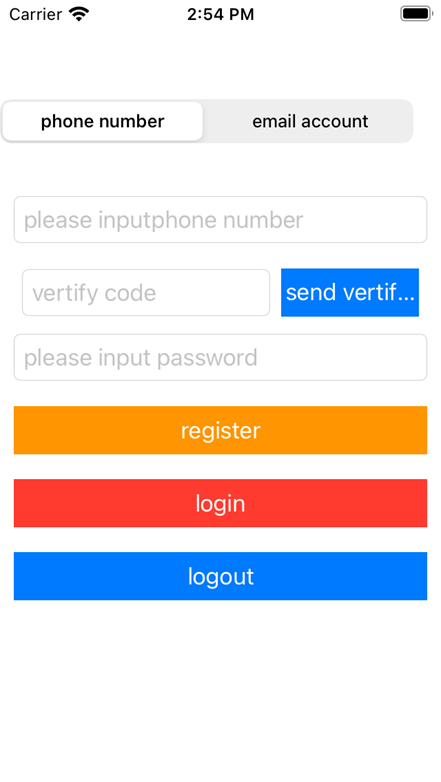
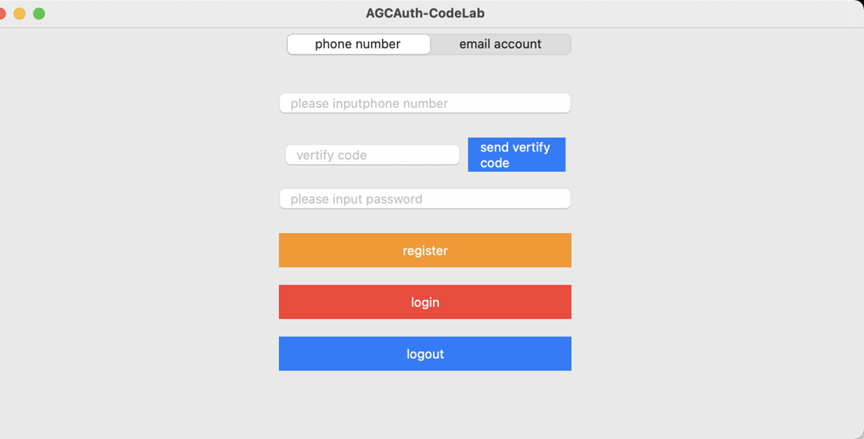
1、选择在iOS设备上运行,显示正常。
2、选择在MacOS上运行:可以看到Picker明显偏移了。
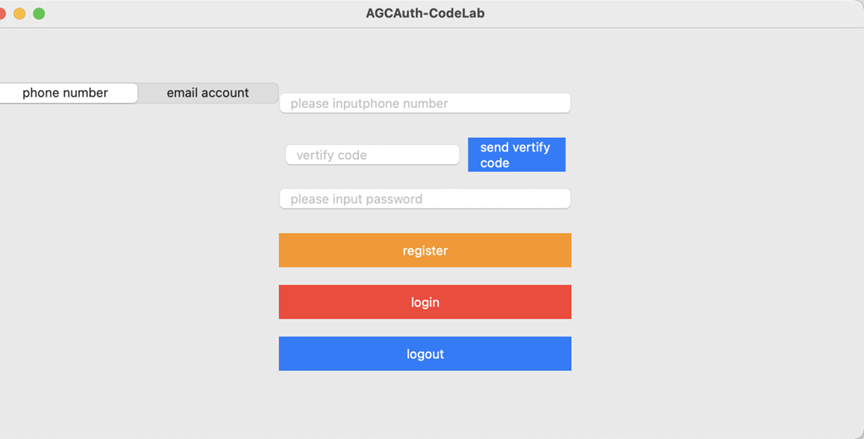
由此可见,代码中属性设置alignment: .center并没起作用。
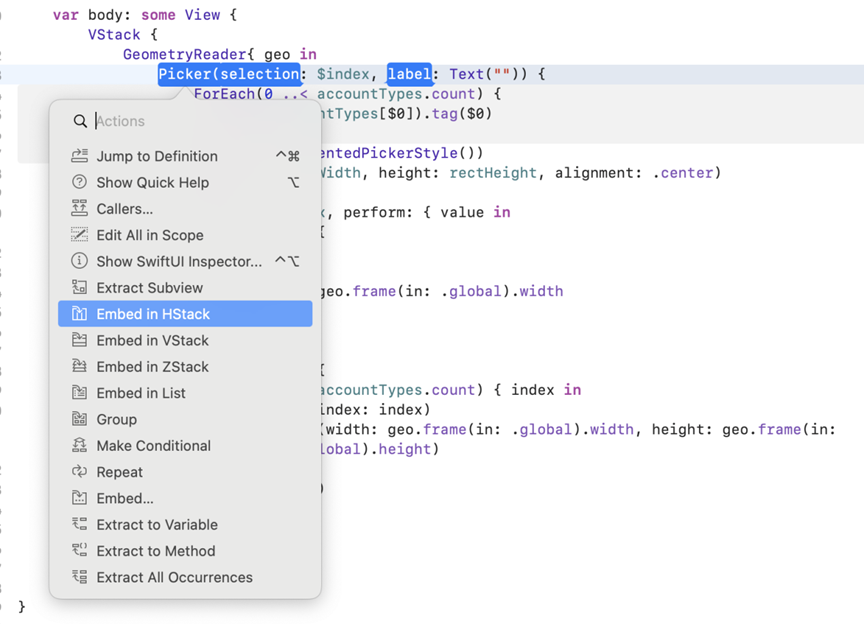
3、解决问题:寻找原因,造成这个问题,是由GeometryReader使用不正确导致的。GeometryReader的本质是获取父视图大小的一种方法。通常情况下,我们不会使用它来布局视图,仍需要使用嵌套在GeometryReader中的VStack、ZStack和HStack来布局。我们修改GeometryReader中的代码,即可将Picker水平居中。
var body: some View {
        VStack {
            GeometryReader{ geo in
                HStack {
                    Spacer()
                    Picker(selection: $index, label: Text("")) {
                        ForEach(0 ..< accountTypes.count) {
                            Text(accountTypes[$0]).tag($0)
                        }
                    }.pickerStyle(SegmentedPickerStyle())
                    .frame(width: rectWidth, height: rectHeight, alignment: .center)
                    .onChange(of: index, perform: { value in
                        if index == 0 {
                            offset = 0
                        }else {
                            offset = -geo.frame(in: .global).width
                        }
                })
                    Spacer()
                }

                HStack(spacing: 0){
                    ForEach(0 ..< accountTypes.count) { index in
                        LoginView(index: index)
                            .frame(width: geo.frame(in: .global).width, height: geo.frame(in: .global).height)
                    }
                }.offset(x: offset)

            }
        }
}4、再次选择在MacOS上运行:可以看到界面显示正常了。
欲了解更多更全技术文章,欢迎访问https://developer.huawei.com/consumer/cn/forum/?ha_source=zzh