目录
学习笔记,写到哪是哪。
websocket也是常用的协议了,在上一篇中主要测试使用了一下grpc。
下面我会把代码贴出来,然后对方法进行说明。
整体思路是服务端在连接上来的客户端进行记录,并且回复客户端连接情况。编写测试客户端在连接后定时发消息,来看一下使用情况。
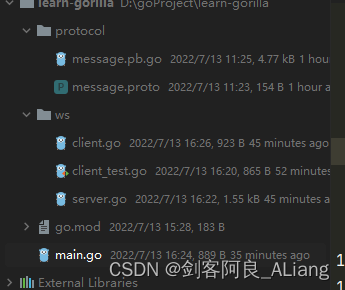
项目结构
先简单的看一下项目结构,如下图:
这里的消息协议还是使用protocol,如果有不清楚怎么使用,可以看我这篇文章:Go语学习笔记 - grpc server/client protobuf | 从零开始Go语言_剑客阿良_ALiang的博客-CSDN博客
消息结构
先看一下message.proto文件,内容如下:
syntax = "proto3";
option go_package = "./protocol";

message Message{
  int32 id = 1;
  string from = 2;
  string to = 3;
  string content = 4;
}
From主要是消息来源,To主要是接收人。
服务端代码
先看一下ws目录下的server.go代码,主要是构建一个服务结构体去接受连接上来的客户端对象。
代码如下:
package ws

import (
	"fmt"
	"google.golang.org/protobuf/proto"
	"learn-gorilla/protocol"
)

var MyServer = NewWsServer()

type WsServer struct {
	WsClients map[string]*WsClient
	Register  chan *WsClient
	Ungister  chan *WsClient
	Handler   chan []byte
}

func NewWsServer() *WsServer {
	return &WsServer{
		WsClients: make(map[string]*WsClient),
		Register:  make(chan *WsClient),
		Ungister:  make(chan *WsClient),
		Handler:   make(chan []byte),
	}
}

func (w *WsServer) Start() {
	fmt.Println("server starting...")
	for {
		select {
		case _client := <-w.Register:
			fmt.Printf("客户端:%s,注册\n", _client.Name)
			w.WsClients[_client.Name] = _client
			_msg := &protocol.Message{
				From:    "System",
				To:      _client.Name,
				Content: "you register",
			}
			_protoMsg, _ := proto.Marshal(_msg)
			_client.Msg <- _protoMsg
		case _client := <-w.Ungister:
			fmt.Printf("客户端:%s,取消注册\n", _client.Name)
			if _, ok := w.WsClients[_client.Name]; ok {
				close(_client.Msg)
				delete(w.WsClients, _client.Name)
			}
		case _msg := <-w.Handler:
			_protoMsg := &protocol.Message{}
			proto.Unmarshal(_msg, _protoMsg)
			fmt.Printf("收到消息:%s\n", _protoMsg)
			if _protoMsg.From != "" && w.WsClients[_protoMsg.From] != nil {
				_client := w.WsClients[_protoMsg.From]

				_responseMsg := &protocol.Message{
					From:    "System",
					To:      _client.Name,
					Content: "receive your message",
				}
				_protoResponse, _ := proto.Marshal(_responseMsg)
				_client.Msg <- _protoResponse
			}
		}
	}
}
代码说明
1、可以看到WsServer结构体有几个channel,Register主要是注册通道,Ungister主要是下线通道,Hander主要是处理消息通道。
2、Start方法一旦启动,会不停的轮询几个通道,如果有消息则进行对应的处理。
3、注意到Hander通道会生成一个报文推给客户端对象Msg通道,这个后面在说client.go代码的时候提到。
定义客户端行为
这里理解上会有误区,其实client.go文件内,主要是用来定义客户端行为的,不是真实的客户端。
先看一下代码:
package ws

import (
	"fmt"
	"github.com/gorilla/websocket"
	"google.golang.org/protobuf/proto"
	"learn-gorilla/protocol"
)

type WsClient struct {
	Conn *websocket.Conn
	Name string
	Msg  chan []byte
}

//读取数据
func (c *WsClient) Read() {
	defer func() {
		MyServer.Ungister <- c
		c.Conn.Close()
	}()
	for {
		_, _message, _err := c.Conn.ReadMessage()
		if _err != nil {
			fmt.Println("client read message error ", _err.Error())
			MyServer.Ungister <- c
			c.Conn.Close()
			break
		}
		_msg := &protocol.Message{}
		proto.Unmarshal(_message, _msg)
		if _msg.From == "" {
			_msg.From = c.Name
		}
		_req, _ := proto.Marshal(_msg)
		fmt.Printf("client read message -> %s\n", _msg)
		MyServer.Handler <- _req
	}
}

//发送数据
func (c *WsClient) Write() {
	defer func() {
		MyServer.Ungister <- c
		c.Conn.Close()
	}()
	for message := range c.Msg {
		c.Conn.WriteMessage(websocket.BinaryMessage, message)
	}
}
代码说明
1、当客户端连接上来,我们会构造一个我定义的WsClient结构对象,将连接作为构造参数之一。
2、然后我们定义了WsClient需要执行的两种行为,一种是读,一种是写。读操作就是循环读取真实客户端内的数据,并吐给服务端的轮询器。写操作就是服务端将数据推送给Msg通道,轮询Msg通道将数据发给真实客户端。
服务启动
主要看一下main.go文件,里面是怎么启动的。
package main

import (
	"fmt"
	"github.com/google/uuid"
	"github.com/gorilla/websocket"
	"learn-gorilla/ws"
	"net/http"
)

var upGrader = websocket.Upgrader{
	//定义读写缓冲区大小
	WriteBufferSize: 4096,
	ReadBufferSize:  4096,

	CheckOrigin: func(r *http.Request) bool {
		return true
	},
}

//升级链接,处理客户端
func Connect(w http.ResponseWriter, r *http.Request) {
	//通过升级器获得链接
	_conn, _err := upGrader.Upgrade(w, r, nil)
	if _err != nil {
		fmt.Println("获取连接失败:", _err.Error())
		return
	}
	//创建客户端
	_client := &ws.WsClient{
		Conn: _conn,
		Name: uuid.New().String(),
		Msg:  make(chan []byte),
	}
	ws.MyServer.Register <- _client
	go _client.Read()
	go _client.Write()
}

func main() {
	//后台启动服务处理
	go ws.MyServer.Start()
	http.HandleFunc("/socket", Connect)
	http.ListenAndServe("127.0.0.1:8081", nil)
}
代码说明
1、这里可以看到试讲http升级为websocket,Connect方法主要进行连接后处理,可以看到会先构建一个WsClient对象,并将该对象通知到服务端Register通道中。
2、协程启动client的Read和Write方法,这部分是客户端对象需要去做的。
测试代码
OK,我们看一下启动后的打印。

client_test.go文件代码如下:
package ws

import (
	"fmt"
	"github.com/gorilla/websocket"
	"google.golang.org/protobuf/proto"
	"learn-gorilla/protocol"
	"sync"
	"testing"
	"time"
)

var wg sync.WaitGroup

func TestClient(t *testing.T) {
	conn, _, err := websocket.DefaultDialer.Dial("ws://127.0.0.1:8081/socket", nil)
	if err != nil {
		fmt.Println("错误信息:", err)
	}
	wg.Add(2)
	go read(conn)
	go send(conn)
	wg.Wait()
}

func read(conn *websocket.Conn) {
	defer wg.Done()
	for {
		_, _msg, _ := conn.ReadMessage()
		_protoMsg := &protocol.Message{}
		proto.Unmarshal(_msg, _protoMsg)
		fmt.Printf("测试客户端收到消息:%s\n", _protoMsg.Content)
	}
}

func send(conn *websocket.Conn) {
	defer wg.Done()
	for {
		time.Sleep(10 * time.Second)
		_reqMsg, _ := proto.Marshal(&protocol.Message{
			To:      "System",
			Content: "test data",
		})
		conn.WriteMessage(1, _reqMsg)
	}
}
测试代码说明
1、可以看到在连接后会不停的读取连接返回的数据,同时每隔10秒钟会发送一条测试数据。
执行结果
看一下服务的日志。

测试客户端日志。

总结
越学习go语言,越发现和Java的一些写法有些区别。主要还是站在思维角度的不一致,给人的差异感比较重。
分享:
不是“我觉得”三个字,就可以弥补所有因为好心办坏事带来的后果。