前一篇使用eclipse开发,考虑java现在使用的流行开源工具idea,本章介绍使用idea如何创建一个springboot项目。
1、开发准备
Ø 开发环境jdk1.7或者1.8
Ø 开发工具idea-2017.2.5
Ø 项目管理工具apache-maven-3.3.9
idea下载:http://www.jetbrains.com/idea/download/#section=windows
maven、idea使用请自行百度,这里不做具体介绍。在次过程中使用的部分快捷键,我会在项目中写名,方便刚开始使用的人员属性idea基本快捷键,如需开发工具,请加qq或者微信联系1057718341。
2、创建工作空间
打开idea, 选择File-->new -->project ,选择spring initializr , 选择本地安装jdk,如果没有jdk,点击new自己添加。
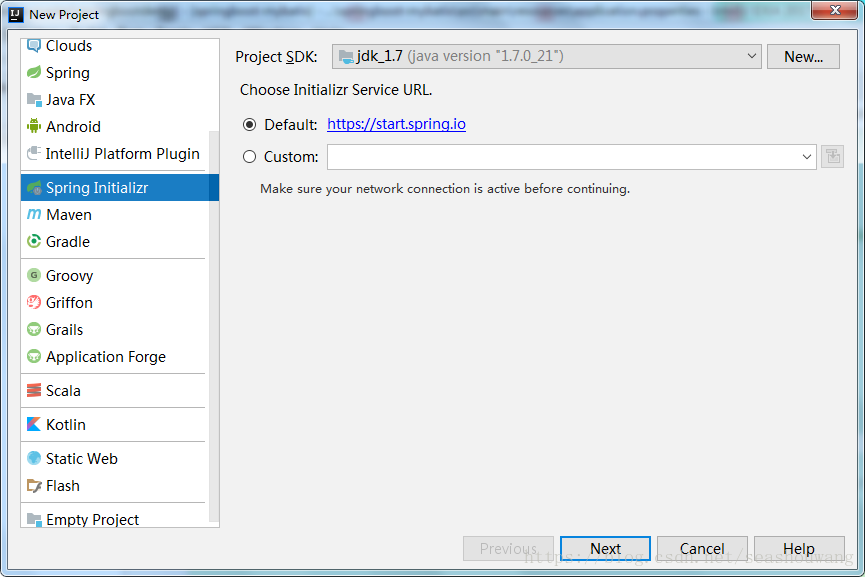
然后点击next下一步。

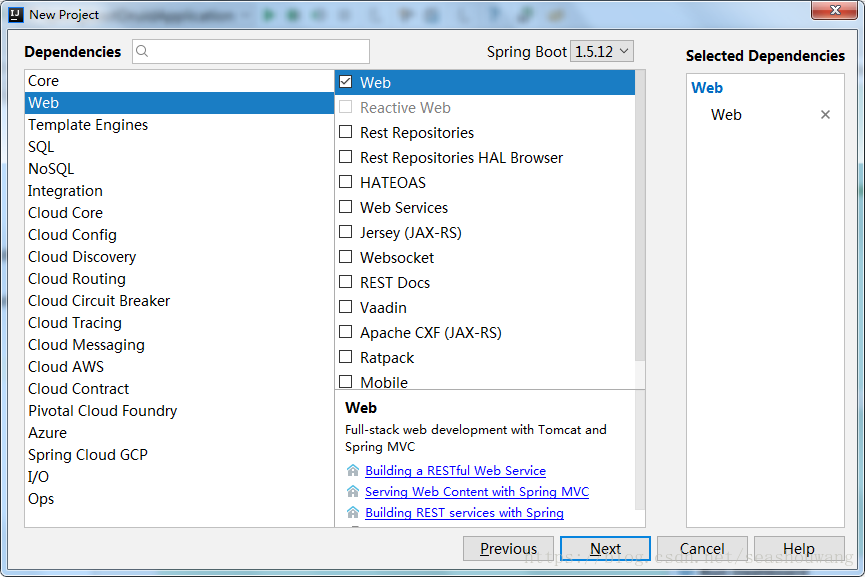
这里选择spring boot自带jar包,首次不做其他操作,只选择web即可,选择spring boot版本为1.5.12稳定版本。
创建成功后项目结构如下:
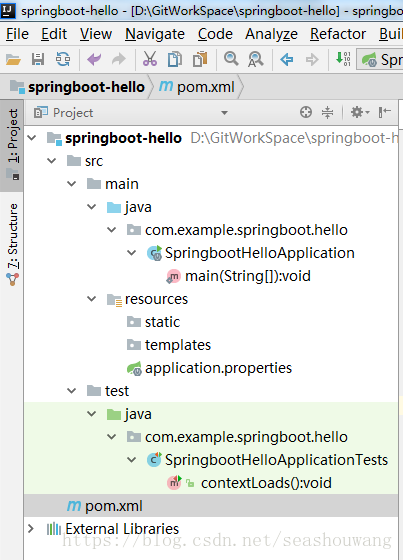
目录说明:
src/main/java: 项目源码目录,用于编写java代码
src/main/resources: 项目配置文件目录。
static: 静态资源目录
templates: 模板文件目录,例如:使用framemark模板文件等。
src/test/java: 测试文件目录
pom.xml :配置依赖jar包等。
3、在pom.xml中引入spring-boot的jar包
idea常见项目时,选择依赖包后会自动在pom文件中添加如下配置:
<?xml version="1.0" encoding="UTF-8"?>
<project xmlns="http://maven.apache.org/POM/4.0.0" xmlns:xsi="http://www.w3.org/2001/XMLSchema-instance"
         xsi:schemaLocation="http://maven.apache.org/POM/4.0.0 http://maven.apache.org/xsd/maven-4.0.0.xsd">
    <modelVersion>4.0.0</modelVersion>

    <groupId>com.example.springboot</groupId>
    <artifactId>springboot-hello</artifactId>
    <version>0.0.1-SNAPSHOT</version>
    <packaging>jar</packaging>

    <name>springboot-hello</name>
    <description>Demo project for Spring Boot</description>

    <!--项目基本属性配置  注释快捷键:Ctrl+shift+正斜杠 ; 格式化: Ctrl+Alt+L -->
    <properties>
        <project.build.sourceEncoding>UTF-8</project.build.sourceEncoding>
        <project.reporting.outputEncoding>UTF-8</project.reporting.outputEncoding>
        <java.version>1.7</java.version>
    </properties>

    <!-- 引入spring-boot父节点-->
    <parent>
        <groupId>org.springframework.boot</groupId>
        <artifactId>spring-boot-starter-parent</artifactId>
        <version>1.5.12.RELEASE</version>
        <relativePath/> <!-- lookup parent from repository -->
    </parent>

    <dependencies>
        <!-- 引入spring-boot-web依赖包-->
        <dependency>
            <groupId>org.springframework.boot</groupId>
            <artifactId>spring-boot-starter-web</artifactId>
        </dependency>
        <!-- 引入spring-boot-test测试包-->
        <dependency>
            <groupId>org.springframework.boot</groupId>
            <artifactId>spring-boot-starter-test</artifactId>
            <scope>test</scope>
        </dependency>
    </dependencies>

    <build>
        <plugins>
            <!-- 引入spring tomcat插件包-->
            <plugin>
                <groupId>org.springframework.boot</groupId>
                <artifactId>spring-boot-maven-plugin</artifactId>
            </plugin>
        </plugins>
    </build>

</project>
4、编写HelloWorldController类
package com.example.springboot.hello;
import org.springframework.web.bind.annotation.RequestMapping;
import org.springframework.web.bind.annotation.RestController;

/**
 * @desc
 * @Author wangsh
 * @date 2018/5/4 22:53
 */
@RestController
public class HelloWorldController {
   /**
    * 请求映射:http://localhost:8080/hello
    *
    * @return
    */
   @RequestMapping("/hello")
   public String hello() {
      System.out.println("hello...........");
      return "hello";
   }
}
这里使用@RestController注解,该注解是一个组合注解,标注该类是一个控制层类。
5、编写启动测试类
package com.example.springboot.hello;

import org.springframework.boot.SpringApplication;
import org.springframework.boot.autoconfigure.SpringBootApplication;
//springboot启动类
@SpringBootApplication
public class SpringbootHelloApplication {

   public static void main(String[] args) {
      SpringApplication.run(SpringbootHelloApplication.class, args);
   }
}
6、启动项目测试

启动结果如下:
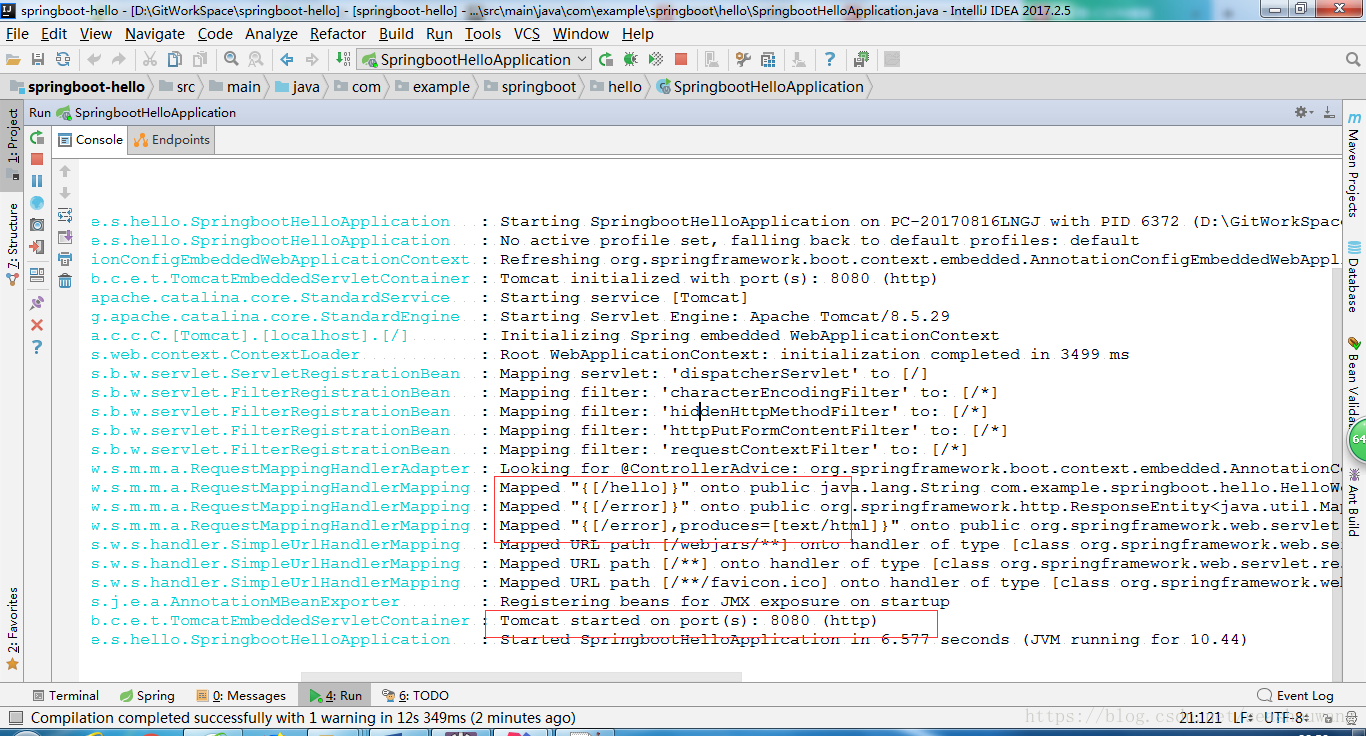
springboot启动后,默认端口是8080,如果需要修改,在配置文件application.properties中添加端口即可。
7、网页登陆测试
浏览器访问:http://localhost:8080/hello

以上表示该项目创建成功!