6. SAP IDT - Projects
To design a Universe in IDT ,
Step 1 : to create a project in Local Project views.
All the resources like Data Foundation and Bussiness layers are managed in a project.You can navigate to local projects and access the resouces in the local project using Information Design Tool(IDT)
Step 2 : Once you create a Local Project, Resouces can be populated under it in different ways
- You can create new resources using “New” option.
- Convert .unv Universe created from Universe Design Tool.
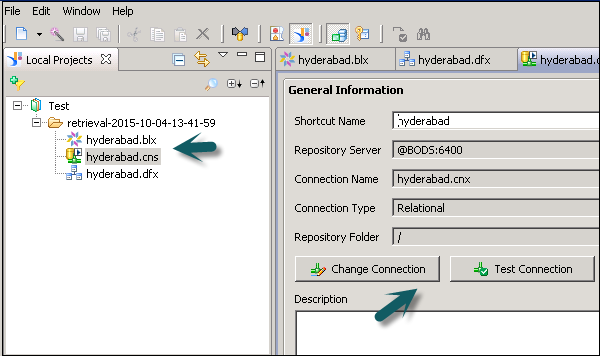
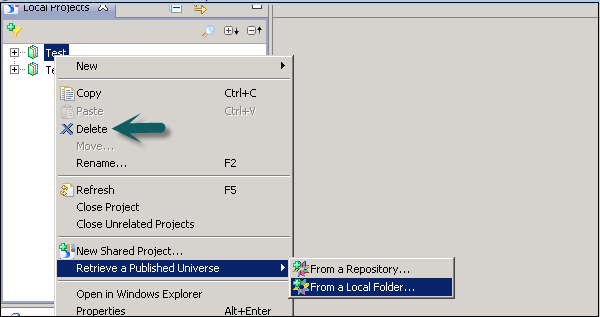
- Retrieve a published Universe.
- To edit a resource, you can double-click on a resource under Local Project.
6.1 Checking Existing Projects in IDT
Step 1: Open an exisitng project in IDT.
Go to File ------> Open Project.

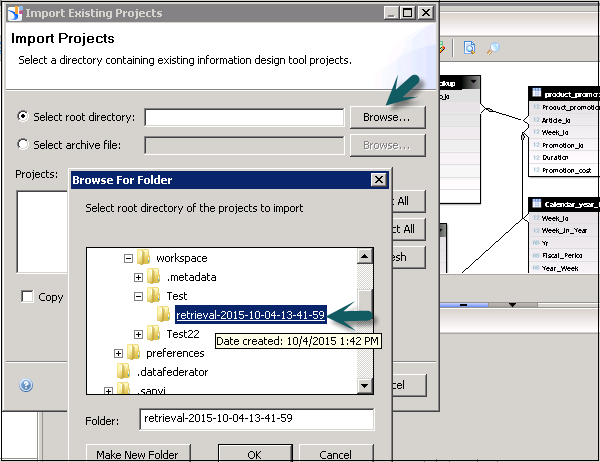
A new window will open. You can select from the root directory or from archive file to import an existing project.
Step 2: To import from the root directory , click on Browse, Select the project you want to import and click OK.
6.2 Creating a New Local Project in IDT.
To create a new project in IDT.
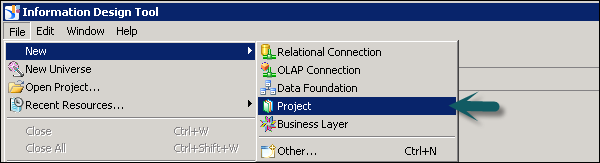
Step 1: go to File ——》 New ——》 Project
Step 2: Enter Project Name, location and click Finish.
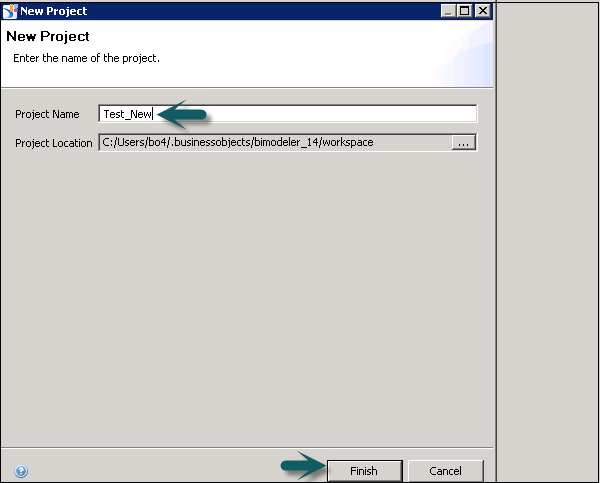
The project is created under Local Projects views.
6.3 Editing an Existing Project
You can also edit an existing project.
Step 1: Open an existing project by going to File ——》 Open Project
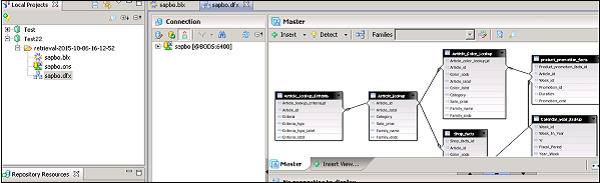
You can also open an exisitng Universe under any Local Project area.
Step 2: Once you open an existing project, you can go to each object by double clicking the object name under Local Project Folder.
Make changes as required and click the Save button.
6.4 Deleting a Project in IDT.
To delete an existing project
Step 1: right-click on the project under Local Project area.
To delete a project permanently, you can select “Delete project contents on disk option” in the "Confirm Project Delete" dialog box.
If you select this option, the deletion is permanent and cannot be undone. Click on “Yes” to confirm the deletion.
If you did not delete the project contents permanently, you can open the project to make it available.
6.5 Project Synchronization
Project synchronization deals with comparing resources in local project views with an associated shared project in the repository. Using project synchronization, you can detect add/delete resources, difference between resources. Based on differences, the local project view and shared resources can be updated.
Under Project synchronization, there are two different panes −
Shared Project Pane
It lists the resources in shared project on the server. If there is a lock icon in the form of resource, it means the resource is locked. Synchronization status lists the status of each resource by comparing resources in shared and local project views.
Different Synchronization Status
Added Locally − A resource is added in the local project but not in the shared project.
Changed Locally − A resource was changed in the local project but not in the shared project.
Deleted Locally − A resource was deleted in the local project but still exists in the shared project.
Added on server − A resource is not in the local project but exists in the shared project.
Changed on server − A resource was changed in the shared project but not in the local project.
Deleted on server − resource exists in the local project but was deleted in the shared project.
Synchronize − Both resources are identical.
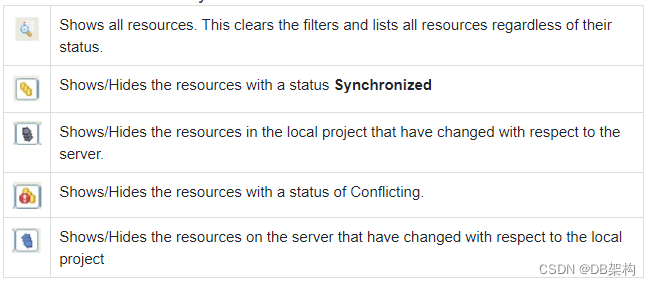
List of Resources in Synchronization Status Pane
6.6 How to Perform Project Synchronization?
To perform Project Synchronization
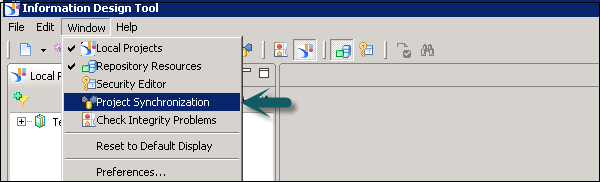
Step 1: go to Windows → Project Synchronization.
Step 2: Click ‘Change session’ to open a session on the repository system where the shared projects are saved.
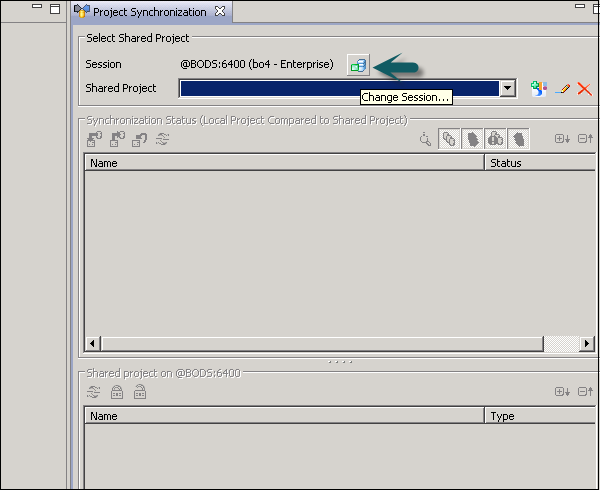
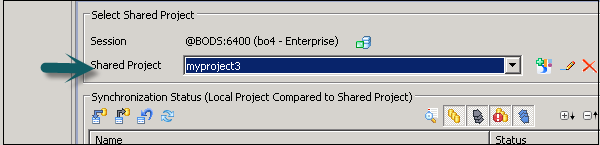
Step 3: Select a project to synchronize in the shared project list.
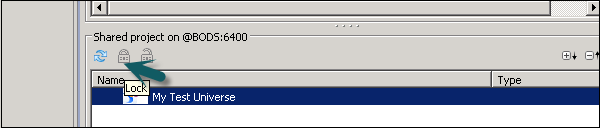
6.7 Locking a Resource
To lock a resource in Project Synchronization, it should be under shared project. Lock informs other developers that you are working on the resource.
To lock a resource
Step 1: Select the shared project from shared project list.
Step 2 : Expand the project.
Step 3 : Select the resource
Step 4: Right click
Step 5: Click Lock.
6.8 Unlocking a Resource
To unlock a resource,
Step1 : select the resource under Project Synchronization.
Step 2: Right click
Step 3: Unlock.
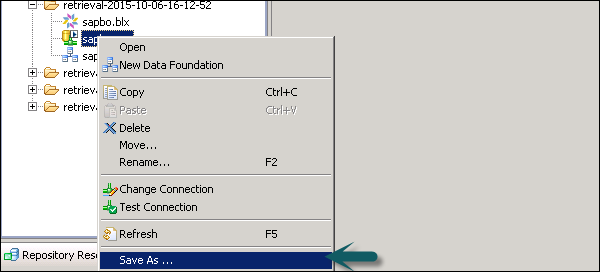
6.9 Saving Resources in IDT
It is also possible to save any resource in a local project as a report in the local file. To save a resource, right-click on any resource, Save As.
In the Report Location box, enter a file path, file name, and file type for the report. The file type can be .pdf, .html, or .txt.

To browse the local file system to find a file path, click the browse button.
For larger resources (data foundations and business layers), you can select which metadata elements to include in the report in the Metadata Elements box.
Click Generate to create the report.