一直想自己搞一个服务器,现在手头上有一块树莓派,就想着自己搭建一下。
1.配置
硬件:树莓派B4
硬盘:4T机械硬盘
系统:ubuntu-22.04.2-preinstalled-server-arm64+raspi(树莓派官网下载)
2.前期准备
根据树莓派官网设置烧录系统并运行起来。
3.挂载硬盘
3.1 将机械硬盘格式化以便挂载
实操过程中,发现卷标为中文时,用ubuntu的控制台修改卷标会报错,建议卷标修改为英文卷标。
3.2 挂载硬盘
将硬盘接到树莓派上,然后挂载,这一步需要先接好硬盘,然后再启动机器,否则操作时会报Input/Output错误。
3.2.1创建目录:
linux中硬盘挂载需要挂载到系统的目录下,因为linux系统无法自动识别,只能挂载的指定的目录中,网上说一般在mnt目录下创建,作为一个新手,那我也在该目录下创建。
sudo mkdir /mnt/DbDisk
3.2.2 识别硬盘
通过fdisk -l指令识别硬盘:
ubuntu@ubuntu:~$ sudo fdisk -l
Disk /dev/loop0: 59.09 MiB, 61956096 bytes, 121008 sectors
Units: sectors of 1 * 512 = 512 bytes
Sector size (logical/physical): 512 bytes / 512 bytes
I/O size (minimum/optimal): 512 bytes / 512 bytes


Disk /dev/loop1: 59.12 MiB, 61988864 bytes, 121072 sectors
Units: sectors of 1 * 512 = 512 bytes
Sector size (logical/physical): 512 bytes / 512 bytes
I/O size (minimum/optimal): 512 bytes / 512 bytes


Disk /dev/loop2: 109.61 MiB, 114929664 bytes, 224472 sectors
Units: sectors of 1 * 512 = 512 bytes
Sector size (logical/physical): 512 bytes / 512 bytes
I/O size (minimum/optimal): 512 bytes / 512 bytes


Disk /dev/loop3: 43.19 MiB, 45289472 bytes, 88456 sectors
Units: sectors of 1 * 512 = 512 bytes
Sector size (logical/physical): 512 bytes / 512 bytes
I/O size (minimum/optimal): 512 bytes / 512 bytes


Disk /dev/loop4: 43.18 MiB, 45277184 bytes, 88432 sectors
Units: sectors of 1 * 512 = 512 bytes
Sector size (logical/physical): 512 bytes / 512 bytes
I/O size (minimum/optimal): 512 bytes / 512 bytes


Disk /dev/sdb: 119.24 GiB, 128035676160 bytes, 250069680 sectors
Disk model: e SSD ST600 MSAT
Units: sectors of 1 * 512 = 512 bytes
Sector size (logical/physical): 512 bytes / 512 bytes
I/O size (minimum/optimal): 512 bytes / 33553920 bytes
Disklabel type: dos
Disk identifier: 0x12c9124a

Device     Boot  Start       End   Sectors  Size Id Type
/dev/sdb1  *      2048    526335    524288  256M  c W95 FAT32 (LBA)
/dev/sdb2       526336 250069679 249543344  119G 83 Linux


Disk /dev/sda: 3.64 TiB, 4000787030016 bytes, 7814037168 sectors
Disk model: 006-3CW104
Units: sectors of 1 * 512 = 512 bytes
Sector size (logical/physical): 512 bytes / 4096 bytes
I/O size (minimum/optimal): 4096 bytes / 4096 bytes
Disklabel type: gpt
Disk identifier: 9463367F-46F9-46DB-AC72-5633AEA58D7E

Device     Start        End    Sectors  Size Type
/dev/sda1   4096 7814037134 7814033039  3.6T Microsoft basic data
我要挂在的硬盘是/dev/sda1,这个我是根据自己要挂载的硬盘大小识别的。
3.2.3 挂载硬盘:
sudo mount /dev/sda1 /mnt/DbDisk通过sudo df可以查看硬盘挂载情况,我目前将sda1硬盘挂载到DbDisk目录下
ubuntu@ubuntu:~$ sudo df
Filesystem      1K-blocks    Used  Available Use% Mounted on
tmpfs              388000    3176     384824   1% /run
/dev/sdb2       122731688 4809364  111667360   5% /
tmpfs             1939984       0    1939984   0% /dev/shm
tmpfs                5120       0       5120   0% /run/lock
/dev/sdb1          258095  151621     106475  59% /boot/firmware
/dev/sda1      3907016516  221416 3906795100   1% /mnt/DbDisk
tmpfs              387996       4     387992   1% /run/user/1000
3.2.4 设置自动挂载
直接挂载,需要每次重启的时候均需要挂载一次,一般设置自动挂载比较香,可通过修改配置文件实现。
ubuntu@ubuntu:~$ sudo vim /etc/fstab然后再配置文件中加入要新挂载的盘:
LABEL=writable  /       ext4    discard,errors=remount-ro       0 1
LABEL=system-boot       /boot/firmware  vfat    defaults        0       1
/dev/sda1               /mnt/DbDisk     ntfs    auto,user,rw    0       1
挂载开头的识别号可用LABEL卷标,UUID硬盘编号,或者向我一样直接写系统识别到的设备路径。实际使用时我出现过LABEL和UUID都无法识别的情况,所以我后面改成使用设备路径直接挂载,好用。
设置完之后,可以重启树莓派看下是否能正常运行。
4.安装svnserver
4.1 安装svn服务器
sudo apt-get install subversion4.2 创建svn仓库文件夹
ubuntu@ubuntu:~$ sudo mkdir /mnt/DbDisk/svn在硬盘目录下创建一个svn仓库文件夹,用来做svn仓库文件夹。
ubuntu@ubuntu:/mnt/DbDisk/svn$ sudo mkdir test
ubuntu@ubuntu:/mnt/DbDisk/svn$ ls
test
在仓库目录下一个版本库test
4.3 创建版本库
sudo svnadmin create /mnt/DbDisk/svn/testubuntu@ubuntu:/mnt/DbDisk/svn/test$ ls
README.txt conf db format hooks locks
ubuntu@ubuntu:/mnt/DbDisk/svn/test$ ls -a
. .. README.txt conf db format hooks locks
ubuntu@ubuntu:/mnt/DbDisk/svn/test$创建完之后目录下又文件。
4.4 配置
通过修改conf文件夹下的文件配置权限。
注意,修改配置文件svnserve.conf、authz、passwd文件时,所有行头不能有空给,末尾也不能添加空空格,下午配置#号说明的信息主要用于备注,实际修改时不能添加,否则会报“authorization failed”错误。
4.4.1 svnserve.conf文件
[general]
### The anon-access and auth-access options control access to the
### repository for unauthenticated (a.k.a. anonymous) users and
### authenticated users, respectively.
### Valid values are "write", "read", and "none".
### Setting the value to "none" prohibits both reading and writing;
### "read" allows read-only access, and "write" allows complete
### read/write access to the repository.
### The sample settings below are the defaults and specify that anonymous
### users have read-only access to the repository, while authenticated
### users have read and write access to the repository.
anon-access = none      # 设置匿名用户不可读
auth-access = write     # 权限用户可写
### The password-db option controls the location of the password
### database file.  Unless you specify a path starting with a /,
### the file's location is relative to the directory containing
### this configuration file.
### If SASL is enabled (see below), this file will NOT be used.
### Uncomment the line below to use the default password file.
password-db = passwd    # 使用用密码文件
### The authz-db option controls the location of the authorization
### rules for path-based access control.  Unless you specify a path
### starting with a /, the file's location is relative to the
### directory containing this file.  The specified path may be a
### repository relative URL (^/) or an absolute file:// URL to a text
### file in a Subversion repository.  If you don't specify an authz-db,
### no path-based access control is done.
### Uncomment the line below to use the default authorization file.
authz-db = authz        # 使用权限文件
4.4.2 authz文件
[groups]
# harry_and_sally = harry,sally
# harry_sally_and_joe = harry,sally,&joe

# [/foo/bar]
# harry = rw
# &joe = r
# * =

# [repository:/baz/fuz]
# @harry_and_sally = rw
# * = r
# 在末尾添加信息
admin = admin   # 管理员用户admin分组属于admin组
[/]             # 从仓库开始设置权限
@admin = rw     # 管理员组的权限是读写
4.4.3 passwd文件
[users]
# harry = harryssecret
# sally = sallyssecret
admin = 123456    # 在末尾添加用户和密码,明文输入
4.5 启动服务器
ubuntu@ubuntu:/mnt/DbDisk/svn/test/conf$ sudo svnserve -d -r /mnt/DbDisk/svn- -d:标识以守护模式启动
- -r:设置svn存储库根目录,这样访问的时候不要输入完整路径
- 其他:暂时还没研究。
4.6 查看连接状态
ubuntu@ubuntu:~$ ps -aux | grep svnserve
root        1588  0.0  0.0  18904  2552 ?        Ss   07:46   0:00 svnserve -d -r /mnt/DbDisk/svn
ubuntu      1598  0.0  0.0   6420  1864 pts/0    S+   07:51   0:00 grep --color=auto svnserve
u
有看到服务表示服务器启动成功。
4.7停止服务器
killall svnserve5 访问svn
5.1 查看端口
ubuntu@ubuntu:~$ sudo netstat -anp
Active Internet connections (servers and established)
Proto Recv-Q Send-Q Local Address           Foreign Address         State       PID/Program name
tcp        0      0 127.0.0.53:53           0.0.0.0:*               LISTEN      822/systemd-resolve
tcp        0      0 0.0.0.0:3690            0.0.0.0:*               LISTEN      1588/svnserve
tcp        0      0 0.0.0.0:22              0.0.0.0:*               LISTEN      987/sshd: /usr/sbin
tcp        0      0 192.168.1.17:22         192.168.1.19:60135      ESTABLISHED 1312/sshd: ubuntu [
tcp6       0      0 :::3389                 :::*                    LISTEN      936/xrdp
tcp6       0      0 ::1:3350                :::*                    LISTEN      896/xrdp-sesman
tcp6       0      0 :::22                   :::*                    LISTEN      987/sshd: /usr/sbin
udp        0      0 127.0.0.53:53           0.0.0.0:*                           822/systemd-resolve
udp        0      0 192.168.1.17:68         0.0.0.0:*                           820/systemd-network
udp6       0      0 fe80::dea6:32ff:fe4:546 :::*                                820/systemd-network
raw6       0      0 :::58                   :::*                    7           820/systemd-network
通过sudo netstat -anp 查看svn服务的端口号,这边我们可以看到svn服务器的默认端口为3690。
5.2 开放svn服务器端口
ubuntu@ubuntu:~$ sudo ufw allow 3690    # 开放端口
Rule added
Rule added (v6)
ubuntu@ubuntu:~$ sudo ufw status        #检查端口状态
Status: active

To                         Action      From
--                         ------      ----
3690                       ALLOW       Anywhere
3690 (v6)                  ALLOW       Anywhere (v6)
端口打开后就可以通过外部访问。
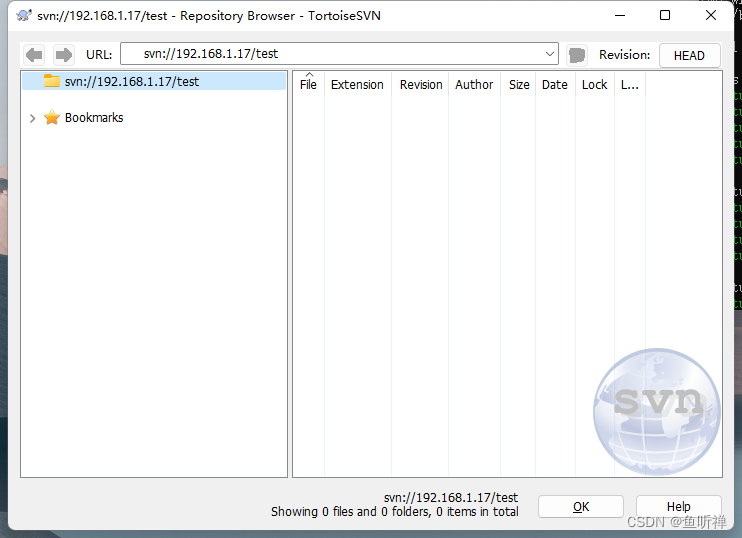
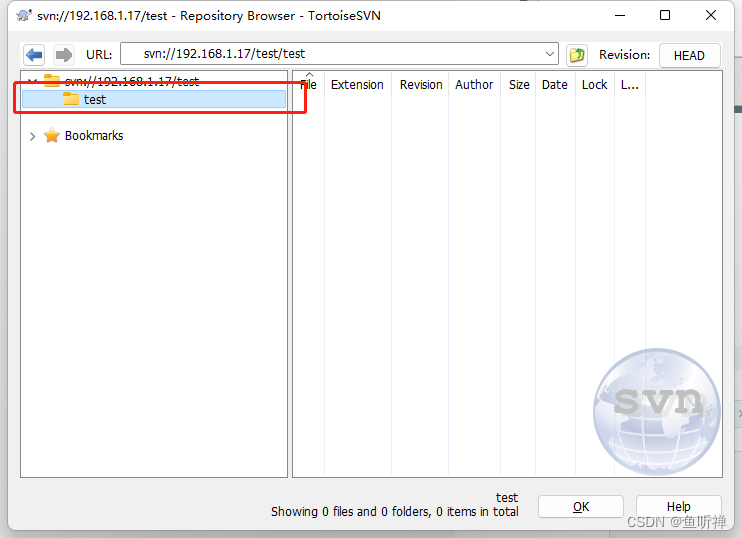
5.3 访问svn库
我是以window环境的svn客户端访问的 :
试着创建个文件夹:
5.4 愉快的玩耍吧
网上资料看着一看就觉得自己会,实际还是需要动手去实践才能发现问题,只有自己动手配置过了才能有所收获。