一、网络爬虫概述
网络爬虫又称网络蜘蛛、网络机器人,在某社区中经常被称为网页追逐者。
网络爬虫可以按照指定规则自动浏览或抓取网络中的信息,python可以很轻松的编写爬虫程序或脚本。
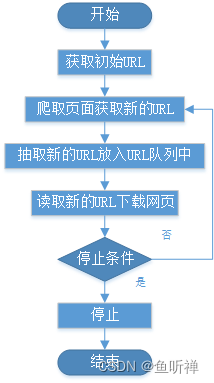
网络爬虫基本工作流程:
二、网络爬虫的常用技术
1 Python的网络请求
Python实现Http网络请求的三种常见方式:rullib、urllib3和requests模块。
1.1 urllib模块
urllib是python的自带模块,提供urlopen()方法,通过指定URL发送网络请求获取数据。
rullib模块的子模块
模块名称 |
描述 |
urllib.request |
定义打开url(主要为http)的方法和类,例如:身份验证,重定向,cookie等 |
urllib.error |
定义异常类,基本的异常为URLError |
urllib.parse |
分为两大类:URL解析和URL引用 |
urllib.robotparser |
用于解析robots.txt文件 |
示例1:通过urllib.request模块发送请求(get请求方式)
# _*_ coding:utf-8 _*_
import urllib.request
class UrllibRequestDemo():
"""网络请求类"""
def __init__(self) -> None:
"""构造函数"""
# 打开指定网页
response = urllib.request.urlopen("http://www.baidu.com")
html = response.read() # 读取网页代码
print(html) # 打印网页代码
if __name__ == "__main__":
"""主程序运行"""
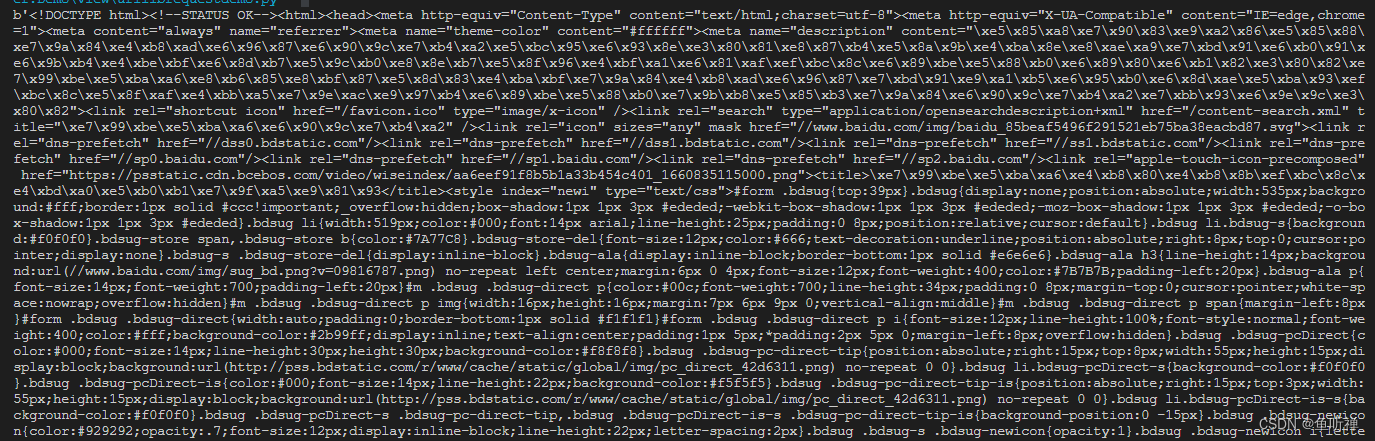
http = UrllibRequestDemo()返回结果:
示例2:使用post方法获取网页信息
# _*_ coding:utf-8 _*_

import urllib.request
import urllib.parse


class UrllibRequestDemo():
    """网络请求类"""

    def __init__(self) -> None:
        """构造函数"""
        pass

    def get(self):
        """Get请求"""
        # 打开指定网页
        response = urllib.request.urlopen("http://www.baidu.com")
        html = response.read()      # 读取网页代码
        print(html)                 # 打印网页代码

    def post(self):
        """Post请求"""
        # 获取请求数据
        data = bytes(urllib.parse.urlencode(
            {"word": "Hello world."}), encoding="utf-8")
        # 打开网页
        response = urllib.request.urlopen("http://httpbin.org/post", data)
        # 读取网页代码
        html = response.read()
        # 打印代码
        print(html)


if __name__ == "__main__":
    """主程序运行"""

    http = UrllibRequestDemo()
    http.post()
    print("Post succeed.")
结果:

注意:
http://httpbin.org/post网站可以作为联系使用urllib的站点使用,可以模拟各种请求操作。
1.2 urllib3模块
Urllib3是一个功能强大的库,适用于python编写的Http客户端,具有如下特性
线程安全
连接池
客户端SSL/TLS验证
使用大部分编码上传文件
Helpers用于重试请求并处理Http重定向
支持gzip和deflate编码
支持HTTP和SOCKS代理
100%的测试覆盖率
示例1:GET请求
# _*_ coding:utf-8 _*_
import urllib3
class Urllib3RequestDemo():
"""Urllib3请求类"""
def get(self) -> None:
"""GET 方法"""
# 创建PoolManager对象,用于处理与线程池的连接以及线程安全的细节
http = urllib3.PoolManager()
# 发送网页请求
response = http.request("GET", "https://www.baidu.com/")
print(response.data) # 打印读取内容
if __name__ == "__main__":
"""主程序运行"""
http = Urllib3RequestDemo()
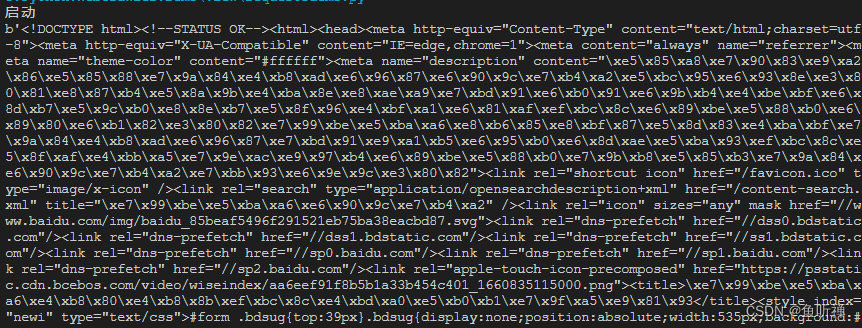
print("启动")
http.get()
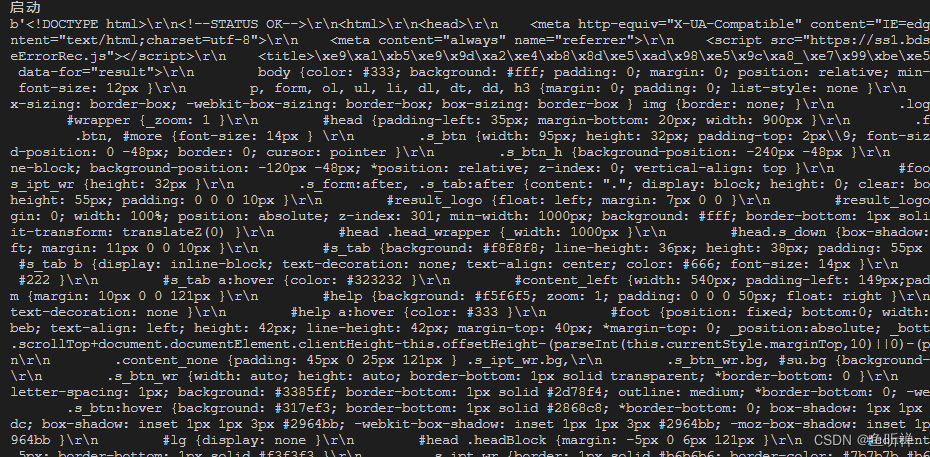
print("结束")结果:

示例2:Post请求
# _*_ coding:utf-8 _*_

import urllib3


class Urllib3RequestDemo():
    """Urllib3请求类"""

    def post(self) -> None:
        """POST 方法"""
        # 创建PoolManager对象,用于处理与线程池的连接以及线程安全的细节
        http = urllib3.PoolManager()
        # 发送网页请求
        response = http.request("POST", "https://www.baidu.com/",fields={"word":"hello"})
        print(response.data)        # 打印读取内容

if __name__ == "__main__":
    """主程序运行"""
    http = Urllib3RequestDemo()
    print("启动")
    http.post()
    print("结束")
结果:
1.3 requests 模块
requests是第三方模块,功能特性如下:
Keep-Alive&连接池
基本/摘要式的身份认证
Unicode响应体
国际化域名和URL
优雅的key/value Cookie
HTTP(S)代理支持
带持久Cookie的会话
自动解压
文件分块上传
浏览器式的SSL认证
流下载
分块请求
自动内容解码
连接超时
支持.netrc
请求方式:
requests.get(url)
requests.post(url,data)
requests.put(url,data)
requests.delete(url)
requests.head(url)
requests.options(url)
若url中参数跟在?之后,可以使用params关键字参数,来传递字符串字典参数。
常见异常模块:
exceptions.ReadTimeout:超时异常
exceptions.HTTPError:HTTP异常
exceptions.RequestException:请求异常
示例1:GET请求
# _*_ coding:utf-8 _*_

import requests


class RequestsDemo():
    """requests请求类"""

    def get(self) -> None:
        """GET 方法"""

        response = requests.get("https://www.baidu.com/") #网页请求
        print(response.status_code)         # 打印状态码
        print(response.url)                 # 打印请求url
        print(response.headers)             # 打印头部信息
        print(response.cookies)             # 打印cookie信息
        print(response.text)                # 以文本形式打印网页源码
        print(response.content)             # 以字节流形式打印网页源码


if __name__ == "__main__":
    """主程序运行"""
    http = RequestsDemo()
    print("启动")
    http.get()
    print("结束")
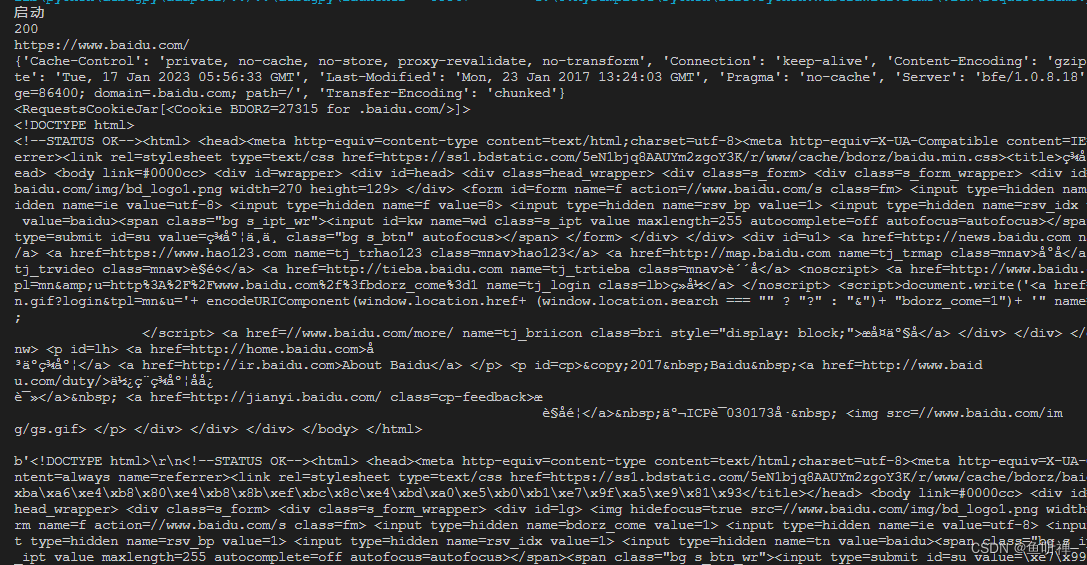
结果:
示例2:post请求
# _*_ coding:utf-8 _*_

import requests


class RequestsDemo():
    """requests请求类"""

    def post(self) -> None:
        """POST 方法"""
        data = {"word": "hello"}
        response = requests.post("http://httpbin.org/post",data=data)
        print(response.content)             # 以字节流形式打印网页源码


if __name__ == "__main__":
    """主程序运行"""
    http = RequestsDemo()
    print("启动")
    http.post()
    print("结束")
结果:

示例3:跟在?之后的参数传递
# _*_ coding:utf-8 _*_

import requests


class RequestsDemo():
    """requests请求类"""

    def getwithparams(self) -> None:
        """GET 方法"""

        dict_params = {"key1": "value1","key2": "value2"}   # 参数字典
        response = requests.get("http://httpbin.org/get",params = dict_params)  # 网页请求
        print(response.content)             # 以字节流形式打印网页源码


if __name__ == "__main__":
    """主程序运行"""
    http = RequestsDemo()
    print("启动")
    http.getwithparams()
    print("结束")
结果:

2 请求headers处理
网站有反爬虫设置时,经常会出现403错误,拒绝用户访问,此时可以通过模拟浏览器头部信息来进行访问。
2.1 通过网络监视器获取头部信息
打开浏览器(360安全浏览器为例),浏览网页,然后按F12按钮打开网络监视器,刷新网页,然后找到浏览的网址,右侧标头找到头部文件。
选中网址:
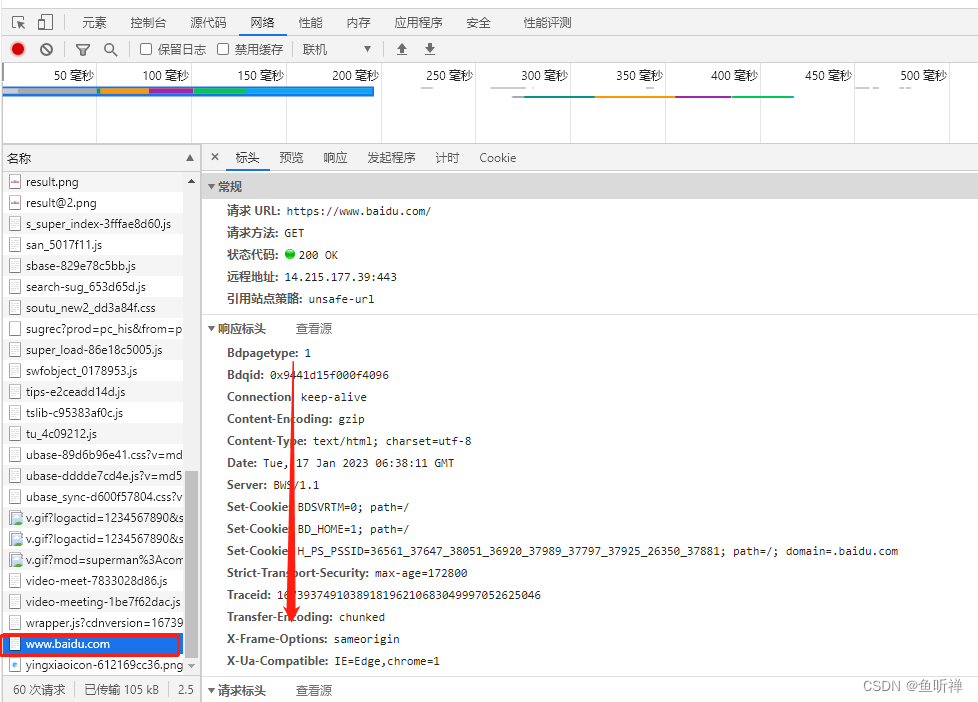
下拉选择请求标头信息,找到头部信息:
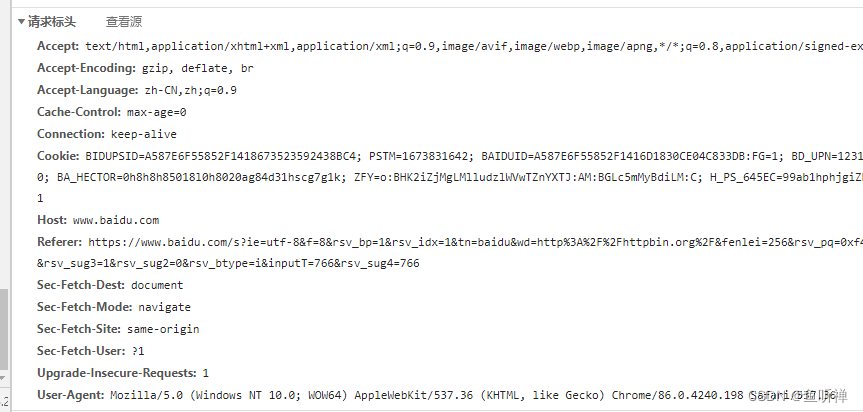
标头信息为:
User-Agent: Mozilla/5.0 (Windows NT 10.0; WOW64) AppleWebKit/537.36 (KHTML, like Gecko) Chrome/86.0.4240.198 Safari/537.362.2 实现代码
发送请求时将头部信息添加到请求参数中。
示例:添加头部标识访问
# _*_ coding:utf-8 _*_

import requests


class RequestsDemo():
    """requests请求类"""


    def getwithheaders(self) -> None:
        """GET 方法"""

        # 浏览器头部信息
        dict_headers = {
            "User-Agent": "Mozilla/5.0 (Windows NT 10.0; WOW64) AppleWebKit/537.36 (KHTML, like Gecko) Chrome/86.0.4240.198 Safari/537.36"}
        response = requests.get("https://www.baidu.com", headers=dict_headers)  # 网页请求
        print(response.content)             # 以字节流形式打印网页源码

if __name__ == "__main__":
    """主程序运行"""
    http = RequestsDemo()
    print("启动")
    http.getwithheaders()
    print("结束")
结果:
3 网络超时
请求网络长时间未响应时,就睡超时,无法打开网页。
示例:连续请求网页,等超时
# _*_ coding:utf-8 _*_

import requests


class RequestsDemo():
    """requests请求类"""


    def gettimeout(self) -> None:
        """超时测试"""

        #循环发送50次
        for i in range(0, 5):
            try:
                # 请求网页,设置超时
                response = requests.get("https://www.baidu.com", timeout=0.05)
                print(response.status_code)
            except Exception as err:
                print("异常" + str(err))


if __name__ == "__main__":
    """主程序运行"""
    http = RequestsDemo()
    print("启动")
    http.gettimeout()
    print("结束")
结果:超时的时候会显示异常,报错
启动
200
200
200
异常HTTPSConnectionPool(host='www.baidu.com', port=443): Read timed out. (read timeout=0.05)
异常HTTPSConnectionPool(host='www.baidu.com', port=443): Read timed out. (read timeout=0.05)
结束
PS E:\5.MyTemplete\Python\Zero.Python.WebCrawler.Demo>
4 代理服务
使用代理服务可以规避,自身ip被网站服务器屏蔽。
一般流程:找到代理地址,端口号(ip:端口),示例免费代理IP(122.114.31.177,可能会不稳定,有时候需要一段时间后才能用。)
示例:
# _*_ coding:utf-8 _*_

import requests


class RequestsDemo():
    """requests请求类"""

    def get_useproxy(self):
        """使用代理"""

        # 代理地址
        proxy = {"HTTP": "122.114.31.177:443",
                "HTTPS": "122.114.31.177.4430"}
        # 请求网页
        response = requests.get("https://www.baidu.com/", proxies=proxy)
        print(response.content)             # 以字节流形式打印网页源码


if __name__ == "__main__":
    """主程序运行"""
    http = RequestsDemo()
    print("启动")
    http.get_useproxy()
    print("结束")
结果:
启动
b'<!DOCTYPE html>\r\n<!--STATUS OK--><html> <head><meta http-equiv=content-type content=text/html;charset=utf-8><meta http-equiv=X-UA-Compatible content=IE=Edge><meta content=always name=referrer><link rel=stylesheet type=text/css href=https://ss1.bdstatic.com/5eN1bjq8AAUYm2zgoY3K/r/www/cache/bdorz/baidu.min.css><title>\xe7\x99\xbe\xe5\xba\xa6\xe4\xb8\x80\xe4\xb8\x8b\xef\xbc\x8c\xe4\xbd\xa0\xe5\xb0\xb1\xe7\x9f\xa5\xe9\x81\x93</title></head> <body link=#0000cc> <div id=wrapper> <div id=head> <div class=head_wrapper> <div class=s_form> <div class=s_form_wrapper> <div id=lg> <img hidefocus=true src=//www.baidu.com/img/bd_logo1.png width=270 height=129> </div> <form id=form name=f action=//www.baidu.com/s class=fm> <input type=hidden name=bdorz_come value=1> <input type=hidden name=ie value=utf-8> <input type=hidden name=f value=8> <input type=hidden name=rsv_bp value=1> <input type=hidden name=rsv_idx value=1> <input type=hidden name=tn value=baidu><span class="bg s_ipt_wr"><input id=kw name=wd class=s_ipt value maxlength=255 autocomplete=off autofocus=autofocus></span><span class="bg s_btn_wr"><input type=submit id=su value=\xe7\x99\xbe\xe5\xba\xa6\xe4\xb8\x80\xe4\xb8\x8b class="bg s_btn" autofocus></span> </form> </div> </div> <div id=u1> <a href=http://news.baidu.com name=tj_trnews class=mnav>\xe6\x96\xb0\xe9\x97\xbb</a> <a href=https://www.hao123.com name=tj_trhao123 class=mnav>hao123</a> <a href=http://map.baidu.com name=tj_trmap class=mnav>\xe5\x9c\xb0\xe5\x9b\xbe</a> <a href=http://v.baidu.com name=tj_trvideo class=mnav>\xe8\xa7\x86\xe9\xa2\x91</a> <a href=http://tieba.baidu.com name=tj_trtieba class=mnav>\xe8\xb4\xb4\xe5\x90\xa7</a> <noscript> <a href=http://www.baidu.com/bdorz/login.gif?login&tpl=mn&u=http%3A%2F%2Fwww.baidu.com%2f%3fbdorz_come%3d1 name=tj_login class=lb>\xe7\x99\xbb\xe5\xbd\x95</a> </noscript> <script>document.write(\'<a href="http://www.baidu.com/bdorz/login.gif?login&tpl=mn&u=\'+ encodeURIComponent(window.location.href+ (window.location.search === "" ? "?" : "&")+ "bdorz_come=1")+ \'" name="tj_login" class="lb">\xe7\x99\xbb\xe5\xbd\x95</a>\');\r\n </script> <a href=//www.baidu.com/more/ name=tj_briicon class=bri style="display: block;">\xe6\x9b\xb4\xe5\xa4\x9a\xe4\xba\xa7\xe5\x93\x81</a> </div> </div> </div> <div id=ftCon> <div id=ftConw> <p id=lh> <a href=http://home.baidu.com>\xe5\x85\xb3\xe4\xba\x8e\xe7\x99\xbe\xe5\xba\xa6</a> <a href=http://ir.baidu.com>About Baidu</a> </p> <p id=cp>©2017 Baidu <a href=http://www.baidu.com/duty/>\xe4\xbd\xbf\xe7\x94\xa8\xe7\x99\xbe\xe5\xba\xa6\xe5\x89\x8d\xe5\xbf\x85\xe8\xaf\xbb</a> <a href=http://jianyi.baidu.com/ class=cp-feedback>\xe6\x84\x8f\xe8\xa7\x81\xe5\x8f\x8d\xe9\xa6\x88</a> \xe4\xba\xacICP\xe8\xaf\x81030173\xe5\x8f\xb7 <img src=//www.baidu.com/img/gs.gif> </p> </div> </div> </div> </body> </html>\r\n'
结束实际测试遇到了报错的问题:
requests.exceptions.ProxyError: HTTPSConnectionPool(host='www.baidu.com', port=443): Max retries exceeded with url: / (Caused by ProxyError('Cannot connect to proxy.', NewConnectionError('<urllib3.connection.HTTPSConnection object at 0x000001EAA41171C0>: Failed to establish a new connection: [Errno 11001] getaddrinfo failed')))解决方案:代理参数设置的key值改成全大写的“HTTP”和“HTTPS”
5 HTML解析之Beautiful Soup
Beautiful Soup支持自动将输入文档转换为Unicode编码,输出文档转换为UTF-8编码。当文档没有指定编码格式时,可以进行补充编码格式说明。
5.1 安装Beautiful Soup
pip install beautifulsoup4Beautiful Soup支持Python标准库以及第三方的HTML解析器,解析器对比如下:
解析器 |
用法 |
优点 |
缺点 |
Python标准库 |
BeautifulSoup(markup,"html.parser") |
Python标准库 执行速度适中 |
在Python 2.7.3或3.2.2之前的版本中文档容错性差 |
lxml的HTML解析器 |
BeautifulSoup(makup,"lxml") |
速度快 文档容错性强 |
需要安装C语言库 |
lxml的XML解析器 |
BeautifulSoup(markup,"lxml-xml") BeautifulSoup(markup,"xml") |
速度快 唯一支持xml的解析器 |
需要安装C语言库 |
html5lib |
BeautifulSoup(markup,"html5lib") |
最好的容错性 以浏览器的方式解析文档 生成html5格式的文档 |
速度慢,不依赖外部扩展 |
5.2 Beautiful Soup的使用
基本使用流程如下:
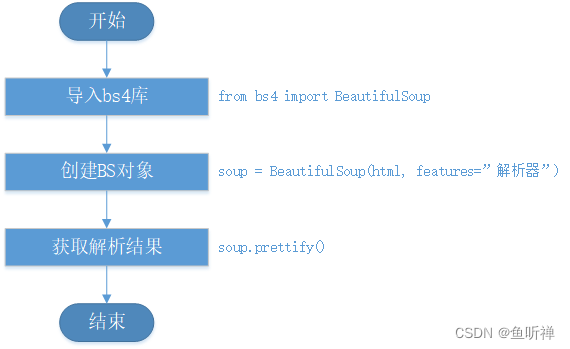
BeautifulSoup4已经挪到了bs4中,所有导入时需要使用from从bs4中导入。
创建对象时指定要分析的文件以及解析器。
使用BeautifulSoup.prettify()方法处理格式化的代码。
示例:
# _*_ coding:utf-8 _*_

import requests
from bs4 import BeautifulSoup


class BeautifulSoupDemo():
    """BeautifulSoup示例"""

    def __get(self):
        """使用bs4解析"""

        response = requests.get("https://www.baidu.com/")  # 网页请求
        return response

    def exportdata(self):
        """输出解析数据"""

        soup = BeautifulSoup(self.__get().content,"lxml")   # lxml需要先安装对应模块。
        print("格式化前:\r\n" + str(soup))
        print("格式化后:\r\n" + soup.prettify())


if __name__ == "__main__":
    """主程序运行"""
    bs = BeautifulSoupDemo()
    print("启动")
    bs.exportdata()
    print("结束")
结果:
启动
格式化前:
<!DOCTYPE html>
<!--STATUS OK--><html> <head><meta content="text/html;charset=utf-8" http-equiv="content-type"/><meta content="IE=Edge" http-equiv="X-UA-Compatible"/><meta content="always" name="referrer"/><link href="https://ss1.bdstatic.com/5eN1bjq8AAUYm2zgoY3K/r/www/cache/bdorz/baidu.min.css" rel="stylesheet" type="text/css"/><title>百度一下,你就知
道</title></head> <body link="#0000cc"> <div id="wrapper"> <div id="head"> <div class="head_wrapper"> <div class="s_form"> <div class="s_form_wrapper"> <div id="lg"> <img height="129" hidefocus="true" src="//www.baidu.com/img/bd_logo1.png" width="270"/> </div> <form action="//www.baidu.com/s" class="fm" id="form" name="f"> <input name="bdorz_come" type="hidden" value="1"/> <input name="ie" type="hidden" value="utf-8"/> <input name="f" type="hidden" value="8"/> <input name="rsv_bp" type="hidden" value="1"/> <input name="rsv_idx" type="hidden" value="1"/> <input name="tn" type="hidden" value="baidu"/><span class="bg s_ipt_wr"><input autocomplete="off" autofocus="autofocus" class="s_ipt" id="kw" maxlength="255" name="wd" value=""/></span><span class="bg s_btn_wr"><input autofocus="" class="bg s_btn" id="su" type="submit" value="百度一下
"/></span> </form> </div> </div> <div id="u1"> <a class="mnav" href="http://news.baidu.com" name="tj_trnews">新闻</a> <a class="mnav" href="https://www.hao123.com" name="tj_trhao123">hao123</a> <a class="mnav" href="http://map.baidu.com" name="tj_trmap">地图</a> <a class="mnav" href="http://v.baidu.com" name="tj_trvideo">视频</a> <a class="mnav" href="http://tieba.baidu.com" name="tj_trtieba">贴吧</a> <noscript> <a class="lb" href="http://www.baidu.com/bdorz/login.gif?login&tpl=mn&u=http%3A%2F%2Fwww.baidu.com%2f%3fbdorz_come%3d1" name="tj_login">登录</a> </noscript> <script>document.write('<a href="http://www.baidu.com/bdorz/login.gif?login&tpl=mn&u='+ encodeURIComponent(window.location.href+ (window.location.search === "" ? "?" : "&")+ "bdorz_come=1")+ '" name="tj_login" class="lb">登录</a>');
</script> <a class="bri" href="//www.baidu.com/more/" name="tj_briicon" style="display: block;">更多产品</a> </div> </div> </div> <div id="ftCon"> <div id="ftConw"> <p id="lh"> <a href="http://home.baidu.com">关于百度</a> <a href="http://ir.baidu.com">About Baidu</a> </p> <p id="cp">©2017 Baidu <a href="http://www.baidu.com/duty/">使用百度前必读</a> <a class="cp-feedback" href="http://jianyi.baidu.com/">意见反馈</a> 京ICP证030173号 <img src="//www.baidu.com/img/gs.gif"/> </p> </div> </div> </div> </body> </html>
格式化后:
<!DOCTYPE html>
<!--STATUS OK-->
<html>
<head>
<meta content="text/html;charset=utf-8" http-equiv="content-type"/>
<meta content="IE=Edge" http-equiv="X-UA-Compatible"/>
<meta content="always" name="referrer"/>
<link href="https://ss1.bdstatic.com/5eN1bjq8AAUYm2zgoY3K/r/www/cache/bdorz/baidu.min.css" rel="stylesheet" type="text/css"/>
<title>
百度一下,你就知道
</title>
</head>
<body link="#0000cc">
<div id="wrapper">
<div id="head">
<div class="head_wrapper">
<div class="s_form">
<div class="s_form_wrapper">
<div id="lg">
<img height="129" hidefocus="true" src="//www.baidu.com/img/bd_logo1.png" width="270"/>
</div>
<form action="//www.baidu.com/s" class="fm" id="form" name="f">
<input name="bdorz_come" type="hidden" value="1"/>
<input name="ie" type="hidden" value="utf-8"/>
<input name="f" type="hidden" value="8"/>
<input name="rsv_bp" type="hidden" value="1"/>
<input name="rsv_idx" type="hidden" value="1"/>
<input name="tn" type="hidden" value="baidu"/>
<span class="bg s_ipt_wr">
<input autocomplete="off" autofocus="autofocus" class="s_ipt" id="kw" maxlength="255" name="wd" value=""/>
</span>
<span class="bg s_btn_wr">
<input autofocus="" class="bg s_btn" id="su" type="submit" value="百度一下"/>
</span>
</form>
</div>
</div>
<div id="u1">
<a class="mnav" href="http://news.baidu.com" name="tj_trnews">
新闻
</a>
<a class="mnav" href="https://www.hao123.com" name="tj_trhao123">
hao123
</a>
<a class="mnav" href="http://map.baidu.com" name="tj_trmap">
地图
</a>
<a class="mnav" href="http://v.baidu.com" name="tj_trvideo">
视频
</a>
<a class="mnav" href="http://tieba.baidu.com" name="tj_trtieba">
贴吧
</a>
<noscript>
<a class="lb" href="http://www.baidu.com/bdorz/login.gif?login&tpl=mn&u=http%3A%2F%2Fwww.baidu.com%2f%3fbdorz_come%3d1" name="tj_login">
登录
</a>
</noscript>
<script>
document.write('<a href="http://www.baidu.com/bdorz/login.gif?login&tpl=mn&u='+ encodeURIComponent(window.location.href+ (window.location.search === "" ? "?" : "&")+ "bdorz_come=1")+ '" name="tj_login" class="lb">登录</a>');
</script>
<a class="bri" href="//www.baidu.com/more/" name="tj_briicon" style="display: block;">
更多产品
</a>
</div>
</div>
</div>
<div id="ftCon">
<div id="ftConw">
<p id="lh">
<a href="http://home.baidu.com">
关于百度
</a>
<a href="http://ir.baidu.com">
About Baidu
</a>
</p>
<p id="cp">
©2017 Baidu
<a href="http://www.baidu.com/duty/">
使用百度前必读
</a>
<a class="cp-feedback" href="http://jianyi.baidu.com/">
意见反馈
</a>
京ICP证030173号
<img src="//www.baidu.com/img/gs.gif"/>
</p>
</div>
</div>
</div>
</body>
</html>
结束三、网络爬虫常用框架
1.Scrapy爬虫框架
Scrapy是一套比较成熟的Python爬虫框架,简单轻巧,开源免费。
2.Crawley爬虫框架
Crawley致力于改变人们从互联网中提取数据的方式,基本特性如下:
基于Eventlet构建的高速网络爬虫框架
可以将数据存储在关系数据库中,入Postgres、MySQL、Oracle、SQLite等数据库。
可以将爬取的数据导入导Json、XML格式
支持非关系数据库,如:Mongodb和Couchdb
支持命令行工具
可以使用其他工具进行数据提取,如XPath、Pyquery等
支持Cookie登录或访问需要登录的网页
简单易学
官网:http://project.crawley-cloud.com(貌似网址已变更,暂时无法正常访问,时间2023.01.19)
3.PySpider爬虫框架
PySpider框架采用Python语言编写,分布式架构,支持多种数据库后端,WebUI支持脚本编辑器,任务监视器,项目管理器以及结果查看器,基本特性如下:
Python脚本控制,可以用相关的HTML解析包(内置pyquery)
WEB界面编写调试脚本、启停脚本、监控执行状态、查看活动历史、获取结果产出
支持MySQL、MongoDB、Redis、SQLite、Elasticsearch、PostgraSQL、SQLAlchemy等数据库
支持RabbitMQ、Beanstalk、Redis、Kombu做未消息队列
支持抓取JavaScript页面
强大的调度控制,支持超时重爬及优先级设置
组件可替换,支持单机/分布式部署,支持Docker部署
源码地址:https://github.com/binux/pyspider/releases
开发文档地址:http://docs.pyspider.org