技术选型
公司现在需要开发移动端的h5,使用现在比较流行的vue 2.0开发,使用的脚手架是Vant2,网络访问使用的是axios,路由跳转使用的是vue-router,开发工具是vscode,作为一个安卓开发程序员,对vue是不熟悉的,好在把环境搭建起来了,通过博客记录一下
Vant 2
vue cli
vue
vue中使用axios最详细教程
vue router
环境搭建
引入库
我这里已经安装好了nodejs,并且已经配置好了淘宝镜像
npm config set registry https://registry.npm.taobao.org
。这些配置网上都有,可以自行查询。
vscode不能直接在工具里创建项目,要先创建一个空文件夹,然后通过vscode打开文件夹。
在E:\vueProject文件夹下创建VueForBlog文件夹,使用vscode打开(vscode默认只能打开一个项目,如果想打开多个,可以使用ctrl+shift+n),点击工具栏终端,新建终端,正式开始创建项目
终端输入
npm i vant@latest-v2 -S
再输入
npm install -g @vue/cli
安装完成

打开package.json看一下依赖

创建一个项目
vue create first-vue
这个好像不能用驼峰,我刚开始用firstVue就报错。一般会出现选择项,我这边选择了vue2
创建完成以后,会是这个样子
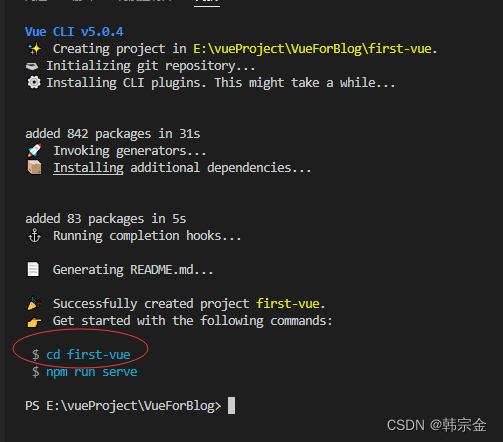
记住,后边要cd到工程里,否则还是在工程外创建引用之类的
下边用同样的方法,引入axios,router,还有vant需要使用的 postcss-px-to-viewport,postcss-pxtorem,lib-flexible
npm install [email protected]
npm install axios
npm i -S amfe-flexible
npm install postcss postcss-pxtorem --save-dev
npm install postcss-px-to-viewport --save-dev
npm install --save less-loader less
配置环境
配置vant 的基础样式,方便引用vant的组件。在first\src\assets\style\下创建theme.less,内容
// Color Palette
@black: #000;
@white: #fff;
@gray-1: #f7f8fa;
@gray-2: #f2f3f5;
@gray-3: #ebedf0;
@gray-4: #dcdee0;
@gray-5: #c8c9cc;
@gray-6: #969799;
@gray-7: #646566;
@gray-8: #323233;
@red: #ee0a24;
@blue: #1989fa;
@orange: #ff976a;
@orange-dark: #ed6a0c;
@orange-light: #fffbe8;
@green: #07c160;

// Gradient Colors
@gradient-red: linear-gradient(to right, #ff6034, #ee0a24);
@gradient-orange: linear-gradient(to right, #ffd01e, #ff8917);

// Component Colors
@text-color: @gray-8;
@active-color: @gray-2;
@active-opacity: 0.7;
@disabled-opacity: 0.5;
@background-color: @gray-1;
@background-color-light: #fafafa;
@text-link-color: #576b95;

// Padding
@padding-base: 4px;
@padding-xs: @padding-base * 2;
@padding-sm: @padding-base * 3;
@padding-md: @padding-base * 4;
@padding-lg: @padding-base * 6;
@padding-xl: @padding-base * 8;

// Font
@font-size-xs: 10px;
@font-size-sm: 12px;
@font-size-md: 14px;
@font-size-lg: 16px;
@font-weight-bold: 500;
@line-height-xs: 14px;
@line-height-sm: 18px;
@line-height-md: 20px;
@line-height-lg: 22px;
@base-font-family: -apple-system, BlinkMacSystemFont, 'Helvetica Neue',
  Helvetica, Segoe UI, Arial, Roboto, 'PingFang SC', 'miui', 'Hiragino Sans GB',
  'Microsoft Yahei', sans-serif;
@price-integer-font-family: Avenir-Heavy, PingFang SC, Helvetica Neue, Arial,
  sans-serif;

// Animation
@animation-duration-base: 0.3s;
@animation-duration-fast: 0.2s;
@animation-timing-function-enter: ease-out;
@animation-timing-function-leave: ease-in;

// Border
@border-color: @gray-3;
@border-width-base: 1px;
@border-radius-sm: 2px;
@border-radius-md: 4px;
@border-radius-lg: 8px;
@border-radius-max: 999px;
同样目录下,创建一个public.css,内容
body {


  background-color: #f8f8f9;
  min-height: 100vh;
  min-width: 100vw;
}
.padding-lr10 {


  padding: 0 10px;
}
.phoneContant header .van-nav-bar {


  text-align: center;
  line-height: 56px;
  background: #68c2bd;
}
h3 {


  font-size: 16px;
}
.phoneContant header .van-nav-bar .van-icon {


  font-size: 20px;
  color: #fff;
}
.phoneContant header .van-nav-bar__title {


  color: #fff;
}
.contant {


  padding: 0 10px;
}
.re {


  position: relative;
}
.cardContant {


  background: #f5f5f5;
  height: 78vh;
  width: 100%;
  clear: both;
  padding: 8px 0;
}
.hosImg {


  width: 60px !important;
  height: 60px !important;
  border-radius: 50%;
}
这里的内容,是根据项目中需要的样式自定义的
在vue.config.js里进行配置
css: {


    loaderOptions: {


      less: {


        lessOptions: {


          modifyVars: {


            // 或者可以通过 less 文件覆盖(文件路径为绝对路径)
            hack: `true; @import "@/assets/style/theme.less";`,
          },
        },
      },
    },
  },
访问资源路径,有个快捷方法,设置一个符号,用来直接指定到src目录下,比用.或者..方便,还不容易出错,同样在vue.config.js里,@就代表src目录
  chainWebpack: (config) => {


    config.resolve.alias.set("@", resolve("src"));
    config.plugin("html").tap((args) => {


      args[0].minify = false;
      return args;
    });
  },
vue.config.js全部内容
const path = require("path");
// const CompressionWebpackPlugin = require("compression-webpack-plugin");
// // 定义压缩文件类型
// const productionGzipExtensions = ["js", "css"];
// let timeStamp = new Date().getTime();

function resolve(dir) {


  return path.join(__dirname, dir);
}
module.exports = {


  // 基本路径
  publicPath: "./",
  // 输出文件目录 不写则默认根目录
  outputDir: "dist",
  assetsDir: "static", // 静态资源目录 (js, css, img, fonts)
  lintOnSave: false,
  // eslint-loader 是否在保存的时候检查
  // lintOnSave: 'error',
  // devServer: {


  //   // development server port 8000
  //   port: 8000,
  //   // If you want to turn on the proxy, please remove the mockjs /src/main.jsL11
  //   proxy: {


  //     '/api/': {


  //       target: process.env.VUE_APP_APIUrl,
  //       changeOrigin: true
  //     }
  //   }
  // },
  // /assets/style/public.css.less
  css: {


    loaderOptions: {


      less: {


        lessOptions: {


          modifyVars: {


            // 或者可以通过 less 文件覆盖(文件路径为绝对路径)
            hack: `true; @import "@/assets/style/theme.less";`,
          },
        },
      },
    },
  },
  devServer: {


    // 设置主机地址
    // 设置默认端口
    port: 8080,
    // // 设置代理
    // proxy: {


    //   "/": {


    //     // target: "http://198.166.21.56:8080/",
    //     ws: true, // 支持ws协议;websocket的缩写;
    //     changeOrigin: true, // 是否跨域
    //     pathRewrite: {


    //       // 路径替换
    //       "^/api": "",
    //     },
    //   },
    // },

  },
  // use the full build with in-browser compiler?
  // https://vuejs.org/v2/guide/installation.html#Runtime-Compiler-vs-Runtime-only
  // compiler: false,

  // webpack配置
  // see https://github.com/vuejs/vue-cli/blob/dev/docs/webpack.md   webpack链接API,用于生成和修改webapck配置
  //部署打包html带引号
  chainWebpack: (config) => {


    config.resolve.alias.set("@", resolve("src"));
    config.plugin("html").tap((args) => {


      args[0].minify = false;
      return args;
    });
  },
  //压缩打包文件大小
  configureWebpack: (config) => {


    if (process.env.NODE_ENV === "Production") {


      // config.output.filename = `assets/js/[name].${timeStamp}.js`;
      // config.output.chunkFilename = `assets/js/[name].${timeStamp}.js`;
      config.plugins.push(
        new CompressionWebpackPlugin({


          algorithm: "gzip",
          test: new RegExp("\\.(" + productionGzipExtensions.join("|") + ")$"),
          threshold: 10240,
          minRatio: 0.8,
        })
      );
    }
    config.externals = {


      //   'vue': 'Vue',
      //   'vuex': 'Vuex',
      //   'vue-router': 'VueRouter',
      //   'element-ui': 'ELEMENT',
      //   'Axios': 'axios',
      //   'jquery': '$',
      //   'moment': 'moment',
      //   'js-cookie': 'Cookies',
      //   'echarts': 'echarts',
      //   'tinymce/tinymce': 'tinymce'
    };
    // }
  },
  // configureWebpack: (config) => {// webpack配置,值位对象时会合并配置,为方法时会改写配置
  //   if (debug) { // 开发环境配置
  //     config.devtool = 'cheap-module-eval-source-map'
  //   } else { // 生产环境配置

  //   }
  //   Object.assign(config, { // 开发生产共同配置
  //     resolve: {


  //       alias: {


  //         '@': path.resolve(__dirname, './src')//设置路径别名
  //         //...
  //       }
  //     }
  //   })
  // },
  // vue-loader 配置项
  // https://vue-loader.vuejs.org/en/options.html
  // vueLoader: {},

  // 生产环境是否生成 sourceMap 文件
  productionSourceMap: false,
  // css相关配置 配置高于chainWebpack中关于css loader的配置
  // css: {


  //   // 是否使用css分离插件 ExtractTextPlugin
  //   extract: true,
  //   // 开启 CSS source maps?是否在构建样式地图,false将提高构建速度
  //   sourceMap: false,
  //   // css预设器配置项
  //   loaderOptions: {},
  //   // 启用 CSS modules for all css / pre-processor files.
  //   modules: false
  // },
  // use thread-loader for babel & TS in production build
  // enabled by default if the machine has more than 1 cores 构建时开启多进程处理babel编译
  //parallel: require('os').cpus().length > 1,
  // 是否启用dll
  // See https://github.com/vuejs/vue-cli/blob/dev/docs/cli-service.md#dll-mode
  // dll: false,

  // PWA 插件相关配置
  // see https://github.com/vuejs/vue-cli/tree/dev/packages/%40vue/cli-plugin-pwa
  //pwa: {},
  // webpack-dev-server 相关配置
  // devServer: {


  //   open: process.platform === 'darwin',
  //   host: '0.0.0.0',
  //   port: 8080,
  //   https: false,
  //   hotOnly: false,
  //   proxy: null, // 设置代理
  //   before: app => { }
  // },
  // 第三方插件配置
  pluginOptions: {


    // ...
  },
};
lintOnSave: false,这个的意思就是关闭语法检查,要不然会很多报错,运行不起来
在first-vue目录下,新建一个.postcssrc.js,在里边配置postcss
module.exports = {


  plugins: {


    //...
    autoprefixer: {


      browsers: ["Android >= 4.0", "iOS >= 7"],
    },
    "postcss-pxtorem": {


      rootValue: 37.5, //vant-UI的官方根字体大小是37.5
      propList: ["*"],
    },
  },
};
底部安全区适配
在public目录下的index.html文件配置底部安全区适配
<!DOCTYPE html>
<html lang="en">
  <head>
    <meta base="/" id="base" />
    <meta charset="utf-8" />
    <meta http-equiv="X-UA-Compatible" content="IE=edge" />
    <meta
      name="viewport"
      content="width=device-width, initial-scale=1.0, maximum-scale=1.0, minimum-scale=1.0, viewport-fit=cover,user-scalable=no"
    />

    <link rel="icon" href="<%= BASE_URL %>favicon.ico" />
    <title>首页</title>
  </head>

  <body>

    <!-- 开启顶部安全区适配 -->
    <van-nav-bar safe-area-inset-top />
    <div id="app"></div>
    <!-- built files will be auto injected -->
    <!-- 开启底部安全区适配 -->
    <van-number-keyboard safe-area-inset-bottom />
  </body>
</html>
<script>

</script>
src目录下,新建router目录,下边新建index.js,对router进行配置
import Vue from "vue";
//路由
import VueRouter from "vue-router";
import {

     asyncRouterMap } from "@/config/router.config";
Vue.use(VueRouter);
const routes = []
  const router = new VueRouter({


    routes: routes.concat(asyncRouterMap),

    mode: "hash",
  });

  export default router;
在src的config目录下,新建router.config,这个对应路由和相应的页面
export const asyncRouterMap = [
  {


    path: "/",
    component: () => import("@/components/Header.vue"),
    meta: {

     title: "首页" },
    // redirect: '/dashboard/workplace',
    redirect: "/home",
    children: [
      {


        path: "/home",
        name: "home",
        component: () => import("@/views/Home.vue"),
        hidden: true,
        meta: {

     title: "首页" },
      },
      {


        path: "/second",
        name: "second",
        component: () => import("@/views/Second.vue"),
        hidden: true,
        meta: {

     title: "第二页" },
      },

    ],
  },
  {


    path: "*",
    redirect: "/home",
    hidden: true,
  },
];
具体页面,等会创建
对App.vue进行修改
<template>
  <div id="app">
    <router-view></router-view>
  </div>
</template>

<script>

export default {


  name: 'App',

}
</script>

<style>
#app {


  height: 100%;
}
.el-header,
.el-footer {


  background-color: #b3c0d1;
  color: #333;
  text-align: center;
  line-height: 60px;
}

body > .el-container {


  margin-bottom: 40px;
}
</style>
我现在需要对一个头部组件进行封装,因为每个页面都有头部导航栏,所以封装成一个组件
在components目录里,新建Header.vue
<template>
  <div class="phoneContant">
    <header>

      <van-nav-bar
        class="personheader"
        :fixed="true"
        :placeholder="true"
        :safe-area-inset-top="true"
        :title="$route.meta.title"
        left-text=""
        :left-arrow="true"
        @click-left="back"
      />
    </header>
        <router-view></router-view>
  </div>
</template>

<script>

var config = {


  isAndroid: /Android/i.test(navigator.userAgent), //判断是否为移动端
  isIos: !!navigator.userAgent.match(/\(i[^;]+;( U;)? CPU.+Mac OS X/), //判断是否为IOS
};

export default {


  name: "Headers",
  //import引入的组件需要注入到对象中才能使用
  components: {

    },
  data() {


    //这里存放数据
    return {


      title: "",
    };
  },
  //监听属性 类似于data概念
  computed: {

    },
  //监控data中的数据变化
  watch: {


    $route: {


      handler(newRouter, fromRouter) {


      },
      immediate: true,
    },
  },
  //方法集合
  methods: {


    back() {


    this.$router.go(-1);

      return false;
    },
  },
  //生命周期 - 创建完成(可以访问当前this实例)
  created() {


    let cont = window.history.length;
    console.log("window.history.length-----------------roomstep");
    console.log(cont);
  },
  //生命周期 - 挂载完成(可以访问DOM元素)
  mounted() {


  },
  beforeCreate() {

    }, //生命周期 - 创建之前
  beforeMount() {

    }, //生命周期 - 挂载之前
  beforeUpdate() {

    }, //生命周期 - 更新之前
  updated() {

    }, //生命周期 - 更新之后
  beforeDestroy() {

    }, //生命周期 - 销毁之前
  destroyed() {


  }, //生命周期 - 销毁完成
  activated() {

    }, //如果页面有keep-alive缓存功能,这个函数会触发
};
</script>
在main.js里进行引入vant和css样式,以及其他组件
import Vue from 'vue'
import App from './App.vue'
import "@/assets/style/public.css";
import router from "@/router";
import Vant from "vant";
import "vant/lib/index.less";
import "@/assets/style/public.css";
Vue.config.productionTip = false
Vue.use(Vant);

new Vue({


  router,
  render: h => h(App),
}).$mount('#app')
在src下创建一个views文件夹,新建两个vue,Home.vue和Second.vue,内容很简单
Home.vue
<template>

  <div class="phoneContant">
    <van-button type="warning" @click="goToNext">进入下一页</van-button>
  </div>
</template>

<script>

export default {


  name: "Home",
  data() {


    return {


      msg: "我是首页",
    };
  },
  methods: {


    goToNext() {


      this.$router.push("/second");
    },

  },
};
</script>

<style>
</style>
Second.vue
<template>
<div>
    {

    {

    msg}}
</div>

</template>

<script>
export default {


    data(){


        return{


            msg:"第二页"
        }
    }
}
</script>

<style>

</style>
运行
命令行输入
npm run serve
没问题的话,就能运行起来了。如果想要中断运行,终端里边用ctrl+c快捷键

网络封装
对axios进行封装一下,方便使用。在src下新建utils文件夹,utils下新建request.js,
import axios from "axios";
import {

     Notify } from "vant";
import router from "@/router";

const baseURL =BaseUrl
  // process.env.NODE_ENV === "development" ? "/api" : window.productionUrl;
//创建axios实例
const service = axios.create({


  baseURL, // api的base_url  window.productionUrl
  withCredentials: true,
  timeout: 30000, // 请求超时时间
});

// 发送请求拦截器
service.interceptors.request.use(
  (config) => {


    const Nonce =
      Math.ceil(+new Date() / 1000) + "" + Math.ceil(Math.random() * 10000);
    const CurTime = Math.floor(+new Date() / 1000).toString();
    config.headers["Content-Type"] = "application/json;charset=UTF-8";

    return config;
  },
  (error) => {


    return Promise.reject(error);
  }
);

//发送请求响应拦截
service.interceptors.response.use(
  (response) => {


    const res = JSON.parse(CryptoJS.decrypt(response.data));
    // 错误的status情况
    // console.log(res);
    if (!res.result) {


      Notify({

     type: "danger", message: res.message || "error" });
      return Promise.reject(res.message || "error");
    } else {


      return res;
    }
  },
  (error) => {


    Notify({

     type: "danger", message: error.message || "error" });
    return Promise.reject(error);
  }
);

export default service;
结语
现在只是搭建了工程,如果没有缺少步骤的话,应该是可以运行起来的,剩下的还有很多工作要做。。。
补充
之前的工程创建方式顺序应该错了,不是先创建文件夹,然后再用vscode打开,再执行vue create命令,这样的话,主目录下,就会有子目录,子目录就是项目名。如果想主目录就是项目,要现在需要创建工程的地方,打开cmd命令行,执行命令,然后用vscode打开


