想要搞清楚ssh无法连接的原因 首先要先排查SSH基础的配置是否完整以及服务是否安装
1.首先查看centos7上是否装了openssh-server,如果你是卸载的openssh然后重新安装,可能卸载的时候把openssh-server给卸载了但是安装openssh时却没有安装openssh-server。所以导致ssh连接出错,如果你是源码包安装的openssh,卸载的时候可能将openssh-server一起卸载了。(yum install -y xxx只能安装系统自带的openssh-7.4p1的版本)。事实上系统自带的openssh-7.4p1版本的带有openssh-7.4p1、openssh-clients-7.4p1、openssh-server-7.4p1
检查系统本地有没有openssh-clients和openssh-server可以使用如下命令查看
rpm -qa|grep openssh

yum list installed |grep openssh
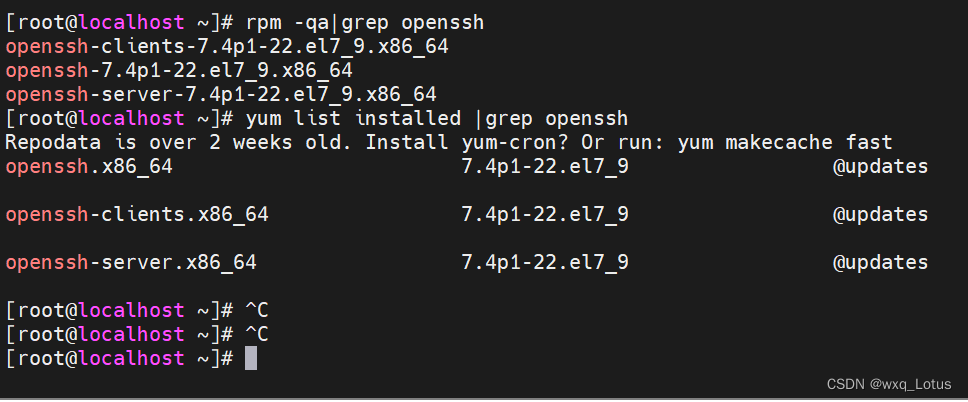
如果显示没有安装可以使用yum install -y openssh-server或yum install -y openssh-clients进行安装
2.编辑/etc/ssh/sshd_config配置文件,将文件中的ssh监听的22端口、监听地址前的注释#去掉,然后开启允许root账户远程登录、以及开启用户名密码作为连接验证。然后保存退出


然后开启sshd服务,查看ssh进程和端口号
sudo service sshd start #开启sshd服务
ps -ef |grep sshd #检查sshd进程
netstat -an |grep 22 #检查22端口号是否开启监听
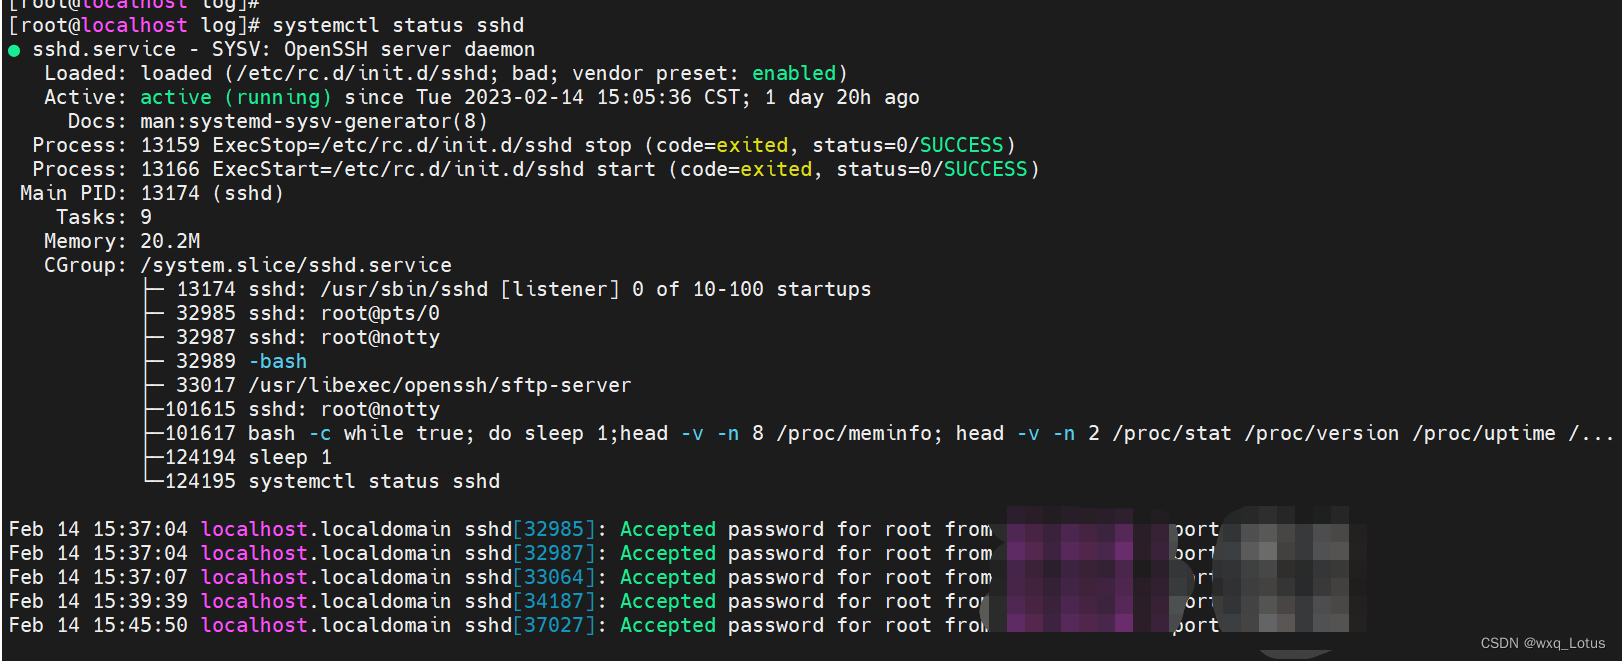
systemctl status sshd #查看ssh服务状态是否开启设置开机自启动ssh服务
systemctl enable sshd.service    #设置开机自启动服务

systemctl list-unit-files |grep sshd    #查看是否开启sshd服务自启动

chkconfig sshd on  #设置ssh服务为开机启动命令


chkconfig sshd off  #设置ssh服务禁止开机自启动命令

service sshd stop   #停止ssh服务命令
3.如果以上两项都检查过了没问题那可能就是配置的静态地址的问题
首先看一下centos系统的ip地址
ip add
或
ifconfig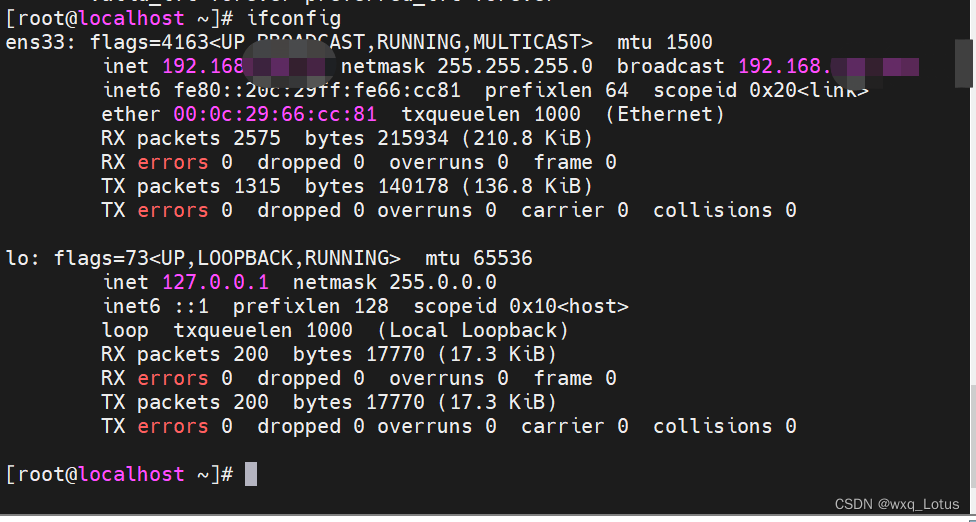
然后检查配置的静态地址是否跟ifconfig的ens33网卡地址一样
vi /etc/sysconfig/network-scripts/ifcfg-ens33

如果配置的静态地址跟系统显示的地址不一样,可能是配置完成是没有重启网络,需要重启一下网络,这样地址就对上了。
systemctl restart network4.如果上面三点都尝试过了不行,就要打开虚拟网络编辑器,然后点击还原默认配置

然后等待初始化,初始化完成后,打开网络和internet设置
查看VMware Network Adapter VMnet8虚拟网卡,右击然后查看状态-详细信息
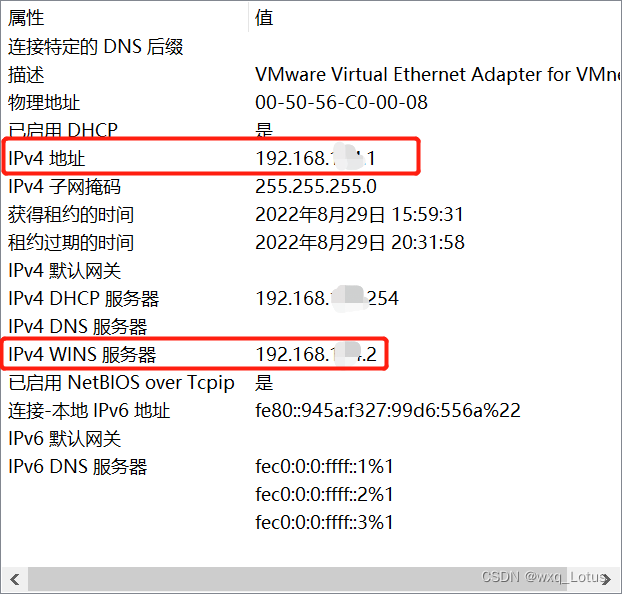
或者win+r输入cmd进入命令行,ipconfig查看VMware Network Adapter VMnet8虚拟网卡地址

然后重新配置静态IP跟VMware Network Adapter VMnet8虚拟网卡地址在同一个网段,网关为查看VMware Network Adapter VMnet8虚拟网卡,右击然后查看状态-详细信息的IPv4 WINS服务器地址为xxx.xxx.xxx.2,我这里是192.168.124.2

然后保存退出,重启网络systemctl restart network


然后centos系统ping VMware Network Adapter VMnet8虚拟网卡IPv4地址,然后windows 命令行ping centos地址,确保都能ping通

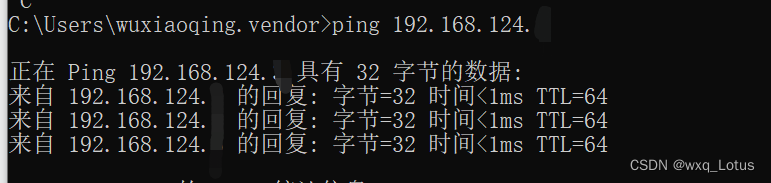
然后再重启sshd服务
systemctl restart sshd再发起ssh连接这个时候就可以连接了

5.检查/etc/hosts.deny和/etc/hosts.allow文件中有没有限制sshd协议,如果有删除sshd协议在某个IP范围内在/etc/hosts.deny跟/etc/hosts.allow中的配置
vi /etc/hosts.deny

vi /etc/hosts.allow
6.有可能是sshd_config配置文件限制了root用户登录
echo "PermitRootLogin yes" >> /etc/ssh/sshd_config
或
sed -i 's/#PermitRootLogin yes/PermitRootLogin yes/g' /etc/ssh/sshd_config
#将PasswordAuthentication置为yes
echo 'PasswordAuthentication yes' >> /etc/ssh/sshd_config
或
sed -i 's/#PasswordAuthentication yes/PasswordAuthentication yes/g' /etc/ssh/sshd_config7.配置认证
#可能升级ssh后,/etc/pam.d.sshd配置文件覆盖了,可以从没升级ssh之前的机器拷贝该文件内容到该目录下,拷贝前先备份现在的sshd文件
cat /etc/pam.d/sshd
cd /etc/pam.d
mv sshd sshd.bak
8.更改etc/ssh下的文件的ssh_host_dsa_key、ssh_host_ecdsa_key、ssh_host_ed25519_key
、ssh_host_rsa_key等key文件的权限 这些目录下的这些key文件权限太高了 把这些key文件权限改为600
cd /etc/ssh
chmod 600 ssh_host_dsa_key
chmod 600 ssh_host_ecdsa_key
chmod 600 ssh_host_ed25519_key
chmod 600 ssh_host_rsa_key
9.关闭selinux
setenforce 0   #临时关闭selinux
#找到SELINUX=enforcing,按i进入编辑模式,将参数修改为SELINUX=disabled即可(永久关闭)
vi /etc/selinux/config
SELINUX=disabled
或
sed -i -e "s/SELINUX=enforcing/SELINUX=disabled/g" /etc/selinux/config
#查看selinux是否关闭,显示Disabled为关闭
getenforce
10.使用ssh连接的xshell版本太低
如果升级ssh版本之后无法连接,请更新xshell版本到5版本以上,再发起ssh连接应该就可以了
11.查看是否是设置了防火墙拒绝该地址进行连接。
例如:
#设置只允许192.168.6.0网段的允许访问本机的22端口
iptables -I INPUT -s 192.168.6.0/24 -p tcp --dport 22 -j ACCEPT

#再设置其他IP拒绝访问本机22端口
iptables -A INPUT -p tcp --dport 22 -j ACCEPT

#查看itables规则
iptables -L
12.确认是否有安装openssl,当我们只升级openssh,(其他原因不能升级openssl)时
使用rpm包安装openssh的时候,没有使用rpm包安装openssl的时候需要像以下这样做。
升级openssh-8.9p1前的备份
ssh -V #查看openssh跟openssl的版本
openssl version #查看真正在使用的openssl的版本
#备份openssh的相关目录
cp -r /etc/ssh{,.back`date "+%Y%m%d"`}
cp /etc/pam.d/sshd{,.back`date "+%Y%m%d"`}
cp /usr/bin/ssh{,.back`date "+%Y%m%d"`}

#升级openssh
rpm -Uvh --nodeps --force openssh-8.9p1-1.el7.x86_64.rpm
rpm -Uvh --nodeps --force openssh-clients-8.9p1-1.el7.x86_64.rpm
rpm -Uvh --nodeps --force openssh-server-8.9p1-1.el7.x86_64.rpm
这时候升级的时候会提示报错,因为正确的升级顺序是需要先升级openssl,因为openssh-8.0p1版本及以上依赖openssl-1.1.1系列

查看openssh的日志
systemctl status sshd
或
cd /var/log
cat messages
方法1:卸载新安装的openssh-8.9p1版本
rpm -qa |grep openssh     #查看已经安装的openssh的rpm包

#卸载openssh8.9版本
rpm -e nodeps openssh-clients-8.9p1-1.el7.x86_64
rpm -e nodeps openssh-8.9p1-1.el7.x86_64
rpm -e nodeps openssh-server-8.9p1-1.el7.x86_64
安装老版本ssh-7.4p1版本
首先将openssh-7.4p1的rpm包先上传到/root/目录下
openssh-7.4p1的rpm包已经上传到我的资源里面,点进主页去下载
#安装openssh-7.4p1
rpm -ivh --nodeps --force openssh-7.4p1-1.el7.x86_64.rpm
rpm -ivh --nodeps --force openssh-clients-7.4p1-1.el7.x86_64.rpm
rpm -ivh --nodeps --force openssh-server-7.4p1-1.el7.x86_64.rpm
重启openssh
systemctl start sshd    #启动openssh

systemctl status sshd #查看openssh的状态 
查看日志
systemctl status sshd
或
cd /var/log
cat messages
登录openssh,使用其他机器登录本地openssh或者使用xshell和MobaXterm登录

方法2:添加openssl的库文件
根据刚刚提示的升级失败日志的提醒是少了libcrypto.so.1.1库文件,我们把已经升级了想要的openssl版本的机器中拷贝出来,放到需要libcrypto.so.1.1库文件的机器的相对应的目录下。
前面升级了openssh-8.9p1版本,这里拷贝openssl-1.1.1q版本的libcrypto.so.1.1、libssl.so.1.1库文件为例。
在已经升级的openssl-1.1.1q的机器中去拷贝libcrypto.so.1.1库文件,为保险起见,把libssl.so.1.1库文件也一起拷贝放到需要libcrypto.so.1.1、libssl.so.1.1库文件的机器的相对应的目录下。
这里把这两个libcrypto.so.1.1、libssl.so.1.1库文件也上传到我的资源,点进去我主页进行下载。
#去到已经升级了openssl-1.1.1q版本的机器中,进入到该目录
cd /usr/lib64/


#拷贝这两个文件libcrypto.so.1.1、libssl.so.1.1到/root/下然后再下载到本地物理机上再传到需要这两个库文件的机器上
cp libcrypto.so.1.1 libssl.so.1.1  /root/
使用xshell登录已经升级了openssh-8.9p1的机器
#进到对应的这两个库文件所在的目录
cd /usr/lib64


输入rz 这里会弹出来物理机上传的路径选中这两个库文件libcrypto.so.1.1、libssl.so.1.1进行上传

#如果显示没有安装rz,使用yum安装一下就可以了
yum install -y lrzsz
另外xshell还需要设置一下rz的设置

systemctl start sshd

systemctl restart sshd

ls libcrypto.so.1.1 libssl.so.1.1

systemctl status sshd
登录openssh,使用其他机器登录本地openssh或者使用xshell和MobaXterm登录

查看openssh和openssl的版本
ssh -V
openssl --version