何为自定义指令
通过前面的学习,我们都有了一定的Vue知识,我们都知道可以在Vue实例创建后,在template标签中写我们的界面,当我们需要控制某个dom元素的显示或者隐藏时,我们可以使用v-if指令。循环打印一个列表时,我们可以使用v-for指令等…,然而这些指令都是Vue给我们提供的,我们其实可以自己定义我们的指令,其实我理解这个自定义指令就是把某个功能做一个封装,以这个指令提供给调用者使用。减少相同代码的重复编写。在Vue中,自定义指令可以有全局定义和局部定义两种方式,下面我们一起看下如何定义自定义指令
实例解析
1.基本知识介绍
我们以一个简单的输入框自动焦的例子来演示Vue的自定义指令,具体的场景是:界面中有一个输入框,当界面加载出来后,让输入框自动获取焦点,我们先看下一般的实现方法,代码如下:
<!DOCTYPE html>
<html lang="en">
<head>
    <meta charset="UTF-8">
    <meta http-equiv="X-UA-Compatible" content="IE=edge">
    <meta name="viewport" content="width=device-width, initial-
    scale=1.0">
    <title>自定义指令</title>
    <script src="https://unpkg.com/vue@next"></script>
</head>
<body>
    <div id="root"></div>
</body>
<script>
 const app = Vue.createApp({


    mounted(){


        this.$refs.input.focus();
    },
        template:
        `
        <div>
            <input ref="input"/>
        </div>
        `
    });

    const vm = app.mount('#root');
</script>
运行结果读者可以自己运行看下效果,然后去掉focus函数调用,再运行看效果
我们在输入框中使用ref属性的方式,当页面加载完后,使用this.$refs.input.focus(),获取到input输入框,然后调用focus方法让输入框获取焦点。
使用上面的方法虽然能完成我们的需求,但是写起来比较麻烦,而且需要在我们的app实例的mounted()方法中增加聚焦的逻辑,使用自定义指令可以更简单的实现上面的输入框自动获取焦点的功能,代码如下:
<!DOCTYPE html>
<html lang="en">
<head>
    <meta charset="UTF-8">
    <meta http-equiv="X-UA-Compatible" content="IE=edge">
    <meta name="viewport" content="width=device-width, initial-
    scale=1.0">
    <title>自定义指令</title>
    <script src="https://unpkg.com/vue@next"></script>
</head>
<body>
    <div id="root"></div>
</body>
<script>
 const app = Vue.createApp({


       data(){


        return{


            display:true
        	}
       },

        template:
        `
        <div v-show="display">
            <input v-focus/>
        </div>
        `
    });

    // 定义全局的自定义指令
    app.directive('focus',{


        mounted(el){


            console.log(el);
            el.focus();
            console.log('mounted');
        }
    });

    const vm = app.mount('#root');
</script>
如上面代码所示,使用app.directive(‘指令名称’,{ xxxx});的方式可以自定义的指令,使用时在对应的dom元素上添加v-指令名称就可以了,就如本例子中,调用的方法如下:
<input v-focus/>
这时候运行代码会发现效果和我们之前做的一模一样,这个写法更简单。在文中我们看到了mounted函数,这个函数是Vue生命周期的函数吗,意思是当界面挂载完成时会回调它,el参数就是我们使用自定义指令的那个Dom元素
 mounted(el){
            console.log(el);
            el.focus();
            console.log('mounted');
        }
其实定义自定义指令时不只可以重写mounted()函数,还可以重写其他的函数,如下所示:
    app.directive('focus',{
        beforeMount(el){
            console.log('beforeMount');

        },
        mounted(el){
            console.log('mounted');
        },
        beforeUpdate(){
            console.log('beforeUpdate');
        },
        updated(){
            console.log('updated');
        },
        beforeUnmount(){
            console.log('beforeUnmount');
        },
        unmounted(){
            console.log('unmounted');
        }
    });
在浏览器中运行上面代码,打开console,如下
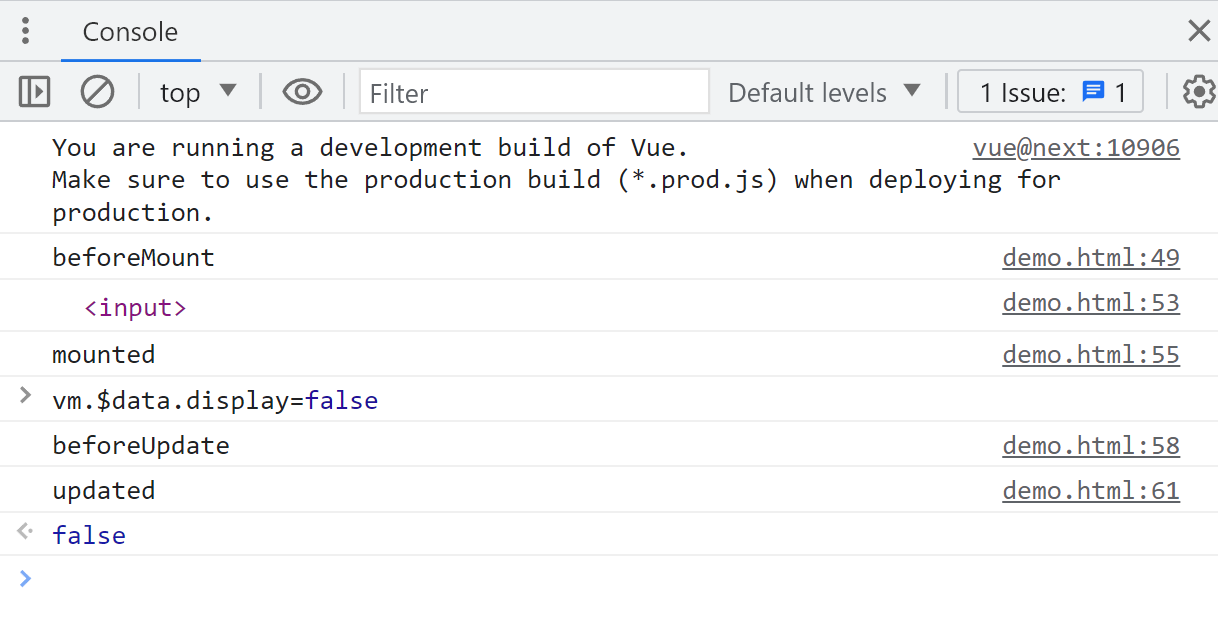
我们可以在对应的生命周期回调中做对应的事情。
在上面的代码中我们定义自定义指令用的是全局的方式,其实我们还有局部的方式,代码如下:
<!DOCTYPE html>
<html lang="en">
<head>
    <meta charset="UTF-8">
    <meta http-equiv="X-UA-Compatible" content="IE=edge">
    <meta name="viewport" content="width=device-width, initial-
    scale=1.0">
    <title>自定义指令</title>
    <script src="https://unpkg.com/vue@next"></script>
</head>
<body>
    <div id="root"></div>
</body>
<script>
 const direc = {


      focus:{


            mounted(el){


               el.focus();
            }
        }
    };
 const app = Vue.createApp({


       data(){


        return{


            display:true
        }
       },
       directives:direc,
        template:
        `
        <div v-show="display">
            <input v-focus/>
        </div>
        `
    });
     const vm = app.mount('#root');
</script>
使用局部定义自定义属性的方式是:
 const direc = {
      focus:{
            mounted(el){
               el.focus();
            }
        }
    };
然后使用的时候需要加上:
 const app = Vue.createApp({
   ...
       directives:direc,
   ...
    });
2.使用自定义指令实现改变输入框位置
我们接下来使用Vue的自定义指令实现一个小功能,就是动态改变输入框的位置,代码如下:
<!DOCTYPE html>
<html lang="en">
<head>
    <meta charset="UTF-8">
    <meta http-equiv="X-UA-Compatible" content="IE=edge">
    <meta name="viewport" content="width=device-width, initial-
    scale=1.0">
    <title>自定义指令</title>
    <style>
        .header{


            position: absolute;
        }
    </style>
    <script src="https://unpkg.com/vue@next"></script>
</head>
<body>
    <div id="root"></div>
</body>
<script>

 const app = Vue.createApp({


    data(){


        return{


            pxValue:50
        }
    },
        template:
        `
        <div>
            <div v-pos:left="pxValue" class="header">
            <input />
            </div>
        </div>
        `
    });

    app.directive('pos',{


        mounted(el,binding){


            el.style[binding.arg] = binding.value + 'px';

        },
        updated(el,binding){


            el.style[binding.arg] = binding.value + 'px';
        }
    });

    // 上面代码等价于下面注释掉的代码

    // app.directive('pos',(el,binding)=>{


    //     console.log(binding.arg,'binding')
    //     el.style[binding.arg]=(binding.value+'px');
    // })

    const vm = app.mount('#root');
</script>
首先我们定义一个样式,使用绝对定位的方式确定输入框的位置:
    <style>
        .header{


            position: absolute;
        }
    </style>
使用一个pxValue表示输入框位置的值,然后可以通过
v-pos:left="pxValue"的方式确定输入框是距离左边还是右边或者距离其他参照物。然后自定义指令的时候,拿到属性传过来的值和pxValue,改变输入框位置:
  app.directive('pos',{
        mounted(el,binding){
            el.style[binding.arg] = binding.value + 'px';

        },
        updated(el,binding){
            el.style[binding.arg] = binding.value + 'px';
        }
    });
这里也可以写成:
   app.directive('pos',(el,binding)=>{
        console.log(binding.arg,'binding')
        el.style[binding.arg]=(binding.value+'px');
    })
然后使用的时候就可以如下:
 <div v-pos:left="pxValue" class="header">
或者  <div v-pos:right="pxValue" class="header">
或者  <div v-pos:top="pxValue" class="header">
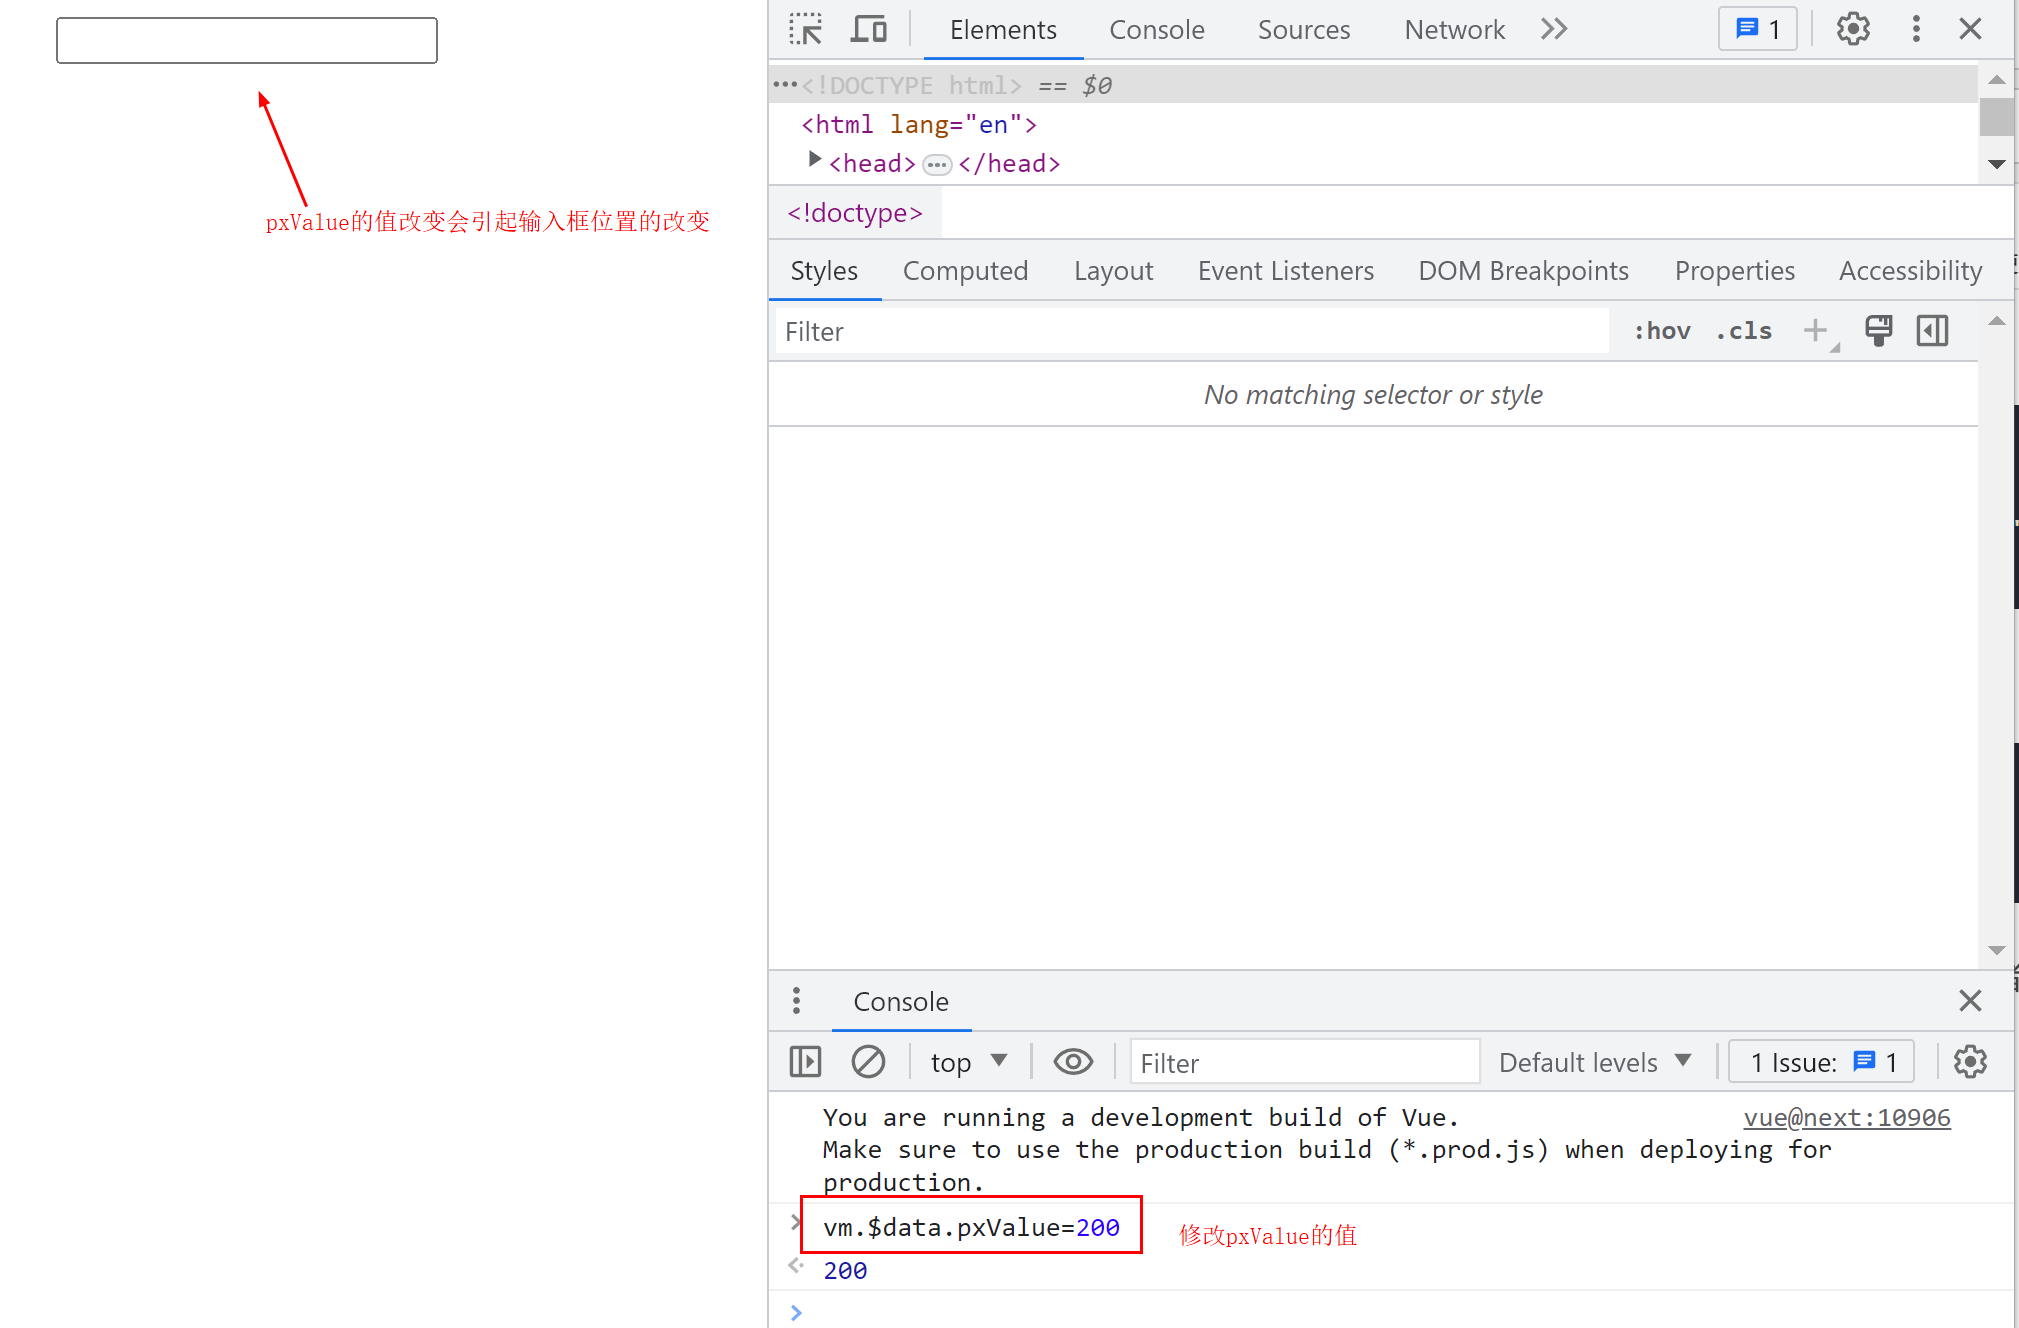
运行之后,可以修改对应的值查看效果,这里留给读者去自己体验:
总结
本文主要介绍了Vue使用自定义指令的两种方法,一种是全局自定义指令的使用方式,另一种是局部自定义指令的使用方式。需要注意的是,局部自定义指令定义完后需要在Vue.createApp({directives:局部自定义指令的变量名});才可以使用自定义指令。最后我们使用了一个动态改变输入框位置的例子展示了自定义指令的使用方式。