手把手教你开发微信小程序自定义底部导航栏
一.创建微信小程序

二.配置底部菜单
1. 配置app.json文件,增加底部菜单
{


  "pages":[
    "pages/index/index",
    "pages/logs/logs"
  ],
  "window":{


    "backgroundTextStyle":"light",
    "navigationBarBackgroundColor": "#fff",
    "navigationBarTitleText": "Weixin",
    "navigationBarTextStyle":"black"
  },
  "tabBar": {


    "list": [{


      "pagePath": "pages/index/index",
      "text": "首页"
    }, {


      "pagePath": "pages/logs/logs",
      "text": "日志"
    }]
  },
  "style": "v2",
  "sitemapLocation": "sitemap.json"
}
三.增加自定义底部菜单
1. app.json配置文件 tabBar,增加"custom": true,
  "tabBar": {
    "custom": true,
    "list": [{
      "pagePath": "pages/index/index",
      "text": "首页"
    }, {
      "pagePath": "pages/logs/logs",
      "text": "日志"
    }]
  }
2. 添加导航图标
根目录创建image文件夹,并添加导航图标
3. 添加 tabBar 代码文件夹
在项目根目录创建custom-tab-bar
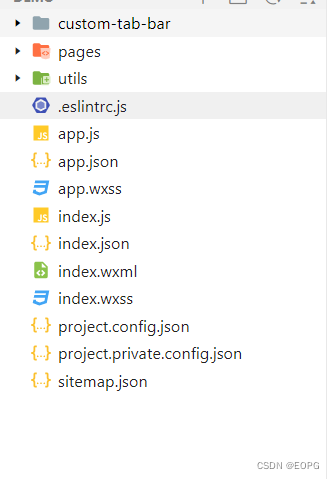

新建custom-tab-bar/index.js文件
Component({
  data: {
    selected: 0,
    color: "#7A7E83",
    selectedColor: "#3cc51f",
    list: [{
      pagePath: "/pages/index/index",
      iconPath: "/image/icon_component.png",
      selectedIconPath: "/image/icon_component_HL.png",
      text: "首页"
    }, {
      pagePath: "/pages/logs/logs",
      iconPath: "/image/icon_API.png",
      selectedIconPath: "/image/icon_API_HL.png",
      text: "日志"
    }]
  },
  attached() {
  },
  methods: {
    switchTab(e) {
      const data = e.currentTarget.dataset
      const url = data.path
      wx.switchTab({url})
      this.setData({
        selected: data.index
      })
    }
  }
})
新建custom-tab-bar/index.json文件
{
  "component": true
}
新建custom-tab-bar/index.wxml文件
<!--miniprogram/custom-tab-bar/index.wxml-->
<cover-view class="tab-bar">
  <cover-view class="tab-bar-border"></cover-view>
  <cover-view wx:for="{

   {list}}" wx:key="index" class="tab-bar-item" data-path="{

   {item.pagePath}}" data-index="{

   {index}}" bindtap="switchTab">
    <cover-image src="{

   {selected === index ? item.selectedIconPath : item.iconPath}}"></cover-image>
    <cover-view style="color: {

   {selected === index ? selectedColor : color}}">{

   {item.text}}</cover-view>
  </cover-view>
</cover-view>
新建custom-tab-bar/index.wxss文件
.tab-bar {
  position: fixed;
  bottom: 0;
  left: 0;
  right: 0;
  height: 48px;
  background: white;
  display: flex;
  padding-bottom: env(safe-area-inset-bottom);
}

.tab-bar-border {
  background-color: rgba(0, 0, 0, 0.33);
  position: absolute;
  left: 0;
  top: 0;
  width: 100%;
  height: 1px;
  transform: scaleY(0.5);
}

.tab-bar-item {
  flex: 1;
  text-align: center;
  display: flex;
  justify-content: center;
  align-items: center;
  flex-direction: column;
}

.tab-bar-item cover-image {
  width: 27px;
  height: 27px;
}

.tab-bar-item cover-view {
  font-size: 10px;
}
此时虽然可以导航了,但是还有导航栏闪动问题
四. 解决导航栏闪动
1. 安装全局数据状态包
在项目根目录右击在外部终端打开,输入一下命令
命令如下
npm install --save [email protected] [email protected]
安装完成之后,点击开发者工具选择工具,点击构建npm
2. 配置全局数据
项目根目录创建common文件夹,创建store.js文件
//在这个js中专门创建Store的实例对象,引入要使用的初始化方法
import {


  action,
  observable
} from 'mobx-miniprogram'

//创建Store对象并导出
export const store = observable({


  //在此处填写共享的数据
  active: 0,
  menulist: [{


      "pagePath": "pages/index/index",
      "text": "首页",
      "iconPath": "/image/icon_component.png",
      "selectedIconPath": "/image/icon_component_HL.png"
    },
    {


      "pagePath": "pages/logs/logs",
      "text": "日志",
      "iconPath": "/image/icon_API.png",
      "selectedIconPath": "/image/icon_API_HL.png"
    }
  ],
  //action 方法,用来修改store中的数据
  updateActive: action(function (step) {


    this.active = step
    return this.active
  })
})
3. 修改自定义custom-tab-bar的文件
修改indec.js 文件
import {


  storeBindingsBehavior
} from 'mobx-miniprogram-bindings'
import {


  store
} from '../common/store.js'

Component({


  data: {

    },
  // 通过 storeBindingsBehavior 来实现自动绑定
  behaviors: [storeBindingsBehavior],
  storeBindings: {


    //数据源 指定要绑定的 store
    store,
    //属性 指定要绑定的字段数据
    fields: {


      active: "active", //左侧为组件中属性的名字 右侧为Store中属性的名字
      menulist: "menulist"
    },
    //方法 指定要绑定的方法
    actions: {


      updateActive: 'updateActive', //左侧为组件中方法的名字 右侧为Store中方法的名字
    }
  },
  attached() {

    },
  methods: {


    switchTab(e) {


      this.updateActive(e.currentTarget.dataset.index);
      this.setData({


        selected: e.currentTarget.dataset.index
      })
      wx.switchTab({


        url: `/${

      e.currentTarget.dataset.path}`
      })
    },

  }
})
修改indec.wxml 文件
<!--miniprogram/custom-tab-bar/index.wxml-->
<cover-view class="tab-bar">
  <cover-view class="tab-bar-border"></cover-view>
  <cover-view wx:for="{

   {menulist}}" wx:key="index" class="tab-bar-item" data-path="{

   {item.pagePath}}" data-index="{

   {index}}" bindtap="switchTab">
    <cover-image src="{

   {active === index ? item.selectedIconPath : item.iconPath}}"></cover-image>
    <cover-view style="color: {

   {active === index ? selectedColor : color}}">{

   {item.text}}</cover-view>
  </cover-view>
</cover-view>
到此为止自定义底部导航栏算是基本完成,但是如果定义的是自定义动态菜单栏还差一丢丢!
五. 自定义动态底部导航栏
懒得敲代码了,提供一种思路!
用户登录之后,把用户的菜单存储到本地缓冲中,在app.js 的onLaunch 方法的读取本地存储的菜单。
示例代码:下载地址
粉丝喜欢的话,留言后续更新