一、SpringMVC的视图
SpringMVC中的视图是View接口,视图的作用渲染数据,将模型Model中的数据展示给用户SpringMVC视图的种类很多,默认有转发视图和重定向视图
当工程引入jstl的依赖,转发视图会自动转换为JstlView
若使用的视图技术为Thymeleaf,在SpringMVC的配置文件中配置了Thymeleaf的视图解析器,由此视图解析器解析之后所得到的是ThymeleafView。
1.ThymeleafView视图
当控制器方法中所设置的视图名称没有任何前缀时,此时的视图名称会被SpringMVC配置文件中所配置的视图解析器解析,视图名称拼接视图前缀和视图后缀所得到的最终路径,会通过转发的方式实现跳转。
@RequestMapping("/test_view")
public String test_view(){


    return "test_view";
}
@Controller
public class ViewController {
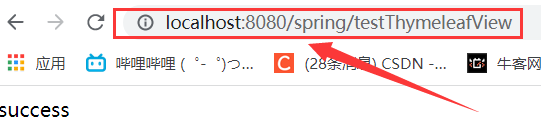
@RequestMapping("/testThymeleafView")
public String testThymeleafView(){
return "success";
}
}
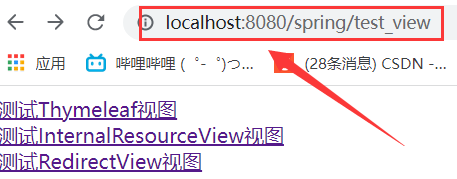
<a th:href="@{/testThymeleafView}">测试Thymeleaf视图</a>
2.转发视图
SpringMVC中默认的转发视图是InternalResourceView。
SpringMVC中创建转发视图的情况:
当控制器方法中所设置的视图名称以"forward:"为前缀时,创建InternalResourceView视图,此时的视图名称不会被SpringMVC配置文件中所配置的视图解析器解析,而是会将前缀"forward:"去掉,剩余部分作为最终路径通过转发的方式实现跳转。
如:“forward:/” , “forward:/employee”
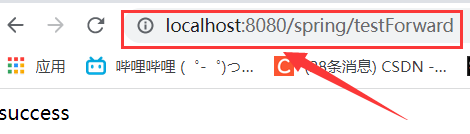
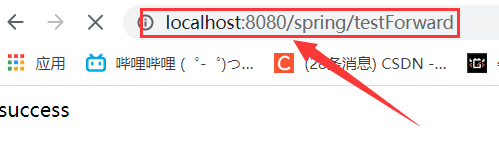
@RequestMapping("/testForward")
public String testForward(){


    return "forward:/testThymeleafView";
}
<a th:href="@{/testForward}">测试InternalResourceView视图</a><br>
3.重定向视图
SpringMVC中默认的重定向视图是RedirectView。
当控制器方法中所设置的视图名称以"redirect:"为前缀时,创建RedirectView视图,此时的视图名称不会被SpringMVC配置文件中所配置的视图解析器解析,而是会将前缀"redirect:“去掉,剩余部分作为最终路径通过重定向的方式实现跳转。
例如"redirect:/”, “redirect:/employee”
注意:
重定向视图在解析时,会先将redirect:前缀去掉,然后会判断剩余部分是否以/开头,若是则会自动拼接上下文路径
@RequestMapping("/testRedirect")
public String testRedirect(){


    return "redirect:/testThymeleafView";
}
<a th:href="@{/testRedirect}">测试RedirectView视图</a><br>
点击超链接即可实现跳转到重定向视图。
二.SpringMVC的视图控制器
1.作用:实现请求地址和视图之间的映射关系
2.使用条件:当前请求映射所对应的控制器方法中没有其他请求过程的处理,只需要设置一个视图名称时。
3.使用方法:在SpringMVC的配置文件中添加SpringMVC的视图控制器,并且开启SpringMVC的注解驱动即可,此时控制器方法既可以被注释。
<!--配置SpringMVC的视图控制器-->
<!--path: 设置处理的请求地址		view-name:设置请求地址所对应的视图名称-->
<mvc:view-controller path="/" view-name="index"></mvc:view-controller>
<!--开启SpringMVC的注解驱动(当使用视图控制器后,其他的请求映射将会失效)-->
<mvc:annotation-driven/>
@Controller
public class TestController {


	//当springmvc的配置文件中使用了视图控制器时,对应的视图控制器的控制方法就可以注释
    /*@RequestMapping("/")
    public String index(){
        return "index";
    }*/
}
三、视图解析器
视图解析目前常用的是Thymeleaf技术,对于jsp视图的解析技术通常使用InternalResourceView进行解析,视图解析器负责解析视图,通过在springmvc的配置文件中进行配置视图解析器。
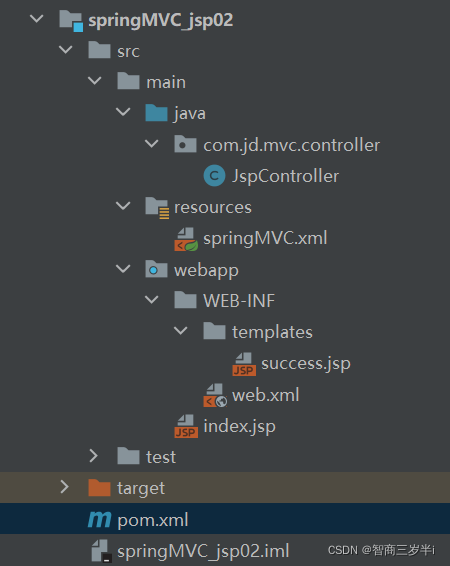
(1)springMVC.xml
<?xml version="1.0" encoding="UTF-8"?>
<beans xmlns="http://www.springframework.org/schema/beans"
       xmlns:xsi="http://www.w3.org/2001/XMLSchema-instance"
       xmlns:context="http://www.springframework.org/schema/context"
       xsi:schemaLocation="http://www.springframework.org/schema/beans http://www.springframework.org/schema/beans/spring-beans.xsd
                  http://www.springframework.org/schema/context http://www.springframework.org/schema/context/spring-context.xsd">
	<!--开启包扫描-->
    <context:component-scan base-package="com.jd.mvc.controller"/>
    <!--视图解析器-->
    <bean class="org.springframework.web.servlet.view.InternalResourceViewResolver" >
        <!--视图前缀-->
        <property name="prefix" value="/WEB-INF/templates/"/>
        <!--视图后缀-->
        <property name="suffix" value=".jsp"/>
    </bean>
</beans>
(2)web.xml
<?xml version="1.0" encoding="UTF-8"?>
<web-app xmlns="http://xmlns.jcp.org/xml/ns/javaee"
         xmlns:xsi="http://www.w3.org/2001/XMLSchema-instance"
         xsi:schemaLocation="http://xmlns.jcp.org/xml/ns/javaee http://xmlns.jcp.org/xml/ns/javaee/web-app_4_0.xsd"
         version="4.0">
    <!--配置编码过滤器-->
    <filter>
        <filter-name>CharacterEncodingFilter</filter-name>
        <filter-class>org.springframework.web.filter.CharacterEncodingFilter</filter-class>
        <init-param>
            <param-name>encoding</param-name>
            <param-value>UTF-8</param-value>
        </init-param>
        <init-param>
            <param-name>forceResponseEncoding</param-name>
            <param-value>true</param-value>
        </init-param>
    </filter>
    <filter-mapping>
        <filter-name>CharacterEncodingFilter</filter-name>
        <url-pattern>/*</url-pattern>
    </filter-mapping>
    <!--配置SpringMVC的前端控制器-->
    <servlet>
        <servlet-name>DispatcherServlet</servlet-name>
        <servlet-class>org.springframework.web.servlet.DispatcherServlet</servlet-class>
        <init-param>
            <param-name>contextConfigLocation</param-name>
            <param-value>classpath:springMVC.xml</param-value>
        </init-param>
        <load-on-startup>1</load-on-startup>
    </servlet>
    <servlet-mapping>
        <servlet-name>DispatcherServlet</servlet-name>
        <url-pattern>/</url-pattern>
    </servlet-mapping>
</web-app>
(3)JspController.java
@Controller
public class JspController {
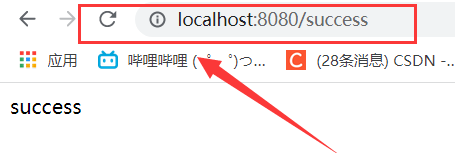
@RequestMapping("/success")
public String success(){
return "success";
}
}
(4)index.jsp
<%@ page contentType="text/html;charset=UTF-8" language="java" %>
<html>
<head>
    <title>Title</title>
</head>
<body>
<h1>我是首页</h1>
<%--${pageContext.request.contextPath}代表上下文--%>
<a href="${pageContext.request.contextPath}/success">success.jsp</a>
</body>
</html>
(5)pom.xml依赖
<packaging>war</packaging>
<dependencies>
    <!--SpringMVC-->
    <dependency>
        <groupId>org.springframework</groupId>
        <artifactId>spring-webmvc</artifactId>
        <version>5.3.1</version>
    </dependency>
    <!--日志-->
    <dependency>
        <groupId>ch.qos.logback</groupId>
        <artifactId>logback-classic</artifactId>
        <version>1.2.3</version>
    </dependency>
    <!--servletAPI-->
    <dependency>
        <groupId>javax.servlet</groupId>
        <artifactId>javax.servlet-api</artifactId>
        <version>3.1.0</version>
        <scope>provided</scope>
    </dependency>
    <!--Spring与Thymeleaf整合-->
    <dependency>
        <groupId>org.thymeleaf</groupId>
        <artifactId>thymeleaf-spring5</artifactId>
        <version>3.0.12.RELEASE</version>
    </dependency>
</dependencies>
将项目部署到tomcat,然后运行
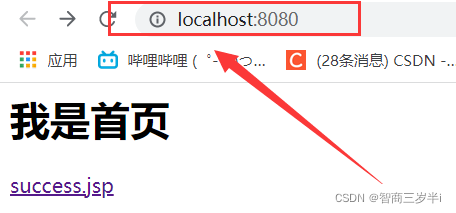
点击超链接,即可实现页面跳转