编辑工具:Intellij IDEA
一.SpringBoot的应用:
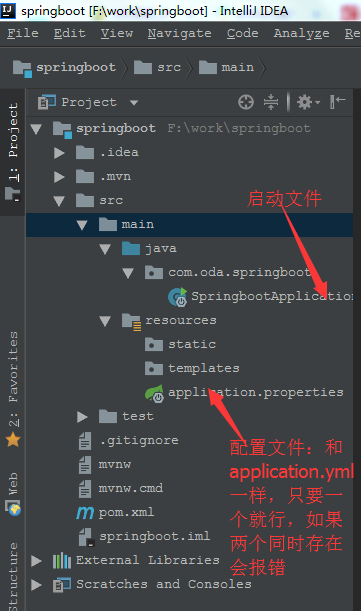
1.创建文件


2.项目结构
3.开始构建springboot项目,项目结构
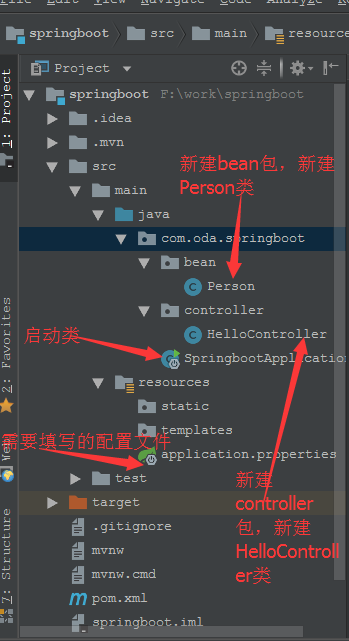
第一步创建Person类:
package com.oda.springboot.bean;

        import org.springframework.boot.context.properties.ConfigurationProperties;
        import org.springframework.stereotype.Component;

//@Component:把普通pojo类实例化到spring容器中,相当于配置文件中的<bean id="">
@Component
//@ConfigurationProperties:application.properties文件中的属性前缀
@ConfigurationProperties(prefix = "person") public class Person { private String name; private int age; public Person() { } public Person(String name, int age) { this.name = name; this.age = age; } public String getName() { return name; } public void setName(String name) { this.name = name; } public int getAge() { return age; } public void setAge(int age) { this.age = age; } }
第二步创建HelloController类
package com.oda.springboot.controller;

import com.oda.springboot.bean.Person;
import org.springframework.beans.factory.annotation.Autowired;
import org.springframework.web.bind.annotation.RequestMapping;
import org.springframework.web.bind.annotation.RestController;

//@RestController:不能返回视图,相当于@Controller+@ResponseBody
@RestController
public class HelloController {

    @Autowired
    private Person person;
    @RequestMapping("/")
    public String first(){
        return "Hello World!";
    }

    @RequestMapping("/index")
    public String index(){
        return "name:"+person.getName()+"age:"+person.getAge();
    }
}
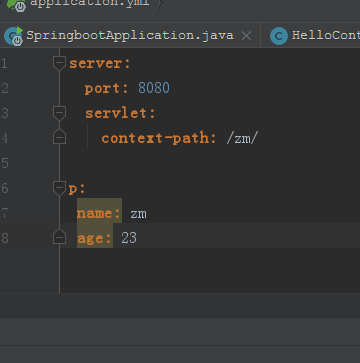
第三 步填写application,properties文件
server.port=8080
server.servlet.context-path=/zm/
person.name=zm
perosn.age=23
第四步:启动SpringbootApplication类(右击,run)
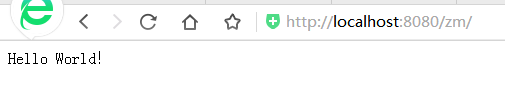
访问:http://localhost:8080/zm/
再访问:http://localhost:8080/zm/index

注意:yml文件是key,value形式的,写yml文件中自定义的属性如果不变色(变色才是正确的),具体如下图,value值前面空一格就好了。