Bootstrap.yml的作用
加载顺序
若application.yml 和bootstrap.yml 在同一目录下:bootstrap.yml 先加载 application.yml后加载,bootstrap.yml 用于应用程序上下文的引导阶段。bootstrap.yml 由父Spring ApplicationContext加载。
配置区别
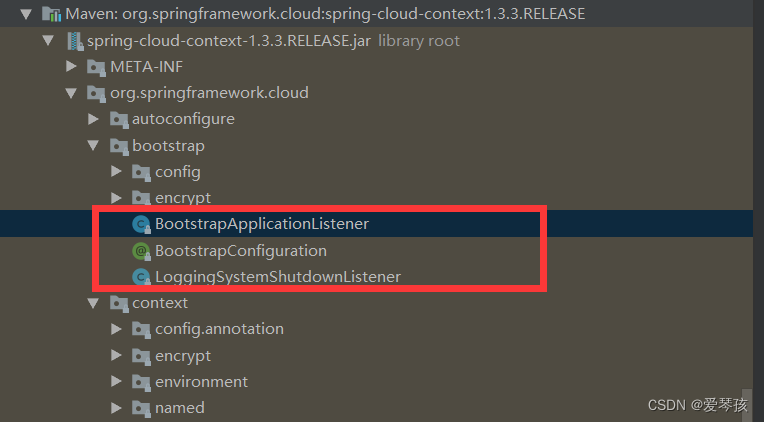
bootstrap是spring cloud的配置上下文加载。由spring-cloud-context包加载。引入依赖
<dependency>
  <groupId>org.springframework.cloud</groupId>
  <artifactId>spring-cloud-starter</artifactId>
</dependency>
具体加载类
关键代码
public void onApplicationEvent(ApplicationEnvironmentPreparedEvent event) {
		ConfigurableEnvironment environment = event.getEnvironment();
		if (!environment.getProperty("spring.cloud.bootstrap.enabled", Boolean.class,
				true)) {
			return;
		}
		// don't listen to events in a bootstrap context
		if (environment.getPropertySources().contains(BOOTSTRAP_PROPERTY_SOURCE_NAME)) {
			return;
		}
		ConfigurableApplicationContext context = null;
		String configName = environment
				.resolvePlaceholders("${spring.cloud.bootstrap.name:bootstrap}");
		for (ApplicationContextInitializer<?> initializer : event.getSpringApplication()
				.getInitializers()) {
			if (initializer instanceof ParentContextApplicationContextInitializer) {
				context = findBootstrapContext(
						(ParentContextApplicationContextInitializer) initializer,
						configName);
			}
		}
		if (context == null) {
			context = bootstrapServiceContext(environment, event.getSpringApplication(),
					configName);
		}
		apply(context, event.getSpringApplication(), environment);
	}
application是spring boot的配置加载。引入依赖
<dependency>
  <groupId>org.springframework.boot</groupId>
  <artifactId>spring-boot-starter-web</artifactId>
</dependency>
Spring Cloud 配置中心多环境配置
一:spring boot 多环境配置文件
我们知道spring boot可以通过文件名来区分配置,如下:
application-dev.yml #开发环境
application-test.yml #测试环境
application-prod.yml #正式环境
二:spring cloud多环境配置文件
但是spring cloud用上了配置中心,就一个boostrap.yml,且不支持文件名的方式来区分。spring cloud 配置中心bootstrap.yml区分环境的办法如下:
spring:
  profiles:
    active: dev
  application:
    name: user-server
feign:
  hystrix:
    enabled: true
##上面是基础配置,不用上配置中心那种
##下面是环境区分,主要不同环境不同文件获取
---
#开发环境
spring:
  profiles: dev
  cloud:
    nacos:
      discovery:
        server-addr: localhost:8848
        namespace: c97d4f46-deba-5588-b05f-c2a061ccc688
      config:
        server-addr: localhost:8848
        file-extension: yaml
        group: DEFAULT_GROUP
        namespace: c97d4f46-deba-5588-b05f-c2a061ccc688
---
#正式环境
spring:
  profiles: prod
  cloud:
    nacos:
      discovery:
        server-addr: localhost:8848
        namespace: aa3de4c8-61ad-5568-9887-ed731659edd4
      config:
        server-addr: localhost:8848
        file-extension: yaml
        group: DEFAULT_GROUP
        namespace: aa3de4c8-61ad-5568-9887-ed731659edd4
---
#测试环境
spring:
  profiles: test
  cloud:
    nacos:
      discovery:
        server-addr: localhost:8848
        namespace: 98adcdd5-f25c-7890-b8f3-97352adc83e8
      config:
        server-addr: localhost:8848
        file-extension: yaml
        group: DEFAULT_GROUP
        namespace: 98adcdd5-f25c-7890-b8f3-97352adc83e8
多个配置以 — 分开,然后通过spring.profiles=环境表示具体的环境配置.。
三:java启动方式
启动时可以指定我们的服务器上面的运行引用配置如:
java -jar -Dspring.profiles.active=test *****.jar

或者dockerfile启动方式
ENTRYPOINT ["java","-jar","-Dspring.profiles.active=test","*****.jar"]