词云:对文本中出现频率较高的关键词进行视觉上的突出。
普通版:
比如:
主要是使用WordCloud函数。
from wordcloud import WordCloud
import matplotlib.pyplot as plt

# 打开文本。content_ch.txt是中文文本的一大段话。
text = open('03词云\\content_ch.txt', encoding='UTF-8').read()
# 生成对象。font_path是生成词云的字体风格,一般网络都有,后缀是ttf或者otf。
wc = WordCloud(font_path='03词云\\simhei.ttf',
                width=800, height=600, mode='RGBA', background_color=None).generate(text)

# 显示词云
plt.imshow(wc, interpolation='bilinear')
plt.axis('off')
plt.show()

# 保存到文件
wc.to_file('wordcloud_ch.png')
但会发现问题:词和词之间没有分开。

所以,又引入jieba函数,解决中文分词问题。
from wordcloud import WordCloud
import matplotlib.pyplot as plt
import jieba

# 打开文本
text = open('03词云\\content_ch.txt', encoding='UTF-8').read()

# 中文分词
text = ' '.join(jieba.cut(text))

wc = WordCloud(font_path='03词云\\simhei.ttf',
                width=800, height=600, mode='RGBA', background_color=None).generate(text)

# 显示词云
plt.imshow(wc, interpolation='bilinear')
plt.axis('off')
plt.show()

# 保存词云
wc.to_file('word_ch_cor.png')
打印出来的text大概就是这样:每个词用空格分开了。
词云结果就是文章最开始的那样。
升级版:指定形式的词云。

这里是使用到了背景图。
黑白背景图:

程序:就是在生成对象那一步里加入了mask。
from wordcloud import WordCloud
import matplotlib.pyplot as plt
import jieba
from PIL import Image
import numpy as np

# 打开文本
text = open('03词云\\content_ch.txt', encoding='UTF-8').read()

# 中文分词
text = ' '.join(jieba.cut(text))

# 生成对象
mask = np.array(Image.open("03词云\\111.png"))
wc = WordCloud(font_path='03词云\\simhei.ttf', mask=mask, mode='RGBA', background_color=None).generate(text)

# 显示词云
plt.imshow(wc, interpolation='bilinear')
plt.axis('off')
plt.show()

# 保存词云
wc.to_file('word_ch_mas.png')
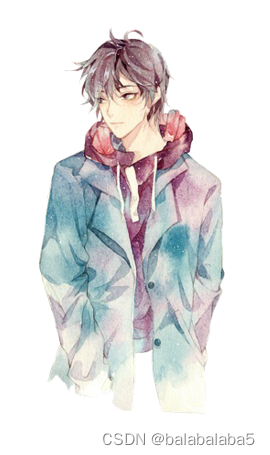
彩色背景图是什么样的呢?
代码:
from wordcloud import WordCloud, ImageColorGenerator
from PIL import Image
import numpy as np
import matplotlib.pyplot as plt
import jieba

# 打开文本
text = open('03词云\\content_ch.txt', encoding='UTF-8').read()

# 中文分词
text = ' '.join(jieba.cut(text))

# 生成对象
mask = np.array(Image.open("03词云\\cai_pic.png"))
wc = WordCloud(mask=mask, font_path='03词云\\simhei.ttf', mode='RGBA', background_color=None).generate(text)

# 从图片中生成颜色
image_colors = ImageColorGenerator(mask)
wc.recolor(color_func=image_colors)

# 显示词云
plt.imshow(wc, interpolation='bilinear')
plt.axis("off")
plt.show()

# 保存到文件
wc.to_file('wordcloud.png')
结果:发现原始图片每个地方的颜色,在词云图中对应位置的颜色也一样。

最后:既指定形状又自定义颜色版本。
程序:
from wordcloud import WordCloud, ImageColorGenerator
import matplotlib.pyplot as plt
import jieba
from PIL import Image
import numpy as np
import random

# 颜色函数。
## hsl(0, %d%%, %d%%)代表HSI色调,第一个参数是0,代表是红色。
### 剩下两个就是饱和度、强度,这里采用的是随机数。
def random_color(word, font_size, position, orientation, font_path, random_state):
    s = 'hsl(0, %d%%, %d%%)' % (random.randint(60,80), random.randint(60,80))
    return s

# 打开文本
text = open('03词云\\content_ch.txt', encoding='UTF-8').read()

# 中文分词
text = ' '.join(jieba.cut(text))

# 生成对象
mask = np.array(Image.open("03词云\\cai_pic.png"))
wc = WordCloud(color_func=random_color, font_path='03词云\\simhei.ttf', mask=mask, mode='RGBA', background_color=None).generate(text)


# # 从图片中生成颜色
# image_colors = ImageColorGenerator(mask)
# wc.recolor(color_func=image_colors)

# 显示词云
plt.imshow(wc, interpolation='bilinear')
plt.axis('off')
plt.show()

# 保存词云
wc.to_file('word_mas_colo.png')
结果:

遇到的错误:
error: 'gbk' codec can't decode byte 0xac in position 2: illegal multibyte sequence
![]()
解决方案:
代码改成:
text = open('03词云\\content_ch.txt', encoding='UTF-8').read()

