之前搭的LNMP都是在一台机器上实现的,把mysql数据库单独分离至独立的mysql机器上有利于分担服务器压力,以下的mysql数据迁移实验是在wordpress博客成功搭建后进行的,附上链接以供大家参考。
LNMP之WordPress个人博客搭建
LNMP之二进制安装mysql-5.5.54
# 新建一mysql虚拟机
hostname: db01
eth0:192.168.90.51/24
eth1:172.16.1.51/24
# 二进制安装mysql数据库,可以参考上面给的链接
# 导出LNMP(web01)中的wordpress数据库数据
mysqldump -uroot -poldboy wordpress -B |gzip>bak.sql.gz
# 拷贝到db01的数据库中
scp bak.sql.gz root@192.168.90.51:/tmp
# 解压并导入51的数据库中
[root@db01 tmp]# gzip -d bak.sql.gz
[root@db01 tmp]# mysql -uroot -poldboy123 </tmp/bak.sql
[root@db01 tmp]# mysql -uroot -poldboy123 -e "show databases like 'wordpress'"
+----------------------+
| Database (wordpress) |
+----------------------+
| wordpress |
+----------------------+
# 为此数据库创建一个wordpress管理员用户, 进行数据库授权,让web01可以访问
mysql> grant all on wordpress.* to wordpress@'172.16.1.%' identified by '123456';
Query OK, 0 rows affected (0.01 sec)
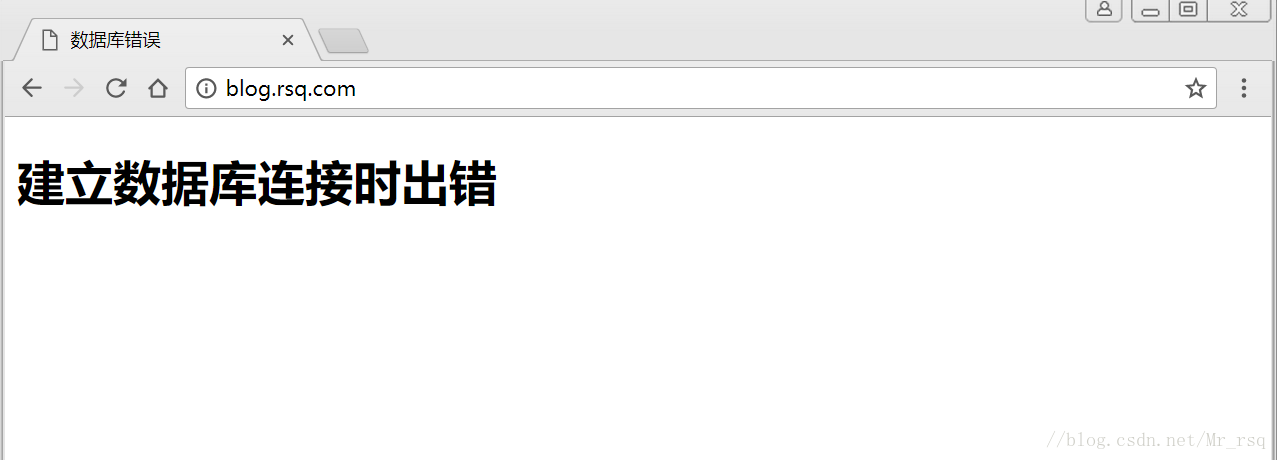
# 停止掉web01中的数据库服务并测试
[root@web01 tools]# /etc/init.d/mysqld stop
Shutting down MySQL.. SUCCESS!
[root@web01 tools]# lsof -i :3306
[root@web01 tools]# chkconfig mysqld off- 1
- 2
- 3
- 4
- 5
- 6
- 7
- 8
- 9
- 10
- 11
- 12
- 13
- 14
- 15
- 16
- 17
- 18
- 19
- 20
- 21
- 22
- 23
- 24
- 25
- 26
- 27
- 28
- 29
- 30
- 31
# 测试访问
# 修改wordpress中的数据库配置文件/application/nginx/html/blog/ wp-config.php中的
主机IP地址为db01的内网IP地址。
[root@web01 tools]# cd /application/nginx/html/blog/
[root@web01 blog]# vim wp-config.php   #把这个配置文件中的主机名改成db01(172.16.1.51)
/** MySQL主机 */
define('DB_HOST', '172.16.1.51');- 1
- 2
- 3
- 4
- 5
- 6
# 再次测试访问
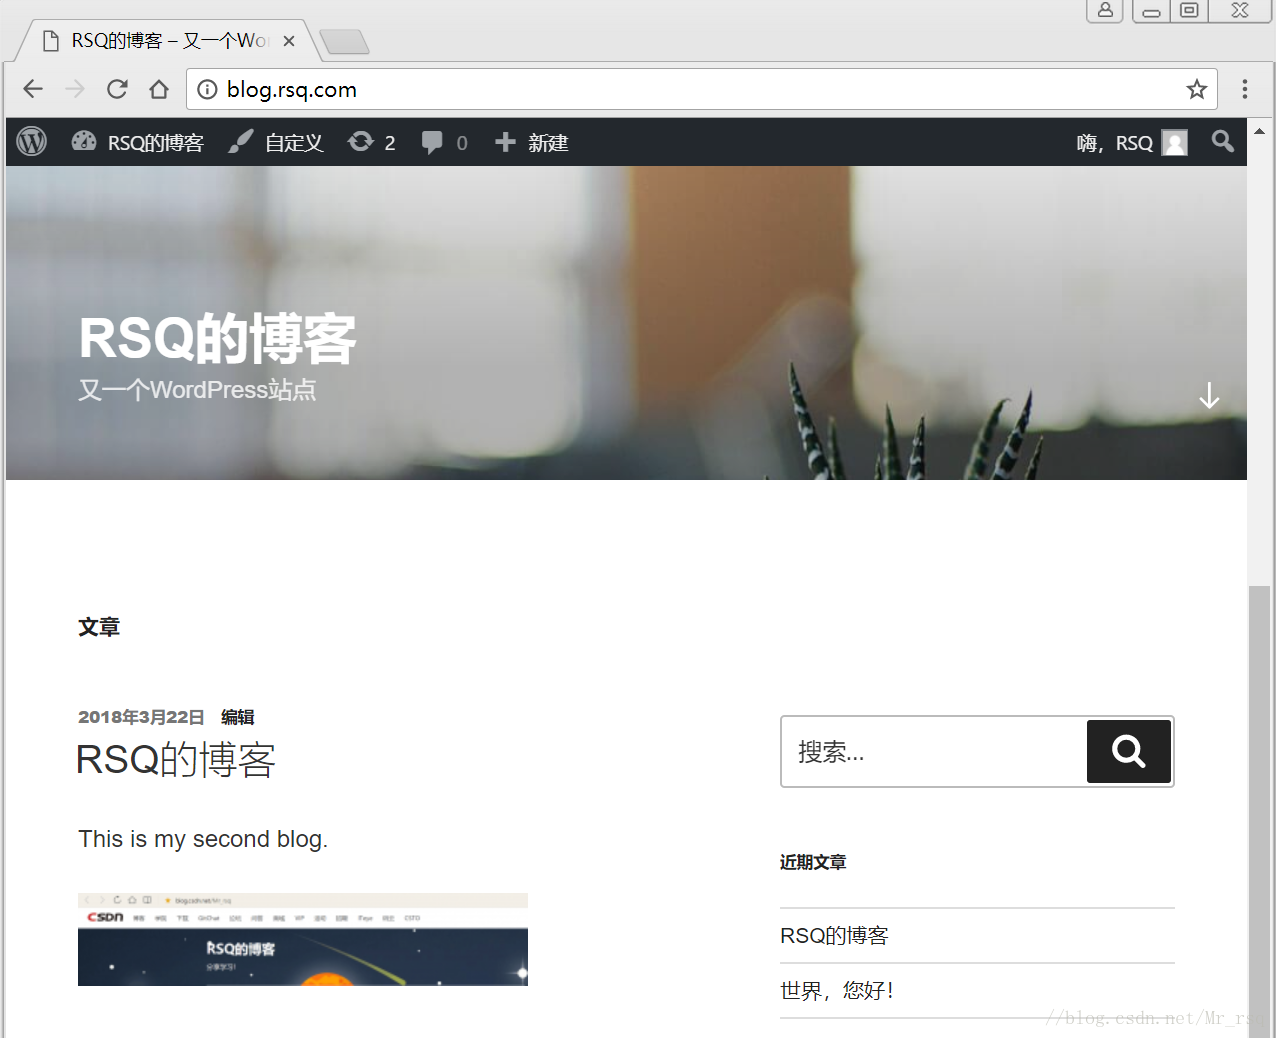
# 数据库迁移完毕
转载至https://blog.csdn.net/mr_rsq/article/details/79653763