Hello guys! Recently, I got some requirements that pieces of people in the university are going to do a joint project using python. For your guys quickly setting up, here are some tips to install and use Django step by step.
Pre-required:
1. Pycharm Community
2. Python interpreter
3. pip >= 19.0.x (package management tool)
4. setuptools >= 40.8.x
5. Usable python environment
Django Install
-
Turn on Pycharm and create a new folder with any name you want to store your project.
-
At the bottom, click
Terminal. -
Input command
pip install Django(NOTICE: python is case-sensitive). -
After installing sucessfully, you will get these in your Package. (Using
pip listto check you package)
-
And then, start your first project. Here is command
django-admin startproject xxxx(project name). (I use DjangoTest as an example)
-
Next, change your directory to “DjangoTest” using
cd DjangoTest. -
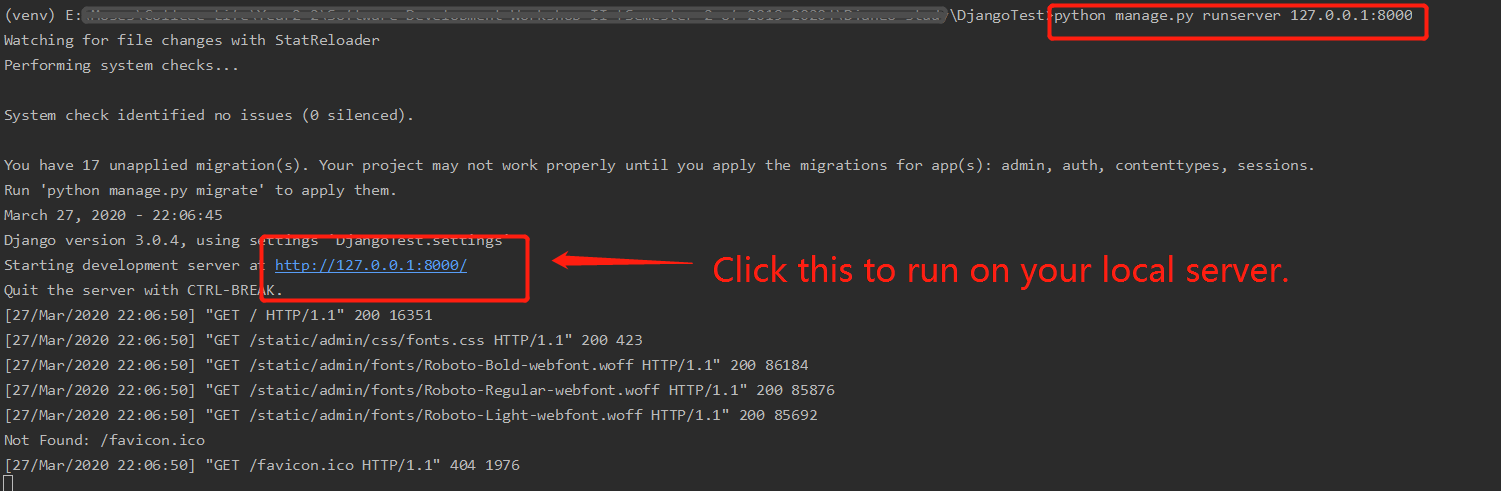
Now it’s time to run your initial project. In terminal, input following command
python manage.py runserver 127.0.0.1:8000(If you do not have special requirements or preference, just do as I suggest). -
After you get the following picture, you have started your first Django project.