前言
本文主要讲几个利用Python实现网络扫描的小例子,可以结合多线程或多进程编程改进实例
我曾经走过多遥远的路
跨越过多少海洋去看你
环境准备
- Python3环境
- scapy库
- socket库
- 能与物理机正常通信的虚拟机
由于本文实验目的为实现网络扫描,即探测网络中存活的主机,为了避免影响真实的网络环境,建议通过虚拟机进行实验,确保主机和虚拟机之间网络通信正常即可。
scapy库和socket库都可以通过pip命令直接安装:
pip install scapy
Python实现主机扫描
基于ARP协议
ARP协议这里不做过多讲解,大家自行百度即可,扫描目标主机的工作原理大致如下:
- 首先向目标主机发送一个ARP Request请求
- 若目标主机回应了ARP Reply,则表明目标主机可能存活
- 若目标主机没有回应,则表明目标主机可能处于非活跃状态
需要注意的是,这里我们可以直接发送MAC地址全为F的广播报文,而不需要单独给每个IP主机发送数据包,这样能够极大的优化系统运行时间
实验代码
注意:由于我这里虚拟机在VMnet8虚拟网卡上,因此我们发送数据包的时候应该选择对应的网卡进行实验,windows下可以通过ipconfig /all命令查看对应网卡的名称和属性
from scapy.all import *

# 设置发送数据包的网卡
send_iface = "VMware Virtual Ethernet Adapter for VMnet8"

# 扫描IP地址范围
ip_range = "10.0.0.0/24"

# 发送ARP请求并获取响应
ans, unans = srp(Ether(dst="ff:ff:ff:ff:ff:ff")/ARP(pdst=ip_range), iface=send_iface, timeout=2)

# 打印响应结果
for snd, rcv in ans:
    print(f"{rcv.psrc} is up.")
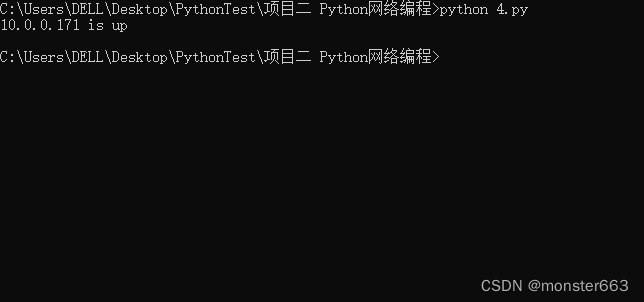
代码执行结果:

其中的10.0.0.171就是我开启的虚拟机,可以看到代码成功执行并扫描到了目标主机的IP地址
基于ICMP协议
基于ICMP协议的主机扫描原理类似,这里我们将需要对每个主机发送ARP请求报文
普通版本
常规书写的代码如下:
from scapy.all import *

# 输入需要扫描的IP地址范围
ip_range = '10.0.0.0/24'

# 输入需要发送数据包的网卡名
iface = "VMware Virtual Ethernet Adapter for VMnet8"

# 定义发送的ICMP数据包
packet = IP(dst=ip_range)/ICMP()

# 扫描IP地址范围段
ans, unans = sr(packet, iface=iface)

# 输出扫描结果
print("以下IP地址可用:")
for s, r in ans:
    print(r.sprintf("%IP.src%"))
由于遍历每个IP再发送ICMP请求包的方式速度较慢,在网络条件允许的情况下可以用多线程的方式改写上述代码
多线程版本
import threading
from scapy.all import *
import logging
#关闭warning警告信息
logging.getLogger("scapy.runtime").setLevel(logging.ERROR)

def scan(ip_list, iface):
    for ip in ip_list:
        pkt = IP(dst=ip)/ICMP()
        res = sr1(pkt, timeout=1, iface=iface, verbose=0)
        if res:
            print(f"{ip} is up")

def scan_ips(target_ips, iface, thread_count=10):
    ip_lists = [[] for _ in range(thread_count)]
    for i, ip in enumerate(target_ips):
        ip_lists[i % thread_count].append(ip)

    threads = []
    for ip_list in ip_lists:
        thread = threading.Thread(target=scan, args=(ip_list, iface))
        threads.append(thread)
        thread.start()

    for thread in threads:
        thread.join()

if __name__ == '__main__':
    ips = ["10.0.0.{}".format(i) for i in range(1, 201)]
    iface = "VMware Virtual Ethernet Adapter for VMnet8"
    scan_ips(ips, iface, thread_count=10)
执行该代码即可得到目标网段中存活的主机IP
Python实现端口扫描
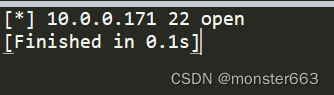
扫描单个端口
这里主要演示利用socket库进行端口扫描,这里利用虚拟机的22端口为例进行实验:
from socket import *

def portScanner(host, port):
	try:
		s = socket(AF_INET, SOCK_STREAM)
		s.connect((host,port))
		print('[*]',host,port,'open')
		s.close()
	except:
		print('[-]',host,port,'close')


portScanner('10.0.0.171',22)
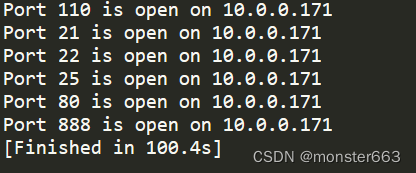
利用多线程扫描端口
利用多线程扫描端口的实例如下:
import socket
import threading

# 定义扫描函数
def scan_port(ip, port):
    try:
        # 创建套接字
        sock = socket.socket(socket.AF_INET, socket.SOCK_STREAM)
        sock.settimeout(1)
        # 连接目标主机的指定端口
        result = sock.connect_ex((ip, port))
        if result == 0:
            print(f"Port {

      port} is open on {

      ip}")
        # 关闭套接字
        sock.close()
    except Exception as e:
        print(e)
        pass

# 定义多线程扫描函数
def scan_thread(ip, start_port, end_port):
    for port in range(start_port, end_port):
        scan_port(ip, port)

# 主函数
if __name__ == '__main__':
    # 设置要扫描的主机和端口范围
    target_host = '10.0.0.171'
    start_port = 1
    end_port = 65536

    tpool=[]

    # 创建多个线程进行扫描
    for i in range(start_port-1, (end_port+1)//100):
        t = threading.Thread(target=scan_thread, args=(target_host, i*100+1, (i+1)*100))
        t.start()
        tpool.append(t)
    for t in tpool:
        t.join()
运行效果:
后记
以上就是本文的全部内容,若有疑问欢迎评论留言或与我联系~