
1.如何去掉默认标题栏,实现全屏显示?
在config.json中的ability配置信息中添加属性:
"abilities": [
{


     ...
    "metaData": {


        "customizeData": [
          {


            "name": "hwc-theme",
            "value": "androidhwext:style/Theme.Emui.Translucent.NoTitleBar",
            "extra": ""
          }
        ]
      }
      ...
}]
2.应用冷启动白屏?
这个问题类似与安卓应用冷启动时白屏一样,鸿蒙应用的解决办法同问题1,将主题设置为:
androidhwext:style/Theme.Emui.Translucent.NoTitleBar
注意是Translucent。
3.如何获取屏幕尺寸?
import display from '@ohos.display';

display.getDefaultDisplay((err, data) => {


  if (err) return;
  console.error("屏幕宽高:" + data.width + "," + data.height);
});
4.如何获取状态栏高度,以及设置状态栏背景色?
import window from '@ohos.window';

window.getTopWindow((err, mainWindowClass) => {


  if (err) return;
  mainWindowClass.setSystemBarEnable(['status']);
  mainWindowClass.setLayoutFullScreen(true);
  mainWindowClass.setSystemBarProperties({


    statusBarColor: '#00ff0000', // 状态栏背景色透明
    isStatusBarLightIcon: false,//状态栏图标是否为亮色
    statusBarContentColor: '#000000',//状态栏字体颜色
  });
  mainWindowClass.getAvoidArea(window.AvoidAreaType.TYPE_SYSTEM, (err, data) => {


    if (err) return;
    console.error("状态栏高度:" + data.topRect.height);
  });
});
5.如何显示Toast提示?
import prompt from '@ohos.prompt';

prompt.showToast({


  message: "提示信息",
  bottom: "1000px"//距离屏幕底部高度
})
效果:
6.网络请求
http:
import http from '@ohos.net.http';

let httpRequest = http.createHttp()
httpRequest.request(url, {


    method: method,
    header: header,
    extraData: paramsStr,
    connectTimeout: 30000, // 可选,默认为60s
    readTimeout: 30000, // 可选,默认为60s
  }, (err, data) => {


})
fetch:
import fetch from '@system.fetch';

fetch.fetch({


  url: url,
  method: method,
  header: header,
  success: res => {


  },
  fail: error => {


  }
})
7.自定义LoadingDialog
@CustomDialog
export struct LoadingDialog {


  controller: CustomDialogController
  @State angle: number = 0
  interval: number

  aboutToAppear() {


    this.angleChange()
  }

  aboutToDisappear() {


    clearInterval(this.interval)
  }

  angleChange() {


    this.angle = 0
    this.interval = setInterval(() => {


      this.angle += -30
      if (this.angle == -360) this.angle = 0
    }, 50)
  }

  build() {


    Stack() {


      Column() {


        Image($r('app.media.ic_loading'))
          .width(20)
          .height(20)
          .rotate({

     x: 0, y: 0, z: 1, angle: this.angle })
      }
    }
    .width(50)
    .height(50)
    .backgroundColor(0x88000000)
    .borderRadius(10)
    .shadow({

     radius: 10, color: Color.Gray, offsetX: 3, offsetY: 3 })
  }
}
使用方法,在page内:
声明CustomDialogController :
  dialogController: CustomDialogController = new CustomDialogController({


    builder: LoadingDialog(),
    autoCancel: false,
    customStyle: true
  });

显示:this.dialogController.open()
隐藏:this.dialogController.close()
槽点:目前dialog只能在@Entry修饰的page内使用,无法进行封装,也就是说,在想使用loading的页面,都要进行以上声明并调用相关方法才能使用!
效果:
8.如何进行真机调试?
首先,你的真机系统版本要跟你的项目api版本要一致,或者真机系统版本高于项目api版本,例如项目api是8,真机就必须为鸿蒙3.0以上系统,2.0无法安装调试;
9.如何设置正式签名及发布应用?
File->Project Structure:
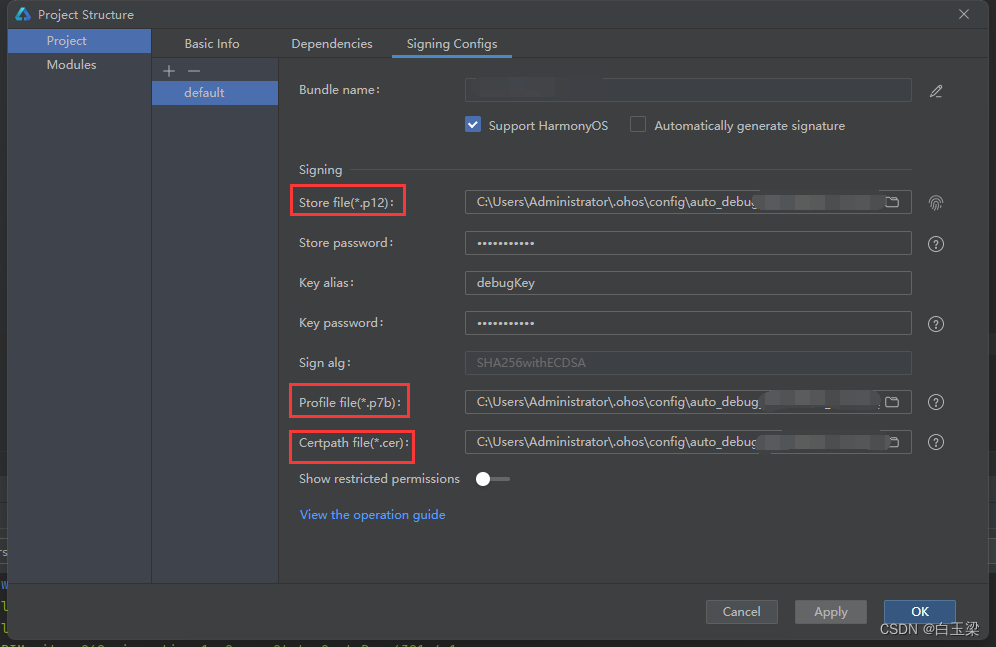
勾选Automatically generate signature,则自动生成debug版本的签名,调试时可以直接运行到真机或模拟器。
当你发布应用时则需要正式签名,此时就需要手动设置签名,手动签名需要三个文件:
- .p12:自己创建;
- .cer:通过自己创建的.csr从华为后台申请得到;
- .p7b:通过上一步得到的.cer通过华为后台申请得到;
第一步:创建.p12和.csr:
Build->Generate Key and CSR:
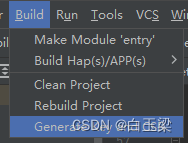
首先需要创建p12证书,填写证书名称,密码等;
创建成功后进入到生成CSR这一步,填写别名,密码以及csr的文件名和保存位置:
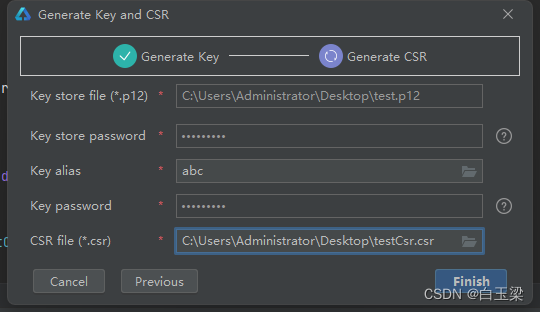
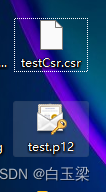
点击Finish后生成:
第二步:上传第一步获取的.csr申请.cer
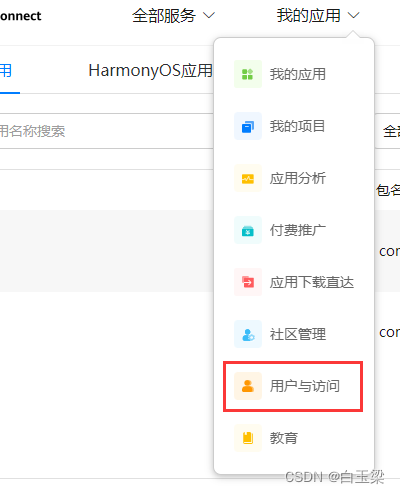
选择用户与访问:
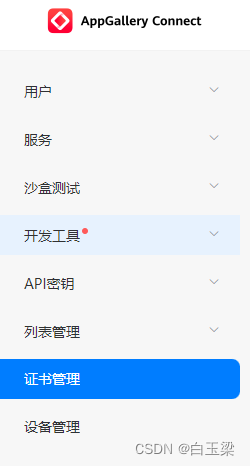
选择右侧菜单证书管理:
点击右侧,新增证书按钮:
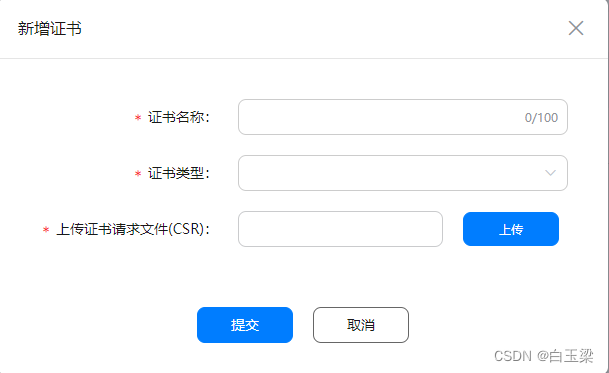
证书名称自定义,证书类型选择发布证书,csr即第一步生成的csr文件,提交后会在后台生成一个正式的发布证书,下载下来并保存:

第三步:上传第二步获取的.cer,申请.p7b:
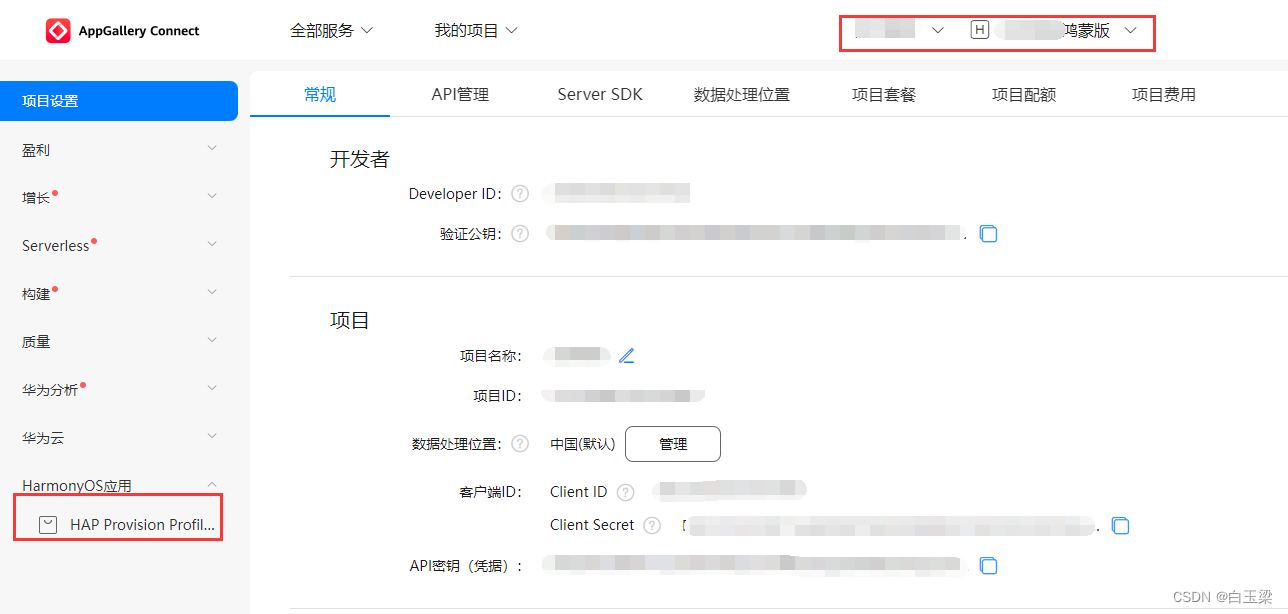
选择我的项目,并选择你的鸿蒙版应用,然后在右侧菜单选择 HAP Provision Profile管理:
在右侧点击添加按钮:
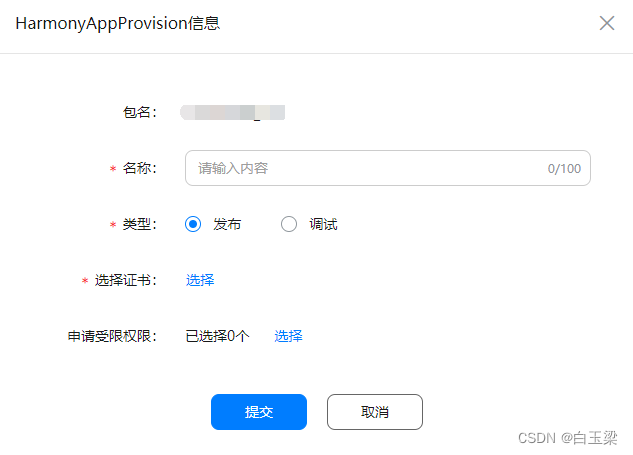
名称自定义,类型选择发布,证书选择时会自动弹出第二步创建的.cer,选择即可,首先权限根据项目情况选择,提交成功后:

下载.p7b证书并保存!
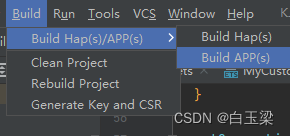
回开发工具中设置签名的界面:
依次选择你所生成和下载的.p12,.cer和.p7b并确定!然后开发工具选择Build->BuildAPP(s)即可,注意上传市场只能是.app格式的包:
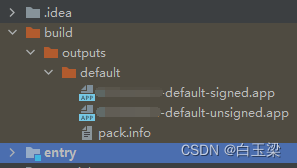
编译完成后,app包在项目根目录的build文件夹下:
10.上传市场时可能遇到的审核问题
- 应用图标问题:最好为纯色背景+logo,右下角明显HMOS标识,尺寸216直角
- 项目存在bug,影响下一步操作
- 功能不完善
- 无隐私条款
- 如有个性化推荐功能,则必须要提供关闭功能
- 最好加上账号注销功能
如果你的鸿蒙版应用已有安卓版在华为市场上架,审核会轻松不少
11.目前上传到市场的鸿蒙应用内允许的操作
比如内部一些功能无法通过鸿蒙版app实现时,可以提示用户,跳转到安卓版对应页面操作,如用户没有安装,则跳转到安卓版应用市场详情页(以上需要自己实现)
12.arkui中的直播支持问题
arkui的video组件目前只支持本地视频和网络视频,不支持如直播推拉流,官方回复目前暂无支持计划,也没有解决方案,无解,只能等待ark技术栈逐步完善!
13.【Bug】arkui+api8网络请求回调中无法执行setTimeOut,router等方法或事件
官方回复确认这是bug,等待修复…
14.arkts开发的服务卡片如何显示或更新网络图片?
文档上提供的“内存图片”只有java开发的服务卡片支持,官方回复ets开发的服务卡片目前没有提供显示或更新卡片上网络图片的方法!
本人经过研究摸索实现了一种方法可显示或卡片上的网络图片:
1.使用request.download下载图片保存再本地;
2.使用let fd=fileio.openSync(path) 同步打开本地图片得到资源标志(注意path要去掉file://,否则打开失败);
3.在form.ts中更新卡片:
 let fd = fileio.openSync(path)
 let obj = {


	  'jsonImage': 'memory://image',
      'formImages': {


        image: fd
      }
 }
 let formData = formBindingData.createFormBindingData(obj);
 formProvider.updateForm("" + formId, formData)
jsonImage即卡片中image标签显示的src路径(初始在index.json中配置,默认先显示本地资源):
<image id="image" src="{

    { jsonImage }}"></image>
此方法唯一的缺点就是,下载图片时,通知栏会有下载提示,应该是为了让用户知道下载了什么,防止应用静默下载,所以因为通知栏的提示问题,这个实现方法又有点鸡肋了…
15.app如何完全退出?
import process from '@ohos.process';
import app from '@system.app';

app.terminate();//非完全退出
process.kill(0, process.pid)//杀掉进程,完全退出
process.exit(0)
待续…