利用laf云开发实现uni-app调用chatGPT API,实现与openai对话
1.实现后台接口
注册laf云开发账号 https://laf.dev/
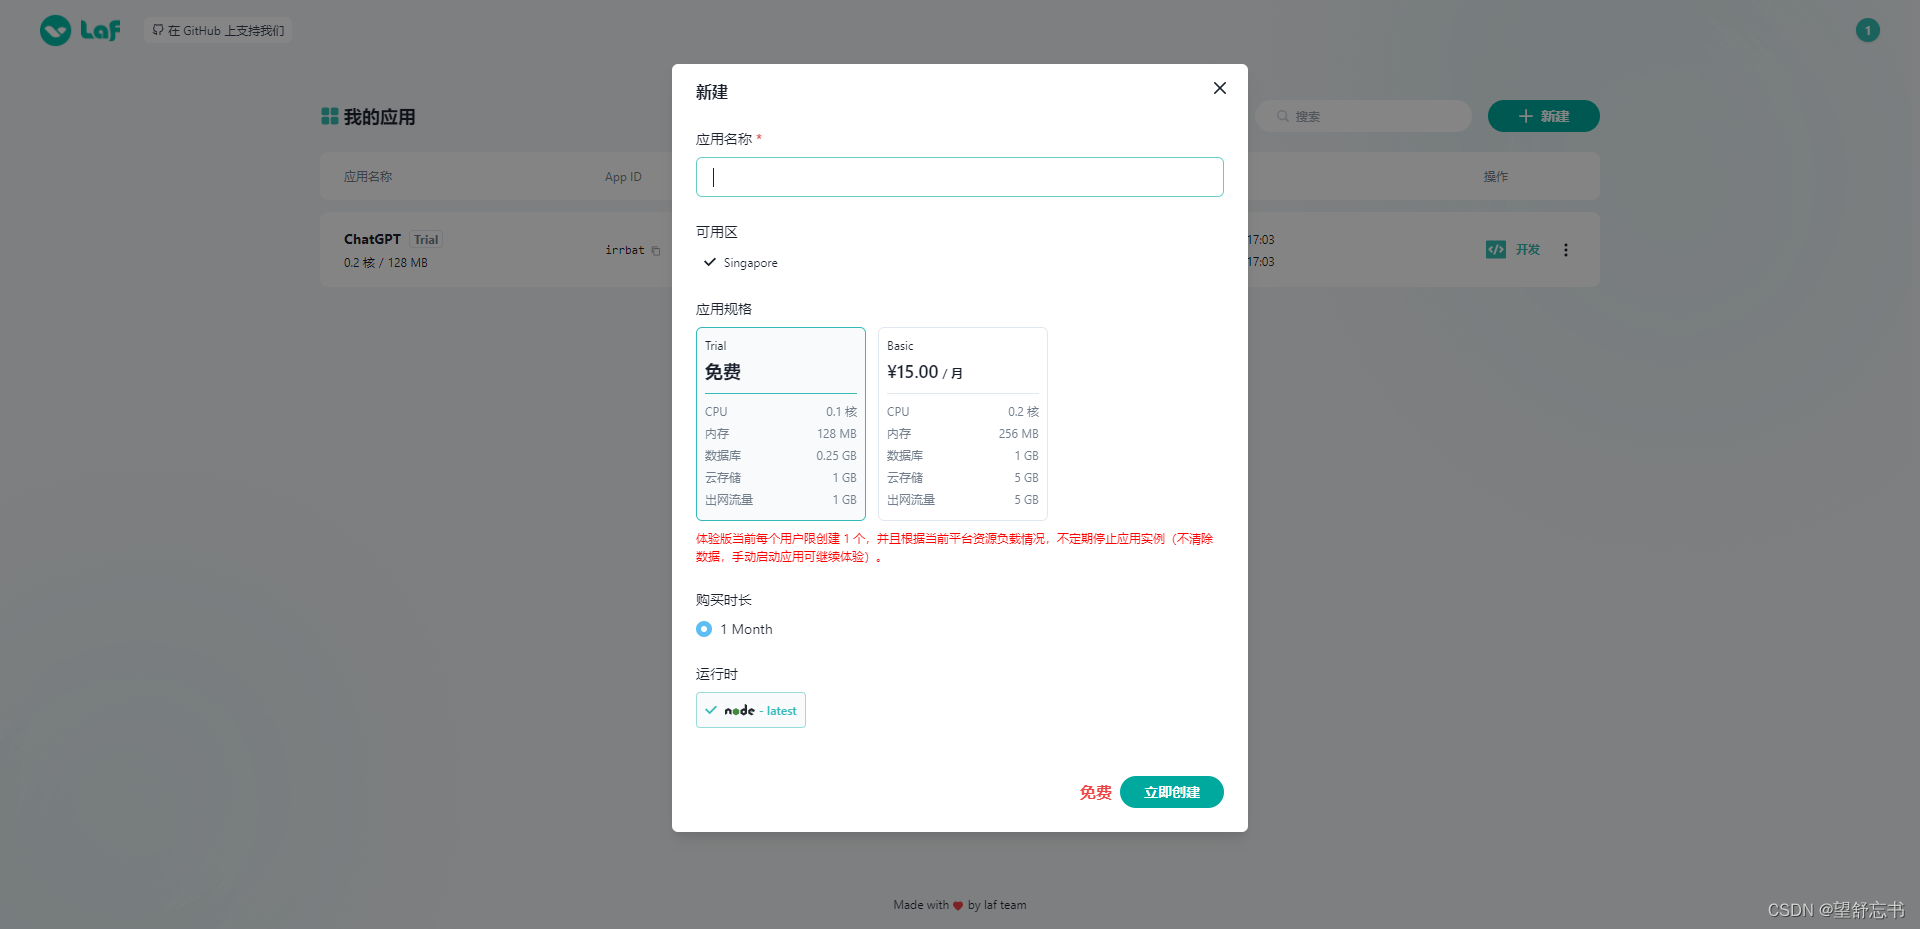
注册一个应用后进入这个页面:
- 下载依赖 chatgpt
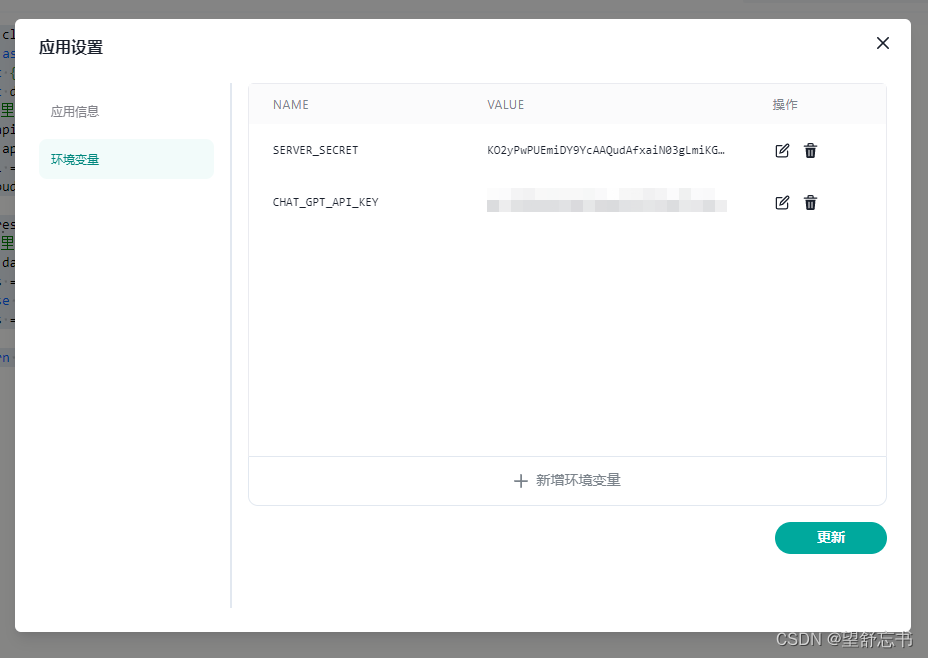
- 配置apiKey
- 写send函数
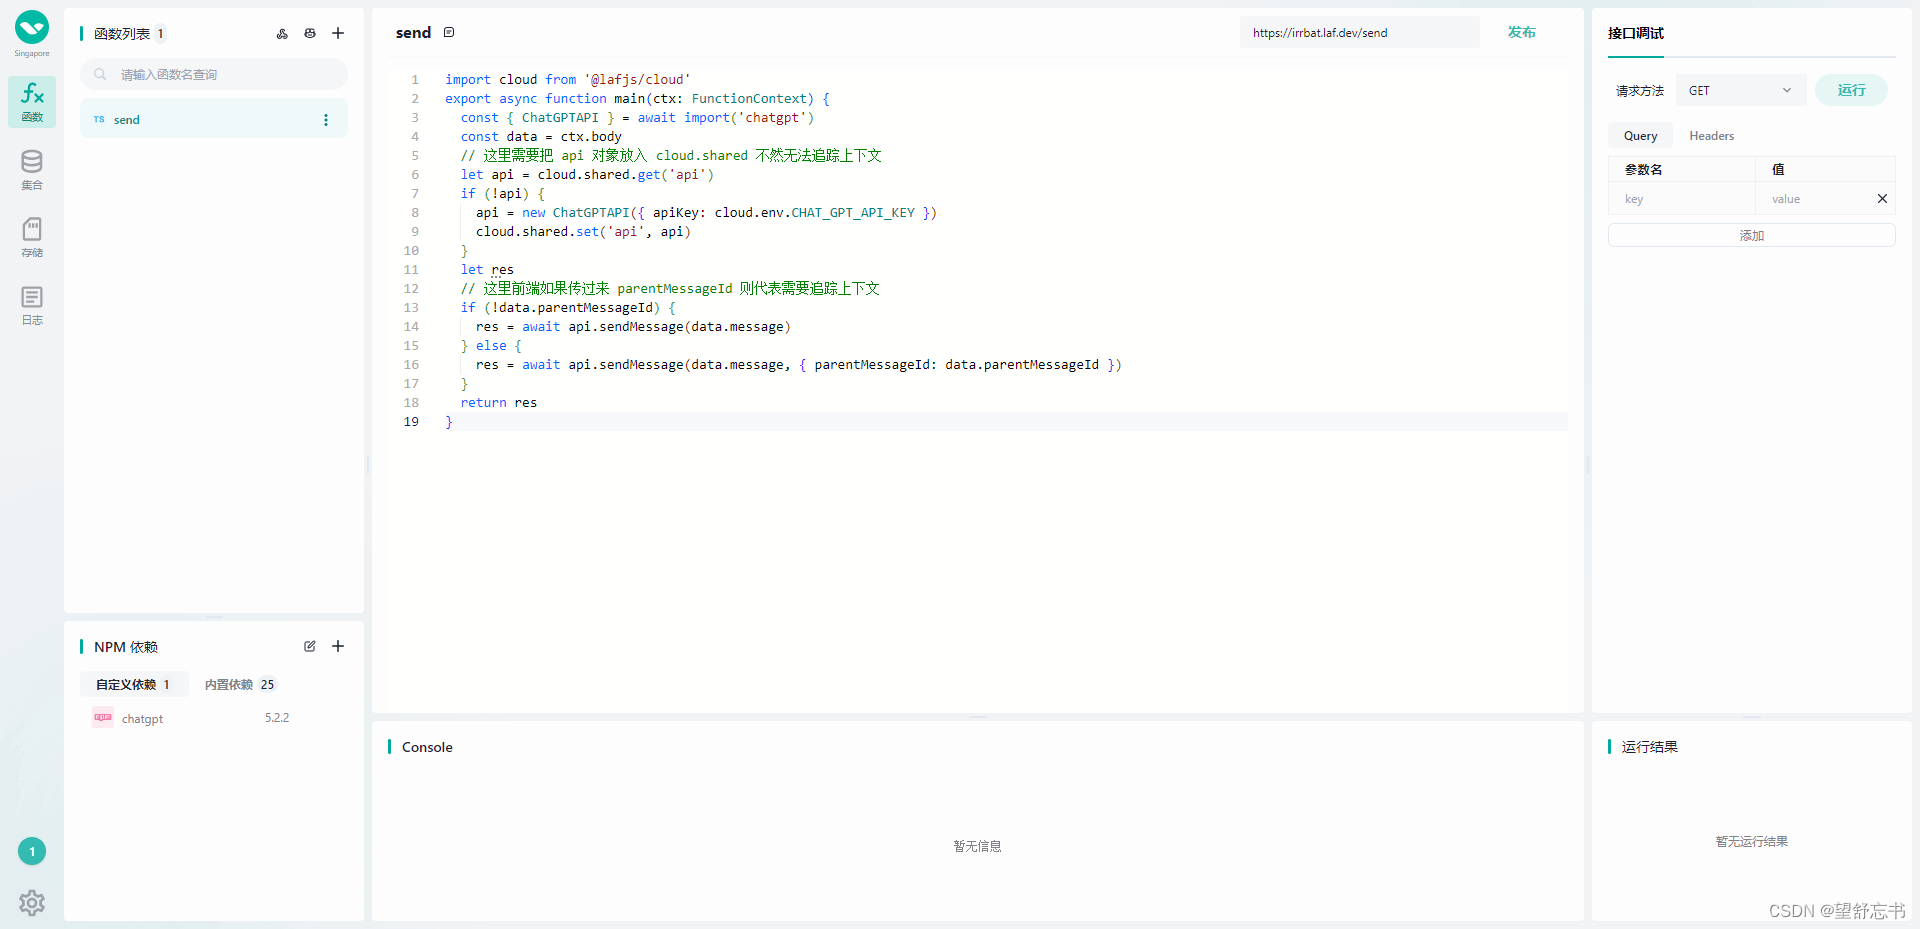
//send函数源码
import cloud from '@lafjs/cloud'
export async function main(ctx: FunctionContext) {


  const {

     ChatGPTAPI } = await import('chatgpt')
  const data = ctx.body
  // 这里需要把 api 对象放入 cloud.shared 不然无法追踪上下文
  let api = cloud.shared.get('api')
  if (!api) {


    api = new ChatGPTAPI({

     apiKey: cloud.env.CHAT_GPT_API_KEY })
    cloud.shared.set('api', api)
  }
  let res
  // 这里前端如果传过来 parentMessageId 则代表需要追踪上下文
  if (!data.parentMessageId) {


    res = await api.sendMessage(data.message)
  } else {


    res = await api.sendMessage(data.message, {

     parentMessageId: data.parentMessageId })
  }
  return res
}
配置你的apiKey
2.uni-app小程序代码中
//封装cloud
import {

     Cloud } from "laf-client-sdk"
// 创建 cloud 对象 这里需要将 <appid> 替换成自己的 App ID
// const cloud = new Cloud({


//   baseUrl: "https://irrbat.laf.dev",
//   getAccessToken: () => "", // 这里不需要授权,先填空
// })
const cloud = new Cloud({


  // the laf app server base url
  baseUrl: "https://irrbat.laf.dev",
  // the database proxy entry, `app` is the policy name which response for the security of database access
  getAccessToken: () => "",
  environment: "uniapp",
})
export default cloud
发送消息方法
import cloud from './CloudService'
export async function sendToGpt (msg,parentMessageId=null) {


  // 我们提问的内容
  const message = msg
  let res
  // 与云函数逻辑一样,有上下文 id 就传入
  if (!parentMessageId) {


    res = await cloud.invoke("send", {

     message })
  } else {


    res = await cloud.invoke("send", {

     message, parentMessageId: parentMessageId })
  }
  return Promise.resolve(res)
}
微信小程序中使用
const cloud = new Cloud({
  // the laf app server base url
  baseUrl: "https://APPID.lafyun.com",
  // the database proxy entry, `app` is the policy name which response for the security of database access
  dbProxyUrl: "/proxy/app",
  getAccessToken: () => localStorage.getItem("access_token"),
  environment: "wxmp",
});
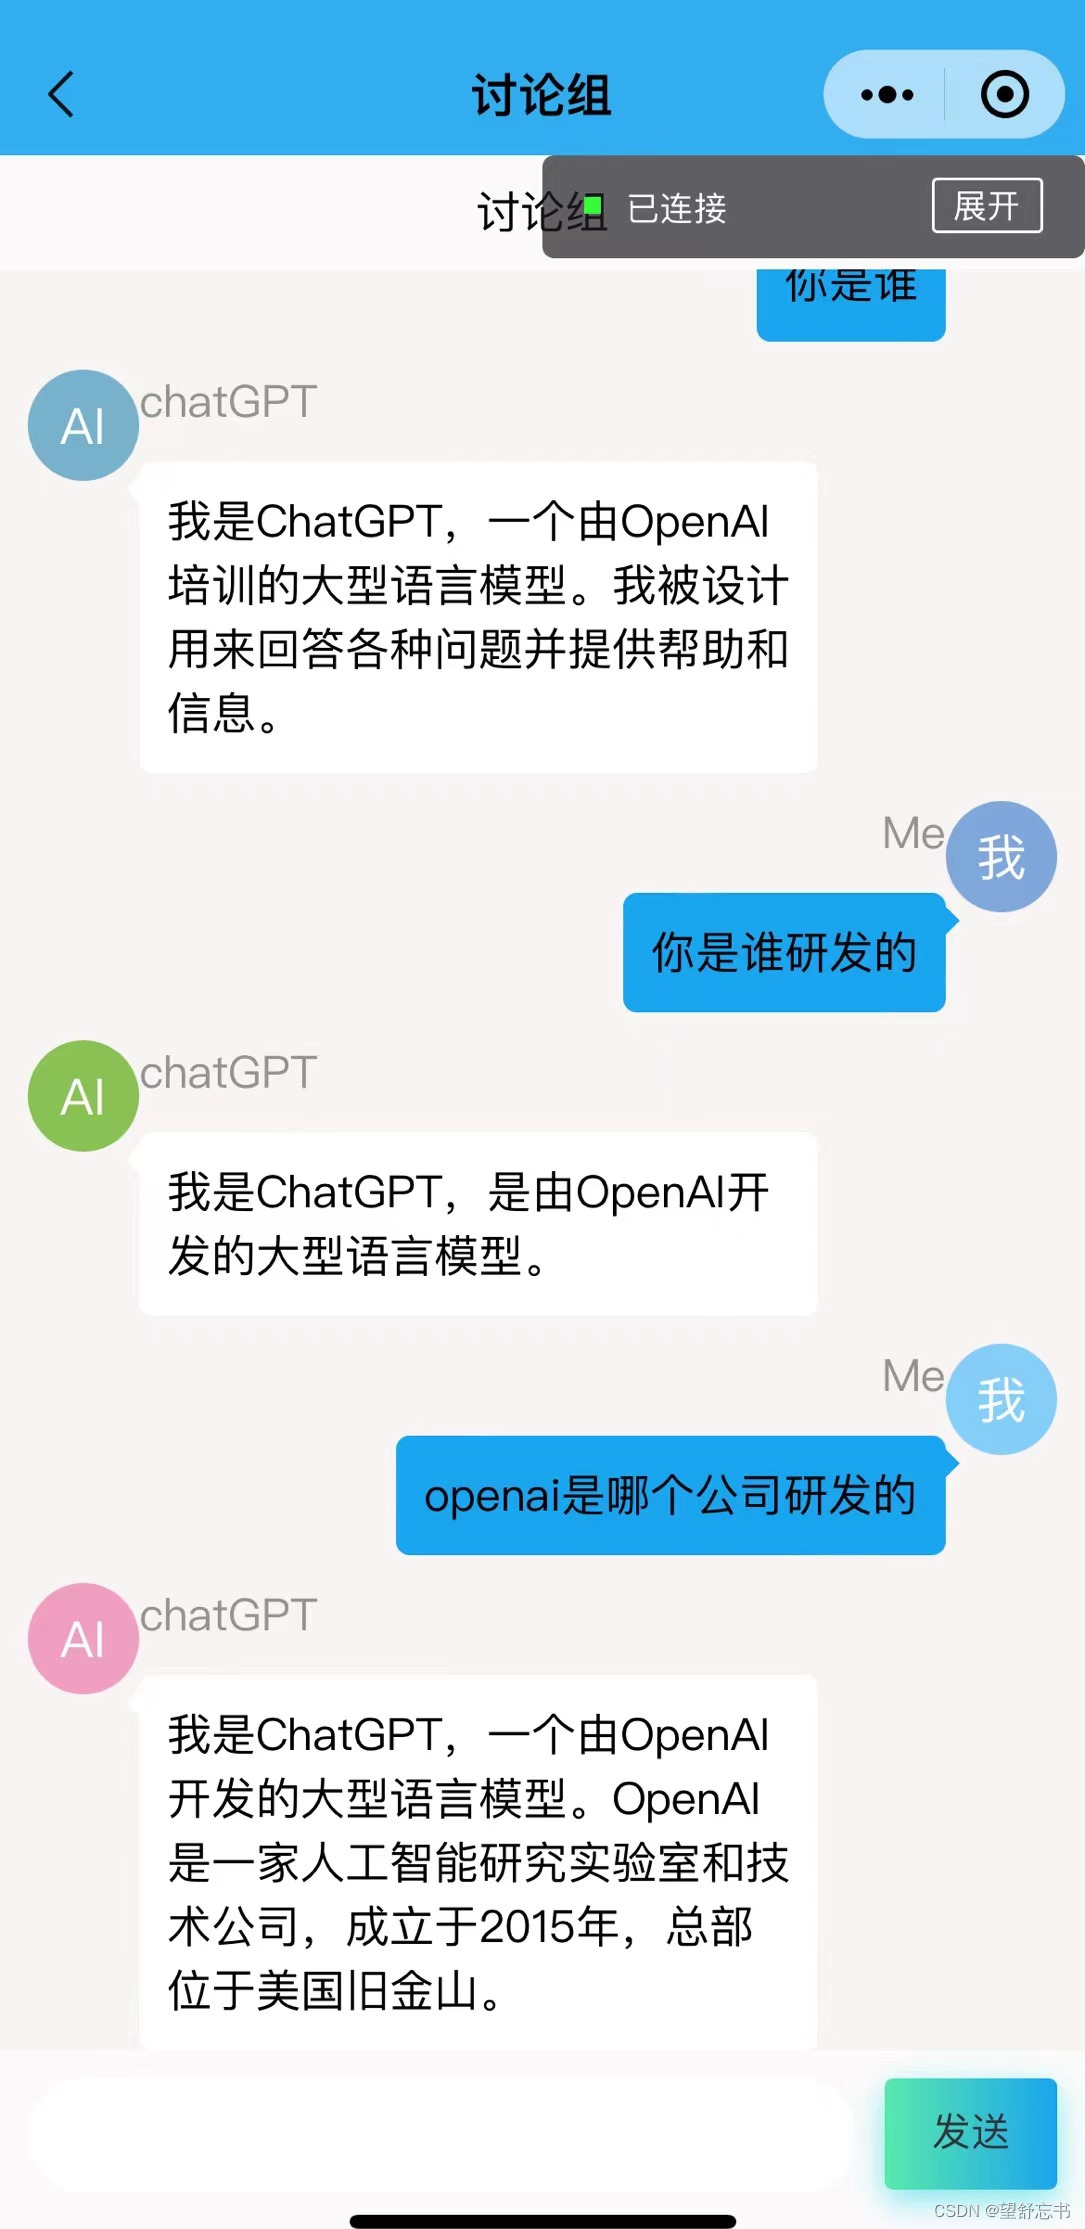
3.实现效果
在这里插入图片描述