目录
相信这些小块知识了解了之后,我们都能基于ssm项目去用springboot进行整合
Springboot 整合 Junit
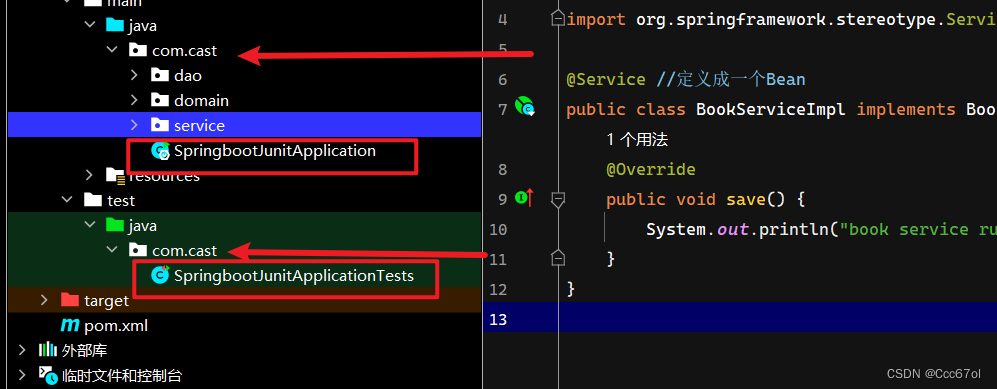
跳过模块构建,下面是模块结构。主要是为了测试Springboot整合Junit

在引导类所在的包下创建service包目录,并在其包下创建一个实现类的包目录Impl。
创建com.cast.service.BookService 接口
package com.cast.service;

public interface BookService {
    void save();
}
创建 com.cast.service.Impl.BookServiceImpl 实现类
package com.cast.service.Impl;

import com.cast.service.BookService;
import org.springframework.stereotype.Service;

@Service //定义成一个Bean
public class BookServiceImpl implements BookService {
    @Override
    public void save() {
        System.out.println("book service running ...");
    }
}
来到测试类中,开始测试
package com.cast;

import com.cast.service.BookService;
import org.junit.jupiter.api.Test;
import org.springframework.beans.factory.annotation.Autowired;
import org.springframework.boot.test.context.SpringBootTest;

@SpringBootTest
class SpringbootJunitApplicationTests {

    @Autowired
    private BookService bookService;

    @Test
    void contextLoads() {
        bookService.save();
    }

}
运行之后没有问题,说明工程没有出错。下面有个细节分享。
只有当我们的测试类运行接口和引导类运行接口在同名包下程序才不会报错
运行结果如下

当然实际开发中我们也不会这么创建错误的包结构,只是做个分享。
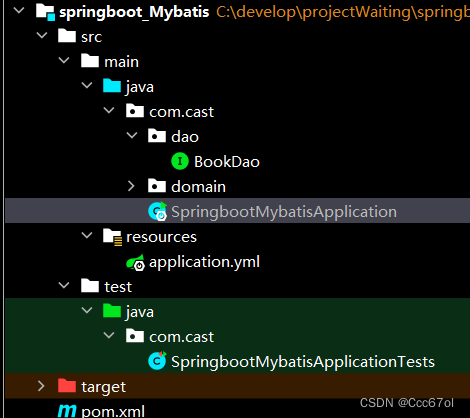
Springboot 整合 Mybatis
创建maven工程,记得数据库和Mybatis的配置勾选上
下面是我们模块的包结构
在recource目录下的application.properties中配置上数据库连接信息
将配置文件后缀名改为.yml
配置信息和文件结构如下
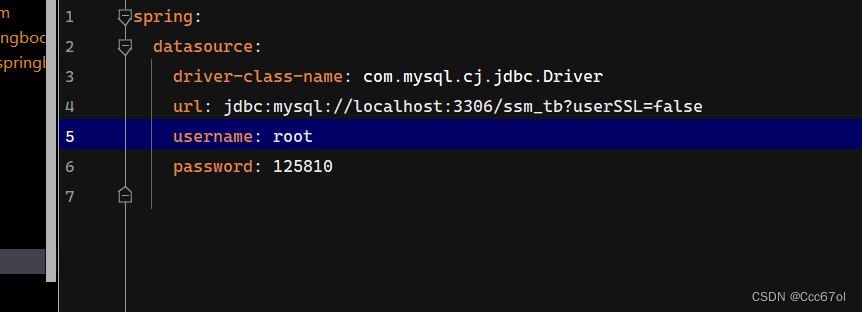
注意驱动类名是com.mysql.cj.jdbc.Driver,用原来的 com.mysql.jdbc.Driver 会报错

com.cast.service.Book 类
package com.cast.domain;

public class Book {
    private Integer id;
    private String type;
    private String name;
    private String description;

    @Override
    public String toString() {
        return "book{" +
                "id=" + id +
                ", type='" + type + '\'' +
                ", name='" + name + '\'' +
                ", description='" + description + '\'' +
                '}';
    }

    public Integer getId() {
        return id;
    }

    public void setId(Integer id) {
        this.id = id;
    }

    public String getType() {
        return type;
    }

    public void setType(String type) {
        this.type = type;
    }

    public String getName() {
        return name;
    }

    public void setName(String name) {
        this.name = name;
    }

    public String getDescription() {
        return description;
    }

    public void setDescription(String description) {
        this.description = description;
    }
}
mapper代理接口
com.cast.dao.BookDao 接口
package com.cast.dao;

import com.cast.domain.Book;
import org.apache.ibatis.annotations.Select;

public interface BookDao {
    @Select("select * from tb_books where id = #{id}")
    Book SelectById(Integer id);
}
这里我们是简单的实验,只做些简单的案例。
最后是test测试接口
package com.cast;

import com.cast.dao.BookDao;
import com.cast.domain.Book;
import org.junit.jupiter.api.Test;
import org.springframework.beans.factory.annotation.Autowired;
import org.springframework.boot.test.context.SpringBootTest;

@SpringBootTest
class SpringbootMybatisApplicationTests {

    @Autowired
    private BookDao bookDao;
    @Test
    public void SelectByIdTest() {
        Book book = bookDao.SelectById(2);
        System.out.println(book);
    }

}
运行之后程序报错
NoSuchBeanDefinitionException
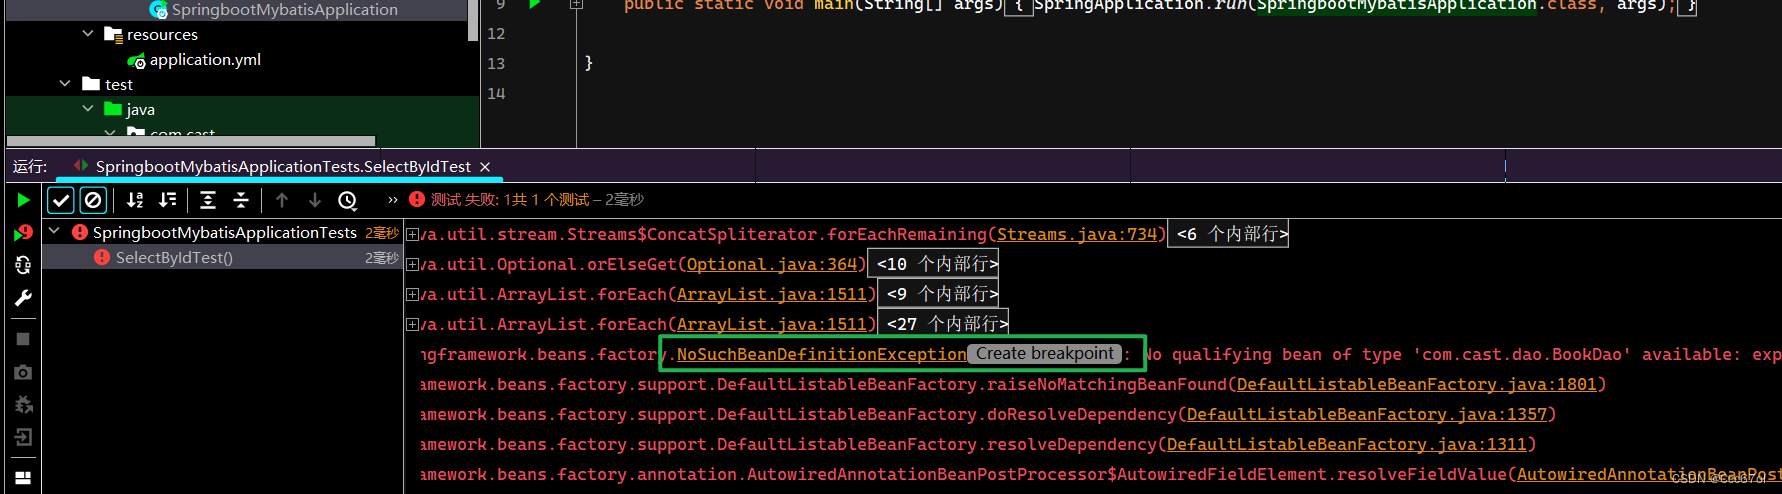
意思是找不到com.cast.dao这样一个mapper接口,我们得要让程序识别到这个接口并将其实现类加载成bean
回到com.cast.dao包下的代理接口,加上@Mapper注解,重新启动程序

此时程序运行,测试成功
