目录
7.2.1、实现无条件跳过(skip(reason=None))
7.2.2、满足条件跳过,skipif(condition,reason=None)
8.1.1、该文件要和需要执行的测试文件所在的目录文件在同一级
6、用例执行失败重试
6.1、安装插件 pytest-rerunfailures
1、打开终端,使用pip安装;
2、输入命令:pip3 install pytest-rerunfailures,显示安装成功;

6.2、设置重试次数
1、示例代码:测试文件:test_09.py
import pytest

import pytest

class Test_1():

    def test_01(self):
        print('测试用例: 1')
        assert '1' == '1'

    def test_02(self):
        print('测试用例: 2')
        assert 2 == 2

class Test_2():

    def test_03(self):
        print('测试用例: 3')
        assert '1' == '1'

    def test_04(self):
        print('测试用例: 4')
        assert 2 == 3   # 使其断言失败

if __name__ == '__main__':
    pytest.main(["-s", "test_08.py"])
2、执行该文件:pytest test_09.py --reruns 2 --reruns-delay 2 --(参数--reruns 2 ,表示失败了的用例再重复执行2次,共三次;--reruns-delay 2 表示间隔两秒执行一次)
3、执行结果:

7、标记机制
7.1、对测试用例进行分级
7.1.1、使用背景或场景
1、使用场景或背景:我们可以对测试用例标记,不同的标记区分用例的优先级、重要程度或者分主次流程的用例;这样我们可以在不同的情况下执行不同的测试用例;还例如在做冒烟测试的时候可以选择性执行测试用例;
2、标记规则:
一个测试函数(类、方法)可以有多个标记;
一个标记也可以用于多个函数(类、方法);
执行参数使用:pytest -m mark名
执行多个标记(例如标记:L1和L2):pytest -m “L1 or L2”
3、示例代码:测试文件test_10.py
import pytest
"""
test_01 增加两个标记 L1、L2
test_02 增加1个标记 L2
test_03 增加1个标记 L1
test_04 增加1个标记 L3
"""

class Test_1():
    @pytest.mark.L1
    @pytest.mark.L2
    def test_01(self):
        print('测试用例: 1')
        assert '1' == '1'

    @pytest.mark.L2
    def test_02(self):
        print('测试用例: 2')
        assert 2 == 2

class Test_2():
    @pytest.mark.L1
    def test_03(self):
        print('测试用例: 3')
        assert '1' == '1'

    @pytest.mark.L3
    def test_04(self):
        print('测试用例: 4')
        assert 2 == 2
只执行L1级的测试用例:pytest -s “test_10.py” -m “L1”

执行L1和L3级的测试用例:pytest -s “test_10.py” -m “L1 or L3”

注:在执行标记的时候会出现报错,可以将marks配置到pytest.ini文件中来解决这个问题
7.2、跳过用例
7.2.1、实现无条件跳过(skip(reason=None))
1、示例代码:
import pytest

class Test_1():
    @pytest.mark.skip(reason='原因描述')
    def test_01(self):
        print('测试用例: 1')
        assert '1' == '1'
    def test_02(self):
        print('测试用例: 2')
        assert 2 == 2

class Test_2():
    def test_03(self):
        print('测试用例: 3')
        assert '1' == '1'
    @pytest.mark.skip(reason='原因描述')
    def test_04(self):
        print('测试用例: 4')
        assert 2 == 2
if __name__ == '__main__':
    pytest.main(["-s", "test_11.py"])
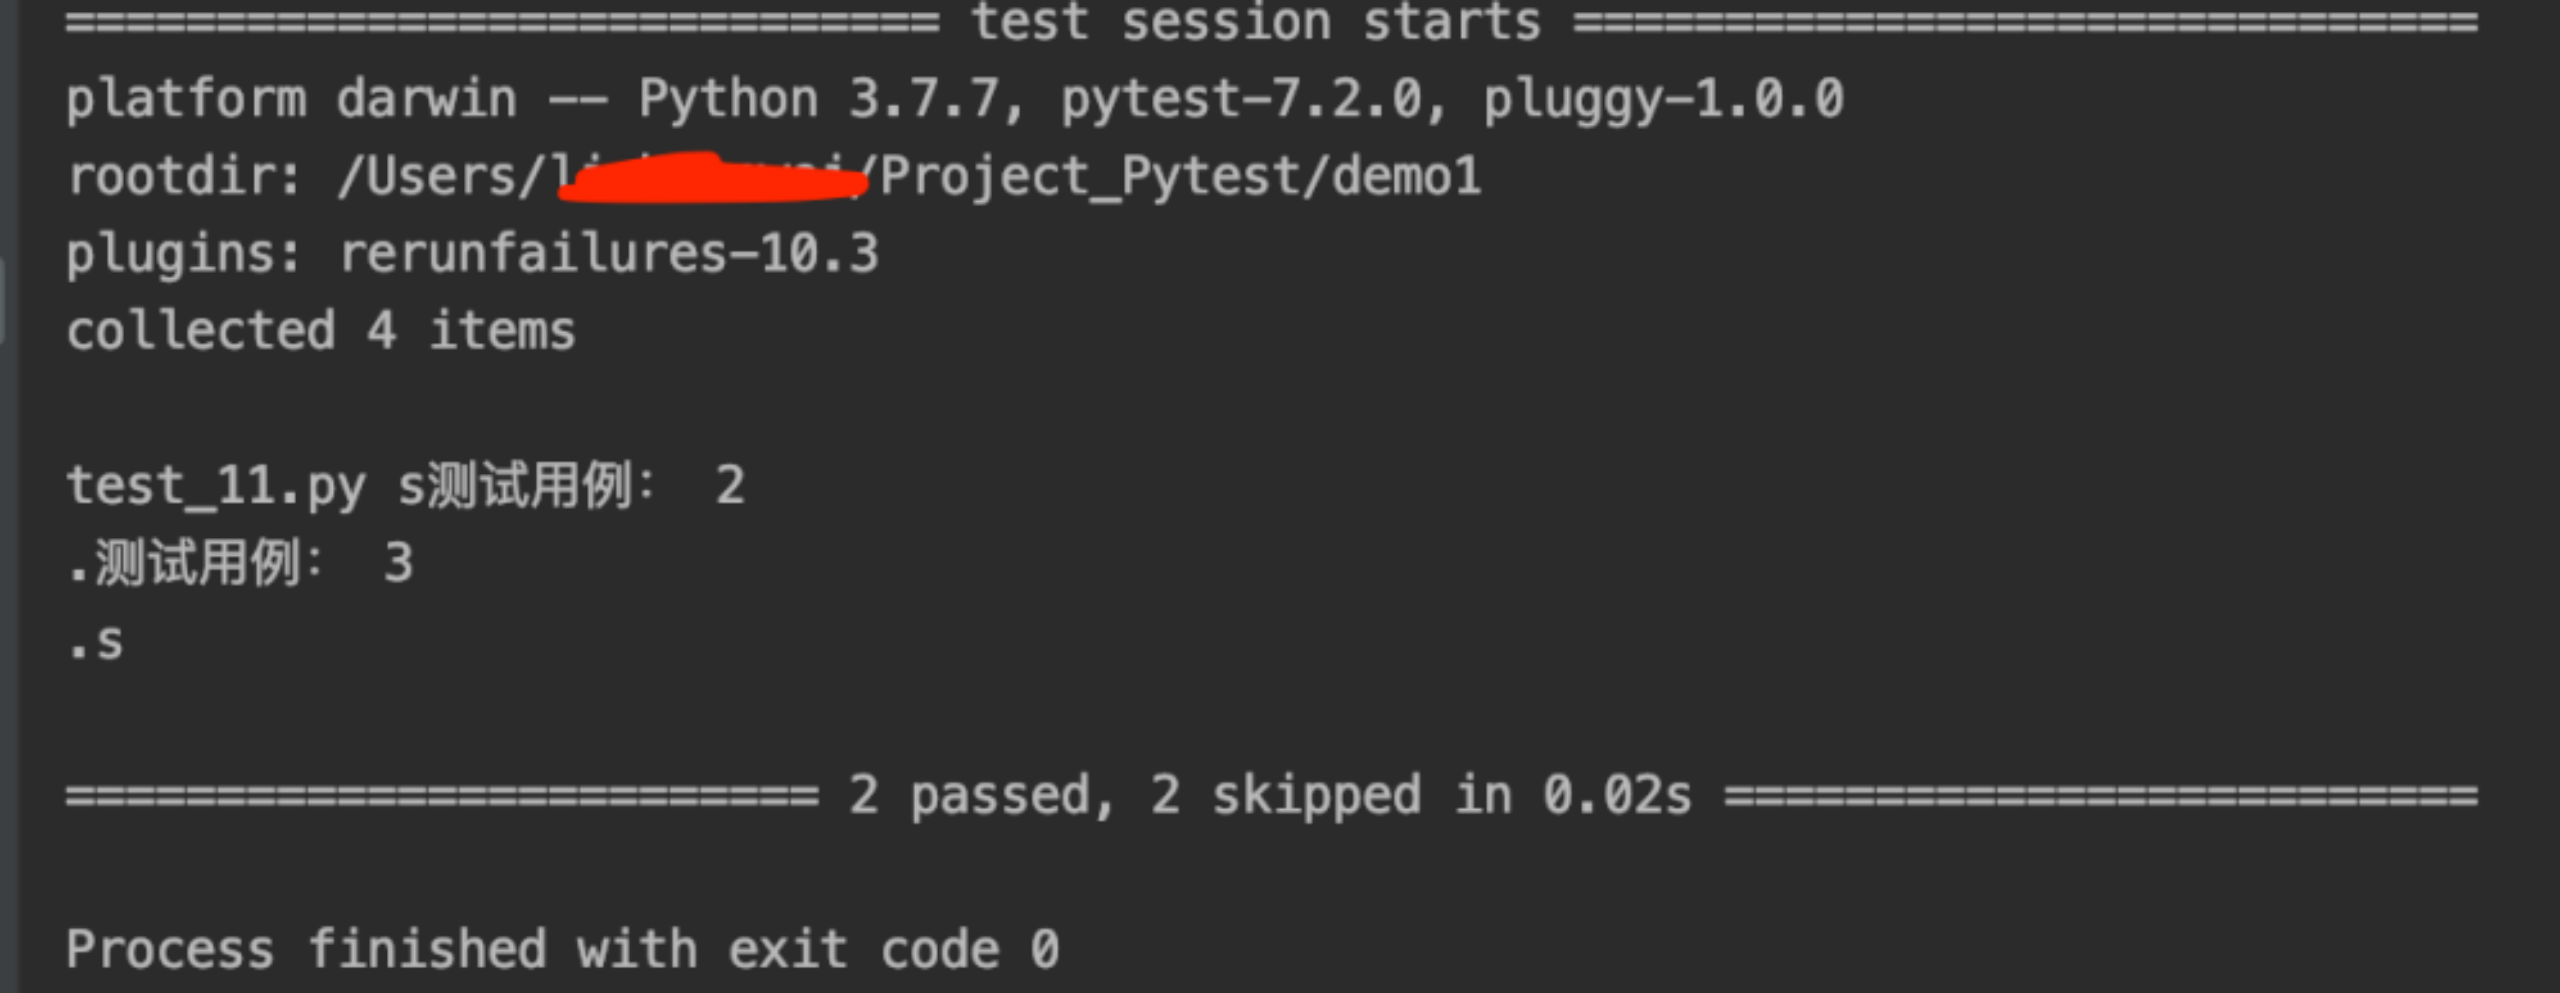
2、执行结果:

7.2.2、满足条件跳过,skipif(condition,reason=None)
1、示例代码:
mport pytest


class Test_1():

    @pytest.mark.skipif(3>2, reason='原因描述')
    def test_01(self):
        print('测试用例: 1')
        assert '1' == '1'

    def test_02(self):
        print('测试用例: 2')
        assert 2 == 2

class Test_2():

    def test_03(self):
        print('测试用例: 3')
        assert '1' == '1'

    @pytest.mark.skipif(4==4,  reason='原因描述')
    def test_04(self):
        print('测试用例: 4')
        assert 2 == 2

if __name__ == '__main__':
    pytest.main(["-s", "test_11.py"])
2、测试结果:

8、全局设置
8.1、创建一个配置文件:pytest.ini
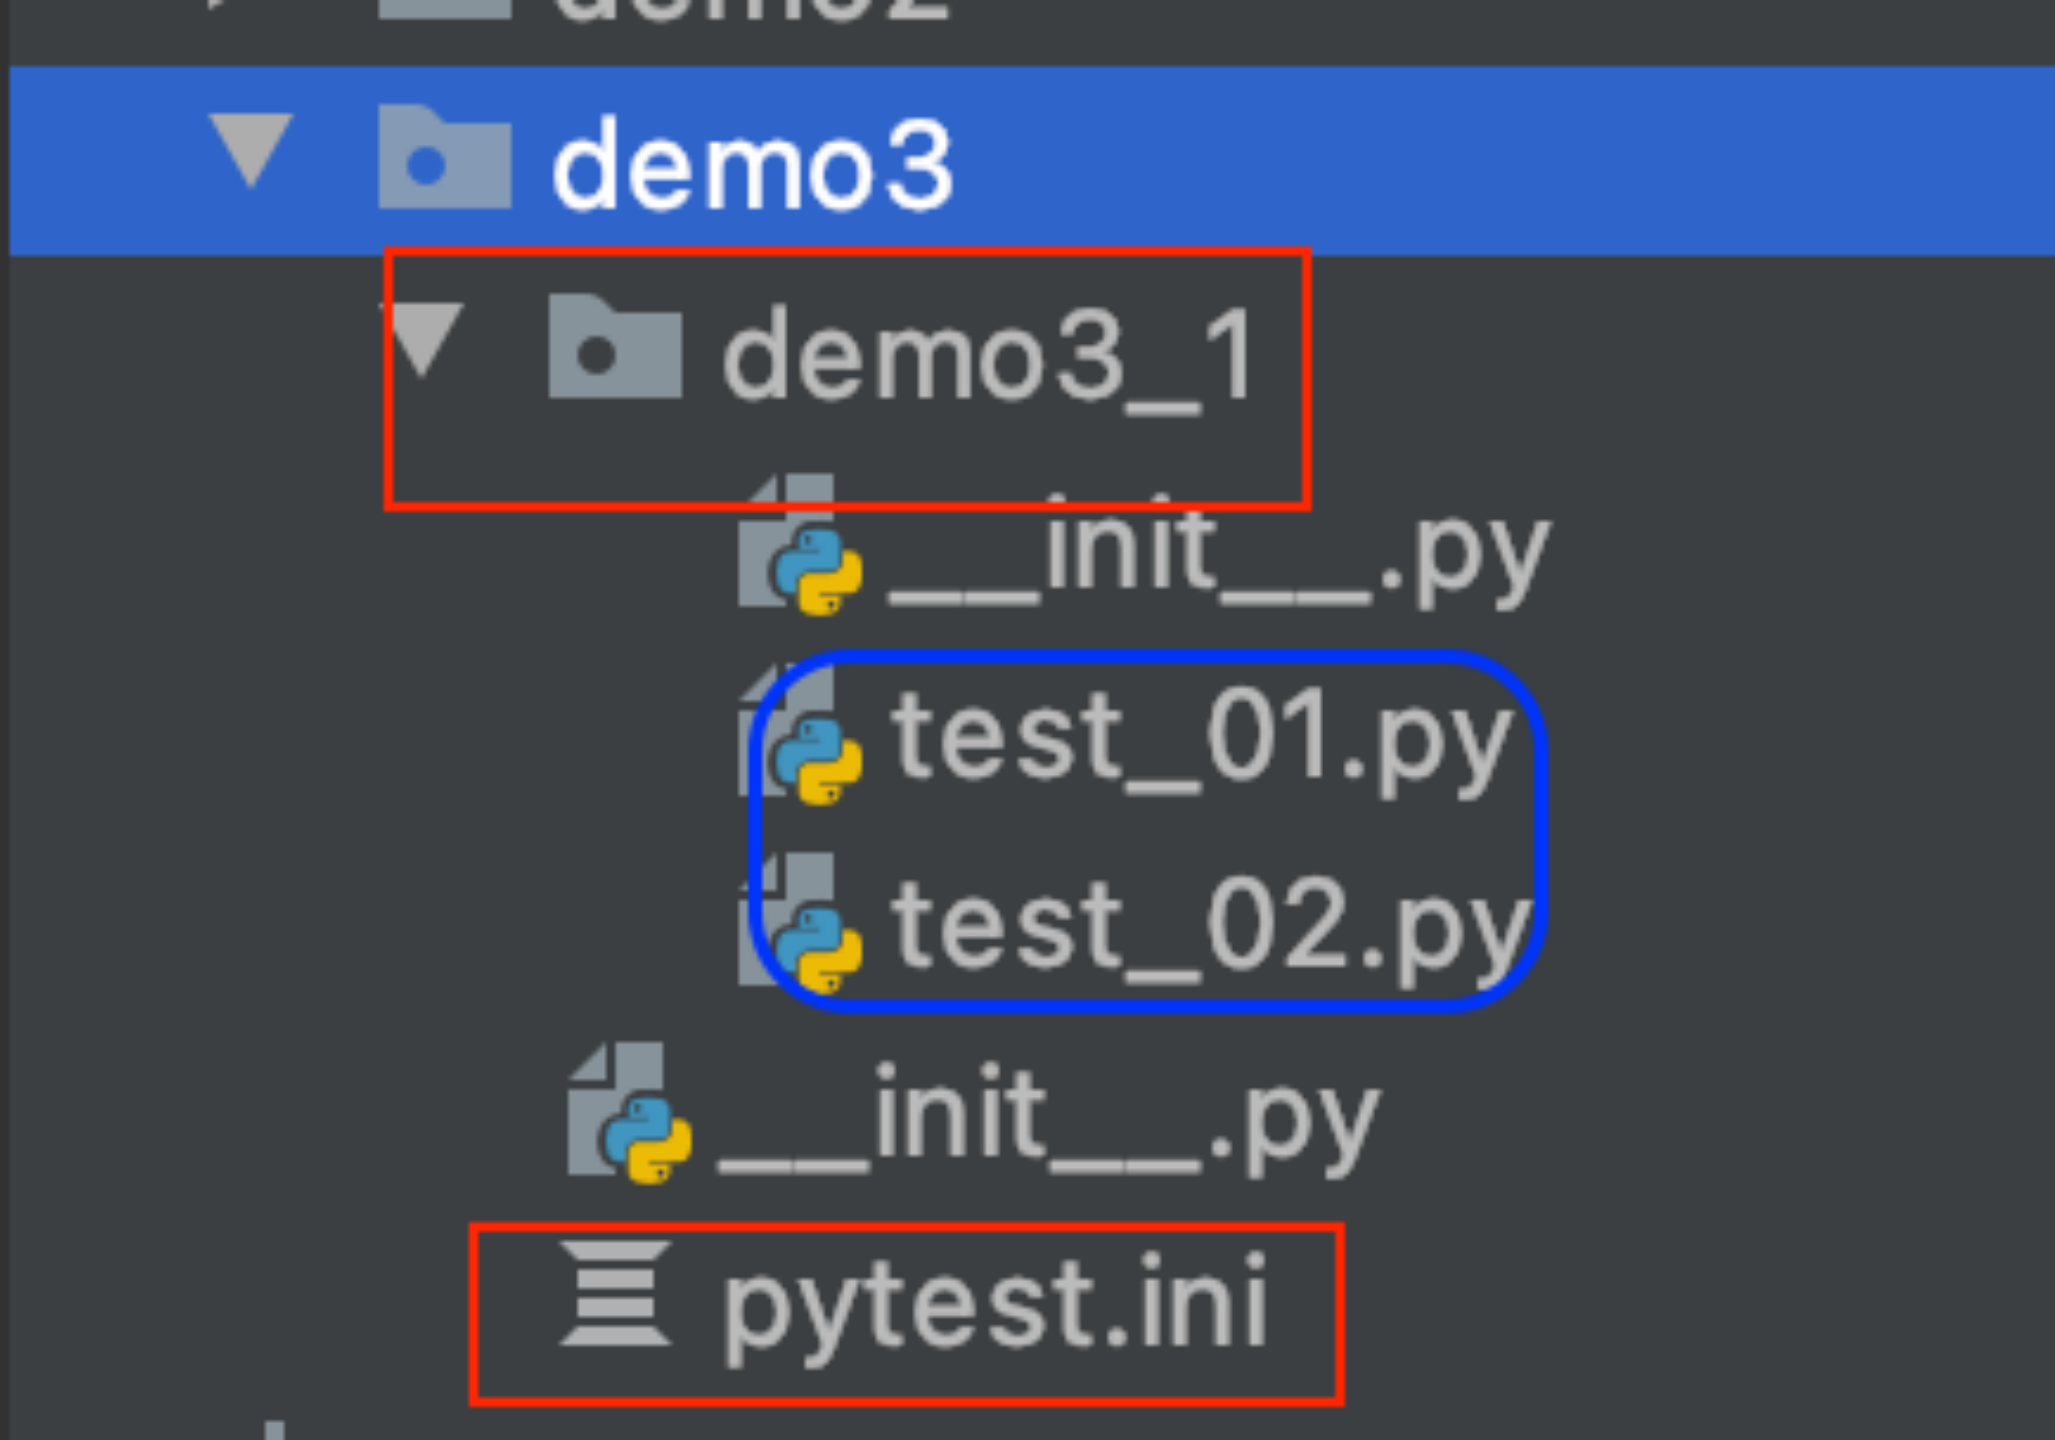
8.1.1、该文件要和需要执行的测试文件所在的目录文件在同一级
如下图:

文件名必须是pytest.ini;
文件内容必须以[pytest]开头;
文件内容不能包含中文;
8.1.2、命令行参数
1、 通过addopts来设置命令行参数;如“-s”或”-v” 监控、失败重试的次数、重试的时间间隔、按标签来执行,多个参数之间用空格分隔。
2、示例如下:
addopts = -v --reruns 2 --reruns-delay 2 -m “L1”
8.1.3、自定义标签
1、 可以将自定义标签添加到pytest.ini文件中,例如下面,自定义2个标签(分开写,存在缩进),如下:
markers = L1:level_1 testcases
L2:level_2 testcases
8.1.4、自定义测试用例查找规则
1、在当前文件同级的目录demo3_1里查找测试用例:testpaths = testcases
2、查找文件名以”test_”开头的文件,也可自定义修改为以其他字符串开头:python_file=test_*.py
3、查找以”Test_”开头的类,也可自定义修改为以其他字符串开头的类:python_class=Test_*
4、查找以”test_”开头的函数,也可自定义修改为以其他字符串开头的函数:python_functions=test_*
testpaths = testcases
python_file=test_*.py
python_class=Test_*
python_functions=test_*
8.1.5、创建目录
1、demo3_1目录里测试文件test_01.py和test_02.py,示例代码:
2、test_01.py,示例代码:
import pytest


class Test_1():

    @pytest.mark.L1
    def test_02(self):
        print('测试用例: 1')
        assert '1' == '1'
2、test_02.py,示例代码:
import pytest


class Test_2():

    @pytest.mark.L2
    def test_02(self):
        print('测试用例: 1')
        assert '1' == '2'  # 断言失败
3、pytest.ini文件:
[pytest]
addopts = -v --reruns  2  --reruns-delay  2  -m  "L1 or L2"
markers = L1:level_1 testcases
    L2:level_2 testcases
testpaths = testcases
python_file = test*.py
python_class = Test*
python_functions = test_*
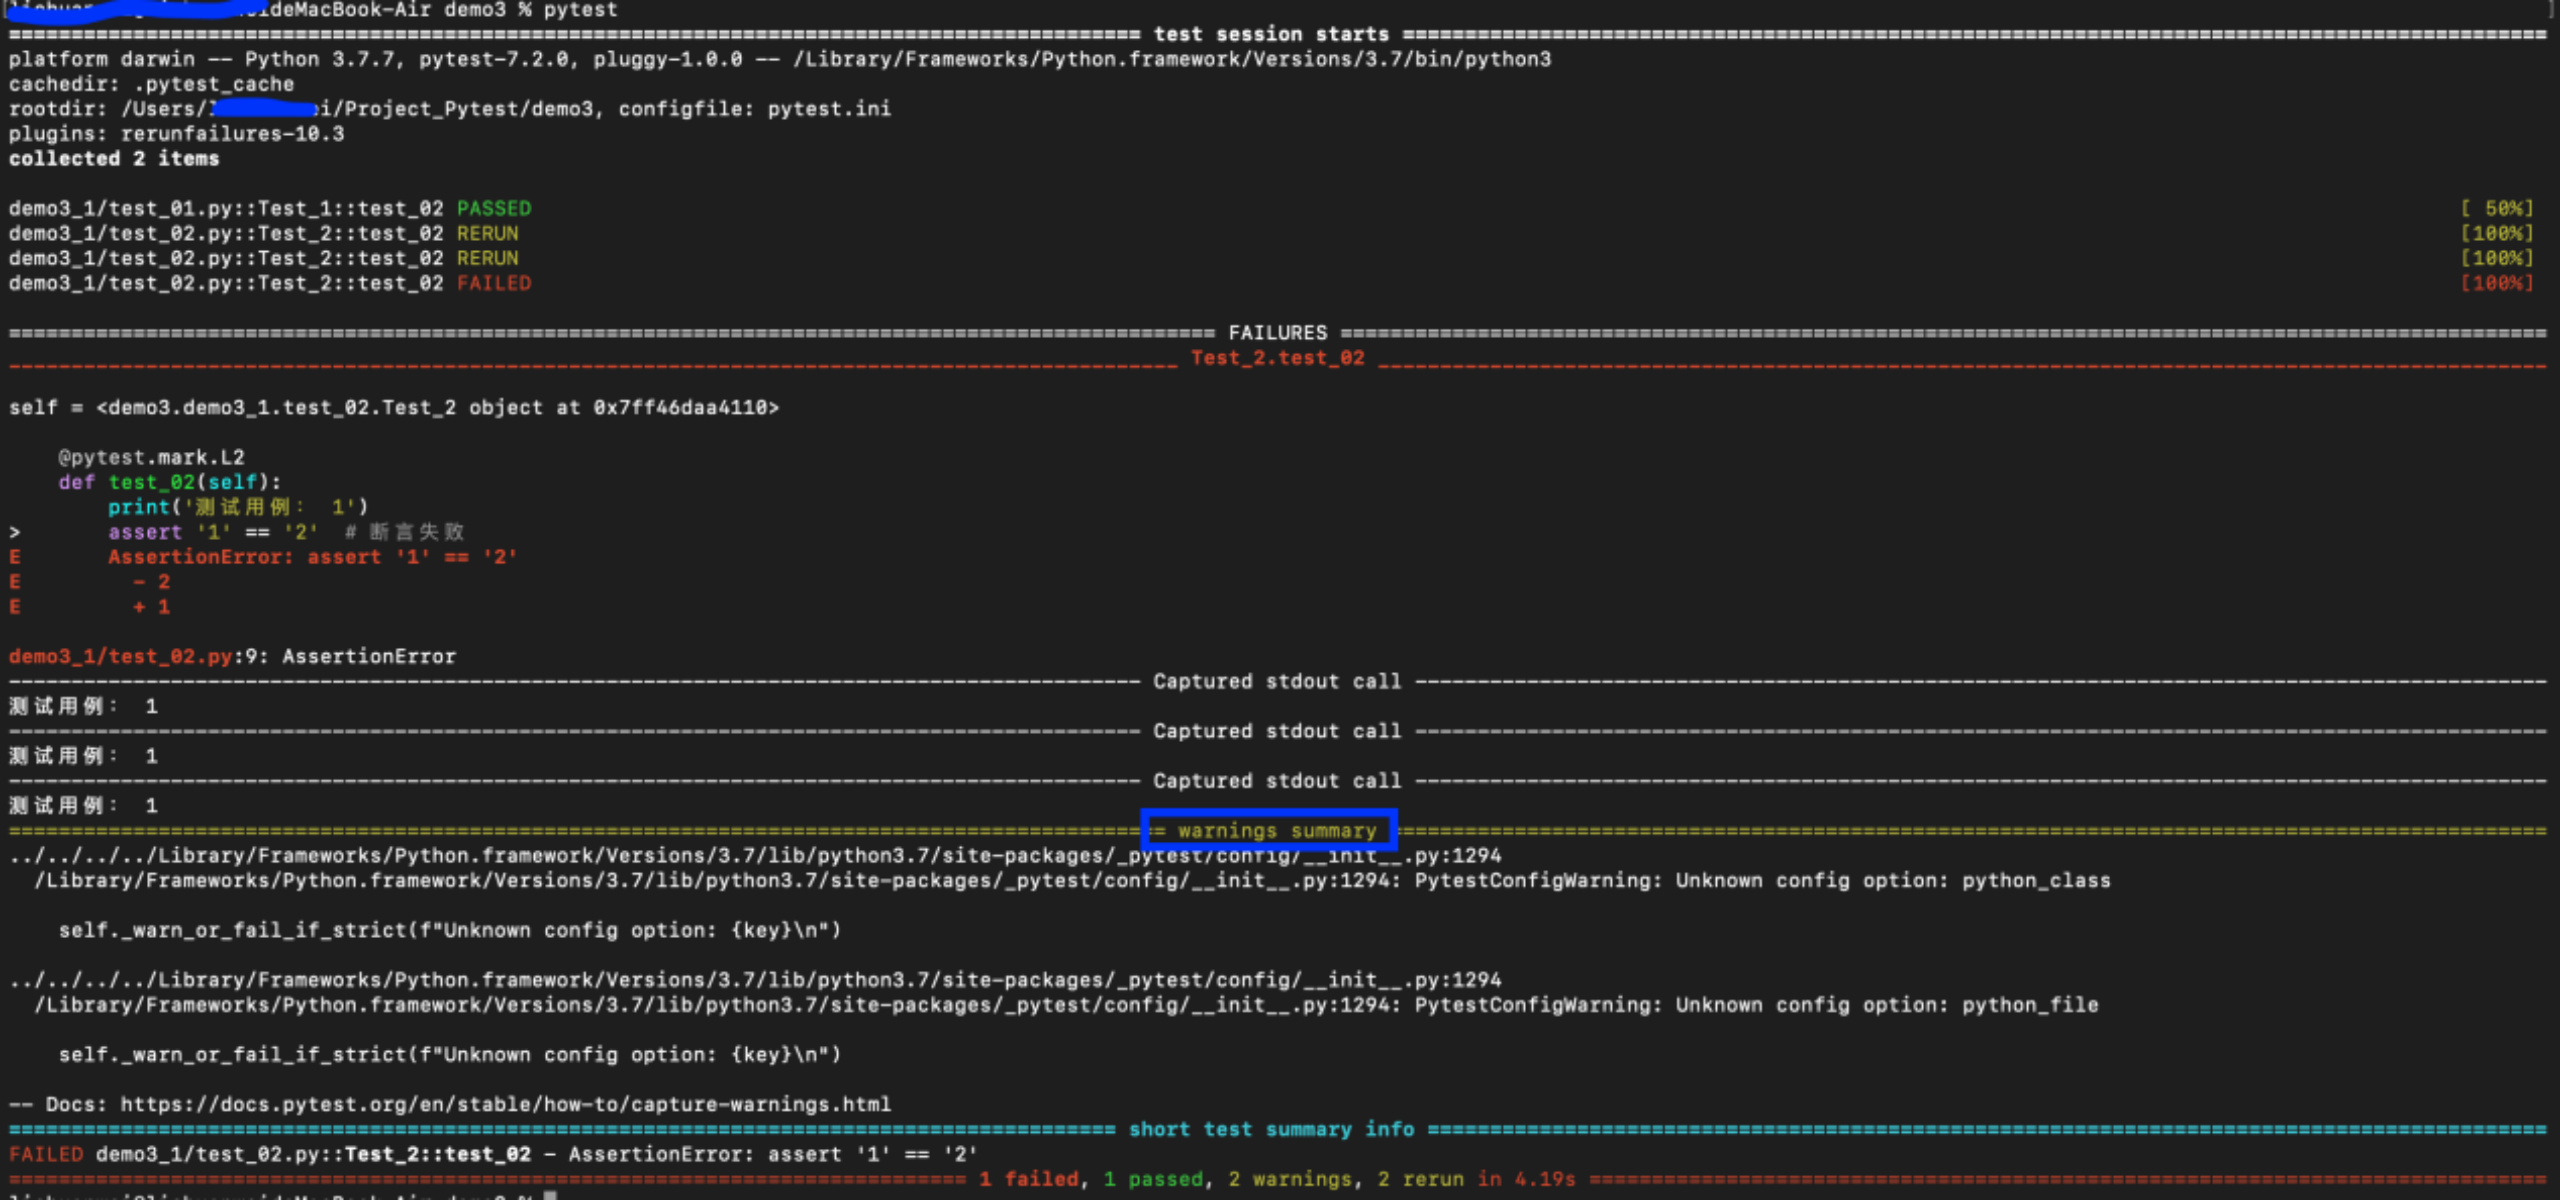
4、执行结果:

5、修改test_02.文件的class名,把Test_2改为test_2,不符合pytest.ini的配置规则(预期,test_02.py的class类test_2不会被执行)
执行结果:

注:3.1版本开始,pytest现在在测试执行期间自动捕获警告,并在会话结束时显示:这个告警我们是可以通过警告过滤器配置给忽略掉的;
我们是可以通过参数把所有告警忽略掉的;
- --disable-warnings;
- -p no:warnings
- 也可以把以上参数添加到pytest.ini文件中