【项目管理】SpringBoot2 整合 Swagger3、Knife4j
系统:Win10
JDK:1.8.0_333
IDEA:2022.2.4
SpringBoot:2.7.6
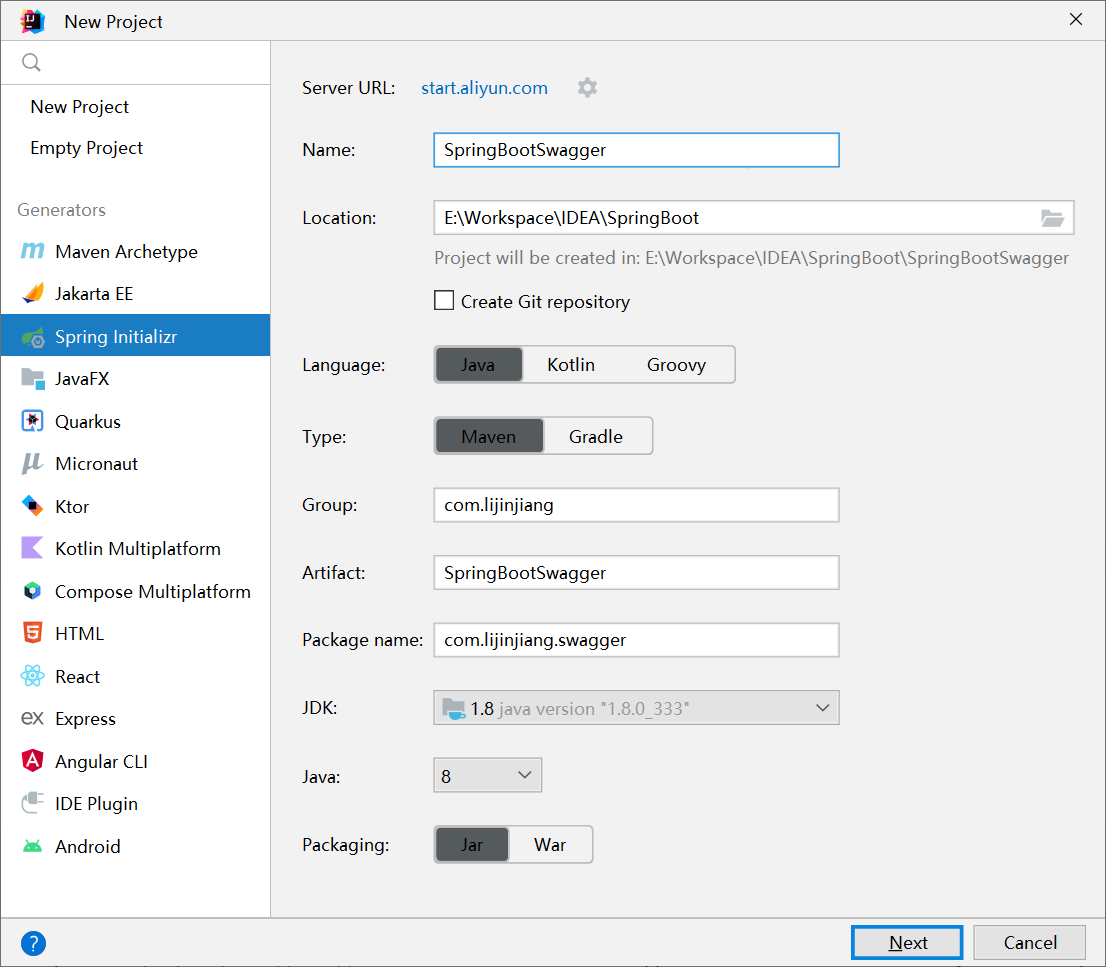
1.项目新建
首先我们先简单搭建一个简单的 SpringBoot 项目,如果之前没有创建过 SpringBoot 项目,可以参考我之前写的一篇创建 SpringBoot 项目的文章:使用IDEA创建SpringBoot项目
2.导入依赖
我们需要使用 Swagger3,需要导入对应依赖,因为 Swagger3 当前只有一个版本,所以版本也不用选了,直接使用 3.0.0 的版本
<?xml version="1.0" encoding="UTF-8"?>
<project xmlns="http://maven.apache.org/POM/4.0.0" xmlns:xsi="http://www.w3.org/2001/XMLSchema-instance"
         xsi:schemaLocation="http://maven.apache.org/POM/4.0.0 https://maven.apache.org/xsd/maven-4.0.0.xsd">
    <modelVersion>4.0.0</modelVersion>
    <parent>
        <groupId>org.springframework.boot</groupId>
        <artifactId>spring-boot-starter-parent</artifactId>
        <version>2.7.6</version>
        <relativePath/> <!-- lookup parent from repository -->
    </parent>
    <groupId>com.lijinjiang</groupId>
    <artifactId>SpringBootSwagger</artifactId>
    <version>1.0.0</version>
    <name>SpringBootSwagger</name>
    <description>SpringBootSwagger</description>

    <properties>
        <!-- JDK 版本 -->
        <java.version>1.8</java.version>
        <!-- Lombok 版本 -->
        <lombok.version>1.18.24</lombok.version>
        <!-- Swagger 版本 -->
        <swagger.version>3.0.0</swagger.version>
    </properties>

    <dependencies>
        <!-- Lombok -->
        <dependency>
            <groupId>org.projectlombok</groupId>
            <artifactId>lombok</artifactId>
            <version>${

    lombok.version}</version>
            <scope>provided</scope>
        </dependency>
        <!--Swagger-->
        <dependency>
            <groupId>io.springfox</groupId>
            <artifactId>springfox-boot-starter</artifactId>
            <version>${

    swagger.version}</version>
        </dependency>

        <!-- 配置元数据 -->
        <dependency>
            <groupId>org.springframework.boot</groupId>
            <artifactId>spring-boot-configuration-processor</artifactId>
            <optional>true</optional>
        </dependency>

        <dependency>
            <groupId>org.springframework.boot</groupId>
            <artifactId>spring-boot-starter-web</artifactId>
        </dependency>

        <dependency>
            <groupId>org.springframework.boot</groupId>
            <artifactId>spring-boot-starter-test</artifactId>
            <scope>test</scope>
        </dependency>
    </dependencies>

    <build>
        <plugins>
            <plugin>
                <groupId>org.apache.maven.plugins</groupId>
                <artifactId>maven-compiler-plugin</artifactId>
                <version>3.8.1</version>
                <configuration>
                    <source>1.8</source>
                    <target>1.8</target>
                    <encoding>UTF-8</encoding>
                </configuration>
            </plugin>
            <plugin>
                <groupId>org.springframework.boot</groupId>
                <artifactId>spring-boot-maven-plugin</artifactId>
                <version>2.7.6</version>
            </plugin>
        </plugins>
    </build>

</project>
3.yml配置
我们将 application.properties 的后缀名改为 yml,并创建对应测试环境的:application-test.yml,并将其中的配置信息完善,这里我们将 Swagger 的配置信息配置到 application-test.yml 中,如果使用的 SpringBoot 版本大于等于 2.6.0,则需要配置路径匹配规则,否则会报错
application.yml
# Tomcat配置
server:
  # 端口
  port: 8080

# Spring配置
spring:
  application:
    # 应用名称
    name: SpringBootSwagger
  # 配置文件
  profiles:
    # 运行环境
    active: test
  # 路径匹配机制
  mvc:
    pathmatch:
      matching-strategy: ANT_PATH_MATCHER
application-test.yml
# Document配置信息
swagger:
  # 文档标题
  title: SpringBoot整合Swagger案例
  # 组织信息
  group-name: SpringBoot-Swagger
  # 是否开启
  enable: true
  # 描述信息
  describe: 测试API接口平台
  # 版本信息
  version: Release 1.0.0
  # 扫包路径
  scan-package: com.lijinjiang.swagger.controller
  # 组织信息
  terms-of-service-url: https://gitee.com/lijinjiang01
  # 联系人作者
  contact-name: 李晋江
  # 链接
  contact-url: https://lijinjiang.blog.csdn.net
  # 邮箱
  contact-email: lijinjiang01@126.com
4.Swagger配置类
在 java 目录下新建 com.lijinjiang.swagger.config.property 包,创建对应的 Swagger 属性配置实体类 SwaggerProperty
import lombok.Data;
import org.springframework.boot.context.properties.ConfigurationProperties;

/**
 * @Description Swagger接口文档配置类
 * @Author 03010430
 * @ModifyDate 2023/2/13 14:36
 */
@Data
@ConfigurationProperties("swagger")
public class SwaggerProperty {


    //系统标题
    private String title;
    //分组名称
    private String groupName;
    //是否开启
    private Boolean enable = true;
    //描述信息
    private String describe;
    //版本信息
    private String version;
    //扫描路径
    private String scanPackage;
    //组织链接
    private String termsOfServiceUrl;
    //联系人名称
    private String contactName;
    //联系人url
    private String contactUrl;
    //联系人email
    private String contactEmail;
}
在 com.lijinjiang.swagger.config 包下创建 Swagger 的配置类 SwaggerConfig
import com.lijinjiang.swagger.config.property.SwaggerProperty;
import org.springframework.boot.context.properties.EnableConfigurationProperties;
import org.springframework.context.annotation.Bean;
import org.springframework.context.annotation.Configuration;
import springfox.documentation.builders.ApiInfoBuilder;
import springfox.documentation.builders.RequestHandlerSelectors;
import springfox.documentation.service.ApiInfo;
import springfox.documentation.service.Contact;
import springfox.documentation.spi.DocumentationType;
import springfox.documentation.spring.web.plugins.Docket;

import javax.annotation.Resource;
import java.sql.Timestamp;
import java.util.Date;

/**
 * @Description Swagger配置文件
 * @Author 03010430
 * @ModifyDate 2023/2/13 14:35
 */
@Configuration
@EnableConfigurationProperties(SwaggerProperty.class)
public class SwaggerConfig {


    @Resource
    private SwaggerProperty swaggerProperty;

    @Bean
    public Docket createApiDoc() {


        return new Docket(DocumentationType.OAS_30)
                .apiInfo(apiInfo())
                .groupName(swaggerProperty.getGroupName())
                .enable(swaggerProperty.getEnable())
                .select()
                .apis(RequestHandlerSelectors.basePackage(swaggerProperty.getScanPackage()))
                .build().directModelSubstitute(Timestamp.class, Date.class);
    }

    private ApiInfo apiInfo() {


        return new ApiInfoBuilder()
                .title(swaggerProperty.getTitle())
                .description(swaggerProperty.getDescribe())
                .version(swaggerProperty.getVersion())
                .termsOfServiceUrl(swaggerProperty.getTermsOfServiceUrl())
                .contact(new Contact(swaggerProperty.getContactName(), swaggerProperty.getContactUrl()
                        , swaggerProperty.getContactEmail()))
                .build();
    }
}
5.模拟案例
这里我们模拟一个用户类的增删改查操作
先创建一个 com.lijinjiang.swagger.entity 包,然后创建对应用户类 User
import io.swagger.annotations.ApiModel;
import io.swagger.annotations.ApiModelProperty;
import lombok.Data;

import java.io.Serializable;
import java.sql.Timestamp;

/**
 * @Description 用户类
 * @Author 03010430
 * @ModifyDate 2023/2/13 14:52
 */
@Data
@ApiModel(description = "用户类")
public class User implements Serializable {


    private static final long serialVersionUID = 1L;
    @ApiModelProperty(value="主键ID")
    private String id;
    @ApiModelProperty(value="账号")
    private String account;
    @ApiModelProperty(value="密码")
    private String password;
    @ApiModelProperty(value="头像")
    private String avatar;
    @ApiModelProperty(value="电话")
    private String phone;
    @ApiModelProperty(value="创建时间")
    private Timestamp ctime;
}
然后创建 com.lijinjiang.swagger.controller 包,并创建用户控制类 UserController,并在里面模拟用户的增删改查操作(具体的 Mapper 和 Service 没有写)
import com.lijinjiang.swagger.common.Result;
import com.lijinjiang.swagger.entity.User;
import io.swagger.annotations.Api;
import io.swagger.annotations.ApiOperation;
import org.springframework.web.bind.annotation.*;

/**
 * @Description 用户控制器
 * @Author 03010430
 * @ModifyDate 2023/2/13 14:56
 */
@Api(tags = {

    "用户管理"})
@RestController
public class UserController {


    @ApiOperation(value = "新增用户", notes = "根据传入的数据,新增用户", produces = "application/json")
    @PostMapping("/users")
    public Result addUser(@RequestBody User user) {


        //具体业务代码
        return Result.success(null);
    }

    @ApiOperation(value = "删除用户", notes = "根据传入的id,删除对应用户")
    @DeleteMapping("/users/{id}")
    public Result deleteUser(@PathVariable("id") String id) {


        //具体业务代码
        return Result.success(null);
    }

    @ApiOperation(value = "修改用户", notes = "根据传入的数据,修改用户")
    @PutMapping("/users")
    public Result updateUser(@RequestBody User user) {


        //具体业务代码
        return Result.success(null);
    }

    @ApiOperation(value = "查询用户", notes = "根据传入的id,查找返回对应用户信息")
    @GetMapping("/users/{id}")
    public Result queryUser(@PathVariable("id") String id) {


        //具体业务代码
        return Result.success(null);
    }
}
6.项目运行
运行项目启动类(这里我将启动类名称改为了 Application) Application,然后登陆 Swagger 的 UI 界面
http://localhost:8080/swagger-ui/index.html
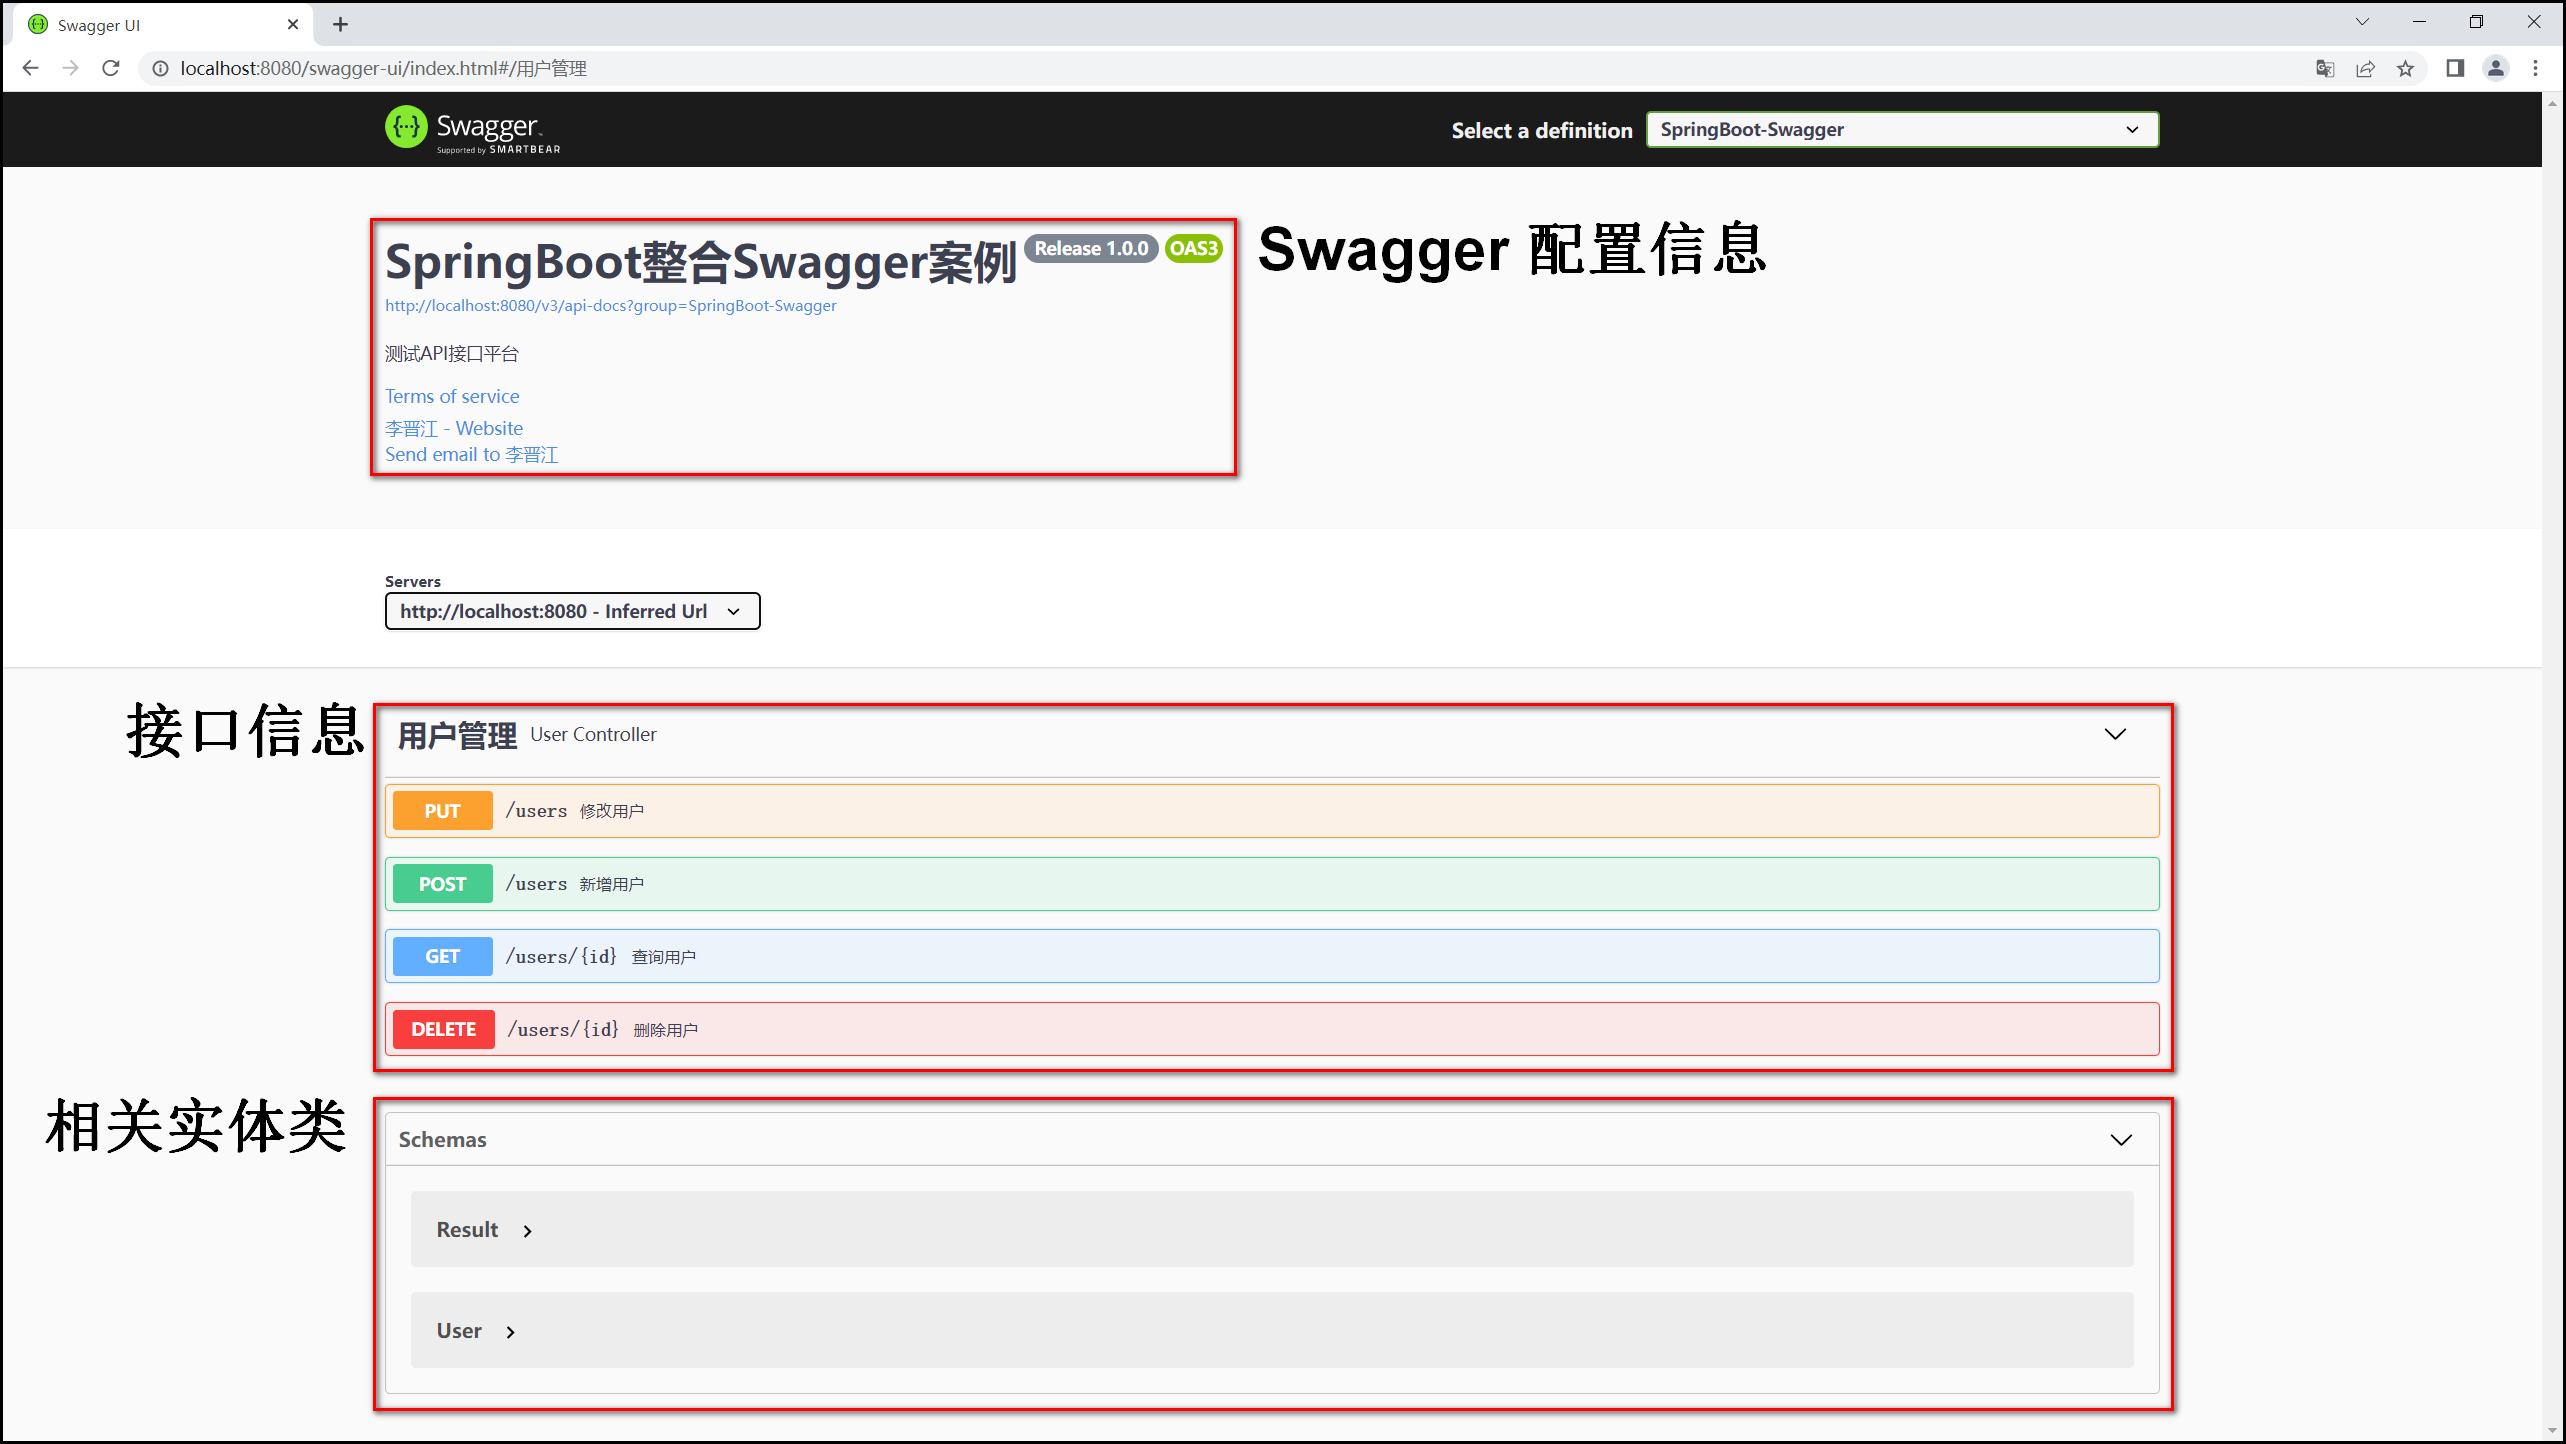
这里还可以做一些简单的测试,不过操作及显示不太友好,最好引入其他显示 UI
7.引入knife4j
因为 Swagger 的默认 UI 显示的不太友好,根据市场上大家的选择,我最终选择 knife4j 作为 Swagger 的显示 UI
这里对 pom.xml 进行调整,直接将引入的 Swagger 依赖改为引入 knife4j 即可
<!-- Knife4j 版本 -->
<knife4j.version>3.0.3</knife4j.version>

<!-- Knife4j 接口文档 -->
<dependency>
    <groupId>com.github.xiaoymin</groupId>
    <artifactId>knife4j-spring-boot-starter</artifactId>
    <version>${knife4j.version}</version>
</dependency>
在 application-test.yml 上添加 knife4j 开启增强功能
# knife4j配置
knife4j:
  # 开启增强配置
  enable: true

使用一段时间之后,我发现在这个系统上查看文档和测试接口都比较方便的,当然如果是使用 postman 测试的话,可以直接将上面的 Swagger 接口的 url 链接导入到 postman,一样可以进行测试
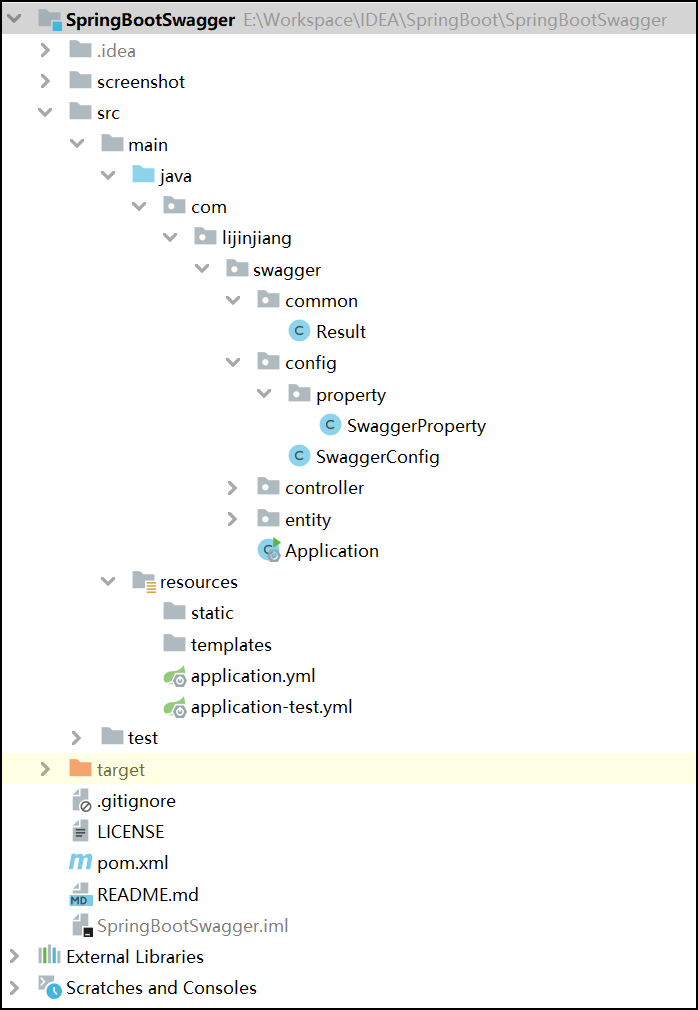
8.项目结构
这里附上项目最终结构树,供大家参考