一、介绍
这篇文章记录一下使用macbook pro m1芯片(arm64架构)部署k8s 1.27.3版本的过程和遇到的问题。
如果大家遇到同样的问题的话可以给大家参考一下。

环境准备:
MacBook Pro M1
VM Ware Fusion
三台arm64架构 2核 4G 50G 虚拟机
k8s-master 192.168.153.101
k8s-node01 192.168.153.101
k8s-node02 192.168.153.101
k8s官网: https://kubernetes.io/docs/setup/production-environment/tools/kubeadm/install-kubeadm/
二、安装前设置
2.1 设置hostname
分别设置三台虚拟机的hostname
hostnamectl set-hostname k8s-master
hostnamectl set-hostname k8s-node01
hostnamectl set-hostname k8s-mast02
为三台节点配置域名解析
cat  >> /etc/hosts << EOF
192.168.153.101 k8s-master
192.168.153.102 k8s-node01
192.168.153.103 k8s-mast02
EOF
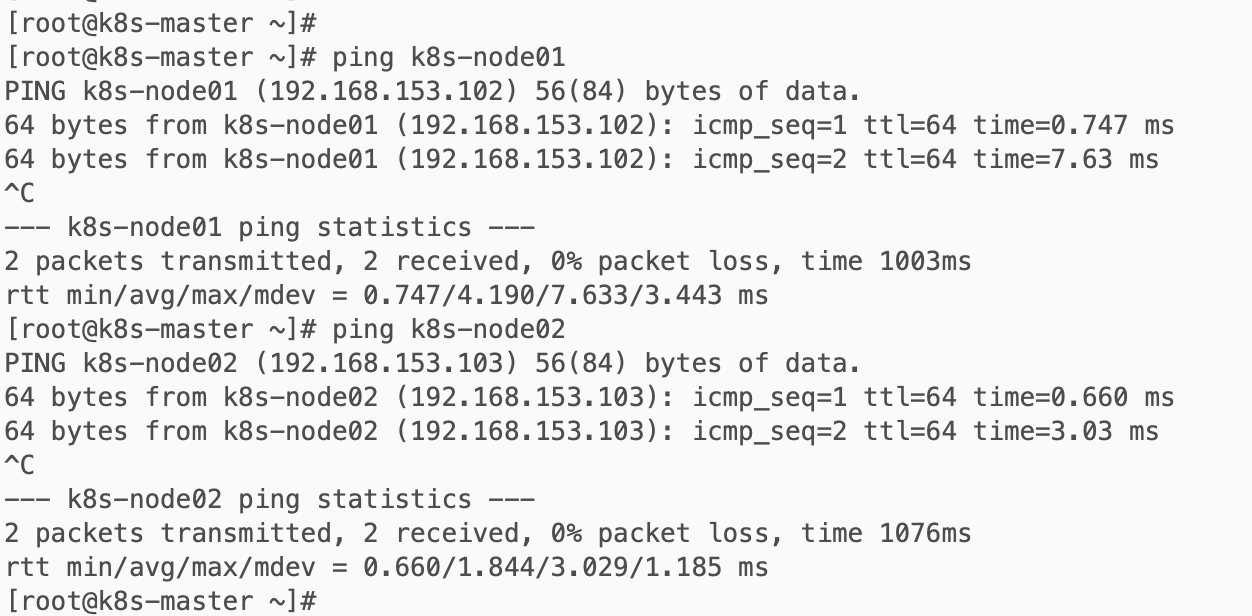
可以在节点互相ping一下,看是否能ping通。
2.2 关闭防火墙
关闭三个节点的防火墙
# 关闭防火墙
systemctl stop firewalld
# 关闭开机自启
systemctl disable firewalld
# 查看防火墙状态
firewall-cmd --state
2.3 关闭selinux
#将 SELinux 设置为 permissive 模式(相当于将其禁用)
sudo setenforce 0
sudo sed -i 's/^SELINUX=enforcing$/SELINUX=permissive/' /etc/selinux/config
2.4 关闭swap
禁用swap交换分区
swapoff -a  # 临时关闭,主机重启后k8s无法自动重启,需要重新关闭swap

sed -i -r '/swap/ s/^/#/' /etc/fstab  # 永久关闭
2.5 允许 iptables 检查桥接流量
cat <<EOT >> /etc/modules-load.d/k8s.conf
overlay
br_netfilter
nf_nat
xt_REDIRECT
xt_owner
iptable_nat
iptable_mangle
iptable_filter
EOT

cat <<EOF | sudo tee /etc/sysctl.d/k8s.conf
net.bridge.bridge-nf-call-ip6tables = 1
net.bridge.bridge-nf-call-iptables = 1
EOF
modprobe br_netfilter ; modprobe nf_nat ; modprobe xt_REDIRECT ; modprobe xt_owner; modprobe iptable_nat; modprobe iptable_mangle; modprobe iptable_filter
2.6 安装Docker
wget https://mirrors.aliyun.com/docker-ce/linux/centos/docker-ce.repo -O /etc/yum.repos.d/docker-ce.repo

yum -y install docker-ce

systemctl enable docker && systemctl start docker
配置镜像加速
sudo mkdir -p /etc/docker

sudo tee /etc/docker/daemon.json <<-'EOF'
{


  "registry-mirrors": ["https://iedolof4.mirror.aliyuncs.com"],
  "exec-opts": ["native.cgroupdriver=systemd"]
}
EOF

sudo systemctl daemon-reload

sudo systemctl restart docker
使用docker info 或者 docker version 命令进行验证。
三、安装container runtime
k8s官方文档:https://kubernetes.io/zh-cn/docs/setup/production-environment/container-runtimes/
containerd文档:https://github.com/containerd/containerd/blob/main/docs/getting-started.md
为了在 Pod 中运行容器,Kubernetes 使用container runtime,默认情况下,Kubernetes 使用 Container Runtime Interface(CRI) 来与你所选择的容器运行时交互。
如果你不指定container runtime,kubeadm 会自动尝试通过扫描已知的端点列表来检测已安装的container runtime。如果检测到没有container runtime,kubeadm 将抛出一个错误。
v1.24 之前的 Kubernetes 版本直接集成了 Docker Engine 的一个组件,名为 dockershim。但是自 1.24 版起,Dockershim 已从 Kubernetes 项目中移除。所以我们需要手动部署一个Container Runtime
Kubernetes 支持许多container runtime,例如 containerd、 CRI-O
注意:containerd和cri-docker只需要安装一个即可!如果检测到有多个container runtime,kubeadm 将抛出一个错误并要求你指定一个想要使用的container runtime。
(需要在所有节点执行。)
3.1 安装containerd
containerd文档:https://github.com/containerd/containerd/blob/main/docs/getting-started.md
下载containerd:https://github.com/containerd/containerd/releases
注意下载arm64版本!
tar Cxzvf /usr/local containerd-1.7.2-linux-arm64.tar.gz
bin/
bin/containerd-shim-runc-v2
bin/containerd-shim
bin/ctr
bin/containerd-shim-runc-v1
bin/containerd
bin/containerd-stress
然后下载containerd.service到/usr/local/lib/systemd/system/containerd.service,将containerd注册为系统服务:https://raw.githubusercontent.com/containerd/containerd/main/containerd.service
然后执行以下命令,启动containerd服务:
systemctl daemon-reload
systemctl enable --now containerd
还需要安装runc,下载https://github.com/opencontainers/runc/releases,注意同样是下载arm64版本。
install -m 755 runc.arm64 /usr/local/sbin/runc
最后需要安装CNI plugins:https://github.com/containernetworking/plugins/releases,选择arm64版本。
$ mkdir -p /opt/cni/bin
$ tar Cxzvf /opt/cni/bin cni-plugins-linux-arm-v1.3.0.tgz
./
./macvlan
./static
./vlan
./portmap
./host-local
./vrf
./bridge
./tuning
./firewall
./host-device
./sbr
./loopback
./dhcp
./ptp
./ipvlan
./bandwidth
生成containerd的默认配置/etc/containerd/config.toml
containerd config default > /etc/containerd/config.toml
在默认的配置中,使用的镜像地址是registry.k8s.io/pause:3.2,下载不下来,需要替换为aliyun的镜像源
[plugins."io.containerd.grpc.v1.cri"]
  sandbox_image = "registry.k8s.io/pause:3.2"
[plugins."io.containerd.grpc.v1.cri"]
  sandbox_image = "registry.aliyuncs.com/google_containers/pause:3.8"
更新了配置文件后,需要执行systemctl restart containerd命令重启containerd。
3.2 安装cri-docker
cri-docker文档:https://github.com/Mirantis/cri-dockerd
下载arm64版本:https://github.com/Mirantis/cri-dockerd/releases
tar -zxvf cri-dockerd-0.3.4.arm64.tgz
cd cri-dockerd
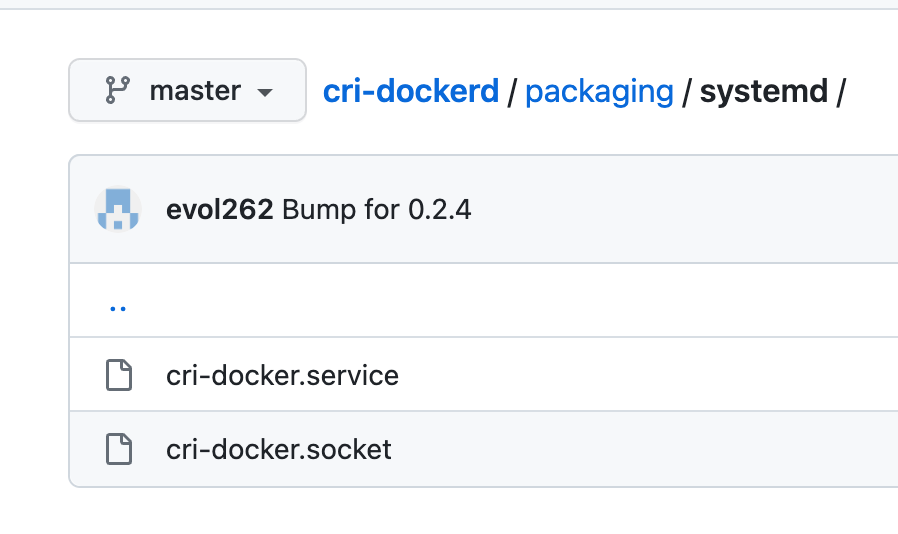
vim cri-docker.service
vim cri-docker.socket
创建cri-docker.service 和 cri-docker.socket文件,将 https://github.com/Mirantis/cri-dockerd/tree/master/packaging/systemd 的两个文件下载或复制粘贴内容。
然后执行以下命令:
sed -i -e 's,/usr/bin/cri-dockerd,/usr/local/bin/cri-dockerd,' /etc/systemd/system/cri-docker.service
systemctl daemon-reload
systemctl enable cri-docker.service
systemctl enable --now cri-docker.socket
四、安装k8s集群
4.1 配置aliyun的kubernetes yum源
添加阿里的yum软件源,注意baseurl为aarch64版本。
cat > /etc/yum.repos.d/kubernetes.repo << EOF
[kubernetes]
name=Kubernetes
baseurl=https://mirrors.aliyun.com/kubernetes/yum/repos/kubernetes-el7-aarch64
enabled=1
gpgcheck=0
repo_gpgcheck=0
gpgkey=https://mirrors.aliyun.com/kubernetes/yum/doc/yum-key.gpg https://mirrors.aliyun.com/kubernetes/yum/doc/rpm-package-key.gpg
EOF
(需要在所有节点执行。)
4.2 下载 kubelet kubeadm kubectl
sudo yum install -y kubelet kubeadm kubectl --disableexcludes=kubernetes

sudo systemctl enable --now kubelet
(需要在所有节点执行。)
4.3 初始化集群 kubeadm init
(在k8s-master节点执行)
生成初始化默认配置文件:
kubeadm config print init-defaults > kubeadm.yaml
修改kubeadm.yaml:
localAPIEndpoint:
  # 修改为k8s-master节点的IP地址
  advertiseAddress: 192.168.153.101
  bindPort: 6443
nodeRegistration:
  # 设置为Container Runtime 的端点
  criSocket: unix:///var/run/containerd/containerd.sock
  imagePullPolicy: IfNotPresent
  # 修改为k8s-master节点的hostname
  name: k8s-master
  taints: null
...
# 修改为aliyun的镜像地址
imageRepository: registry.cn-hangzhou.aliyuncs.com/google_containers
...
containerd unix:///var/run/containerd/containerd.sock
CRI-O unix:///var/run/crio/crio.sock
Docker Engine(使用 cri-dockerd) unix:///var/run/cri-dockerd.sock
然后执行集群初始化命令:
kubeadm init --config=kubeadm.yaml --ignore-preflight-errors=SystemVerification
[root@k8s-master ~]# kubeadm init --config=kubeadm.yaml --ignore-preflight-errors=SystemVerification
[init] Using Kubernetes version: v1.27.3
[preflight] Running pre-flight checks
        [WARNING FileExisting-tc]: tc not found in system path
        [WARNING SystemVerification]: missing optional cgroups: hugetlb
[preflight] Pulling images required for setting up a Kubernetes cluster
[preflight] This might take a minute or two, depending on the speed of your internet connection
[preflight] You can also perform this action in beforehand using 'kubeadm config images pull'
W0705 07:17:49.766204   11729 checks.go:835] detected that the sandbox image "registry.aliyuncs.com/google_containers/pause:3.8" of the container runtime is inconsistent with that used by kubeadm. It is recommended that using "registry.cn-hangzhou.aliyuncs.com/google_containers/pause:3.9" as the CRI sandbox image.
[certs] Using certificateDir folder "/etc/kubernetes/pki"
[certs] Generating "ca" certificate and key
[certs] Generating "apiserver" certificate and key
[certs] apiserver serving cert is signed for DNS names [k8s-master kubernetes kubernetes.default kubernetes.default.svc kubernetes.default.svc.cluster.local] and IPs [10.96.0.1 192.168.153.101]
[certs] Generating "apiserver-kubelet-client" certificate and key
[certs] Generating "front-proxy-ca" certificate and key
[certs] Generating "front-proxy-client" certificate and key
[certs] Generating "etcd/ca" certificate and key
[certs] Generating "etcd/server" certificate and key
[certs] etcd/server serving cert is signed for DNS names [k8s-master localhost] and IPs [192.168.153.101 127.0.0.1 ::1]
[certs] Generating "etcd/peer" certificate and key
[certs] etcd/peer serving cert is signed for DNS names [k8s-master localhost] and IPs [192.168.153.101 127.0.0.1 ::1]
[certs] Generating "etcd/healthcheck-client" certificate and key
[certs] Generating "apiserver-etcd-client" certificate and key
[certs] Generating "sa" key and public key
[kubeconfig] Using kubeconfig folder "/etc/kubernetes"
[kubeconfig] Writing "admin.conf" kubeconfig file
[kubeconfig] Writing "kubelet.conf" kubeconfig file
[kubeconfig] Writing "controller-manager.conf" kubeconfig file
[kubeconfig] Writing "scheduler.conf" kubeconfig file
[kubelet-start] Writing kubelet environment file with flags to file "/var/lib/kubelet/kubeadm-flags.env"
[kubelet-start] Writing kubelet configuration to file "/var/lib/kubelet/config.yaml"
[kubelet-start] Starting the kubelet
[control-plane] Using manifest folder "/etc/kubernetes/manifests"
[control-plane] Creating static Pod manifest for "kube-apiserver"
[control-plane] Creating static Pod manifest for "kube-controller-manager"
[control-plane] Creating static Pod manifest for "kube-scheduler"
[etcd] Creating static Pod manifest for local etcd in "/etc/kubernetes/manifests"
[wait-control-plane] Waiting for the kubelet to boot up the control plane as static Pods from directory "/etc/kubernetes/manifests". This can take up to 4m0s
[apiclient] All control plane components are healthy after 6.509025 seconds
[upload-config] Storing the configuration used in ConfigMap "kubeadm-config" in the "kube-system" Namespace
[kubelet] Creating a ConfigMap "kubelet-config" in namespace kube-system with the configuration for the kubelets in the cluster
[upload-certs] Skipping phase. Please see --upload-certs
[mark-control-plane] Marking the node k8s-master as control-plane by adding the labels: [node-role.kubernetes.io/control-plane node.kubernetes.io/exclude-from-external-load-balancers]
[mark-control-plane] Marking the node k8s-master as control-plane by adding the taints [node-role.kubernetes.io/control-plane:NoSchedule]
[bootstrap-token] Using token: abcdef.0123456789abcdef
[bootstrap-token] Configuring bootstrap tokens, cluster-info ConfigMap, RBAC Roles
[bootstrap-token] Configured RBAC rules to allow Node Bootstrap tokens to get nodes
[bootstrap-token] Configured RBAC rules to allow Node Bootstrap tokens to post CSRs in order for nodes to get long term certificate credentials
[bootstrap-token] Configured RBAC rules to allow the csrapprover controller automatically approve CSRs from a Node Bootstrap Token
[bootstrap-token] Configured RBAC rules to allow certificate rotation for all node client certificates in the cluster
[bootstrap-token] Creating the "cluster-info" ConfigMap in the "kube-public" namespace
[kubelet-finalize] Updating "/etc/kubernetes/kubelet.conf" to point to a rotatable kubelet client certificate and key
[addons] Applied essential addon: CoreDNS
[addons] Applied essential addon: kube-proxy

Your Kubernetes control-plane has initialized successfully!

To start using your cluster, you need to run the following as a regular user:

  mkdir -p $HOME/.kube
  sudo cp -i /etc/kubernetes/admin.conf $HOME/.kube/config
  sudo chown $(id -u):$(id -g) $HOME/.kube/config

Alternatively, if you are the root user, you can run:

  export KUBECONFIG=/etc/kubernetes/admin.conf

You should now deploy a pod network to the cluster.
Run "kubectl apply -f [podnetwork].yaml" with one of the options listed at:
  https://kubernetes.io/docs/concepts/cluster-administration/addons/

Then you can join any number of worker nodes by running the following on each as root:

kubeadm join 192.168.153.101:6443 --token abcdef.0123456789abcdef \
        --discovery-token-ca-cert-hash sha256:d83b1a5a7de6cc8fb54b99a80c9dbbc040d057541f1b2e79f27520f7c1cddfed
[root@k8s-master ~]#
[root@k8s-master ~]#
[root@k8s-master ~]#
[root@k8s-master ~]# mkdir -p $HOME/.kube
[root@k8s-master ~]# sudo cp -i /etc/kubernetes/admin.conf $HOME/.kube/config
[root@k8s-master ~]# sudo chown $(id -u):$(id -g) $HOME/.kube/config
[root@k8s-master ~]# export KUBECONFIG=/etc/kubernetes/admin.conf
[root@k8s-master ~]#
4.4 加入集群 kubeadm join
(在k8s-node01和k8s-node02节点执行)
 kubeadm join 192.168.153.101:6443 --token abcdef.0123456789abcdef \
         --discovery-token-ca-cert-hash sha256:d83b1a5a7de6cc8fb54b99a80c9dbbc040d057541f1b2e79f27520f7c1cddfed \
         --cri-socket=unix:///var/run/containerd/containerd.sock
注意:如果你部署一个Container Runtime了,就不需要指定--cri-socket参数。
[root@k8s-node01 ~]# kubeadm join 192.168.153.101:6443 --token abcdef.0123456789abcdef \
>         --discovery-token-ca-cert-hash sha256:d83b1a5a7de6cc8fb54b99a80c9dbbc040d057541f1b2e79f27520f7c1cddfed
Found multiple CRI endpoints on the host. Please define which one do you wish to use by setting the 'criSocket' field in the kubeadm configuration file: unix:///var/run/containerd/containerd.sock, unix:///var/run/cri-dockerd.sock
To see the stack trace of this error execute with --v=5 or higher

# 由于我部署了两个CRI,所以需要指定
[root@k8s-node01 ~]# kubeadm join 192.168.153.101:6443 --token abcdef.0123456789abcdef \
>         --discovery-token-ca-cert-hash sha256:d83b1a5a7de6cc8fb54b99a80c9dbbc040d057541f1b2e79f27520f7c1cddfed \
>         --cri-socket=unix:///var/run/containerd/containerd.sock
[preflight] Running pre-flight checks
        [WARNING FileExisting-tc]: tc not found in system path
        [WARNING SystemVerification]: missing optional cgroups: hugetlb
[preflight] Reading configuration from the cluster...
[preflight] FYI: You can look at this config file with 'kubectl -n kube-system get cm kubeadm-config -o yaml'
[kubelet-start] Writing kubelet configuration to file "/var/lib/kubelet/config.yaml"
[kubelet-start] Writing kubelet environment file with flags to file "/var/lib/kubelet/kubeadm-flags.env"
[kubelet-start] Starting the kubelet
[kubelet-start] Waiting for the kubelet to perform the TLS Bootstrap...

This node has joined the cluster:
* Certificate signing request was sent to apiserver and a response was received.
* The Kubelet was informed of the new secure connection details.

Run 'kubectl get nodes' on the control-plane to see this node join the cluster.

[root@k8s-node01 ~]#
两个node节点都已经加入到主节点了,但是此时集群状态还没有ready,需要安装网络组建calico。
[root@k8s-master ~]# kubectl get node
NAME         STATUS     ROLES           AGE     VERSION
k8s-master   NotReady   control-plane   41m     v1.27.3
k8s-node01   NotReady   <none>          2m27s   v1.27.3
k8s-node02   NotReady   <none>          44s     v1.27.3
4.5 安装网络节点calico
两个node节点加入master节点后,此时集群还未进入Ready状态,需要部署calico网络组件(仅在master节点执行以下命令)
wget https://raw.githubusercontent.com/projectcalico/calico/v3.25.0/manifests/calico.yaml
kubectl apply -f calico.yaml
等待calico pod running,我们的集群才成为Ready状态。
[root@k8s-master ~]#  wget https://raw.githubusercontent.com/projectcalico/calico/v3.25.0/manifests/calico.yaml
[root@k8s-master ~]# kubectl get node
NAME         STATUS     ROLES           AGE     VERSION
k8s-master   NotReady   control-plane   41m     v1.27.3
k8s-node01   NotReady   <none>          2m27s   v1.27.3
k8s-node02   NotReady   <none>          44s     v1.27.3
[root@k8s-master ~]# kubectl apply -f calico.yaml
poddisruptionbudget.policy/calico-kube-controllers created
serviceaccount/calico-kube-controllers created
serviceaccount/calico-node created
configmap/calico-config created
customresourcedefinition.apiextensions.k8s.io/bgpconfigurations.crd.projectcalico.org created
customresourcedefinition.apiextensions.k8s.io/bgppeers.crd.projectcalico.org created
customresourcedefinition.apiextensions.k8s.io/blockaffinities.crd.projectcalico.org created
customresourcedefinition.apiextensions.k8s.io/caliconodestatuses.crd.projectcalico.org created
customresourcedefinition.apiextensions.k8s.io/clusterinformations.crd.projectcalico.org created
customresourcedefinition.apiextensions.k8s.io/felixconfigurations.crd.projectcalico.org created
customresourcedefinition.apiextensions.k8s.io/globalnetworkpolicies.crd.projectcalico.org created
customresourcedefinition.apiextensions.k8s.io/globalnetworksets.crd.projectcalico.org created
customresourcedefinition.apiextensions.k8s.io/hostendpoints.crd.projectcalico.org created
customresourcedefinition.apiextensions.k8s.io/ipamblocks.crd.projectcalico.org created
customresourcedefinition.apiextensions.k8s.io/ipamconfigs.crd.projectcalico.org created
customresourcedefinition.apiextensions.k8s.io/ipamhandles.crd.projectcalico.org created
customresourcedefinition.apiextensions.k8s.io/ippools.crd.projectcalico.org created
customresourcedefinition.apiextensions.k8s.io/ipreservations.crd.projectcalico.org created
customresourcedefinition.apiextensions.k8s.io/kubecontrollersconfigurations.crd.projectcalico.org created
customresourcedefinition.apiextensions.k8s.io/networkpolicies.crd.projectcalico.org created
customresourcedefinition.apiextensions.k8s.io/networksets.crd.projectcalico.org created
clusterrole.rbac.authorization.k8s.io/calico-kube-controllers created
clusterrole.rbac.authorization.k8s.io/calico-node created
clusterrolebinding.rbac.authorization.k8s.io/calico-kube-controllers created
clusterrolebinding.rbac.authorization.k8s.io/calico-node created
daemonset.apps/calico-node created
deployment.apps/calico-kube-controllers created
[root@k8s-master ~]# kubectl get nodes -o wide
NAME         STATUS   ROLES           AGE     VERSION   INTERNAL-IP       EXTERNAL-IP   OS-IMAGE         KERNEL-VERSION            CONTAINER-RUNTIME
k8s-master   Ready    control-plane   43m     v1.27.3   192.168.153.101   <none>        CentOS Linux 8   5.11.12-300.el8.aarch64   containerd://1.7.2
k8s-node01   Ready    <none>          4m39s   v1.27.3   192.168.153.102   <none>        CentOS Linux 8   5.11.12-300.el8.aarch64   containerd://1.7.2
k8s-node02   Ready    <none>          2m56s   v1.27.3   192.168.153.103   <none>        CentOS Linux 8   5.11.12-300.el8.aarch64   containerd://1.7.2
[root@k8s-master ~]#
问题总结
问题1 由于部署了两个container runtime,命令执行错误
我部署了containerd和cri-docker两个 Container Runtime,所以在执行命令的时候会报错,必须指定criSocket。
[root@k8s-master ~]# kubeadm reset
[reset] Reading configuration from the cluster...
[reset] FYI: You can look at this config file with 'kubectl -n kube-system get cm kubeadm-config -o yaml'
W0705 01:14:49.210110    8176 reset.go:106] [reset] Unable to fetch the kubeadm-config ConfigMap from cluster: failed to get config map: Get "https://192.168.153.101:6443/api/v1/namespaces/kube-system/configmaps/kubeadm-config?timeout=10s": dial tcp 192.168.153.101:6443: connect: connection refused
Found multiple CRI endpoints on the host. Please define which one do you wish to use by setting the 'criSocket' field in the kubeadm configuration file: unix:///var/run/containerd/containerd.sock, unix:///var/run/cri-dockerd.sock
To see the stack trace of this error execute with --v=5 or higher
kubeadm reset --cri-socket=unix:///var/run/containerd/containerd.sock
 kubeadm join 192.168.153.101:6443 --token abcdef.0123456789abcdef \
         --discovery-token-ca-cert-hash sha256:d83b1a5a7de6cc8fb54b99a80c9dbbc040d057541f1b2e79f27520f7c1cddfed \
         --cri-socket=unix:///var/run/containerd/containerd.sock
kubeadm config images pull --cri-socket=unix:///var/run/cri-dockerd.sock
kubeadm config images pull --config=kubeadm.yaml
问题2 kubeadm init集群初始化失败
我执行kubeadm init命令进行集群初始化,但是却出现了报错:
[root@k8s-master ~]# kubeadm init --config=kubeadm.yaml --ignore-preflight-errors=SystemVerification
[init] Using Kubernetes version: v1.27.3
[preflight] Running pre-flight checks
        [WARNING FileExisting-tc]: tc not found in system path
        [WARNING SystemVerification]: missing optional cgroups: hugetlb
[preflight] Pulling images required for setting up a Kubernetes cluster
[preflight] This might take a minute or two, depending on the speed of your internet connection
[preflight] You can also perform this action in beforehand using 'kubeadm config images pull'
W0704 23:17:25.073160    5627 checks.go:835] detected that the sandbox image "registry.k8s.io/pause:3.8" of the container runtime is inconsistent with that used by kubeadm. It is recommended that using "registry.cn-hangzhou.aliyuncs.com/google_containers/pause:3.9" as the CRI sandbox image.
[certs] Using certificateDir folder "/etc/kubernetes/pki"
[certs] Generating "ca" certificate and key
[certs] Generating "apiserver" certificate and key
[certs] apiserver serving cert is signed for DNS names [k8s-master kubernetes kubernetes.default kubernetes.default.svc kubernetes.default.svc.cluster.local] and IPs [10.96.0.1 192.168.153.101]
[certs] Generating "apiserver-kubelet-client" certificate and key
[certs] Generating "front-proxy-ca" certificate and key
[certs] Generating "front-proxy-client" certificate and key
[certs] Generating "etcd/ca" certificate and key
[certs] Generating "etcd/server" certificate and key
[certs] etcd/server serving cert is signed for DNS names [k8s-master localhost] and IPs [192.168.153.101 127.0.0.1 ::1]
[certs] Generating "etcd/peer" certificate and key
[certs] etcd/peer serving cert is signed for DNS names [k8s-master localhost] and IPs [192.168.153.101 127.0.0.1 ::1]
[certs] Generating "etcd/healthcheck-client" certificate and key
[certs] Generating "apiserver-etcd-client" certificate and key
[certs] Generating "sa" key and public key
[kubeconfig] Using kubeconfig folder "/etc/kubernetes"
[kubeconfig] Writing "admin.conf" kubeconfig file
[kubeconfig] Writing "kubelet.conf" kubeconfig file
[kubeconfig] Writing "controller-manager.conf" kubeconfig file
[kubeconfig] Writing "scheduler.conf" kubeconfig file
[kubelet-start] Writing kubelet environment file with flags to file "/var/lib/kubelet/kubeadm-flags.env"
[kubelet-start] Writing kubelet configuration to file "/var/lib/kubelet/config.yaml"
[kubelet-start] Starting the kubelet
[control-plane] Using manifest folder "/etc/kubernetes/manifests"
[control-plane] Creating static Pod manifest for "kube-apiserver"
[control-plane] Creating static Pod manifest for "kube-controller-manager"
[control-plane] Creating static Pod manifest for "kube-scheduler"
[etcd] Creating static Pod manifest for local etcd in "/etc/kubernetes/manifests"
[wait-control-plane] Waiting for the kubelet to boot up the control plane as static Pods from directory "/etc/kubernetes/manifests". This can take up to 4m0s
[kubelet-check] Initial timeout of 40s passed.

Unfortunately, an error has occurred:
        timed out waiting for the condition

This error is likely caused by:
        - The kubelet is not running
        - The kubelet is unhealthy due to a misconfiguration of the node in some way (required cgroups disabled)

If you are on a systemd-powered system, you can try to troubleshoot the error with the following commands:
        - 'systemctl status kubelet'
        - 'journalctl -xeu kubelet'

Additionally, a control plane component may have crashed or exited when started by the container runtime.
To troubleshoot, list all containers using your preferred container runtimes CLI.
Here is one example how you may list all running Kubernetes containers by using crictl:
        - 'crictl --runtime-endpoint unix:///var/run/containerd/containerd.sock ps -a | grep kube | grep -v pause'
        Once you have found the failing container, you can inspect its logs with:
        - 'crictl --runtime-endpoint unix:///var/run/containerd/containerd.sock logs CONTAINERID'
error execution phase wait-control-plane: couldn't initialize a Kubernetes cluster
To see the stack trace of this error execute with --v=5 or higher
几经周折,我想到可能是由于镜像下载不下来导致的,
最后我输入了journalctl -xeu containerd > 1.txt将containerd的日志输出到文件查看,发现原因是registry.k8s.io/pause:3.8这个镜像下载不下来。

解决方法:
修改containerd的配置文件的镜像地址解决。
vim /etc/containerd/config.toml
#将镜像修改为阿里源
sandbox_image = "registry.aliyuncs.com/google_containers/pause:3.8"
# 更新后重启containerd服务
systemctl restart containerd
问题3 kubeadm reset 集群重置
当kubeadm init集群初始化失败后,需要使用 kubeadm reset 命令将集群重置。
由于我部署了两个container runtime,所以需要指定cri-socket。
[root@k8s-master ~]# kubeadm reset
[reset] Reading configuration from the cluster...
[reset] FYI: You can look at this config file with 'kubectl -n kube-system get cm kubeadm-config -o yaml'
W0705 01:14:49.210110    8176 reset.go:106] [reset] Unable to fetch the kubeadm-config ConfigMap from cluster: failed to get config map: Get "https://192.168.153.101:6443/api/v1/namespaces/kube-system/configmaps/kubeadm-config?timeout=10s": dial tcp 192.168.153.101:6443: connect: connection refused
Found multiple CRI endpoints on the host. Please define which one do you wish to use by setting the 'criSocket' field in the kubeadm configuration file: unix:///var/run/containerd/containerd.sock, unix:///var/run/cri-dockerd.sock
To see the stack trace of this error execute with --v=5 or higher

[root@k8s-master ~]# kubeadm reset --cri-socket=unix:///var/run/containerd/containerd.sock
[reset] Reading configuration from the cluster...
[reset] FYI: You can look at this config file with 'kubectl -n kube-system get cm kubeadm-config -o yaml'
W0705 01:17:56.826223    8210 reset.go:106] [reset] Unable to fetch the kubeadm-config ConfigMap from cluster: failed to get config map: Get "https://192.168.153.101:6443/api/v1/namespaces/kube-system/configmaps/kubeadm-config?timeout=10s": dial tcp 192.168.153.101:6443: connect: connection refused
W0705 01:17:56.826877    8210 preflight.go:56] [reset] WARNING: Changes made to this host by 'kubeadm init' or 'kubeadm join' will be reverted.
[reset] Are you sure you want to proceed? [y/N]: y
[preflight] Running pre-flight checks
W0705 01:18:03.549676    8210 removeetcdmember.go:106] [reset] No kubeadm config, using etcd pod spec to get data directory
[reset] Stopping the kubelet service
[reset] Unmounting mounted directories in "/var/lib/kubelet"
[reset] Deleting contents of directories: [/etc/kubernetes/manifests /var/lib/kubelet /etc/kubernetes/pki]
[reset] Deleting files: [/etc/kubernetes/admin.conf /etc/kubernetes/kubelet.conf /etc/kubernetes/bootstrap-kubelet.conf /etc/kubernetes/controller-manager.conf /etc/kubernetes/scheduler.conf]

The reset process does not clean CNI configuration. To do so, you must remove /etc/cni/net.d

The reset process does not reset or clean up iptables rules or IPVS tables.
If you wish to reset iptables, you must do so manually by using the "iptables" command.

If your cluster was setup to utilize IPVS, run ipvsadm --clear (or similar)
to reset your system's IPVS tables.

The reset process does not clean your kubeconfig files and you must remove them manually.
Please, check the contents of the $HOME/.kube/config file.
[root@k8s-master ~]#
问题4 域名解析
例如raw.githubusercontent.com域名虚拟机解析不了。可以使用在线域名解析工具解析域名,然后配置/etc/hosts文件。
[root@k8s-master ~]#  wget https://raw.githubusercontent.com/projectcalico/calico/v3.25.0/manifests/calico.yaml
--2023-07-05 07:42:46--  https://raw.githubusercontent.com/projectcalico/calico/v3.25.0/manifests/calico.yaml
正在解析主机 raw.githubusercontent.com (raw.githubusercontent.com)... 185.199.108.133, 185.199.111.133
正在连接 raw.githubusercontent.com (raw.githubusercontent.com)|185.199.108.133|:443... 已连接。
已发出 HTTP 请求,正在等待回应... 读取文件头错误 (成功。)。
重试中。

--2023-07-05 07:43:34--  (尝试次数: 2)  https://raw.githubusercontent.com/projectcalico/calico/v3.25.0/manifests/calico.yaml
正在连接 raw.githubusercontent.com (raw.githubusercontent.com)|185.199.108.133|:443... ^C
[root@k8s-master ~]#
cat  >> /etc/hosts << EOF
185.199.108.133 raw.githubusercontent.com
185.199.109.133 raw.githubusercontent.com
185.199.110.133 raw.githubusercontent.com
185.199.111.133 raw.githubusercontent.com
EOF
问题5 crictl
crictl info 是一个命令行工具,用于检查和显示与 CRI(Container Runtime Interface)兼容的容器运行时的信息。CRI 是 Kubernetes 使用的容器运行时接口,它定义了容器运行时与 Kubernetes API 服务器之间的通信协议。
crictl 是一个用于与 CRI 兼容运行时进行交互的命令行客户端工具。通过运行 crictl info 命令,您可以获取有关容器运行时的详细信息,包括版本号、运行时类型、Socket 路径、底层实现等。
使用 crictl info 命令可以验证容器运行时是否正确配置并运行,以及与 Kubernetes 集群的连接是否正常。它对于故障排除和调试容器运行时问题非常有用。
[root@k8s-master ~]# crictl info
WARN[0000] runtime connect using default endpoints: [unix:///var/run/dockershim.sock unix:///run/containerd/containerd.sock unix:///run/crio/crio.sock unix:///var/run/cri-dockerd.sock]. As the default settings are now deprecated, you should set the endpoint instead.
E0705 01:56:46.288578    9440 remote_runtime.go:616] "Status from runtime service failed" err="rpc error: code = Unavailable desc = connection error: desc = \"transport: Error while dialing dial unix /var/run/dockershim.sock: connect: no such file or directory\""
FATA[0000] getting status of runtime: rpc error: code = Unavailable desc = connection error: desc = "transport: Error while dialing dial unix /var/run/dockershim.sock: connect: no such file or directory"

[root@k8s-master ~]# sudo cat /etc/crictl.yaml
cat: /etc/crictl.yaml: 没有那个文件或目录
[root@k8s-master ~]# vim /etc/crictl.yaml
手动创建crictl.yaml文件
runtime-endpoint: "unix:///run/containerd/containerd.sock"
timeout: 0
debug: false
[root@k8s-master ~]# crictl ps
CONTAINER           IMAGE               CREATED             STATE               NAME                ATTEMPT             POD ID              POD
[root@k8s-master ~]# crictl images
IMAGE                                                                         TAG                 IMAGE ID            SIZE
registry.aliyuncs.com/google_containers/coredns                               v1.10.1             97e04611ad434       14.6MB
registry.cn-hangzhou.aliyuncs.com/google_containers/coredns                   v1.10.1             97e04611ad434       14.6MB
registry.aliyuncs.com/google_containers/etcd                                  3.5.7-0             24bc64e911039       80.7MB
registry.cn-hangzhou.aliyuncs.com/google_containers/etcd                      3.5.7-0             24bc64e911039       80.7MB
registry.aliyuncs.com/google_containers/kube-apiserver                        v1.27.3             39dfb036b0986       30.4MB
registry.cn-hangzhou.aliyuncs.com/google_containers/kube-apiserver            v1.27.3             39dfb036b0986       30.4MB
registry.aliyuncs.com/google_containers/kube-controller-manager               v1.27.3             ab3683b584ae5       28.2MB
registry.cn-hangzhou.aliyuncs.com/google_containers/kube-controller-manager   v1.27.3             ab3683b584ae5       28.2MB
registry.aliyuncs.com/google_containers/kube-proxy                            v1.27.3             fb73e92641fd5       21.4MB
registry.cn-hangzhou.aliyuncs.com/google_containers/kube-proxy                v1.27.3             fb73e92641fd5       21.4MB
registry.aliyuncs.com/google_containers/kube-scheduler                        v1.27.3             bcb9e554eaab6       16.5MB
registry.cn-hangzhou.aliyuncs.com/google_containers/kube-scheduler            v1.27.3             bcb9e554eaab6       16.5MB
registry.aliyuncs.com/google_containers/pause                                 3.9                 829e9de338bd5       268kB
registry.cn-hangzhou.aliyuncs.com/google_containers/pause                     3.9                 829e9de338bd5       268kB
registry.cn-hangzhou.aliyuncs.com/google_containers/kube-apiserver            v1.27.0             a24244f37e14a       30.4MB
registry.cn-hangzhou.aliyuncs.com/google_containers/kube-controller-manager   v1.27.0             9b1932ec3139d       28.2MB
registry.cn-hangzhou.aliyuncs.com/google_containers/kube-proxy                v1.27.0             190160e5595fb       21.4MB
registry.cn-hangzhou.aliyuncs.com/google_containers/kube-scheduler            v1.27.0             09f714df5ecca       16.5MB
[root@k8s-master ~]#
问题排查思路
查看kubelet和containerd的日志,是否是因为镜像下载失败。
systemctl status kubelet
journalctl -xeu kubelet

systemctl status containerd
journalctl -xeu containerd
附录
cri-docker.service
[Unit]
Description=CRI Interface for Docker Application Container Engine
Documentation=https://docs.mirantis.com
After=network-online.target firewalld.service docker.service
Wants=network-online.target
Requires=cri-docker.socket

[Service]
Type=notify
ExecStart=/usr/bin/cri-dockerd --container-runtime-endpoint fd://
ExecReload=/bin/kill -s HUP $MAINPID
TimeoutSec=0
RestartSec=2
Restart=always

# Note that StartLimit* options were moved from "Service" to "Unit" in systemd 229.
# Both the old, and new location are accepted by systemd 229 and up, so using the old location
# to make them work for either version of systemd.
StartLimitBurst=3

# Note that StartLimitInterval was renamed to StartLimitIntervalSec in systemd 230.
# Both the old, and new name are accepted by systemd 230 and up, so using the old name to make
# this option work for either version of systemd.
StartLimitInterval=60s

# Having non-zero Limit*s causes performance problems due to accounting overhead
# in the kernel. We recommend using cgroups to do container-local accounting.
LimitNOFILE=infinity
LimitNPROC=infinity
LimitCORE=infinity

# Comment TasksMax if your systemd version does not support it.
# Only systemd 226 and above support this option.
TasksMax=infinity
Delegate=yes
KillMode=process

[Install]
WantedBy=multi-user.target
cri-docker.socket
[Unit]
Description=CRI Docker Socket for the API
PartOf=cri-docker.service

[Socket]
ListenStream=%t/cri-dockerd.sock
SocketMode=0660
SocketUser=root
SocketGroup=docker

[Install]
WantedBy=sockets.target