目录
数据流量分摊到多个服务器上执行,减轻每台服务器的压力,多台服务器共同完成工作任务,从而提高了数据的吞吐量。
一、什么是Nginx?
Nginx是一款轻量级的Web 服务器、反向代理服务器及电子邮件(IMAP/POP3)代理服务器
特点:反向代理 负载均衡 动静分离
1.1 什么是反向代理
代理服务可简单的分为正向代理和反向代理:
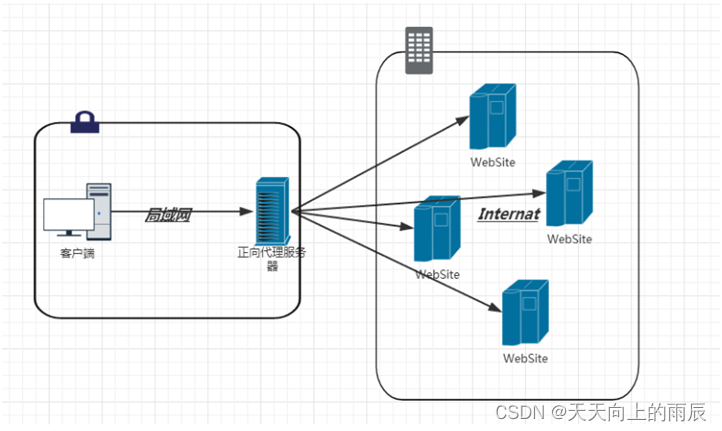
正向代理:
所谓的正向代理就是代理服务器替代访问方【用户】去访问目标服务器【服务器】
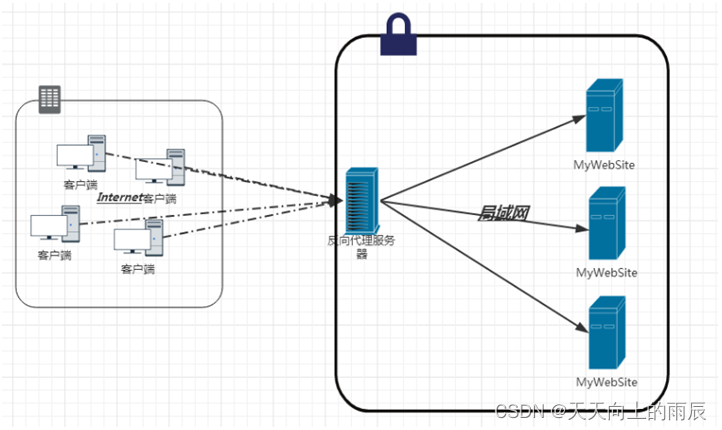
反向代理:
所谓的反向代理就是代替服务器接受用户的请求,从目标服务器中取得用户的需求资源,然后发送给用户
1.2 什么是负载均衡
数据流量分摊到多个服务器上执行,减轻每台服务器的压力,多台服务器共同完成工作任务,从而提高了数据的吞吐量。

1.3 什么是动静分离
动静分离:将静态的资源放到反向代理服务器,节省用户的访问时间
nginx将客户端的请求进行分类转发,静态资源的请求由静态资源服务器(web服务器)来处理,
动态资源的请求由tomcat(web应用服务器)来处理,这样可以提升整个服务的性能
-
web应用服务器,如:
-
tomcat
-
resin
-
jetty
-
-
web服务器,如:
-
Apache 服务器
-
Nginx
-
IIS
-
区分:web服务器不能解析jsp等页面,只能处理js、css、html等静态资源。
并发:web服务器的并发能力远高于web应用服务器。
1.4 安装Nginx
下载nginx的安装包
安装nginx的依赖库
yum -y install gcc pcre pcre-devel zlib zlib-devel openssl openssl-devel
解压安装包
tar -zxvf nginx-1.10.0.tar.gz
配置nginx安装包
cd nginx-1.10.0
//将nginx安装到/usr/java/nginx目录下
./configure --prefix=/usr/local/nginx
编译并安装
make && make install
1.5 Nginx的启动及关闭
启动
#在nginx目录下有一个sbin目录,sbin目录下有一个nginx可执行程序
./nginx
关闭
./nginx -s stop
动态加载配置文件(重新启动)
#可以不关闭nginx的情况下更新配置文件
./nginx -s reload
1.6 配置文件介绍(nginx.conf)
#user  nobody;
#工作进程
worker_processes  1;

events {
    #连接池连接数
    worker_connections  1024;
}
#请求方式
http {
    #媒体类型
    include       mime.types;
    #默认媒体类型 二进制
    default_type  application/octet-stream;
    #上传文件
    sendfile        on;
    #超时时间
    keepalive_timeout  65;

    #gzip  on;
    #服务器配置
	server {
        #监听端口
        listen       80;
        #监听域名
        server_name  localhost;
        #请求头信息
        proxy_set_header X-Forwarded-Host $host;
        proxy_set_header X-Forwarded-Server $host;
        proxy_set_header X-Forwarded-For $proxy_add_x_forwarded_for;
        #请求映射规则,/代表所有请求路径
        location / {
             #请求转发地址
             #root html;
			 proxy_pass http://manage.powershop.com:8080;
             #欢迎页
             #index  index.html index.htm;
             #转发连接超时时间
			proxy_connect_timeout 600;
             #转发读取超时时间
			proxy_read_timeout 600;
        }
    }
}
1.7 Nginx代理tomcat
在linux中安装两台tomcat并修改端口号
代理一台tomcat(反向代理)
修改nginx/conf/nginx.conf文件:
location / {
#请求转发地址
root html;
proxy_pass http://127.0.0.1:8080;
#欢迎页
index index.html index.htm;
}
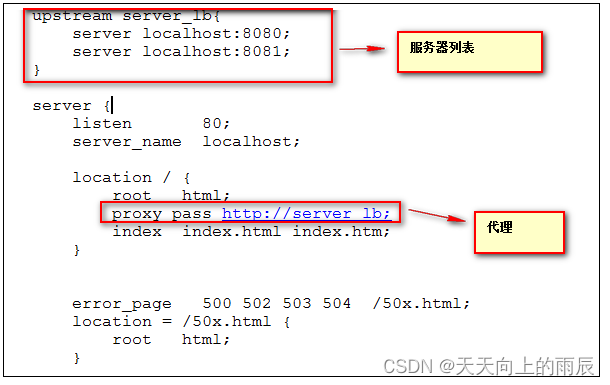
代理多台tomcat(负载均衡)
1、在http节点上添加一个upstream
2、修改location /下的反向代理
1.8 Nginx的六种负载均衡策略
| 负载均衡策略 | 说明 |
|---|---|
| 轮询 | 默认 |
| weight | 权重方式 |
| ip_hash | 依据ip分配方式 |
| least_conn | 按连接数 |
| fair | 按响应时间 |
| url_hash | 依据URL分配 |
权重
upstream server_list{
server localhost:8080 weight=5;
server localhost:8090 weight=1;
}
iphash
upstream server_list{
ip_hash
server localhost:8080;
server localhost:8090;
}
1.9 Tomcat集群的session共享
1、在nginx的upstream中加入ip_hash(这种不是session共享,个人理解是种取巧的方式,而且在一侧服务器宕机后,就会丢失登陆状态。)
2、tomcat集群自带的session共享方式(个人尝试的时候,确认这种方式的tomcat集群需要部署在同一台服务器上,这样服务器宕机后,也是不能实现高可用的,但是的确很方便。可扩展行不高,可做为小集群时使用)
3、tomcat集群与redis实现session共享(着重推荐)
第一种(上面的ip_hash)
第二种
进入tomcat的安装路径,找到conf文件修改conf/server.xml。
在配置文件中将如下代码加在<Engine name="Catalina" defaultHost="localhost">
<Cluster className="org.apache.catalina.ha.tcp.SimpleTcpCluster"
channelSendOptions="8">
<Manager className="org.apache.catalina.ha.session.DeltaManager"
expireSessionsOnShutdown="false"
notifyListenersOnReplication="true"/>
<Channel className="org.apache.catalina.tribes.group.GroupChannel">
<Membership className="org.apache.catalina.tribes.membership.McastService"
address="228.0.0.4"
port="45564"
frequency="500"
dropTime="3000"/>
<Receiver className="org.apache.catalina.tribes.transport.nio.NioReceiver"
address="auto"
port="4000"
autoBind="100"
selectorTimeout="5000"
maxThreads="6"/>
<Sender className="org.apache.catalina.tribes.transport.ReplicationTransmitter">
<Transport className="org.apache.catalina.tribes.transport.nio.PooledParallelSender"/>
</Sender>
<Interceptor className="org.apache.catalina.tribes.group.interceptors.TcpFailureDetector"/>
<Interceptor className="org.apache.catalina.tribes.group.interceptors.MessageDispatch15Interceptor"/>
</Channel>
<Valve className="org.apache.catalina.ha.tcp.ReplicationValve"
filter=""/>
<Valve className="org.apache.catalina.ha.session.JvmRouteBinderValve"/>
<Deployer className="org.apache.catalina.ha.deploy.FarmWarDeployer"
tempDir="/opt/tomcat/tmp/war-temp/"
deployDir="/opt/tomcat/tmp/war-deploy/"
watchDir="/opt/tomcat/tmp/war-listen/"
watchEnabled="false"/>
<ClusterListener className="org.apache.catalina.ha.session.JvmRouteSessionIDBinderListener"/>
<ClusterListener className="org.apache.catalina.ha.session.ClusterSessionListener"/>
</Cluster>
保存后,修改部署的项目,在web.xml中添加标签
<distributable/>
重启tomcat集群,即可实现session共享,千万注意!!tomcat集群需要在同一服务器上,否则不能实现session共享。
第三种
1.redis配置(192.168.159.131:16300)(v2.8.3)

2.tomcat配置

tomcat1(192.168.159.130:8081)

tomcat2(192.168.159.130:8082)

3.nginx安装在192.168.159.131。

       首先,是配置tomcat,使其将session保存到redis上。有两种方法,也是在server.xml或context.xml中配置,不同的是memcached只需要添加一个manager标签,而redis需要增加的内容如下:(注意:valve标签一定要在manager前面。)

<Valve className="com.radiadesign.catalina.session.RedisSessionHandlerValve" />
<Manager className="com.radiadesign.catalina.session.RedisSessionManager"
         host="192.168.159.131"
         port="16300"
         database="0"
         maxInactiveInterval="60"/>
其次,配置nginx,用于测试session保持共享。

upstream  redis.xxy.com  {
      server   192.168.159.130:8081;
      server   192.168.159.130:8082;
}

log_format  www_xy_com  '$remote_addr - $remote_user [$time_local] $request '
               '"$status" $body_bytes_sent "$http_referer"'
               '"$http_user_agent" "$http_x_forwarded_for"';

server
{
      listen  80;
      server_name redis.xxy.com;

      location / {
               proxy_pass        http://redis.xxy.com;
               proxy_set_header   Host             $host;
               proxy_set_header   X-Real-IP        $remote_addr;
               proxy_set_header   X-Forwarded-For  $proxy_add_x_forwarded_for;
      }

      access_log  /data/base_files/logs/redis.xxy.log  www_xy_com;
}
最后,将你的应用放到两个tomcat中,并依次启动redis、tomcat、nginx。访问你的nginx,可以发现两个tomcat中的session可以保持共享了。
如果tomcat配置中,将manager放在server.xml中,那么使用maven做热部署时,会发生失败。所以,推荐放在context.xml中。
2.0 动静分离
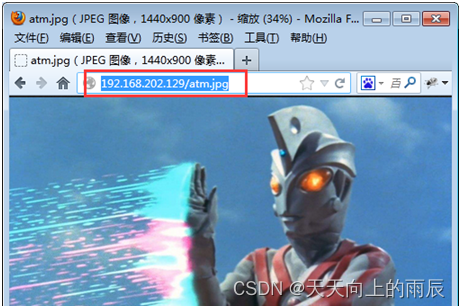
创建静态资源
在虚拟机中新建images文件夹,并上传图片
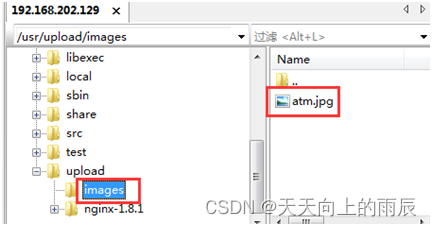
配置nginx的nginx.conf
location ~* \.(gif|jpg|png|jpeg)$ {
root /usr/upload/images;
}
测试
http://192.168.202.129/atm.jpg
2.1 nginx解决端口问题
例子:
比如说我们本地的一个项目访问的地址为:127.0.0.1:8080
我们可以进行如下的设置就可以使用www.powershop.com访问了
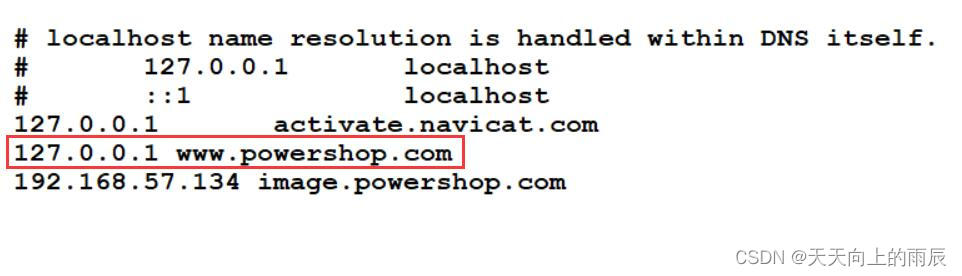
1、修改本地的文件
C:/Windows/System32/drivers/etc/hosts
2、在nginx中nginx.conf文件中设置代理的ip和端口号
server {
listen 80;
server_name localhost;
location / {#如果用的是linux上的nginx,这里ip设置为本机的ip
proxy_pass http://127.0.0.1:8080;
proxy_connect_timeout 600;
proxy_read_timeout 600;
}
}
3、处理流程
1、浏览器准备发起请求,访问http://powershop.com,但需要进行域名解析
2、因为我们在hosts文件中设置了,会优先进行本地域名解析,得到ip地址为:
127.0.0.1
3、请求被发往解析得到的ip,并且默认使用80端口:http://127.0.0.1:80
本机的nginx一直监听80端口,因此捕获这个请求
4、nginx中配置了反向代理规则,将powershop.com代理到127.0.0.1:8080,因此请求被转发
5、后台管理系统得到127.0.0.1:8080请求并处理,完成后将响应返回到nginx
6、nginx将得到的结果返回到浏览器