一、什么是Spring MVC?
(1)构建在Servlet(API)之上的。
(2)是一个Web框架(HTTP)
(3)来自于Spring webMVC模块。
需要掌握:
(1)连接的功能:将用户(浏览器)和Java程序连接起来。
(2)获取参数的功能:用户访问的时候会带一些参数,在程序中要想办法获取参数。
(3)输出数据的功能:要把程序执行的结果返回给用户。
1.MVC定义
Model(模型)是应用程序中用于处理应用程序逻辑的部分。通常模型对象负责在数据库中取数据。
View(视图)是应用程序中处理数据显示的部分。通常视图是依据模型数据创建的。
Controller(控制器)是应用程序中处理用户交互的部分。通常控制器负责从视图读取数据,控制用户输入,并向模型发送数据。
2.MVC与Spring MVC的关系
MVC是一种思想,而Spring MVC是对MVC思想的具体实现。
3.创建方式
(1)使用Maven方式创建Spring MVC(已过时)。
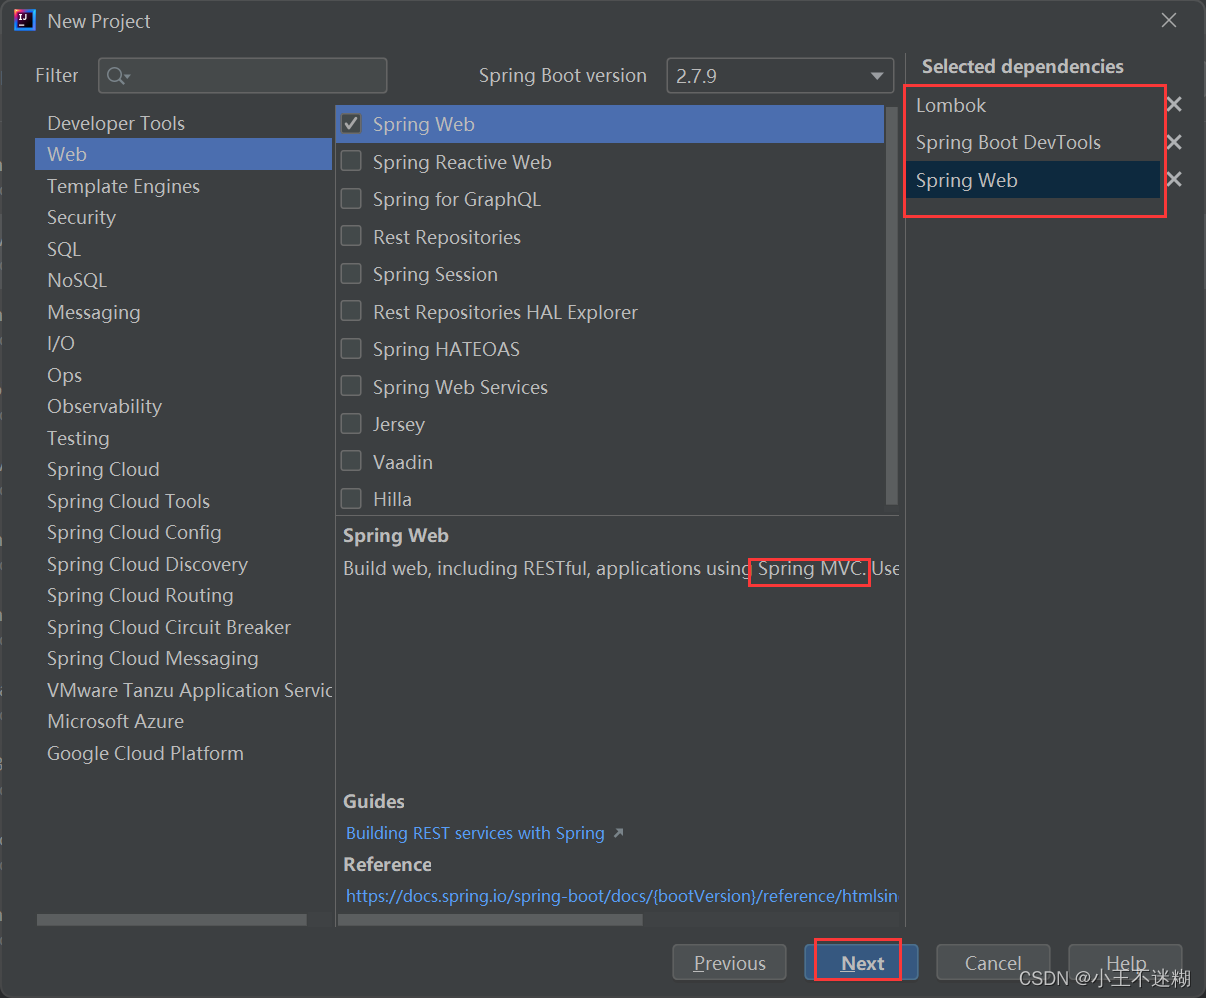
(2)使用Spring Boot添加Spring Web模块(Spring MVC)。
[和SpringBoot创建方式一样。]勾选的Spring Web框架其实就是Spring MVC框架。(https://blog.csdn.net/qq_45283185/article/details/129388891?spm=1001.2014.3001.5501)
二、Spring MVC的核心功能
1.连接功能
浏览器获取前端接口和后端程序连接功能实现
@RequestMapping(“/xxx”)既能修饰类又能修饰方法。
性能:及支持GET方式的请求又支持POST方式的请求。
	方式一:
    @RequestMapping(value = "/xxx",method = RequestMethod.POST)
    方式二:
    @PostMapping("/xxx")
    @GetMapping("/xxx")
get和post的区别
相同:
get请求和post请求底层都是基于TCP/IP协议实现的,两者都可以实现客户端与服务端的双向交互。
不同:
get和post最本质的区别是“约定和规范”上的区别,在规范中,定义get请求是用来获取资源的,也就是进行查询操作的,而post请求是用来传输实体对象的,因此会使用post来进行添加、修改和删除等操作。按照约定来说,get和post的参数传递也是不同的,get请求时将参数拼加到url上进行参数传递的,而post是将请求参数写入到请求body中传递的。
Spring Boot热部署
idea社区版(2021.2)部署:
(1)添加热部署框架;
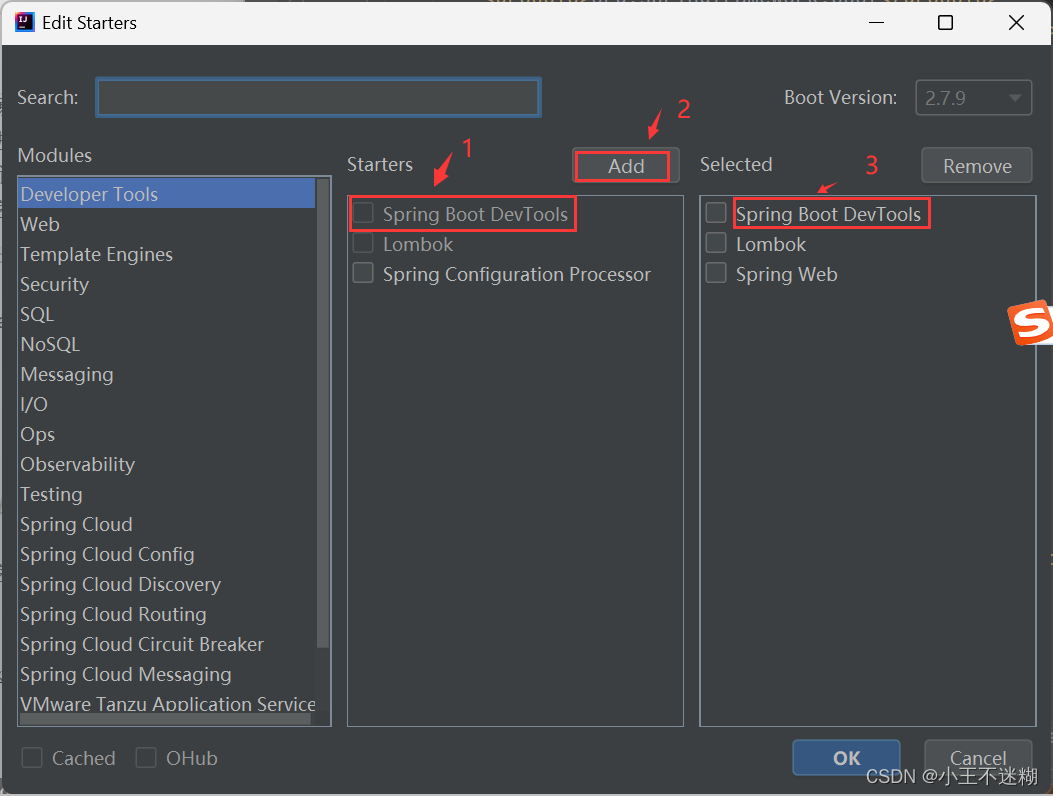
(2)设置settings和new projects setup。
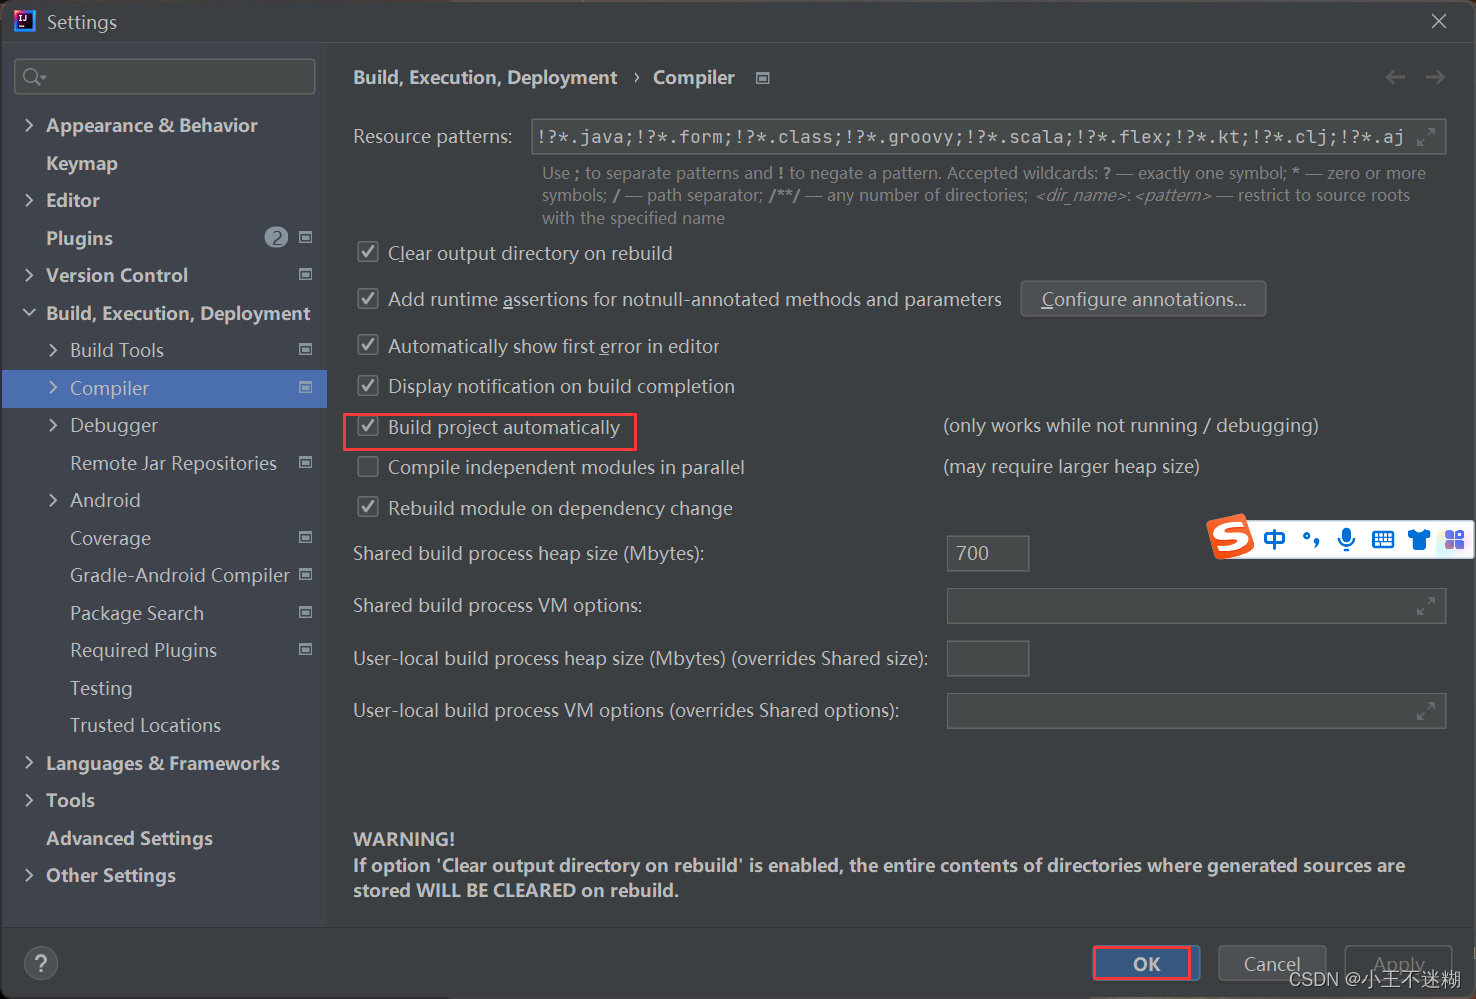
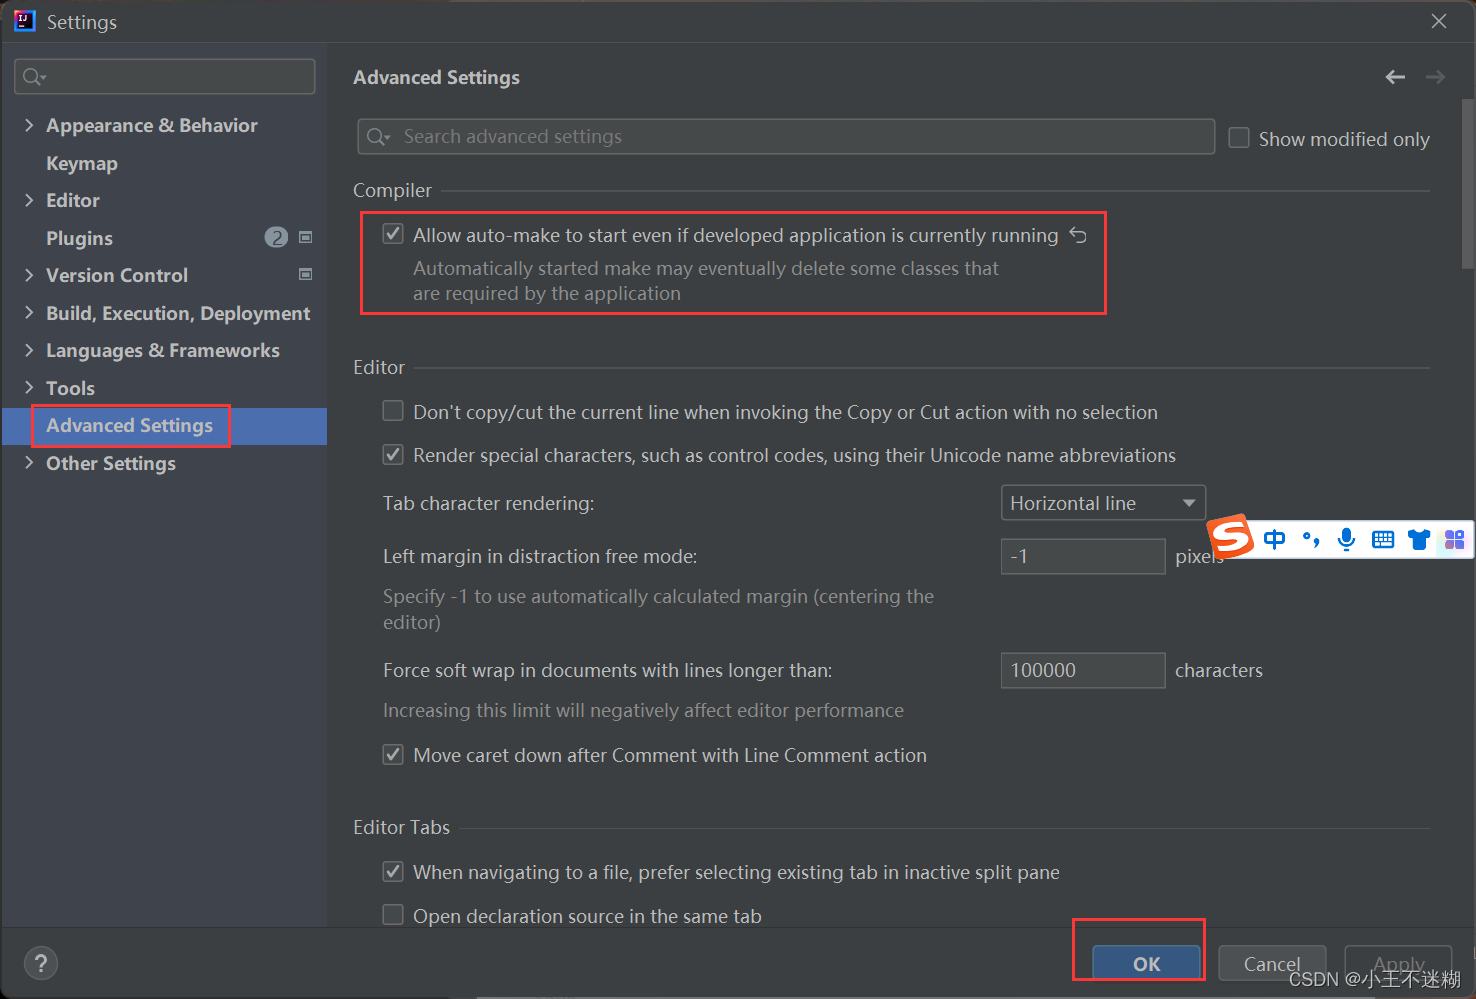
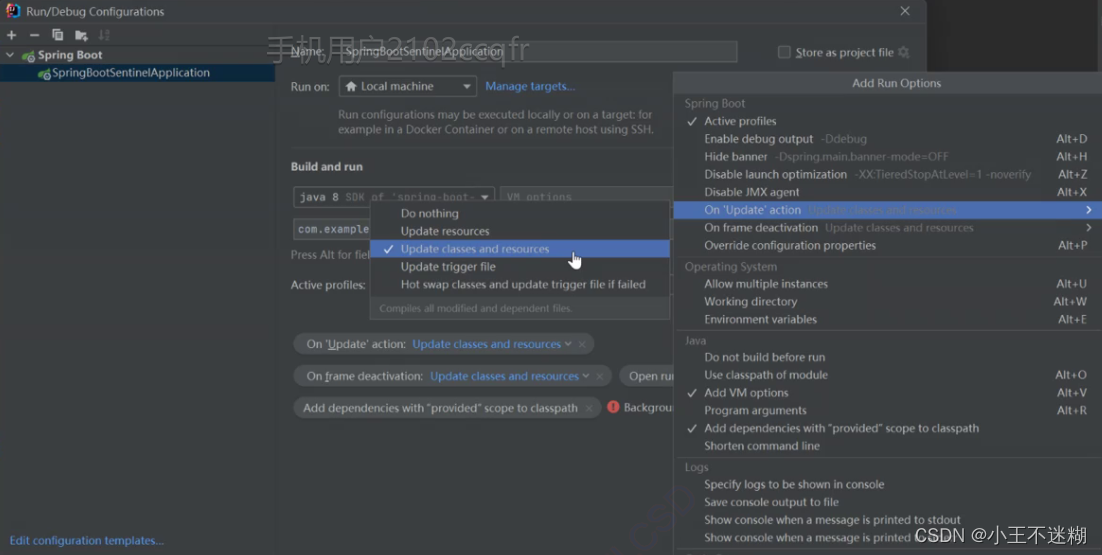
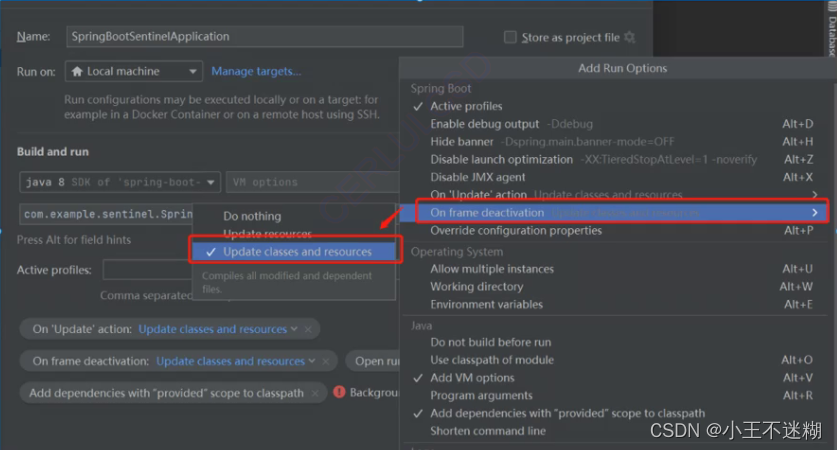
(3)开启运行中热部署。
settings和new projects setup都需要勾选。
idea专业版部署:
(1)引入devtools框架;
(2)在运行那块通过启动文件进行配置。
2.获取参数
(1)传递单个参数
    //@RequestMapping(value = "/hi",method = RequestMethod.POST)
    //@PostMapping("/hi")
    @GetMapping("/hi")
    public String sayHi(String name) {


        return "hello,"+name;
    }
注:在Spring Boot(Spring MVC)中传参一定要传包装类型,而非基础类型。
(2)传递对象
可以通过对象传递多个参数。
    @GetMapping("/user")
    public String showUser(User user) {


        return user.toString();
    }
(3)后端重命名:@RequestParam
required表示该参数可以为空,默认为true。
    @GetMapping("/time")
    public String showTime(@RequestParam(value = "t",required = false) String startTime,
                           @RequestParam("t2") String endTime) {


        return "开始时间:"+startTime + " | 结束时间:"+endTime;
    }
(4)接收JSON对象:@RequestBody
    @PostMapping("/json-user")
    public String showJSONUser(@RequestBody User user) {


        return user.toString();
    }
(5)获取URL中的参数:@PathVariable
    @RequestMapping("/login/{username}/{password}")
    public String showURL(@PathVariable("username") String username,@PathVariable("password") String password) {


        return username+":"+password;
    }
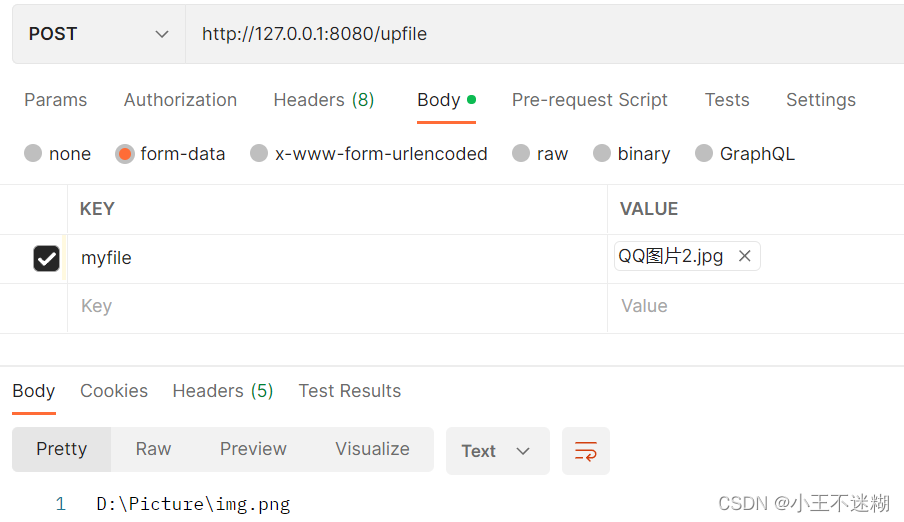
(6)上传文件:@RequestPart
固定文件保存路径:
    //上传文件
    @RequestMapping("/upfile")
    public String upFile(@RequestPart("myfile")MultipartFile file) throws IOException {


        String path = "D:\\Picture\\img.png";
        //保存文件
        file.transferTo(new File(path));
        return path;
    }
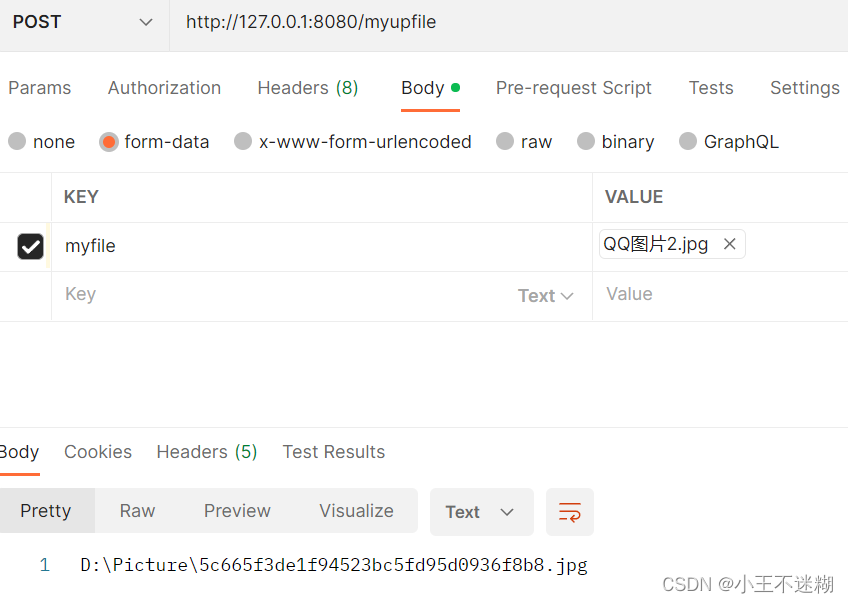
可变的文件保存名:
    @RequestMapping("/myupfile")
    public String myUpFile(@RequestPart("myfile")MultipartFile file) {


        //根目录+唯一文件名+文件后缀
        String path = "D:\\Picture\\";
        path += UUID.randomUUID().toString().replace("-","");
        path += file.getOriginalFilename().substring(file.getOriginalFilename().lastIndexOf("."));
        return path;
    }
使用PostMan构造发送请求。
(7)获取Cookie:@CookieValue
方式一:通过之前的servlet获取(获取的是所有Cookie)
//获取Cookie
    @RequestMapping("/getck")
    public String getCookie(HttpServletRequest req) {


        //servlet的方式是得到所有的cookie
        Cookie[] cookies = req.getCookies();
        for (Cookie cookie : cookies) {


            log.error(cookie.getName()+":"+cookie.getValue());
        }
        return "get cookie";
    }
方式二:通过@CookieValue可以获取单个参数
    //可以获得单个Cookie
    @RequestMapping("/getck2")
    public String getCookie2(@CookieValue("zhangsan") String value) {


        return "Cookie value:"+value;
    }
(8)获取header:@RequestHeader
    //获取header
    @RequestMapping("/getua")
    public String getUA(@RequestHeader("User-Agent") String userAgent) {


        return userAgent;
    }
(9)设置和获取Session:@SessionAttribute
方式一:servlet方式
    //设置和获取session
    @RequestMapping("/setsess")
    public String setSession(HttpServletRequest request) {


        HttpSession session = request.getSession();
        session.setAttribute("userinfo","userinfo");
        return "Set Session Success";
    }
    @RequestMapping("/getsess")
    public String getSession(HttpServletRequest request) {


        HttpSession session = request.getSession(false);
        if (session!=null && session.getAttribute("userinfo")!=null) {


            return (String)session.getAttribute("userinfo");
        } else {


            return "暂无 session 信息";
        }
    }
方式二:@SessionAttribute
@RequestMapping("/getsess2")
    public String getSession2(@SessionAttribute(value = "userinfo",required = false)String userinfo) {


        return userinfo;
    }
3.输出数据
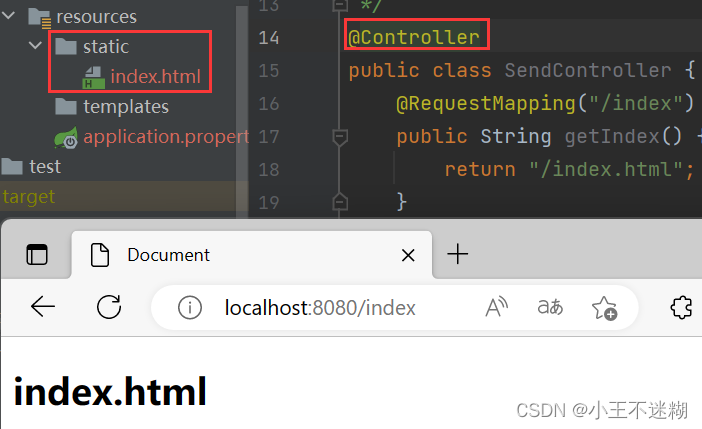
(1)返回静态页面
不需要加@ResponseBody
@Controller
public class SendController {


    @RequestMapping("/index")
    public String getIndex() {


        return "/index.html";
    }
}
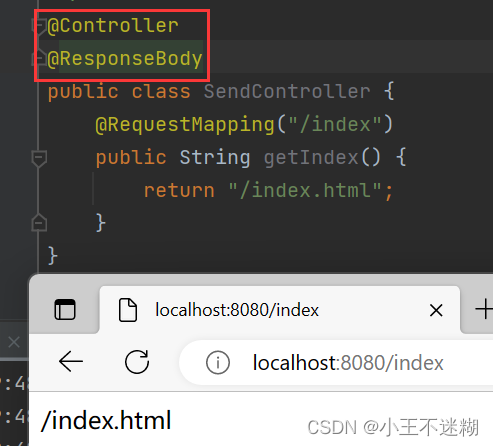
(2)返回text/html
@ResponseBody
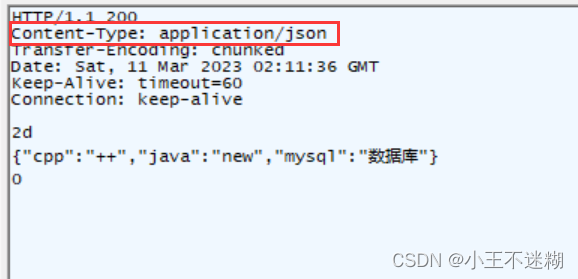
(3)返回JSON对象
    @RequestMapping("/json")
    public HashMap<String,String> jsonBean() {


        HashMap<String,String> map = new HashMap<>();
        map.put("java","new");
        map.put("mysql","数据库");
        map.put("cpp","++");
        return map;
    }
通过fiddler抓包:
(4)请求转发或请求重定向
    //请求重定向
    @RequestMapping("/index1")
    public String index1() {


        return "redirect:/index.html";
    }
    //请求转发
    @RequestMapping("/index2")
    public String index2() {


        return "forward:/index.html";
    }
forward(请求转发),redirect(请求重定向)
区别:
1.请求重定向将请求重新定位到资源;请求转发服务器端转发。
2.请求重定向地址发生变化,请求转发地址不发生变化。
3.请求重定向与直接访问新地址效果一致,不存在原来的外部资源不能访问;请求转发服务器端转发有可能造成原外部资源不能访问。