一开始编写的代码如下:
<!DOCTYPE html>
<html>

<head>
  <title>打印页面</title>
  <script src="https://code.jquery.com/jquery-3.6.0.min.js"></script>
</head>

<body>
  <button id="printButton">打印</button>

  <!-- 页面内容 -->
  <h1>欢迎打印该页面</h1>
  <p>这是要打印的页面内容。</p>
  <script>
    $(document).ready(function () {
      // 点击按钮触发打印事件
      $("#printButton").click(function () {
        window.print(); // 调用window.print()方法打印页面
      });
    });

  </script>
</body>

</html>
发现这样会打印整个页面的内容,不符合需求:

后来进行改进,打印指定的div下的内容:
新建一个临时页面,然后将指定内容赋值到临时页面进行打印,打印之后再关闭临时页面,这样就不会打印无关的内容了
<!DOCTYPE html>
<html>

<head>
  <title>打印页面</title>
  <script src="https://code.jquery.com/jquery-3.6.0.min.js"></script>
</head>

<body>
  <button id="printButton">打印</button>

  <!-- 指定内容 -->
  <div id="customDiv">
    <h1 style="color: red;">欢迎打印该页面</h1>
    <p style="background-color: aqua; font-size: 88px;">这是要打印的页面内容。</p>
  </div>
  <script>
    $(document).ready(function () {
      // 点击按钮触发打印事件
      $("#printButton").click(function () {
        var printContents = $("#customDiv").html(); // 获取要打印的内容

        var printWindow = window.open("", "_blank"); // 打开一个新窗口
        printWindow.document.write('<html><head>');
        printWindow.document.write('<title>打印</title>');
        printWindow.document.write('</head><body>');
        printWindow.document.write(printContents); // 将要打印的内容写入新窗口
        printWindow.document.write('</body></html>');
        printWindow.document.close();

        printWindow.print(); // 在新窗口中调用 print() 方法打印内容
        printWindow.close(); // 关闭新窗口
      });
    });
  </script>
</body>

</html>
但是这样打印,一些样式就无法进行打印了

注解:printWindow.document.close() 是用于关闭在新窗口中打开的文档流
printWindow.document.write() 方法向新窗口的文档流中写入了 HTML 内容。然而,在将内容添加到文档流后,我们需要调用 printWindow.document.close() 来关闭文档流
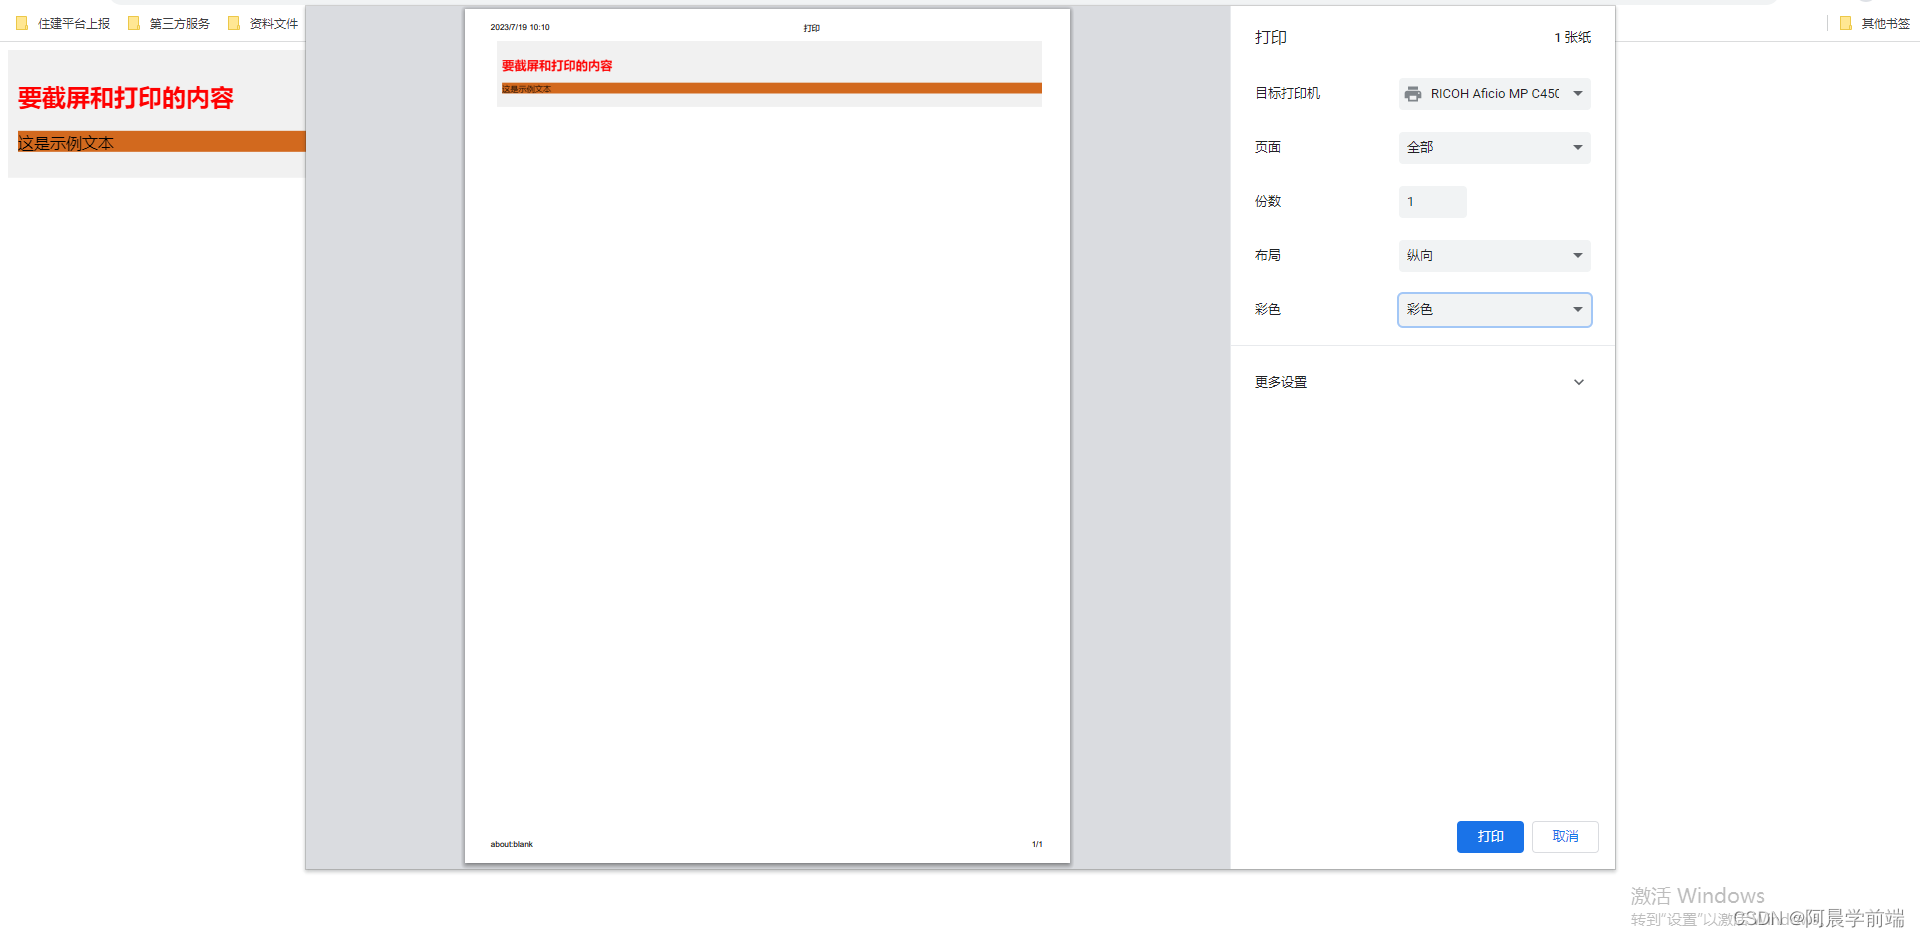
于是又进行修改,想着能不能对指定内容进行一个截屏,然后将截屏的图片进行打印,这样就可以保留跟打印内容一样的样式了:
<!DOCTYPE html>
<html>

<head>
    <title>截屏并打印</title>
    <script src="https://cdnjs.cloudflare.com/ajax/libs/html2canvas/1.4.0/html2canvas.min.js"></script>
    <script src="https://code.jquery.com/jquery-3.6.0.min.js"></script>
</head>

<body>
    <div id="customDiv" style="background-color: #f1f1f1; padding: 10px;">
        <h2 style="color: red;">要截屏和打印的内容</h2>
        <p style="background-color: chocolate;">这是示例文本</p>
    </div>

    <button id="printButton">截屏并打印</button>

    <script>
        $(document).ready(function () {
            // 点击按钮触发截屏和打印事件
            $("#printButton").click(function () {
                var targetDiv = document.getElementById("customDiv");
                var printWindow = window.open("", "_blank"); // 打开一个新窗口

                html2canvas(targetDiv).then(function (canvas) {
                    var imageData = canvas.toDataURL(); // 获取截图数据
                    var imageElement = new Image();
                    imageElement.src = imageData;

                    printWindow.document.write('<html><head>');
                    printWindow.document.write('<title>打印</title>');
                    printWindow.document.write('</head><body>');
                    printWindow.document.write(imageElement.outerHTML); // 将截图添加到新窗口
                    printWindow.document.write('</body></html>');
                    printWindow.document.close();

                    setTimeout(function () {
                        printWindow.print(); // 在新窗口中调用 print() 方法打印内容
                        printWindow.close(); // 关闭新窗口
                    }, 1000); // 延迟 1 秒等待图像加载完成(可根据需要调整延迟时间)
                });
            });
        });
    </script>
</body>

</html>
效果如下:
注解:
引入了 html2canvas 库,它可以将指定元素(这里是 <div>)转换为 <canvas>,从而实现截屏功能
扫描二维码关注公众号,回复:
15945740 查看本文章

当我们点击按钮时,使用 html2canvas 函数将指定 <div>(在代码中被称为 targetDiv)转换为 <canvas>。然后,我们使用 toDataURL() 将 <canvas> 中的图像数据转换为 URL 格式