公钥证书 :Linux常用的为crt后缀的证书。Windows上常用的为cer后缀的证书。
生成CA证书(自签名的根证书)
一、生成私钥: 生成des3加密的私钥private.pem(1024/2048位的密钥)
[root@iZ2zeddfx87fw4m4dlxu8dZ certs]# openssl genrsa -des3 -out private.pem 2048
Generating RSA private key, 2048 bit long modulus
......................+++
................+++
e is 65537 (0x10001)
Enter pass phrase for private.pem: #输入自定义口令
Verifying - Enter pass phrase for private.pem:  #输入确认自定义口令
[root@iZ2zeddfx87fw4m4dlxu8dZ certs]# ll
total 4
-rw-r--r-- 1 root root 1751 Jul 20 14:50 private.pem    #最终生成的私钥文件
二、生成公钥(公钥可以根据私钥进行推算出来,反之则不行)
[root@iZ2zeddfx87fw4m4dlxu8dZ certs]# openssl rsa -in private.pem -pubout -out public.pem
Enter pass phrase for private.pem:  #输入上面的访问密钥的口令
writing RSA key
[root@iZ2zeddfx87fw4m4dlxu8dZ certs]# ll
total 8
-rw-r--r-- 1 root root 1751 Jul 20 14:50 private.pem
-rw-r--r-- 1 root root  451 Jul 20 14:52 public.pem  #公钥文件
三、生成证书:生成X509格式的CA自签名证书(有效期一年)
[root@iZ2zeddfx87fw4m4dlxu8dZ certs]# openssl req -new -x509 -key private.pem -out ca.crt -days 3650
Enter pass phrase for private.pem:
You are about to be asked to enter information that will be incorporated
into your certificate request.
What you are about to enter is what is called a Distinguished Name or a DN.
There are quite a few fields but you can leave some blank
For some fields there will be a default value,
If you enter '.', the field will be left blank.
-----
Country Name (2 letter code) [XX]:#CN
State or Province Name (full name) []:#BEIJING
Locality Name (eg, city) [Default City]:#BEIJING
Organization Name (eg, company) [Default Company Ltd]:#GUANGDA
Organizational Unit Name (eg, section) []:#HR
Common Name (eg, your name or your server's hostname) []:#CA ROOT
Email Address []:#[email protected]
[root@iZ2zeddfx87fw4m4dlxu8dZ certs]# ll
total 12
-rw-r--r-- 1 root root 1407 Jul 20 14:55 ca.crt #CA自签名证书
-rw-r--r-- 1 root root 1751 Jul 20 14:50 private.pem  #私钥文件
-rw-r--r-- 1 root root  451 Jul 20 14:52 public.pem  #公钥文件
说明:这里第三步生成crt证书时,没有直接使用到第二步的公钥文件,而是直接使用的私钥 文件。 是因为,通过私钥可以推算出公钥,并把公钥集成到crt证书里面。然后这里 使用私钥还有另外一个作用,就是 对我们输入的 国家 省会 城市 组织 用户名 邮箱等信息通过摘要算法生成摘要,然后用自己的私钥对摘要做签名 然后 把这个签名也集成到crt证书里面了,这个就是自签名证书(自己给自己颁发的证书 )。 ca.crt证书也叫公钥证书。里面包括 身份信息,摘要签名,公钥,但是不包括私钥
这里也可以看下public.pem和从 ca.crt中导出的公钥是否相同:
[root@iZ2zeddfx87fw4m4dlxu8dZ certs]# openssl x509 -in ca.crt -pubkey -noout  #导出并打印ca证书中的公钥
-----BEGIN PUBLIC KEY-----
MIIBIjANBgkqhkiG9w0BAQEFAAOCAQ8AMIIBCgKCAQEAxjhzq2e3zvFC6pJ3grBQ
JTzy6K2d6lc43/nq3xAXWHHywfax3g5ej9FyMuCELV22ycgEHLVfmvSn6q8hgjT8
yTK6mwDEHb10oDJk8y/sm/d5vwJsQ5+5v+TboQAUXK+U215da4KBwEMQLFXOnB/4
ekk7WgQVGv9BE5tAyNXdQm77XeUcSuO09eSosG9fTa5TcYTCgF2NnHXFV/KqGl0C
pZfyAVhYW2ipP0b3uO1ScHy54pacd6tho3Rkwz5GYE4cKE9dKitD+zonWB3P5Z//
AZlDOHm1/QirZqj96AW37Lz1wcI/fAXzOWbmw3vYNETRskRRQ2bKIP5ksJhRAPWR
gQIDAQAB
-----END PUBLIC KEY-----
[root@iZ2zeddfx87fw4m4dlxu8dZ certs]# cat public.pem # 查看 上方第二步生成的公钥文件
-----BEGIN PUBLIC KEY-----
MIIBIjANBgkqhkiG9w0BAQEFAAOCAQ8AMIIBCgKCAQEAxjhzq2e3zvFC6pJ3grBQ
JTzy6K2d6lc43/nq3xAXWHHywfax3g5ej9FyMuCELV22ycgEHLVfmvSn6q8hgjT8
yTK6mwDEHb10oDJk8y/sm/d5vwJsQ5+5v+TboQAUXK+U215da4KBwEMQLFXOnB/4
ekk7WgQVGv9BE5tAyNXdQm77XeUcSuO09eSosG9fTa5TcYTCgF2NnHXFV/KqGl0C
pZfyAVhYW2ipP0b3uO1ScHy54pacd6tho3Rkwz5GYE4cKE9dKitD+zonWB3P5Z//
AZlDOHm1/QirZqj96AW37Lz1wcI/fAXzOWbmw3vYNETRskRRQ2bKIP5ksJhRAPWR
gQIDAQAB
-----END PUBLIC KEY-----
发现 ca.crt中的公钥和public.pem的内容是一样的,说明没问题。
根据CA证书颁布用户证书
一、生成私钥: 生成des3加密的私钥private.pem(1024/2048位的密钥)
[root@iZ2zeddfx87fw4m4dlxu8dZ certs]# openssl genrsa -des3 -out server_private.pem
Generating RSA private key, 2048 bit long modulus
..........................................................+++
...........+++
e is 65537 (0x10001)
Enter pass phrase for server_private.pem:
Verifying - Enter pass phrase for server_private.pem:
[root@iZ2zeddfx87fw4m4dlxu8dZ certs]# ll
total 16
-rw-r--r-- 1 root root 1407 Jul 20 14:55 ca.crt
-rw-r--r-- 1 root root 1751 Jul 20 14:50 private.pem
-rw-r--r-- 1 root root  451 Jul 20 14:52 public.pem
-rw-r--r-- 1 root root 1743 Jul 20 15:47 server_private.pem
二、根据私钥生成csr(证书请求文件)
[root@iZ2zeddfx87fw4m4dlxu8dZ certs]# openssl req -new -key server_private.pem -out server.csr
Enter pass phrase for server_private.pem:
You are about to be asked to enter information that will be incorporated
into your certificate request.
What you are about to enter is what is called a Distinguished Name or a DN.
There are quite a few fields but you can leave some blank
For some fields there will be a default value,
If you enter '.', the field will be left blank.
-----
Country Name (2 letter code) [XX]:#cn
State or Province Name (full name) []:#henan
Locality Name (eg, city) [Default City]:#puyang
Organization Name (eg, company) [Default Company Ltd]:#xiaoniu
Organizational Unit Name (eg, section) []:#kaifa
Common Name (eg, your name or your server's hostname) []:# xiaoniu
Email Address []:#[email protected]

Please enter the following 'extra' attributes
to be sent with your certificate request
A challenge password []:
An optional company name []:
[root@iZ2zeddfx87fw4m4dlxu8dZ certs]# ll
total 20
-rw-r--r-- 1 root root 1407 Jul 20 14:55 ca.crt
-rw-r--r-- 1 root root 1751 Jul 20 14:50 private.pem
-rw-r--r-- 1 root root  451 Jul 20 14:52 public.pem
-rw-r--r-- 1 root root 1041 Jul 20 15:55 server.csr
-rw-r--r-- 1 root root 1743 Jul 20 15:47 server_private.pem
三、向权威证书颁发机构申请证书(此时ca.crt为颁发机构的证书、server.crt 就是我们需要的证书)
openssl x509 -req -days 3650 -in server.csr \
-CA ca.crt -CAkey private.pem \
-CAcreateserial -out server.crt
就是下面这个换行的命令
[root@iZ2zeddfx87fw4m4dlxu8dZ certs]# openssl x509 -req -days 3650 -in server.csr \
> -CA ca.crt -CAkey private.pem \
> -CAcreateserial -out server.crt
Signature ok
subject=/C=cn/ST=henan/L=puyang/O=xiaoniu/OU=kaifa/CN=xiaoniu/emailAddress=xiaoniu@qq.com
Getting CA Private Key
Enter pass phrase for private.pem: #输入ca的私钥的访问口令
[root@iZ2zeddfx87fw4m4dlxu8dZ certs]# ll
total 28
-rw-r--r-- 1 root root 1407 Jul 20 14:55 ca.crt
-rw-r--r-- 1 root root   17 Jul 20 15:59 ca.srl
-rw-r--r-- 1 root root 1751 Jul 20 14:50 private.pem
-rw-r--r-- 1 root root  451 Jul 20 14:52 public.pem
-rw-r--r-- 1 root root 1281 Jul 20 15:59 server.crt
-rw-r--r-- 1 root root 1041 Jul 20 15:55 server.csr
-rw-r--r-- 1 root root 1743 Jul 20 15:47 server_private.pem
此时会在当前目录下生成server.csr: 公钥证书和ca.srl: 储存公钥证书的证书序列号
首先 提取server.csr里的内容:分公钥 和用户信息。通过ca的私钥来对用户信息做签名,然后把签名集成到server.crt里, 然后也把提取的公钥信息集成到server.crt里。这样一个用户证书就颁发成功了
如果要在google等浏览器显示出安全的绿锁标志,使用自己生成的自签证书作为颁发机构的根证书,然后给其他人进行颁发的证书肯定不好使,得花钱向第三方权威证书颁发机构申请。
将server.crt文件下载到Windows桌面上。双击打开。
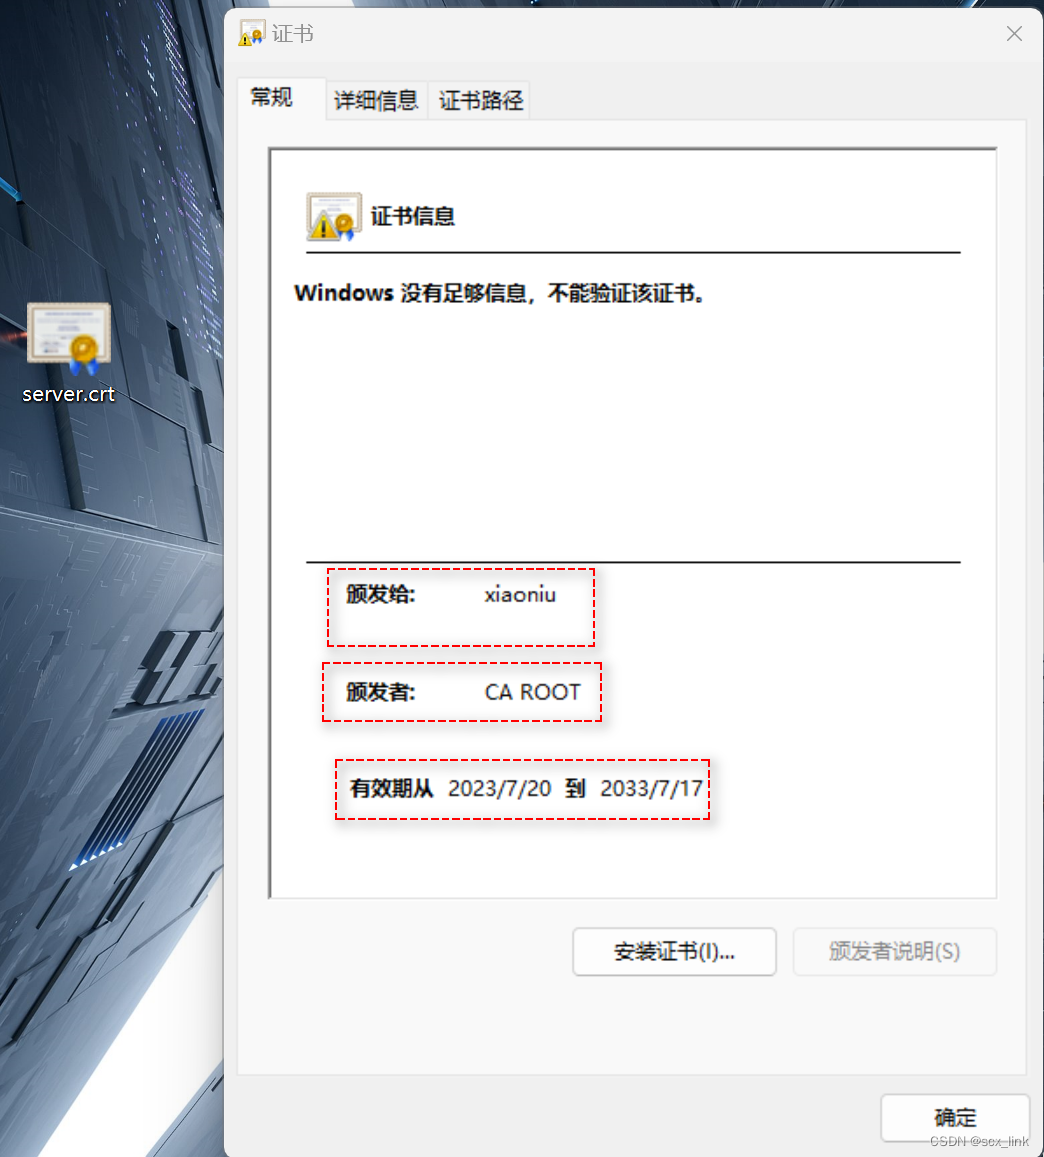
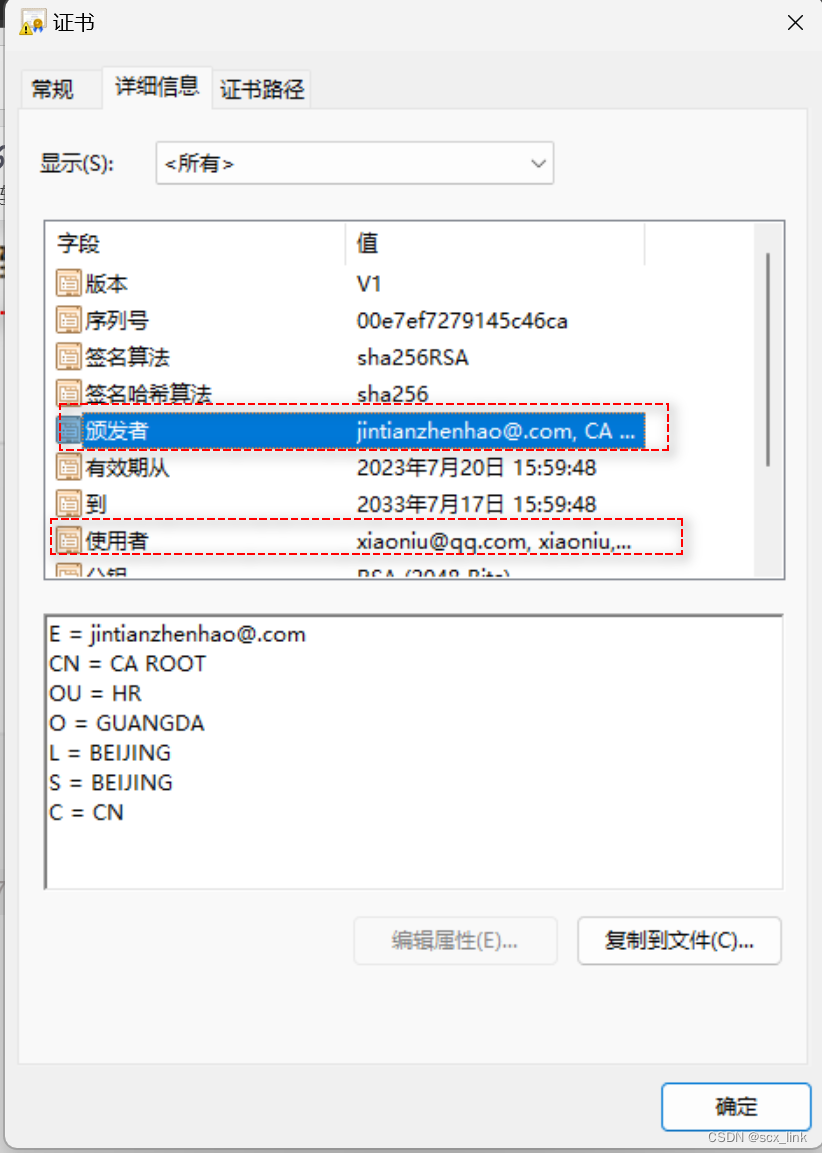
可以看到 证书序列号,颁发者信息,和使用者信息。