Cocos Creator 如何处理物理和碰撞检测?
cocos creator 版本:
v3.6.1
Cocos Creator 3.x 实现碰撞检测
Cocos Creator 通过使用物理引擎来处理物理和碰撞检测。Cocos Creator 默认使用 Box2D 物理引擎,也支持使用 Chipmunk 物理引擎。以下是处理物理和碰撞检测的基本步骤:
1、创建物理世界:在场景中添加一个物理组件,这将自动创建一个物理世界。
2、添加刚体组件:在需要添加物理效果的节点上添加刚体组件。刚体是物理世界中的物体,可以设置质量、摩擦力、弹性等属性(点击官方文档查看刚体属性)。
3、添加碰撞体组件:在刚体节点上添加碰撞体组件,用于检测碰撞。Cocos Creator 支持多种类型的碰撞体,如矩形、圆形、多边形等(点击官方文档查看碰撞组件)。
4、处理碰撞事件(碰撞回调函数):通过添加碰撞回调函数,在节点之间发生碰撞时执行相应的逻辑。可以在碰撞回调函数中获取到碰撞的详细信息,如碰撞体的类型、碰撞点、碰撞法线等(点击官方文档查看碰撞回调)。
下面是一个简单的例子,演示如何在 Cocos Creator 中处理物理和碰撞检测:
5、创建一个场景,并添加一个物理组件。
6、在场景中添加两个节点,都分别添加刚体和碰撞体组件:

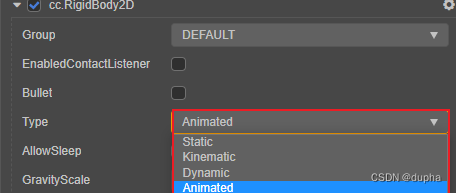
按照需求选择对应刚体类型(点击官方文档查看刚体类型)

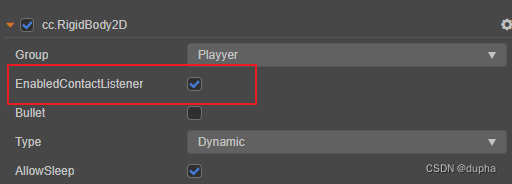
7、开启碰撞监听:
只有开启了刚体的碰撞监听,刚体发生碰撞时才会回调到对应的组件上

//代码开启
rigidbody.enabledContactListener = true;
8、在其中一个节点上添加一个碰撞回调函数:
@ccclass('TestContactCallBack')
export class TestContactCallBack extends Component {


    start () {


        // 注册单个碰撞体的回调函数
        let collider = this.getComponent(Collider2D);
        if (collider) {


            collider.on(Contact2DType.BEGIN_CONTACT, this.onBeginContact, this);
            collider.on(Contact2DType.END_CONTACT, this.onEndContact, this);
            collider.on(Contact2DType.PRE_SOLVE, this.onPreSolve, this);
            collider.on(Contact2DType.POST_SOLVE, this.onPostSolve, this);
        }

        // 注册全局碰撞回调函数
        if (PhysicsSystem2D.instance) {


            PhysicsSystem2D.instance.on(Contact2DType.BEGIN_CONTACT, this.onBeginContact, this);
            PhysicsSystem2D.instance.on(Contact2DType.END_CONTACT, this.onEndContact, this);
            PhysicsSystem2D.instance.on(Contact2DType.PRE_SOLVE, this.onPreSolve, this);
            PhysicsSystem2D.instance.on(Contact2DType.POST_SOLVE, this.onPostSolve, this);
        }
    }
    onBeginContact (selfCollider: Collider2D, otherCollider: Collider2D, contact: IPhysics2DContact | null) {


        // 只在两个碰撞体开始接触时被调用一次
        console.log('onBeginContact');
    }
    onEndContact (selfCollider: Collider2D, otherCollider: Collider2D, contact: IPhysics2DContact | null) {


        // 只在两个碰撞体结束接触时被调用一次
        console.log('onEndContact');
    }
    onPreSolve (selfCollider: Collider2D, otherCollider: Collider2D, contact: IPhysics2DContact | null) {


        // 每次将要处理碰撞体接触逻辑时被调用
        console.log('onPreSolve');
    }
    onPostSolve (selfCollider: Collider2D, otherCollider: Collider2D, contact: IPhysics2DContact | null) {


        // 每次处理完碰撞体接触逻辑时被调用
        console.log('onPostSolve');
    }
}
说明:注意刚体类型一定要选择好,两个节点都是static是无法触发碰撞回调(查看不同刚体类型响应限制条件)
不同类型的刚体之间,并非都可进行碰撞,其结果整理如下:
| – | Static | Dynamic | Kinematic | Animated |
|---|---|---|---|---|
| Static | √ | √ | √ | |
| Dynamic | √ | √ | √ | √ |
| Kinematic | √ | √ | √ | √ |
| Animated | √ | √ | √ | √ |
9、将代码添加到节点中,如下:

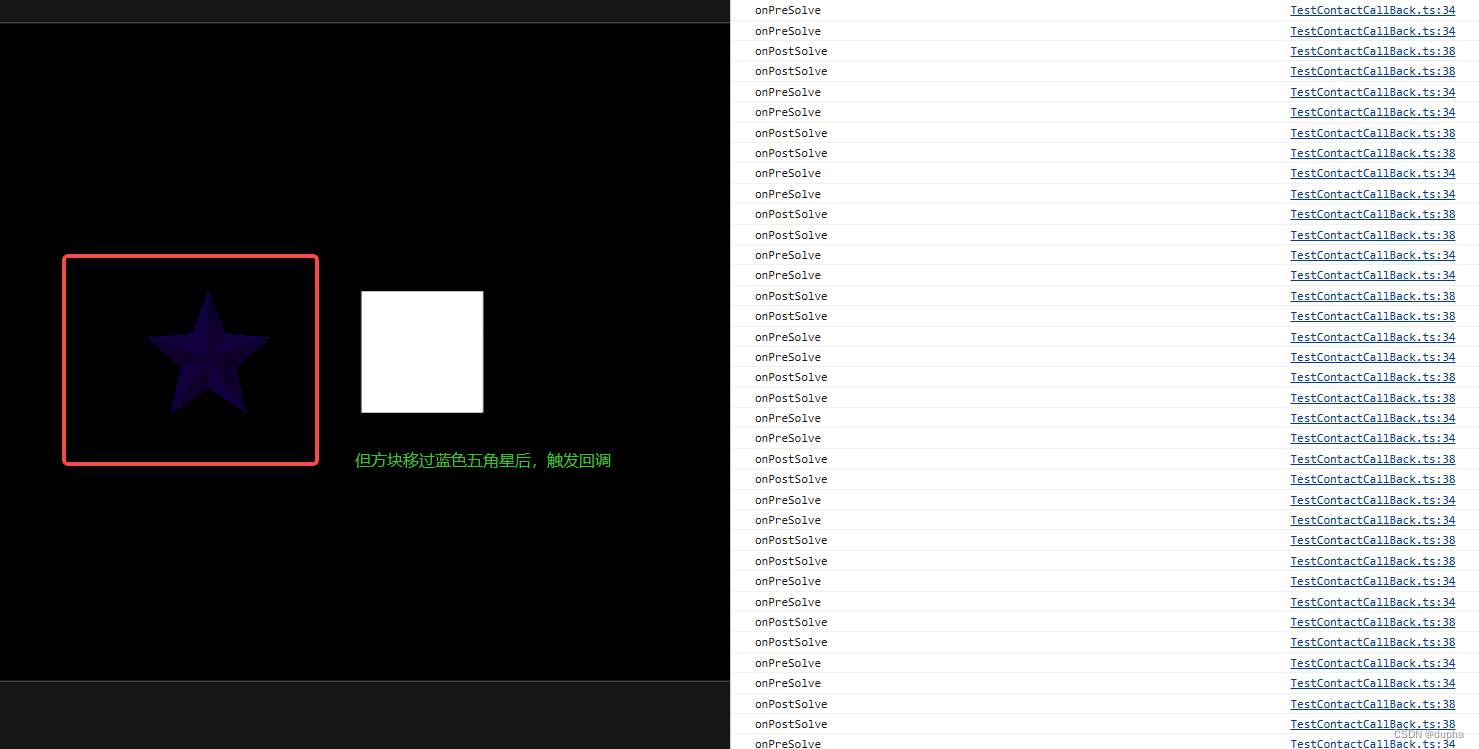
10、结果显示

可以通过缓动系统移过蓝色五角星,代码比如:
tween(this.node.getChildByName("Block")).to(1,{


    	position:new Vec3(200,0,0)
 }).start();
通过以上步骤,就可以在 Cocos Creator 中处理物理和碰撞检测。可以通过调整刚体、碰撞体的属性以及添加更多的碰撞回调函数,来实现更加复杂的物理效果和碰撞检测。
最后,如果有些需求不要物理碰撞效果的话,在Collider2D(如BoxCollider2D),设置属性:sensor
sensor : boolean 一个传感器类型的碰撞体会产生碰撞回调,但是不会发生物理碰撞效果。