完全自定义悬浮窗,保证100%学会的超简单悬浮窗
先看看效果图:

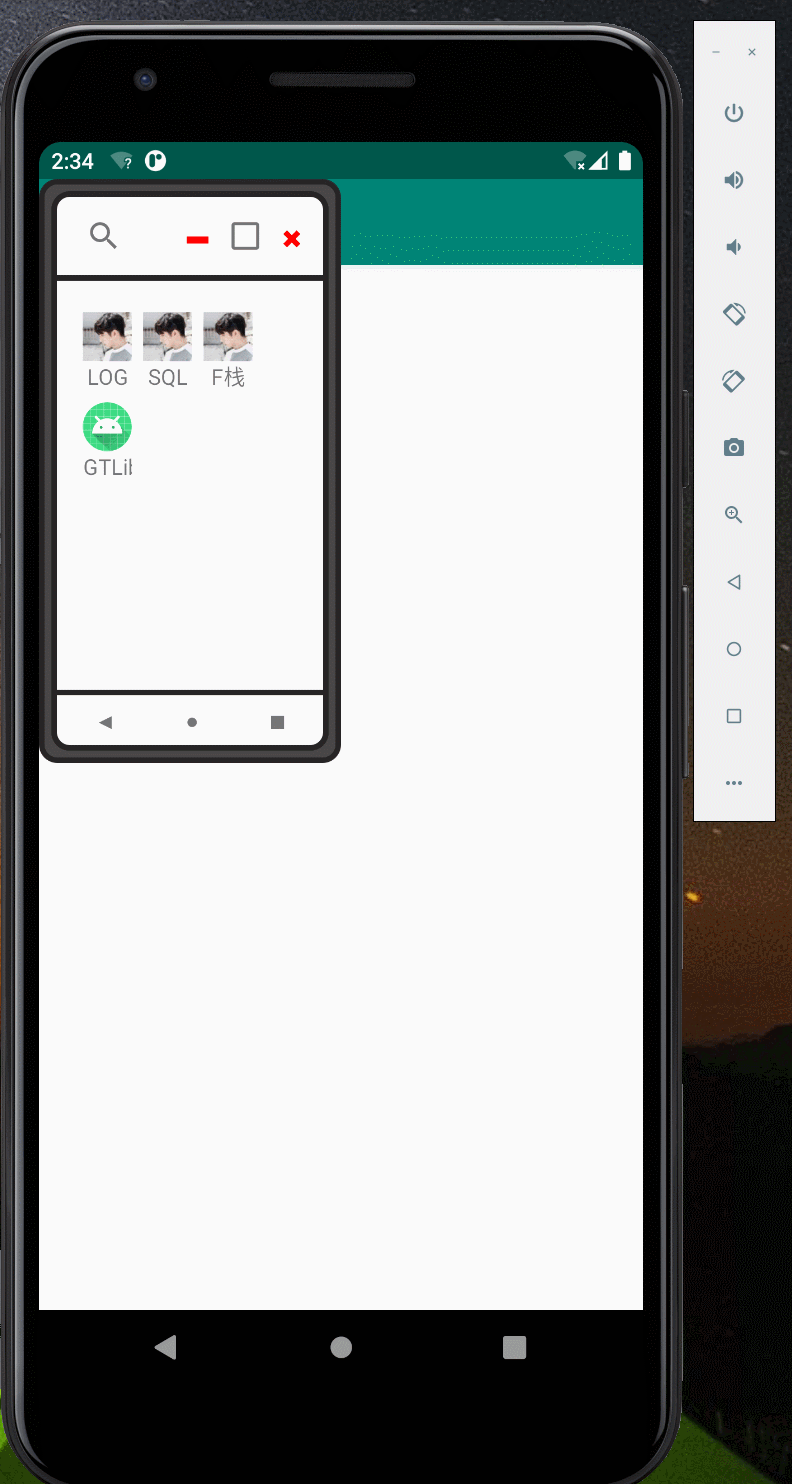
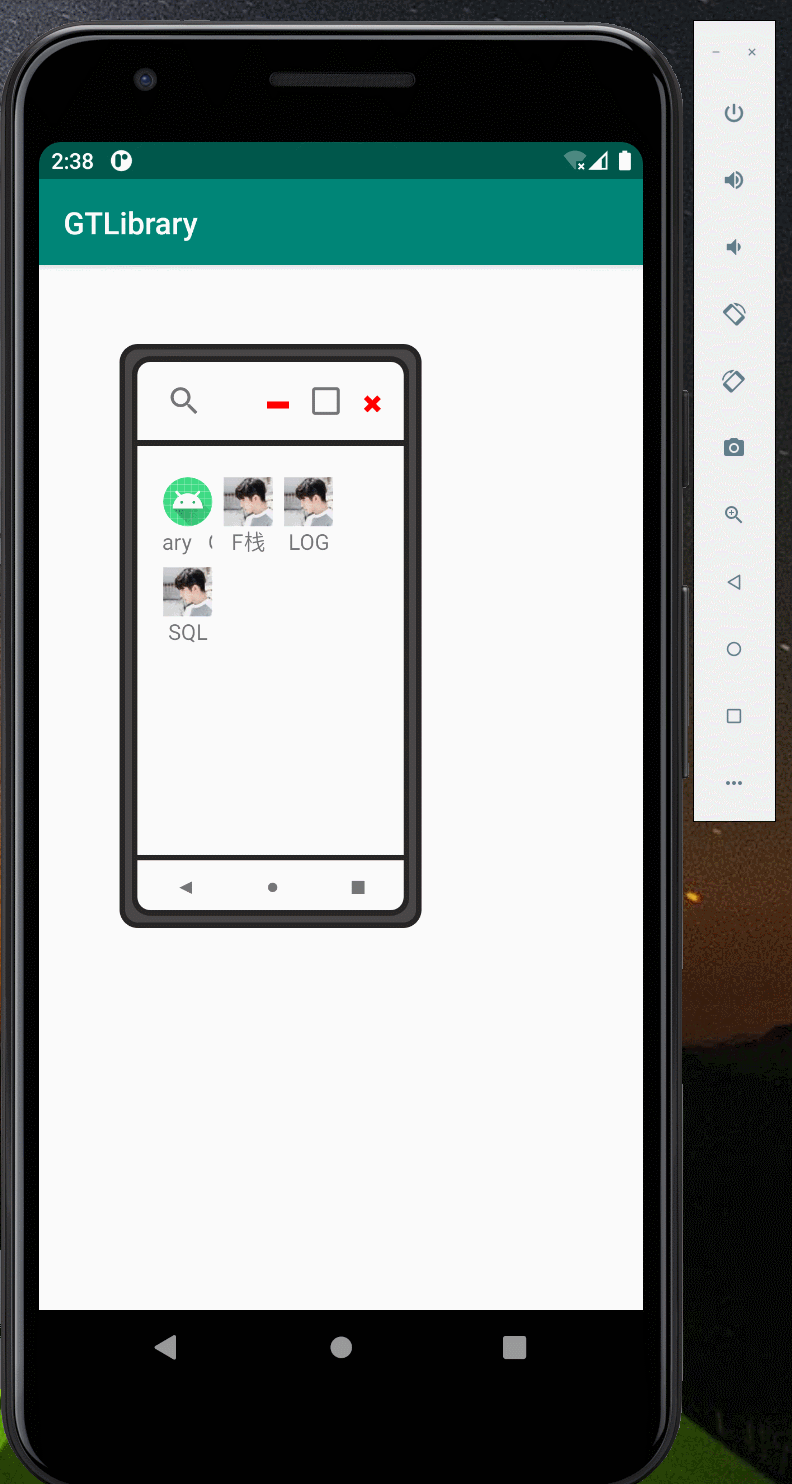
图1 图2 图3
图1只需要31行代码即可完成。
我们来看看这些都是如何实现的
在使用GT库里封装的架构当然需要先依赖好GT库:
详细依赖教程请参看
 https://github.com/1079374315/GT
使用GT 悬浮窗教程
第一步:自定义的xml布局 demo_floating_window
<?xml version="1.0" encoding="utf-8"?>
<LinearLayout xmlns:android="http://schemas.android.com/apk/res/android"
    xmlns:app="http://schemas.android.com/apk/res-auto"
    android:layout_width="wrap_content"
    android:layout_height="wrap_content">

    <!-- ConstraintLayout 必须要将对话框大小设置出来,解决设置最外层宽高无效的问题 -->
    <androidx.constraintlayout.widget.ConstraintLayout
        android:id="@+id/view_bg"
        android:layout_width="300dp"
        android:layout_height="200dp"
        android:background="#5B77D5FF"
        app:layout_constraintEnd_toEndOf="parent"
        app:layout_constraintStart_toStartOf="parent"
        app:layout_constraintTop_toTopOf="parent">

        <TextView
            android:id="@+id/tv_back"
            android:layout_width="wrap_content"
            android:layout_height="wrap_content"
            android:paddingLeft="10dp"
            android:paddingRight="10dp"
            android:text="×"
            android:textColor="#99FFFFFF"
            android:textSize="28sp"
            android:textStyle="bold"
            app:layout_constraintEnd_toEndOf="parent"
            app:layout_constraintTop_toTopOf="parent" />

        <TextView
            android:id="@+id/tv_data"
            android:layout_width="wrap_content"
            android:layout_height="wrap_content"
            android:background="#8D03B1FF"
            android:padding="10dp"
            android:text="简易自定义对话框\n支持返回数据\n支持监听返回键\n用法与 Fragment 毫无差异\n"
            android:textColor="#A4FFFFFF"
            android:textStyle="bold"
            app:layout_constraintBottom_toTopOf="@+id/btn_ok"
            app:layout_constraintEnd_toEndOf="parent"
            app:layout_constraintStart_toStartOf="parent"
            app:layout_constraintTop_toBottomOf="@+id/tv_back" />

        <Button
            android:id="@+id/btn_ok"
            android:layout_width="wrap_content"
            android:layout_height="wrap_content"
            android:text="好的"
            app:layout_constraintBottom_toBottomOf="parent"
            app:layout_constraintEnd_toStartOf="@+id/btn_cancel"
            app:layout_constraintStart_toStartOf="parent" />

        <Button
            android:id="@+id/btn_cancel"
            android:layout_width="wrap_content"
            android:layout_height="wrap_content"
            android:text="取消"
            app:layout_constraintBottom_toBottomOf="@+id/btn_ok"
            app:layout_constraintEnd_toEndOf="parent"
            app:layout_constraintStart_toEndOf="@+id/btn_ok" />

    </androidx.constraintlayout.widget.ConstraintLayout>


</LinearLayout>
第二步:加载悬浮窗布局
//加载布局
@GT.Annotations.GT_AnnotationFloatingWindow(R.layout.demo_floating_window)
public class DemoFloatingWindow extends GT.GT_FloatingWindow.AnnotationFloatingWindow {

    @Override
    protected void initView(View view) {
        super.initView(view);
        setDrag(true);//设置可拖动
    }

    @GT.Annotations.GT_Click({R.id.btn_ok, R.id.tv_back, R.id.btn_cancel})
    public void onClick(View view) {
        switch (view.getId()) {
            case R.id.btn_ok:
                GT.toast("单击了ok");
                break;
            case R.id.tv_back:
            case R.id.btn_cancel:
                finish();//关闭当前悬浮窗
                break;
        }
    }

}
第三步:使用悬浮窗(这里的布局因为只有一个按钮组件,故不贴出布局了)
public class MainActivity extends AppCompatActivity {

    @Override
    protected void onCreate(Bundle savedInstanceState) {
        super.onCreate(savedInstanceState);
        setContentView(R.layout.activity_main);

        findViewById(R.id.btn).setOnClickListener(new View.OnClickListener() {
            @Override
            public void onClick(View v) {
                GT.startFloatingWindow(MainActivity.this, DemoFloatingWindow.class);//启动悬浮窗
            }
        });

    }

}
第四步:添加悬浮窗权限 与 注册写好的悬浮窗 (AndroidManifest.xml)

可直接复制粘贴:
 <!-- 添加悬浮窗权限 -->
 <uses-permission android:name="android.permission.SYSTEM_ALERT_WINDOW" />

 <!-- 注册写好的悬浮窗 -->
 <service android:name=".DemoFloatingWindow"  android:exported="true"/>
然后就完工,可直接运行了
总结:熟悉GT库的是不是感觉特别熟悉,没错,GT内的Activity、Fragment、DialogFragment、FloatingWindow 的使用方法与结构都是一模一样的,也就是说只要你学会了其中一个,那就等同于其他的你都学会了。
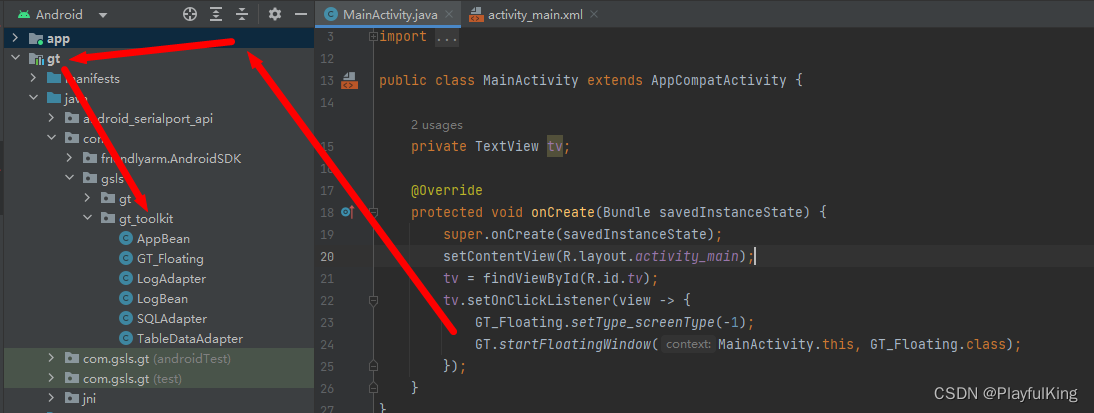
糖豆:如果想要图2、图3的源码,请直接下载最新GT库,GT库中的 util 目录中就是源码。 启动GT模拟手机版悬浮窗的代码如下:
点个关注点个赞呗(〃'▽'〃),关注博主最新发布库:GitHub - 1079374315/GT